はじめに
FlutterでLinux向けのplatform channelsを使う方に向けた記事です。
DartとLinux platformとの連携の仕方を書きます。
flutter開発環境の構築手順、ライセンスやパッケージとして公開する手順などは書きません。
FlutterでのLinux platformは現在Desktop向けを指しますが、
Desktop向けFlutterは、本記事執筆時点(2020/11/3)でアルファ版扱いです。
本記事に記載している内容、特にlinux/以下は今後大きく変更されている可能性がありますので注意してください。
そのような事情もあるので「作り方の調べ方」を意識して書いたつもりですが、
誤りや古くなっている箇所などに気づかれた方はご指摘いただけると幸いです。
以下の環境で確認しています。
$ uname -a
Linux chama 5.5.8 #1 SMP Sat Mar 7 22:29:22 JST 2020 x86_64 x86_64 x86_64 GNU/Linux
$ lsb_release -d
Description:    Ubuntu 18.04.5 LTS
$ flutter --version
Flutter 1.24.0-7.0.pre.42 • channel master • https://github.com/flutter/flutter
Framework • revision c0ef94780c (2 days ago) • 2020-10-31 03:12:27 -0700
Engine • revision 3460519398
Tools • Dart 2.12.0 (build 2.12.0-3.0.dev)
Platform Channels概要
Flutterでプラットフォーム固有のAPIを呼び出すときには、Platform Channelsという仕組みを使います。
Platform Channelsは柔軟に多様なプラットフォームと連携できるように、
シンプルな非同期のメッセージパッシングの仕組みになっています。
非同期だけだとAPIを使う側のコードがわかりにくくなりそうですが、
Dartにはasync/awaitがあるので、可読性を損なわずに柔軟かつシンプルに実装できるようになっています。
Platform Channelsには、用途に応じた下記の3つのAPIが用意されています。
これらの使い分けや経緯については、こちらの記事がわかりやすいです。
- 関数呼び出しを実現するMethodChannel
- イベント配信を実現するEventChannel
- より汎用的なメッセージパッシングを実現するBasicMessageChannel
まずはテンプレートを作る
flutter createコマンドを作ってプロジェクトを生成します。
このとき--template pluginを指定することでplugin開発用の雛形からプロジェクトを作成できます。
--orgには組織Reverse domain name notationを指定します。
下記のコマンドで、linux platform向けのpluginを"platform_proxy"という名前で作成します。
flutter create --platforms linux --template plugin --org xyz.takeoverjp.example platform_proxy
本筋ではないですが、何をいじったかわかるようにこの時点で一旦git commitしておくことをおすすめします。
サンプルアプリを実行してみる
生成されたplatform_proxyの中には、exampleというサンプルアプリも用意されています。
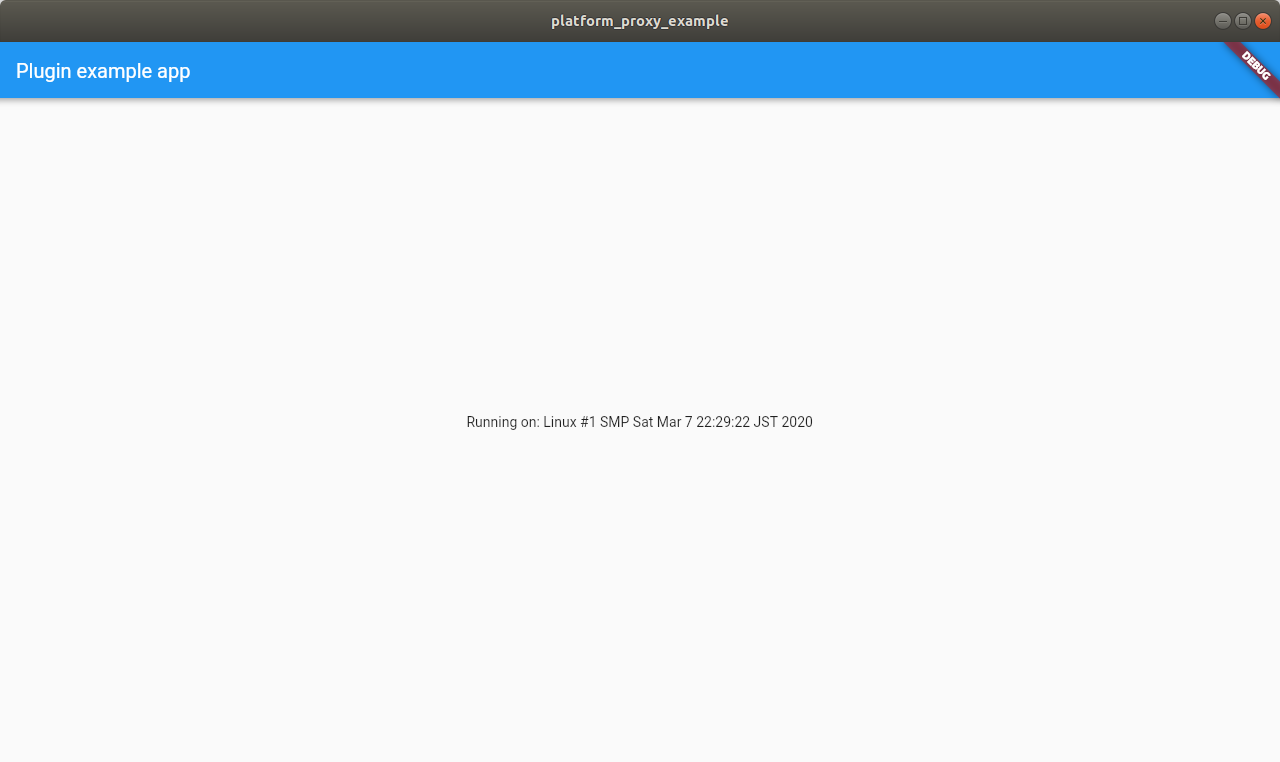
サンプルアプリを実行すると下記のような画面が表示されます。
Linuxを触ったことがあれば文字列からピンとくるかも知れないですが、uname -vの結果を出力するサンプルになっています。
生成されたコードを読む
生成されたコードのうち、以下の3つに注目することで、呼び出しの流れを理解することができます。
-
platform_proxy/example/lib/main.dart- Plugin API呼び出し
-
platform_proxy/lib/platform_proxy.dart- Plugin API実装(Dart部)
- プラットフォーム非依存
-
platform_proxy/linux/platform_proxy_plugin.cc- Plugin API実装(Native部)
- プラットフォーム依存
また、Plugin API開発時は単体テストも一緒に修正するため、ここで併せて紹介します。
Plugin API呼び出し部
class _MyAppState extends State<MyApp> {
  String _platformVersion = 'Unknown';

  @override
  void initState() {
    super.initState();
    initPlatformState();
  }

  // Platform messages are asynchronous, so we initialize in an async method.
  Future<void> initPlatformState() async {
    String platformVersion;
    // Platform messages may fail, so we use a try/catch PlatformException.
    try {
      platformVersion = await PlatformProxy.platformVersion;
    } on PlatformException {
      platformVersion = 'Failed to get platform version.';
    }

    // If the widget was removed from the tree while the asynchronous platform
    // message was in flight, we want to discard the reply rather than calling
    // setState to update our non-existent appearance.
    if (!mounted) return;

    setState(() {
      _platformVersion = platformVersion;
    });
  }

  @override
  Widget build(BuildContext context) {
    return MaterialApp(
      home: Scaffold(
        appBar: AppBar(
          title: const Text('Plugin example app'),
        ),
        body: Center(
          child: Text('Running on: $_platformVersion\n'),
        ),
      ),
    );
  }
}
PlatformProxy.platformVersionというのが、templateが追加したAPIです。
コメントにもあるとおり、PlatformChannelは非同期のメッセージです。
今回利用しているMethodChannelも非同期呼び出しなので、async/awaitを使っています。
Dartのasync/awaitについては、こちらの記事がわかりやすいです。
端的に言えば、非同期呼び出しに対する応答を、次のイベントループで受け取るための構文です。
Plugin API実装(Dart部)
class PlatformProxy {
  static const MethodChannel _channel =
      const MethodChannel('platform_proxy');

  static Future<String> get platformVersion async {
    final String version = await _channel.invokeMethod('getPlatformVersion');
    return version;
  }
}
PlatformProxy#platformVersionの実装です。
platform_proxyに対するMethodChannelを生成し、MethodChannel#invokeMethodを呼び出しています。
ここで、channel名が重なるとhandlerが上書きされて正しく通信できなくなります。
本家では見つけられませんでしたが、こちらのページでは(domain名)/(plugin名)/(channel名)にすることが推奨されています。
templateでは上記の通りdirectなchannel名でMethodChannelを生成していますが、
特にプラグインの場合は名前衝突のリスクが大きいので忘れずに変更しましょう。
例えば、Flutter公式のfile_chooser pluginでは、flutter/filechooserとしています。
MethodChannel#invokeMethodは
呼び出したいメソッド名と引数を渡し非同期で呼び出します。
また、応答はFutureなのでawaitで結果を待つことができます。
ところで、invokeMethodに渡すMethod名は単なる文字列です。
仮に呼び出し側がMethod名をtypoしても、コンパイルエラーにはならず実行時例外になります。
型やプロパティ名が間違っている場合もコンパイル時に検出することはできません。
そのような誤用を防ぎつつ、可読性の高いplugin APIにするためのwrappterがこのレイヤの責務です。
Plugin API実装(Native部)
static void platform_proxy_plugin_handle_method_call(
    PlatformProxyPlugin* self,
    FlMethodCall* method_call) {
  g_autoptr(FlMethodResponse) response = nullptr;

  const gchar* method = fl_method_call_get_name(method_call);

  if (strcmp(method, "getPlatformVersion") == 0) {
    struct utsname uname_data = {};
    uname(&uname_data);
    g_autofree gchar *version = g_strdup_printf("Linux %s", uname_data.version);
    g_autoptr(FlValue) result = fl_value_new_string(version);
    response = FL_METHOD_RESPONSE(fl_method_success_response_new(result));
  } else {
    response = FL_METHOD_RESPONSE(fl_method_not_implemented_response_new());
  }

  fl_method_call_respond(method_call, response, nullptr);
}
...
static void method_call_cb(FlMethodChannel* channel, FlMethodCall* method_call,
                           gpointer user_data) {
  PlatformProxyPlugin* plugin = PLATFORM_PROXY_PLUGIN(user_data);
  platform_proxy_plugin_handle_method_call(plugin, method_call);
}

void platform_proxy_plugin_register_with_registrar(FlPluginRegistrar* registrar) {
  PlatformProxyPlugin* plugin = PLATFORM_PROXY_PLUGIN(
      g_object_new(platform_proxy_plugin_get_type(), nullptr));

  g_autoptr(FlStandardMethodCodec) codec = fl_standard_method_codec_new();
  g_autoptr(FlMethodChannel) channel =
      fl_method_channel_new(fl_plugin_registrar_get_messenger(registrar),
                            "platform_proxy",
                            FL_METHOD_CODEC(codec));
  fl_method_channel_set_method_call_handler(channel, method_call_cb,
                                            g_object_ref(plugin),
                                            g_object_unref);

  g_object_unref(plugin);
}
Desktop Linux向けFlutterでは、イベントループをGLibを使って実装しています。
私はGLibに慣れてないのではじめ面食らってしまいましたが、
GLibの関数(g_***)はほぼオブジェクト管理のためのコードなの一旦気にせず
flutterの関数(fl_***)に注目すればわかりやすいと思います。
plugin登録時に、fl_method_channel_newで生成したFlMethodChannelに
fl_method_channel_set_method_call_handlerでコールバック関数を登録しています。
Dart側で対象のAPIを呼ぶとFlutter Engineからmethod_call_cbが呼び出され、
引数を適切にキャストした上でplatform_proxy_plugin_handle_method_callを呼び出します。
そしてfl_method_call_get_nameでmethod名を取得し対応した処理をします。
今回のgetPlatformVersionでは、uname(2)を呼び出しています。
結果をFL_METHOD_RESPONSE(fl_method_success_response_new(result))で返り値に設定し、
fl_method_call_respondを呼び出すことでFlutter Engineに応答を返しています。
なおplatform channelsの通信はmain threadで行う必要があります。
別のthreadで結果を算出した場合は、g_main_context_invokeなどを使ってmain threadにcontextを移してから応答を返しましょう。
Plugin APIの単体テスト
flutter testを実行することで、Plugin APIの単体テストが実行できます。
MethodChannelには、setMockMethodCallHandlerというDI用のメソッドが用意されており、
Native部を切り離した状態で単体テスト可能です。
逆に、Native部の実装のテストにはならないので、別途行う必要があります。
void main() {
  const MethodChannel channel = MethodChannel('platform_proxy');

  TestWidgetsFlutterBinding.ensureInitialized();

  setUp(() {
    channel.setMockMethodCallHandler((MethodCall methodCall) async {
      return '42';
    });
  });

  tearDown(() {
    channel.setMockMethodCallHandler(null);
  });

  test('getPlatformVersion', () async {
    expect(await PlatformProxy.platformVersion, '42');
  });
}
APIの追加
BasicMessageChannelでDartからplatformの関数を呼び出す場合は、
上記3箇所のコードをN増しすることでAPIを追加できます。
別の型を返す場合や引数を受け取る場合は、
sampleやheaderコメントが参考になります。
また、以下のサンプルプロジェクトに他のバリエーションも実装していますので参考にしてください。
takeoverjp/flutter-linux-plugin-example: A plugin example for platform channels on Linux desktop.
- MethodChannelでplatformからDartの関数を呼び出す
- EventChannelでplatformからevent通知する
- BasicMessageChannelでDartからplatformの関数を呼び出す
[参考] 自動生成パッケージ Pigeonについて
さて、前述の方法ではメソッド名を単なる文字列として扱っていたり、
それぞれのメソッドに対する引数・返り値に対する型が紳士協定になっています。
ここがDart部とNative部でずれた場合、例外か最悪未定義動作になります。
必ずplugin経由でアクセスしきちんとテストしていれば、実際に問題が発生する可能性は抑えられますが、不安は残ります。
対策として、pigeonという自動生成するためのパッケージが用意されています。
Dartのサブセットで記述されたPigeonファイルから、前述のようなplatformとDart間で通信するためのコードを生成します。
ただし、記事執筆時点(2020/11/3)の0.1.14ではまだdesktopが未サポートです。
現時点でもDart部の実装を生成するツールとしては利用可能です。
Native部とのシンボルを合わせるのが大事な要素なのですこし残念な使い方になってしまいますが、
参考に方法を残しておきます。
自動生成の流れは以下のとおりです。
API定義ファイルと生成されたDartコードも見ていただけばよりイメージが掴みやすいかもしれません。
-
pubspec.yamlのdev_dependenciesにpigeonを追加 - APIのプロトタイプ宣言と必要な型を定義したdartファイルを用意
- 以下のコマンドで、Dart部を生成する
flutter pub run pigeon --input pigeons/platform_proxy_message.dart --dart_out lib/pigeon_platform_proxy.dart
その後、生成されたdartファイルにあわせてNative部を実装することになります。
生成されるdartファイルでは、BasicMessageChannelを使っているので、Native部も合わせる必要があります。
Pigeon(0.1.14)で作成するAPIの制約として、引数および返り値は1個以下のAPI定義ファイルで定義されたclassでなければなりません。
つまり、intを引数で受け取ったり、複数の値を引数に受け取ったり、intを返したりすることはサポートしていません。
結果として必ずclass経由になるので、渡す方も受け取る方も少し冗長になります。
また、platform側からのイベント通知やメソッド呼び出しにもまだ対応していないようでした。
おわりに
pluginのtemplateとして生成されるコードを題材に、Linux Desktopでのplatform channelsの使い方を見てみました。
platform channels自体はシンプルですが、Dart部とNative部を両方実装する必要があり、結構大変目な印象です。
もし大きなデータを扱う処理の場合は、シリアライズが走るplatform channelsだと不利なので、ffiを使った方が良いと思います。
一方、やりたいことがIPCで、通信相手がunix domain socket/dbus/grpcに対応している場合など、
そもそもDartから直接dart:io/dbus.dart/grpc-dartを使うことで目的を達成できることもあるかと思います。
そう考えると、Android/iOSの場合はjava/kotlin/Obj-C/swiftのplatfrom APIを使うためにplatform channels必須ですが、
Linuxのことだけ考えればあまり出番ないのかも知れません。
状況にあった方法を選択できるよう、それぞれの方法をちゃんと知っておかねばと思う今日この頃でした。。。
参考
-
Developing packages & plugins - Flutter
- Flutter本家のplugin packageの作り方。
-
Writing custom platform-specific code - Flutter
- Flutter本家のplatform channelsの使い方。
-
Desktop support for Flutter - Flutter
- Flutter本家のDesktop support状況。
-
google/flutter-desktop-embedding: Experimental plugins for Flutter for Desktop
- Flutter本家が用意しているdesktop用のplugin
- Linux Desktopだけでなく、Windows/Macにも対応している
- templateよりは複雑なので、ファイル分割などtemplateより現実的な規模のpluginとして参考になる
-
engine/shell/platform/linux at master · flutter/engine
- Linux Desktop向けMessageChannelの実装
- pigeon | Dart Package
- Flutter Platform Channels. “Nice UI. But how does Flutter deal… | by Mikkel Ravn | Flutter | Medium
- Writing Plugins for Linux in Flutter | by Yash Johri | Level Up Coding
-
Flutter アーキテクチャ ガイド(初版) - kurun-books - BOOTH
- この辺のことに興味がある人は全員読んだ方がいいと思うぐらい良い本です。これが500円は控えめに言って頭おかしいと思います(褒め言葉)。
- Flutter MethodChannel APIの使い方 - Qiita
- Flutter EventChannel APIの使い方 - Qiita
-
Flutter MessageChannel APIの使い方 - Qiita
- 上記の本の著者(@kurun_panさん)のMethodChannel/EventChannel/MessageChannelの記事。
- 良記事なので、platform channelを触るときは目を通すことをおすすめします。
- Dart 非同期処理の async / await について / 桃缶食べたい。
- Oct 27_Graphical User Interface Using Flutter in Embedded Systems_Hidenori Matsubayashi.pdf
- FlutterでPluginプロジェクトを作って実装してみた | Developers.IO
