フロントエンドの設計から実装までした時に考えたことやコードをまとめる
今回はタスクランナー編
デザインパターンはFlux、javascriptのlibraryはriot.jsを使っていますが、基本的な思想部分はどのデザインパターンでも変わらないと思います。
GitHub
- riot_flux_study(まだ研究中、こっちを解説)
- angular_flux_study(angularjs版、yeomanで生成したのでgulpfileは書いてない・・・・)
前提知識として読んでおいて欲しい記事→エンジニア視点から見るWebサービスの全体像
全部を説明するのはめんどくさい尺的に難しいので詳しくはGitHubのソースコードをみてください
目標
タスクランナーgulpを使ってコンパイルやコード生成、各種サーバーの起動を全部自動化する。
公開用ファイルを生成する。
そもそもなんでタスクランナーを使うの?
結論から言うと、めんどくさいからだ。
いちいちES6をjavascriptに、scssをcssに、riot.jsのtagをjavascriptにコンパイルするコマンド打ってサーバーをリロードして変更を確認するのが非常にめんどくさい。
また、それぞれのソースコードを圧縮したり難読化するのも手動でやると非常にめんどくさい。
めんどくさいことは人間がやるべきことじゃない
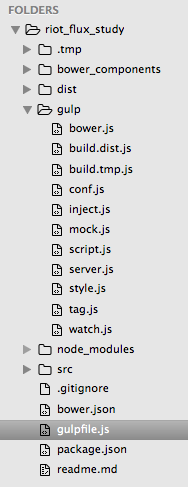
ファイル構造
ファイル構造は図のとおりだ
gulpfile.js
'use strict';

const
	gulp = require('gulp'),
	read = require('fs-readdir-recursive')
;

/**
 * read files in ./gulp/*.js
 */
read('./gulp')
	.filter((file_) => {
		return (/\.js$/i).test(file_);
	})
	.map((file_) => {
		require('./gulp/' + file_);
	});

/**
 * for develop
 */
gulp.task('default', () => {
	gulp.start('build:tmp');
});

/**
 * for distribution
 */
gulp.task('dist', () => {
	gulp.start('build:dist');
});
gulpfile.jsは上のように書いた。fs-readdir-recursiveでgulp/*.jsのソースコードを読み込み、それぞれのタスクを実行するような感じだ。
タスクフロー(開発用)
開発用タスクのフローは以下のようになっている。
gulp/build.tmp.js
/**
 * build .tmp folder and create some server
 */
gulp.task('build:tmp', () => {

	return runSequence(
		'clean:tmp',
		'copy:html:tmp',
		['copy:assets:tmp', 'tag', 'style:tmp'],
		'script:tmp',
		'inject:tmp',
		['server:start:tmp', 'watch:tmp', 'easymock:tmp']
	);
});
-
.tmpのディレクトリを全て削除する -
src/index.htmlを.tmp/server/index.htmlにコピーする -
src/assetsを.tmp/server/assetsにコピーする -
src/app/components/**/*.tagをsrc/app/compoents/**/*.jsに変換する -
src/app/**/*.scssをcssに変換して結合、./tmp/server/app/index.cssに置く -
src/app/**/*.jsをbabelでコンパイルして結合、.tmp/server/app/index.module.jsに置く -
.tmp/server/index.htmlにbowerでインストールしたライブラリと先ほどコンパイルして設置したjsとcssを挿入する - 開発用サーバーを起動する
-
src/**/*.(js|scss|tag|html)を監視して、変更が感知されたら反映する - 擬似APIサーバーを起動する
3,4,5と8,9,10は並列処理をしています。
タスクフロー(公開用)
gulp/build.dist.js
/**
 * build dist folder
 */
gulp.task('build:dist', () => {

	return runSequence(
		'clean:dist',
		['copy:html:dist', 'copy:assets:dist', 'tag', 'style:dist', 'bower:dist'],
		'script:dist',
		'inject:dist',
		'server:dist'
	);
});
-
distのディレクトリを削除する -
src/index.htmlをdist/index.htmlにコピーする -
src/assets/をdist/assetsにコピーする -
src/app/components/**/*.tagをsrc/app/compoents/**/*.jsに変換する -
src/app/**/*.scssをcssに変換して最小化して結合、dist/css/index.min.cssに置く -
bowerでインストールしたものを難読化し結合、dist/js/bower.jsに置く -
src/app/**/*.jsをbabelでコンパイルして難読化し結合、dist/index.min.jsに置く -
dist/index.htmlにdist/(js|css)/*.(js|css)を読み込む - 公開用サーバーを起動する
苦労したところ解説
- tagをjsにコンパイル
同じファイルにtagからjsにコンパイルしたものを置きたいときの処理
gulp/tag.js
/**
 * concat my tag file and compile tag into javascript and put in .tmp/server/app/index.tag.js
 */
gulp.task('tag', () => {

	return gulp
		.src(path.join(conf.paths.src, '/app/components/**/*.tag'))
		.pipe(plumber(conf.plumber))
		.pipe(riot({type: 'babel'}))
		.pipe(babel({presets: ['es2015-riot']}))
		.pipe(gulp.dest((file_) => {
			return file_.base;
		}))
	;
});
の
.pipe(gulp.dest((file_) => {
	return file_.base;
}))
が悩んだ
最後に
試行錯誤して作ったものなので必ずしも正しい知識だとは限りません。指摘批判をコメントでしていただけると幸い
p.s.
gulp超楽しい