読書メーターの本検索画面のようなグリッドレイアウトが作りたくていろいろ調べたので、その実装方法についてまとめます。
作りたいレイアウト
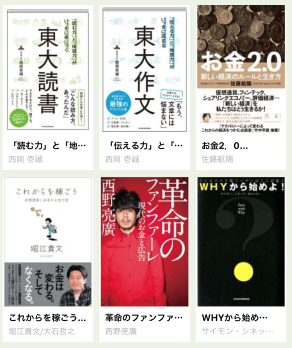
読書メーターの「本を探す」という画面では、以下のように検索結果がレイアウトされます。
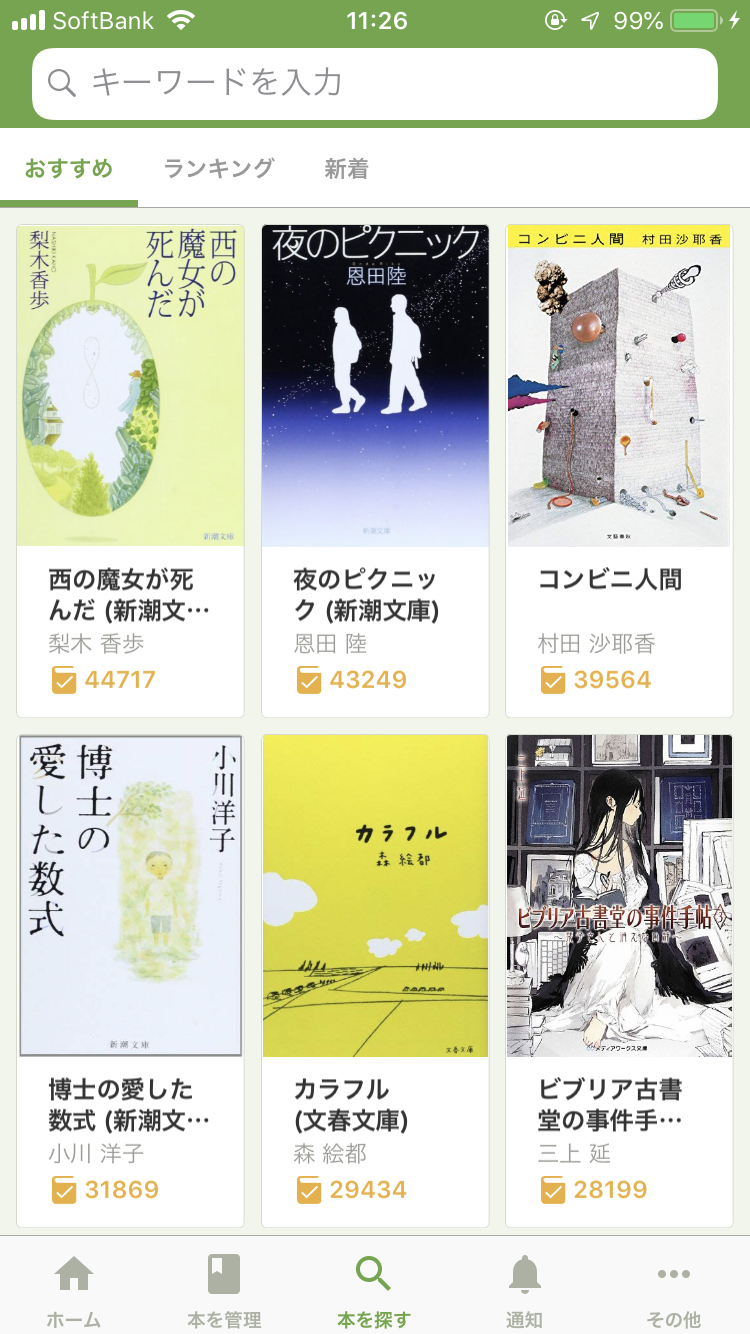
以下ではこのグリッドレイアウト部分の実装方法についてご紹介します。
作ったもの
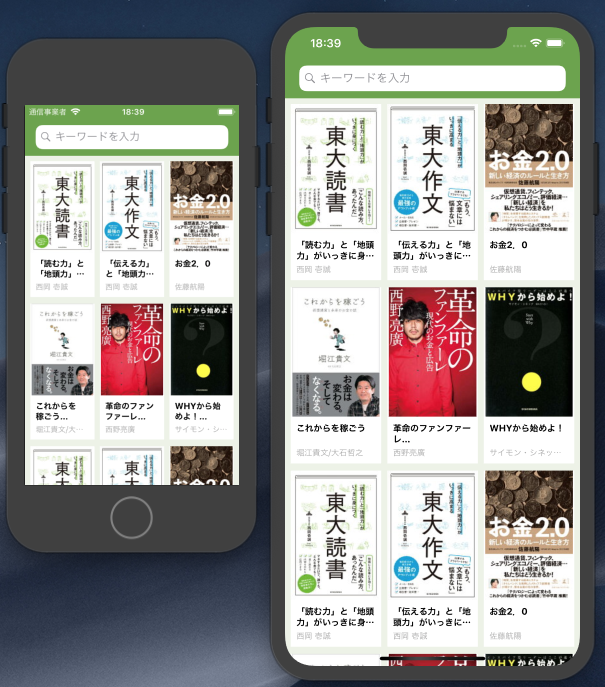
こんな感じのレイアウトになりました。
左がiPhone5s、右がiPhone Xs Maxの画面です。
画面サイズに合わせてセルの大きさが伸縮しているところがポイントです。
なお、以下で紹介する実装はiOS11と12で動作確認をしています。
セルの実装
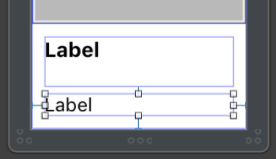
セルのレイアウトはxibで作ります。
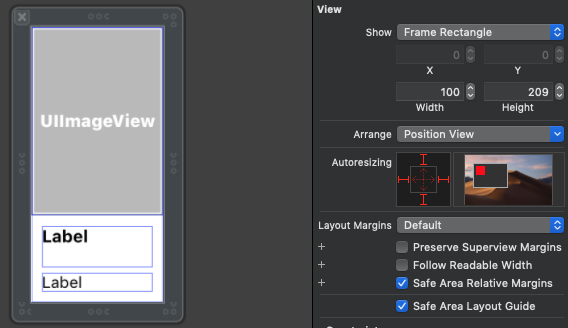
CollectionViewCell直下にコンテナとなるUIViewを配置し、コンテンツとなるビューはその配下に配置していきます。
制約はコンテナビューに対してつけていきます。
ここでのポイントは幅や高さに固定値の制約をつけず、固有サイズを利用して制約を成立させることです。
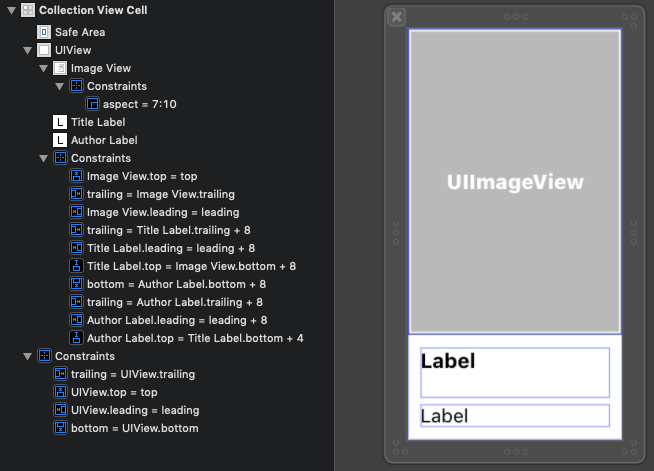
画像に関しては、使用しているAPIがおおよそ幅:高さ=7:10の割合の大きさの画像を返してくるので、7:10の比率の制約をつけています。
本のタイトルを表示するラベルは、2行まで表示できるようにしています。
また、Textの欄に改行を含めているところもポイントです。
詳しくは後述します。
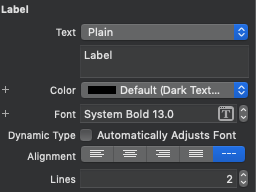
著者名を表示するラベルは特に細かい設定は必要ありません。
コンテナビューに対してbottomの制約をつけるのだけ忘れないでください。
続いてセルのクラスの実装です。
import UIKit

class CollectionViewCell: UICollectionViewCell {
    @IBOutlet weak var imageView: UIImageView!
    @IBOutlet weak var titleLabel: UILabel!
    @IBOutlet weak var authorLabel: UILabel!

    override func awakeFromNib() {
        super.awakeFromNib()
        contentView.translatesAutoresizingMaskIntoConstraints = false

        NSLayoutConstraint.activate([
            contentView.leadingAnchor.constraint(equalTo: leadingAnchor),
            contentView.trailingAnchor.constraint(equalTo: trailingAnchor),
            contentView.topAnchor.constraint(equalTo: topAnchor),
            contentView.bottomAnchor.constraint(equalTo: bottomAnchor)
        ])
    }

    func configure(with model: Model) {
        imageView.image = model.image
        titleLabel.text = "\(model.title)\n"
        authorLabel.text = model.author
    }
}
awaikeFromNib()でcontentViewのエッジがセルのエッジと一致するように制約をつける必要があります。
これがないとAutoLayoutでうまくレイアウトされません。
ビューコントローラの実装
今回はUICollectionViewControllerを使用しました。
import UIKit

class ViewController: UICollectionViewController {
    override func viewDidLoad() {
        super.viewDidLoad()
        setupCollectionView()
    }

    func setupCollectionView() {
        collectionView.contentInset = UIEdgeInsets(top: 8, left: 8, bottom: 8, right: 8)
        collectionView.register(
            UINib(nibName: "CollectionViewCell", bundle: nil),
            forCellWithReuseIdentifier: "Cell")

        let layout = collectionViewLayout as! UICollectionViewFlowLayout
        layout.minimumInteritemSpacing = 8
    }
}

// MARK: UICollectionViewDataSource
extension ViewController {
    override func collectionView(_ collectionView: UICollectionView, numberOfItemsInSection section: Int) -> Int {
        return Model.models.count
    }

    override func collectionView(_ collectionView: UICollectionView, cellForItemAt indexPath: IndexPath) -> UICollectionViewCell {
        let cell = collectionView.dequeueReusableCell(withReuseIdentifier: "Cell", for: indexPath) as! CollectionViewCell
        cell.configure(with: Model.models[indexPath.row])
        return cell
    }
}

// MARK: UICollectionViewDelegateFlowLayout
extension ViewController: UICollectionViewDelegateFlowLayout {
    // [1]
    func collectionView(_ collectionView: UICollectionView, layout collectionViewLayout: UICollectionViewLayout, sizeForItemAt indexPath: IndexPath) -> CGSize {
        let prototypeCell = UINib(nibName: "CollectionViewCell", bundle: nil).instantiate(withOwner: nil, options: nil).first as! CollectionViewCell
        return prototypeCell.systemLayoutSizeFitting(
            CGSize(width: cellWidth, height: 0),
            withHorizontalFittingPriority: .required,
            verticalFittingPriority: .defaultLow)
    }

    private var cellWidth: CGFloat {
        let availableWidth = collectionView.bounds.inset(by: collectionView.adjustedContentInset).width
        let interColumnSpace = CGFloat(8)
        let numColumns = CGFloat(3)
        let numInterColumnSpaces = numColumns - 1

        return ((availableWidth - interColumnSpace * numInterColumnSpaces) / numColumns).rounded(.down)
    }
}
[1]
ここでセルのサイズを動的に決定しています。
以下のようなことをやっています。
- 画像やテキストを設定する前の、原型となるセルのインスタンス(プロトタイプセル)を取得する
-
プロトタイプセルに、画面サイズに合わせて計算された幅(cellWidth)をセットする[2019/04/23追記] iOS11ではcontentViewにもcellWidthをセットする必要がありました-
[2021/05/08追記] 後述しますが、Xcode12ではプロトタイプセルには特にサイズは指定せず、
systemLayoutSizeFittingでサイズを指定する方法に変わったようです
-
cellWidthとプロトタイプセルが持っている制約を基に、セルのサイズを計算する(systemLayoutSizeFitting())
この流れを具体例で説明します。
xibにてセルのサイズが100x209で設定されているとします。
これをインスタンス化するとこのままのサイズをもったセルインスタンス(prototypeCell)が取得できます。
次に、画面に合わせて計算されたセルの幅(cellWidth)が127だとします。
これをプロトタイプセルにセットすると127x209のサイズになります。
最後に、幅を127で固定したまま、プロトタイプセルが持っている制約とラベルの固有サイズをもとに高さを動的に計算します。
systemLayoutSizeFitting(_:withHorizontalFittingPriority:verticalFittingPriority:)メソッドにはこれを実現するための引数を指定する必要があります。
ここで得たいのは制約を満たした上で得られる最小のセルのサイズなので、第一引数にはUIView.layoutFittingCompressedSizeを指定しています。
[2021/05/08追記]
Xcode12では、UIView.layoutFittingCompressedSizeではなくCGSize(width:height:)でサイズを明示的に指定する必要があります。
幅は127を維持したいので、第二引数には.requiredを指定しています。
高さは制約を基に計算されたサイズになってほしいので、第三引数には.defaultLowを指定しています。
先述の通り、本のタイトルを表示するラベルには、デフォルトのテキストにLabel\nというように改行を含めていました。
ラベルに2行分のテキストを表示するための固有サイズをもたせておくことで、systemLayoutSizeFitting()メソッドがそれをもとに高さを計算してくれます。
デフォルトのテキストをLabelとして1行にしてしまうと、以下のように期待したレイアウトになりません。