はじめに
Pygame を使ってマリオの動きを実装していたコードに、新たに敵キャラ「クリボー」を追加しました。この記事では、前回のコードとの差分を解説し、どのように変更を加えたのかを説明します。
参考:【#5 クリボーを表示】クリボーを表示してみよう!マリオを一緒に作ってみませんか!pythonで!【ハンズオン実践解説】
変更点の概要
今回の変更で追加されたのは以下の点です。
- クリボーのクラス (
Kuribo) を追加 main()関数でクリボーを複数生成し、スプライトグループに追加- クリボーの移動ロジックを実装
それでは、コードを詳しく見ていきましょう。
1. クリボーのクラス (Kuribo) の追加
新たに Kuribo クラスを作成しました。このクラスは pygame.sprite.Sprite を継承し、クリボーの動きを管理します。
class Kuribo(pygame.sprite.Sprite):
    WALK_SPEED = 10
    def __init__(self, x, y):
        pygame.sprite.Sprite.__init__(self)

        # クリボーのX軸方向移動距離
        self.__dir = -2
        self.__walkidx = 0
        self.__imgs = [
            pygame.image.load('kuribo001.png')
        ]

        self.image = self.__imgs[0]
        self.rect = pygame.Rect(x, y, 20, 20)

    def update(self):
        self.rect.x += self.__dir
        if self.rect.x <= 0 or self.rect.x >= 320 - self.rect.width:
            self.__dir *= -1

        self.__walkidx += 1
        if self.__walkidx == self.WALK_SPEED:
            self.__walkidx = 0
        self.image = pygame.transform.flip(self.__imgs[0], self.__walkidx < self.WALK_SPEED // 2, False)
ポイント解説
- クリボーの画像 (
kuribo001.png) をロード - 初期位置 (
x, y) を指定して配置 -
update()メソッドで左右に移動する動作を実装 - 画面端に到達したら移動方向を反転
-
flip()を使用して向きを変える(擬似的なアニメーション)
| kuribo001.png |
|---|
 |
2. main() 関数でクリボーを生成
main() 関数にクリボーのオブジェクトを追加しました。
# クリボークラスを構築
kuribos = [
    Kuribo(200, 180),
    Kuribo(260, 180),
    Kuribo(300, 180)
]

# クリボーをグループに追加
for kuribo in kuribos:
    group.add(kuribo)
ポイント解説
-
Kuriboインスタンスを複数作成し、異なる位置に配置 -
group.add(kuribo)を使ってpygame.sprite.RenderUpdates()のグループに追加
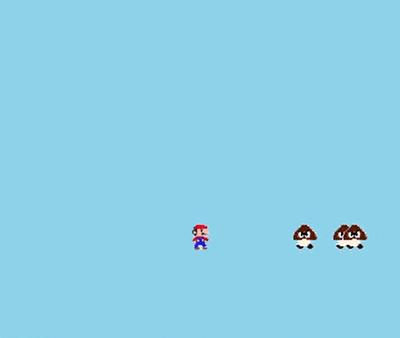
これにより、画面上に 3 体のクリボーが登場し、それぞれが独立して動きます。
3. クリボーの動作を管理する update()
Kuribo クラスの update() メソッドでクリボーの移動とアニメーションを制御します。
def update(self):
    self.rect.x += self.__dir
    if self.rect.x <= 0 or self.rect.x >= 320 - self.rect.width:
        self.__dir *= -1

    self.__walkidx += 1
    if self.__walkidx == self.WALK_SPEED:
        self.__walkidx = 0
    self.image = pygame.transform.flip(self.__imgs[0], self.__walkidx < self.WALK_SPEED // 2, False)
ポイント解説
- 左右に移動 (
self.__dirにより制御) - 画面端に到達したら方向を反転 (
self.__dir *= -1) -
flip()を使ってクリボーの向きを変えることで、歩いているように見せる
まとめ
今回の変更点
- クリボーを追加し、マリオと敵キャラの動きを実装
- クリボーが自動で左右に移動するアニメーションを追加
このように、Pygame では pygame.sprite.Sprite を活用することで、簡単にキャラクターの追加やアニメーションの管理が可能になります。
次回は、マリオとクリボーの衝突判定を実装し、ゲームとしての要素を強化する予定です。
今回のコード全体
import pygame

# 画面サイズを定義
W, H = 320, 270

# タイル数
TILE_X = 16
TILE_Y = 14

class Mario(pygame.sprite.Sprite):
    ''' マリオのクラス
    '''
    WALK_ANIME_IDX = [0, 0, 0, 1, 1, 1]
    def __init__(self):
        pygame.sprite.Sprite.__init__(self)

        # 左右どちら向きかのフラグを定義
        self.__isleft = False
        # 歩くインデックス
        self.__walkidx = 0
        # Y軸方向移動郷里
        self.__vy = 0
        # マリオが地面にいるか
        self.__on_ground = True

        # marioの画像を読み込む
        self.__imgs = [
            pygame.image.load('mario001.png'),
            pygame.image.load('mario002.png')
        ]
        self.image = self.__imgs[0]
        self.rect = pygame.Rect(150, 180, 20, 20)

    def __right(self):
        self.rect.x += 5
        self.__isleft = False
        self.__walkidx += 1

    def __left(self):
        self.rect.x -= 5
        self.__isleft = True
        self.__walkidx += 1

    def __jump(self):
        if self.__on_ground:
            self.__vy = -10
            self.__on_ground = False


    def update(self):
        # キーボードの状態を取得
        keys = pygame.key.get_pressed()
        if keys[pygame.K_RIGHT]:
            self.__right()
        if keys[pygame.K_LEFT]:
            self.__left()
        if keys[pygame.K_SPACE]:
            self.__jump()

        # Y軸方向に移動
        if not self.__on_ground:
            self.rect.y += self.__vy
            self.__vy += 1

            if self.rect.y >= 180:
                self.rect.y = 180
                self.__on_ground = True

        self.image = pygame.transform.flip(self.__imgs[self.WALK_ANIME_IDX[self.__walkidx % 6]], self.__isleft, False)

class Kuribo(pygame.sprite.Sprite):
    WALK_SPEED = 10
    def __init__(self, x, y):
        pygame.sprite.Sprite.__init__(self)

        # クリボーのX軸方向移動距離
        self.__dir = -2
        self.__walkidx = 0
        self.__imgs = [
            pygame.image.load('kuribo001.png')
        ]

        self.image = self.__imgs[0]
        self.rect = pygame.Rect(x, y, 20, 20)

    def update(self):
        self.rect.x += self.__dir
        if self.rect.x <= 0 or self.rect.x >= 320 - self.rect.width:
            self.__dir *= -1

        self.__walkidx += 1
        if self.__walkidx == self.WALK_SPEED:
            self.__walkidx = 0
        self.image = pygame.transform.flip(self.__imgs[0], self.__walkidx < self.WALK_SPEED // 2, False)

def main():
    '''メイン関数'''
    # pygame初期化
    pygame.init()
    # 画面を構築
    win = pygame.display.set_mode((W, H))
    pygame.display.set_caption("Pygame Window")  # ウィンドウタイトルを設定
    # クロックを生成
    clock = pygame.time.Clock()

    # スプライトグループを定義
    group = pygame.sprite.RenderUpdates()
    # マリオクラスを定義
    mario = Mario()
    # マリオをグループに追加
    group.add(mario)
    # クリボークラスを構築
    kuribos = [
        Kuribo(200, 180),
        Kuribo(260, 180),
        Kuribo(300, 180)
    ]
    # クリボーをグループに追加
    for kuribo in kuribos:
        group.add(kuribo)

    # 背景色の初期値(黒)
    bg_color = (0, 0, 0)

    # イベントループ
    running = True
    while running:
        for e in pygame.event.get():
            if e.type == pygame.QUIT:
                running = False  # ループを抜ける

        # 背景を塗りつぶす
        win.fill((135, 206, 235))

        # グループを更新
        group.update()

        # グループを描画
        group.draw(win)

        # 画面の更新
        pygame.display.flip()

        clock.tick(30)  # FPS制限 (60FPS)

    # pygameを終了する
    pygame.quit()

# Pythonのファイルが直接実行された場合のみmain()を実行
if __name__ == '__main__':
    main()