UITableViewCell をカスタマイズする
Playground 上で UITableView の Cell のカスタマイズをやってみました。
実機やシミュレータで UI を確認しながら調整するより簡単にできます。
手順は以下のとおりです。
1. Playground を開く。
File -> New -> Playground で Playground を開きます。
2. ソースコードを貼り付ける。
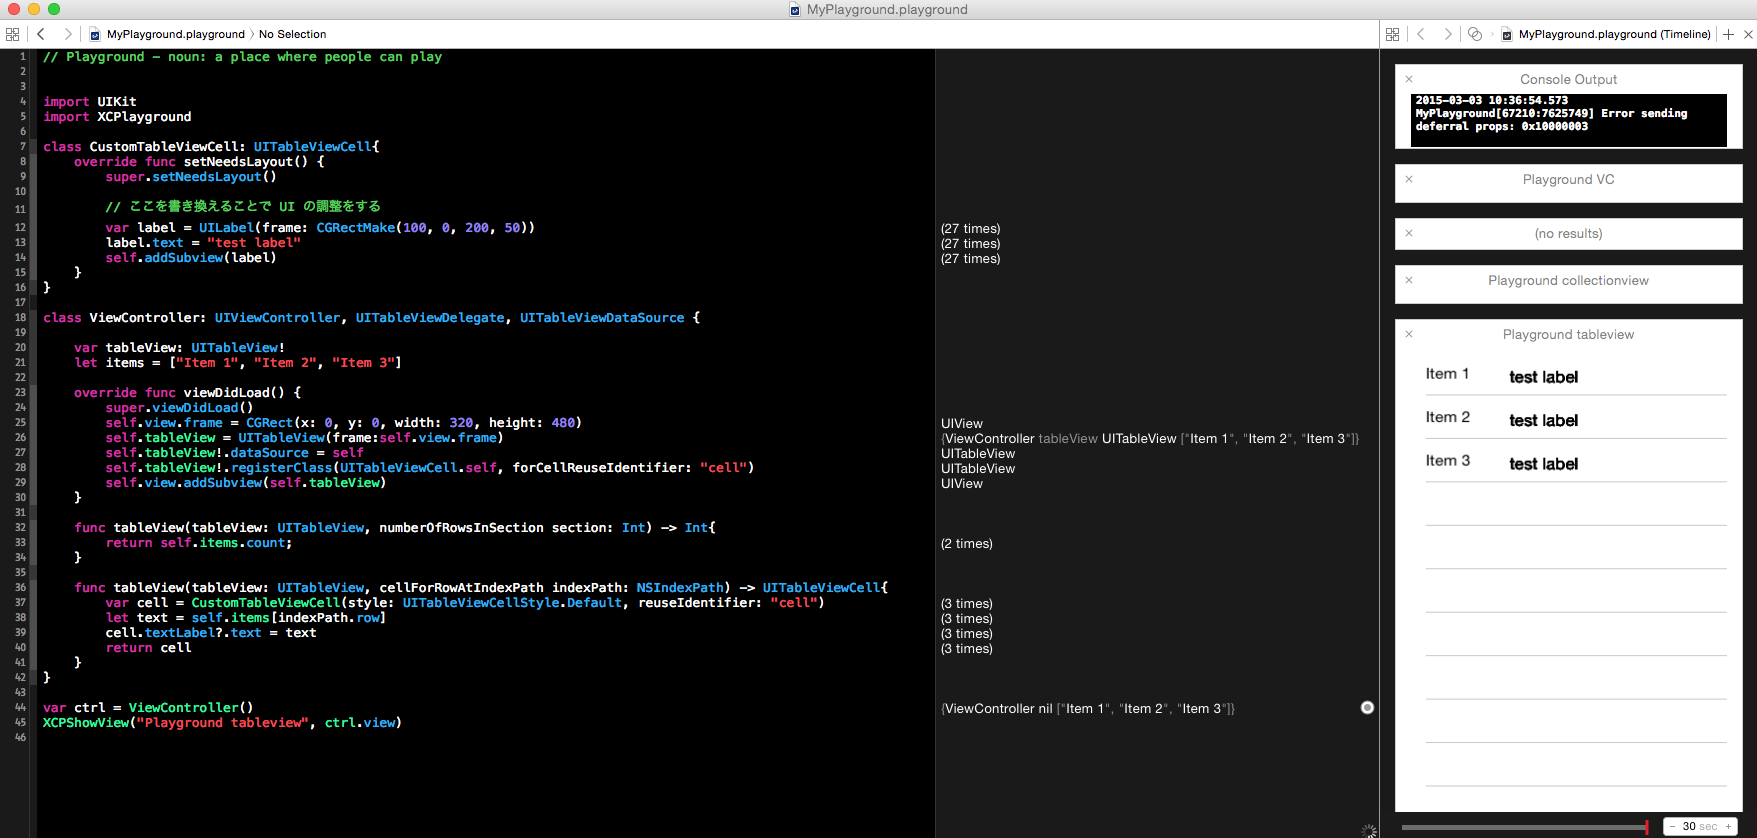
下記コードを Playground に貼り付けます。コードの内容は ViewController 上に UITableView を表示するというシンプルなコードです。
表示する Cell の内容は CustomTableViewCell に記述。
import UIKit
import XCPlayground

class CustomTableViewCell: UITableViewCell{
    override func setNeedsLayout() {
        super.setNeedsLayout()

        // ここを書き換えることで UI の調整をする
        var label = UILabel(frame: CGRectMake(100, 10, 200, 50))
        label.text = "test label"
        self.addSubview(label)
    }
}

class ViewController: UIViewController, UITableViewDelegate, UITableViewDataSource {

    var tableView: UITableView!
    let items = ["Item 1", "Item 2", "Item 3"]

    override func viewDidLoad() {
        super.viewDidLoad()
        self.view.frame = CGRect(x: 0, y: 0, width: 320, height: 480)
        self.tableView = UITableView(frame:self.view.frame)
        self.tableView!.dataSource = self
        self.tableView!.registerClass(UITableViewCell.self, forCellReuseIdentifier: "cell")
        self.view.addSubview(self.tableView)
    }

    func tableView(tableView: UITableView, numberOfRowsInSection section: Int) -> Int{
        return self.items.count;
    }

    func tableView(tableView: UITableView, cellForRowAtIndexPath indexPath: NSIndexPath) -> UITableViewCell{
        var cell = CustomTableViewCell(style: UITableViewCellStyle.Default, reuseIdentifier: "cell")
        let text = self.items[indexPath.row]
        cell.textLabel?.text = text
        return cell
    }
}

var ctrl = ViewController()
XCPShowView("Playground tableview", ctrl.view)
3. Playground 上に UI を表示する
Playground の評価結果の横に出ている丸いアイコンをクリックすると UI が表示されるようになります。
4. コードを書き換えて微調整
Custom の UITableViewCell の内容を書き換えて変更したい UI になるように変更します。
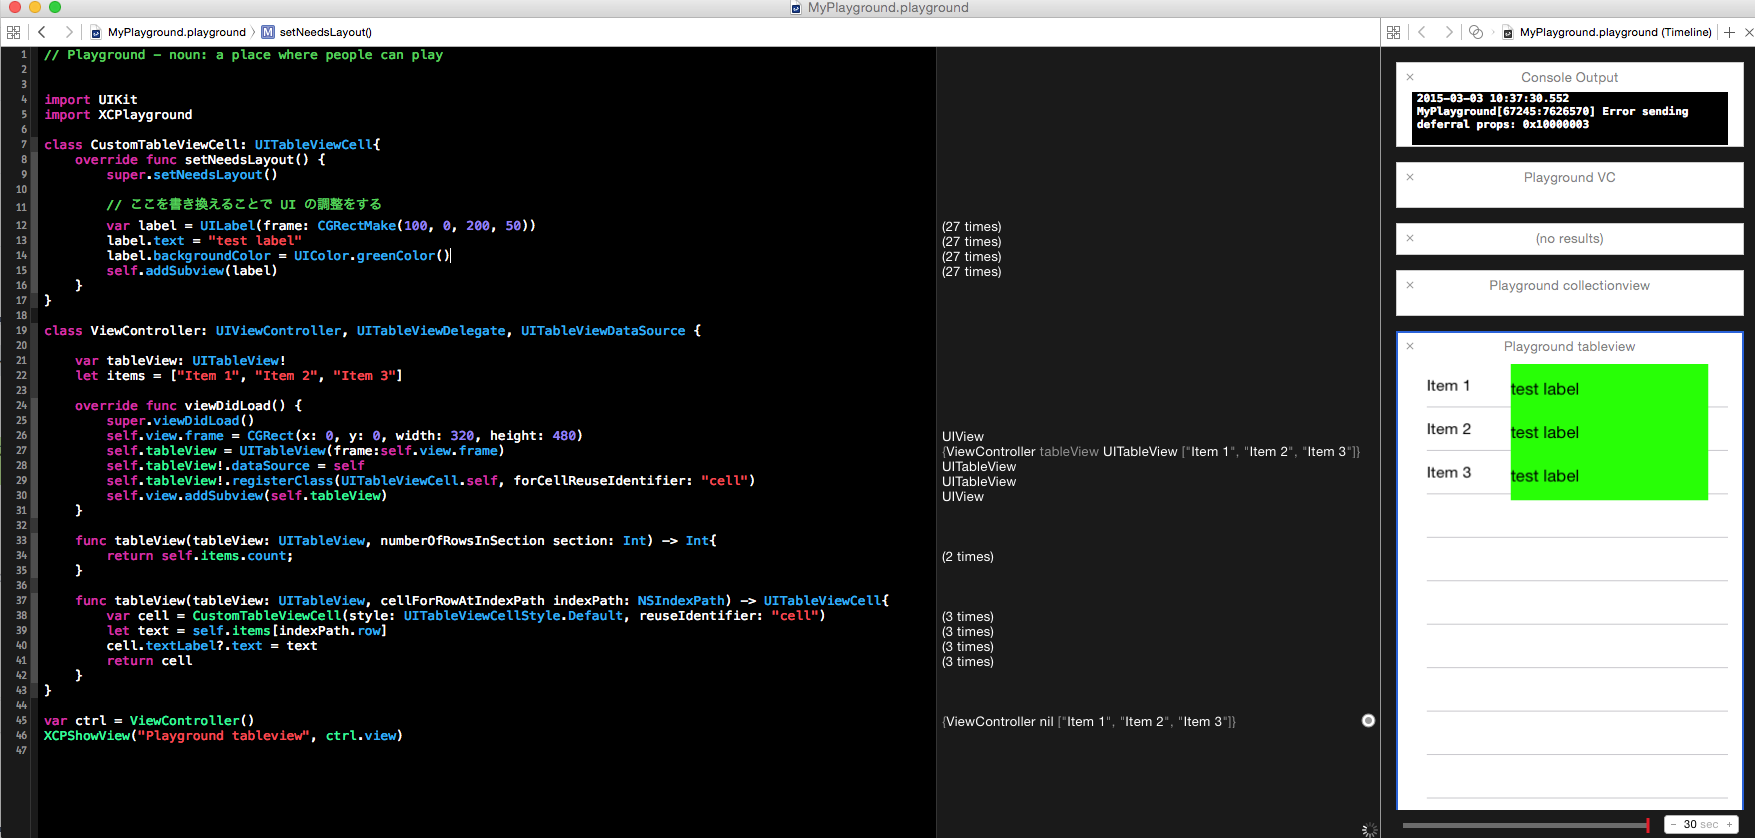
例えば label の背景を緑にする、というコードを追加します。
label.backgroundColor = UIColor.greenColor()
すると下記のように変更が自動的に反映されます。
Playground で Custom Cell の調整をして、完成してからプロジェクトにコピペすると便利です。
UICollectionView の Cell の調整をするサンプルはこちらです。


