まえがき
こないだ初めてIntelliJ IDEAのプラグインを作ったんですけど、公式のドキュメント通りにやってもよく分からないところがあったりしたので、作り方をまとめてみます。
以下の実際に作ったプラグインを例にチュートリアル形式で説明していきます。
このプラグインはEmacsの C-l で発動するrecenter-top-bottomをJetBrains IDEで実現するものです。
またこの記事ではプラグインのコード自体はあまり解説せず、設定周りを中心に解説します。
環境
IntelliJ IDEA 2018.3 (Ultimate Edition)
Build #IU-183.4284.148, built on November 21, 2018
JRE: 1.8.0_152-release-1343-b15 x86_64
JVM: OpenJDK 64-Bit Server VM by JetBrains s.r.o
macOS 10.13.6
作り方
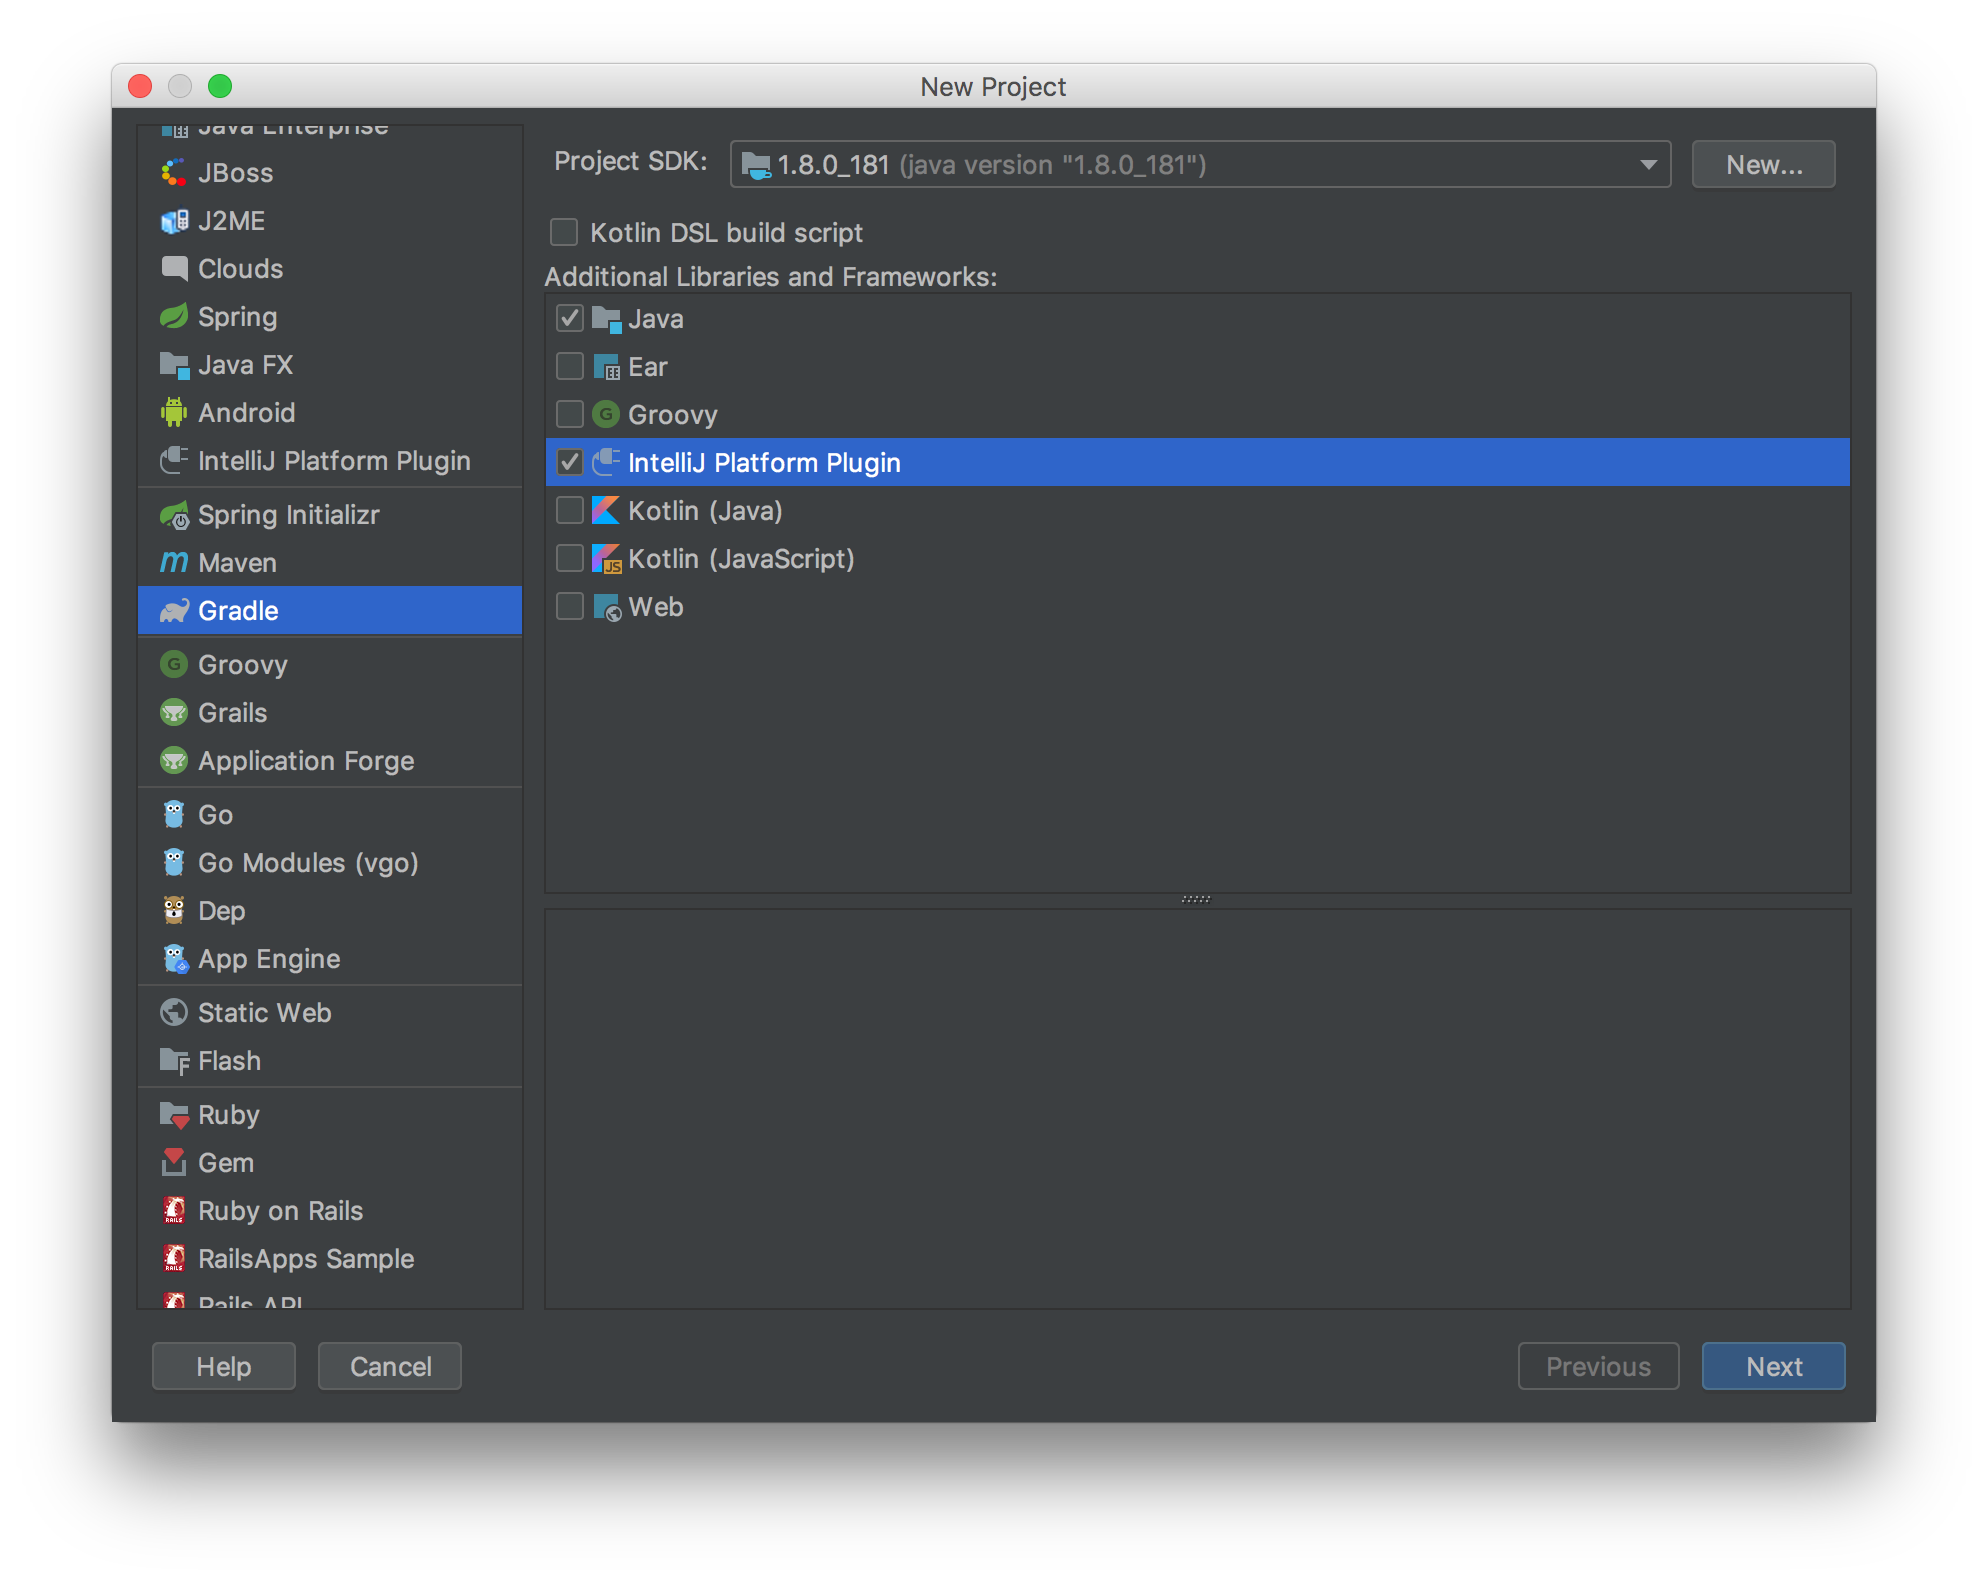
Gradle→IntelliJ Platform Pluginをチェックを入れてNext
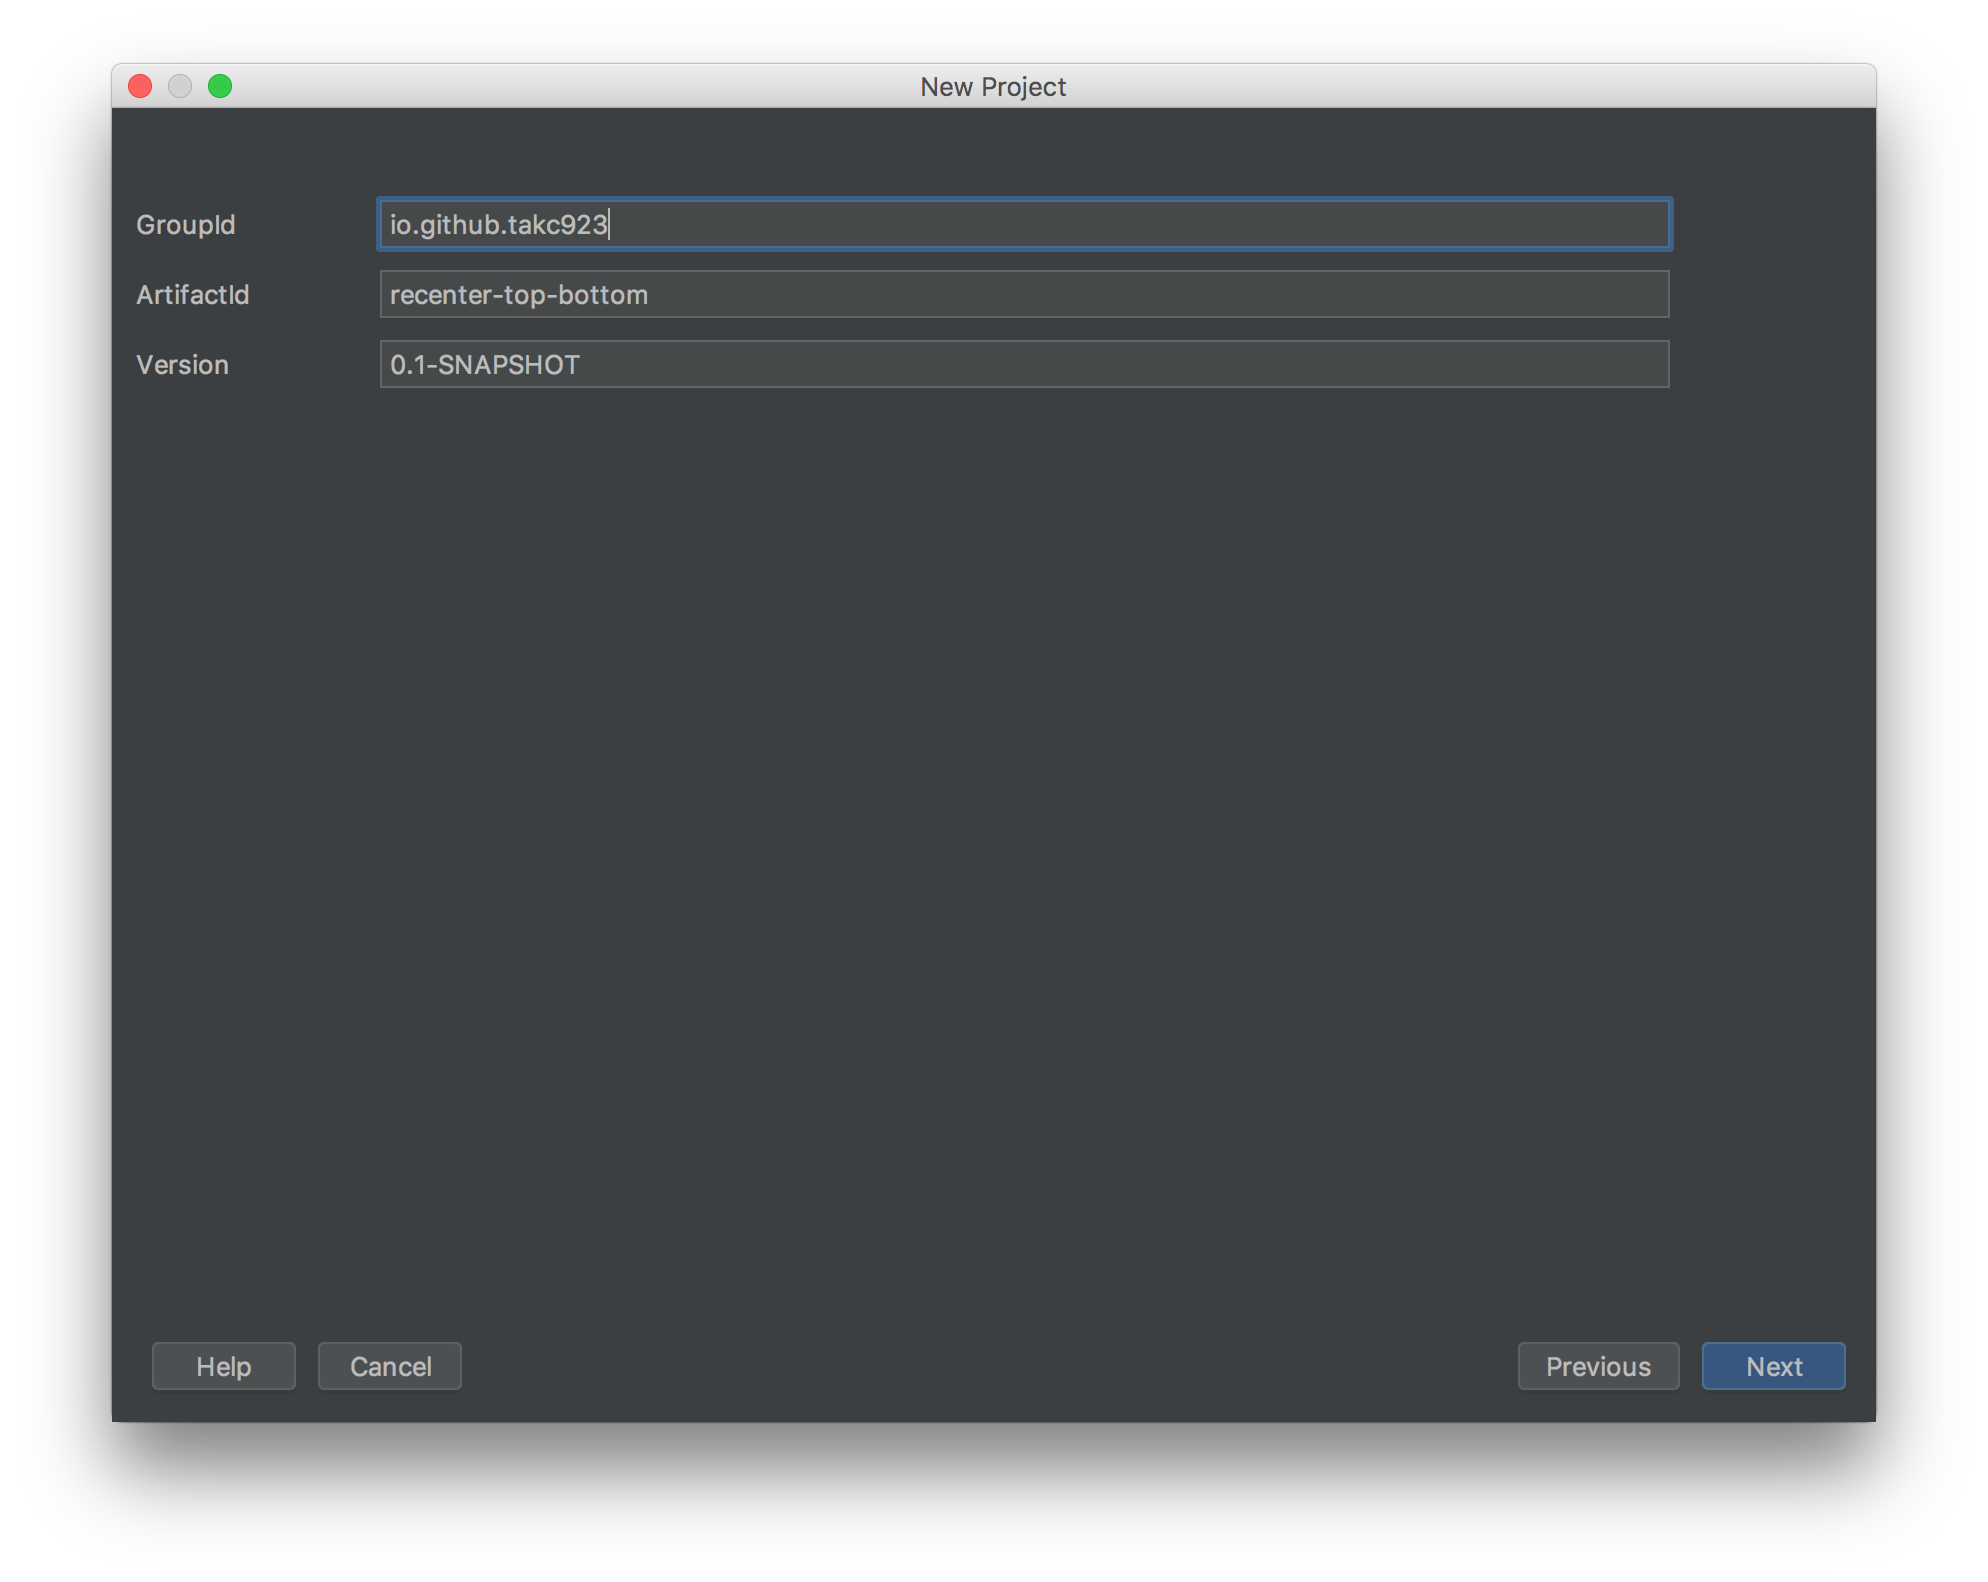
GroupId, ArtifactId, Versionを入力してNext(詳細は後述してるのでこれ何?って人はそっちを参照)。
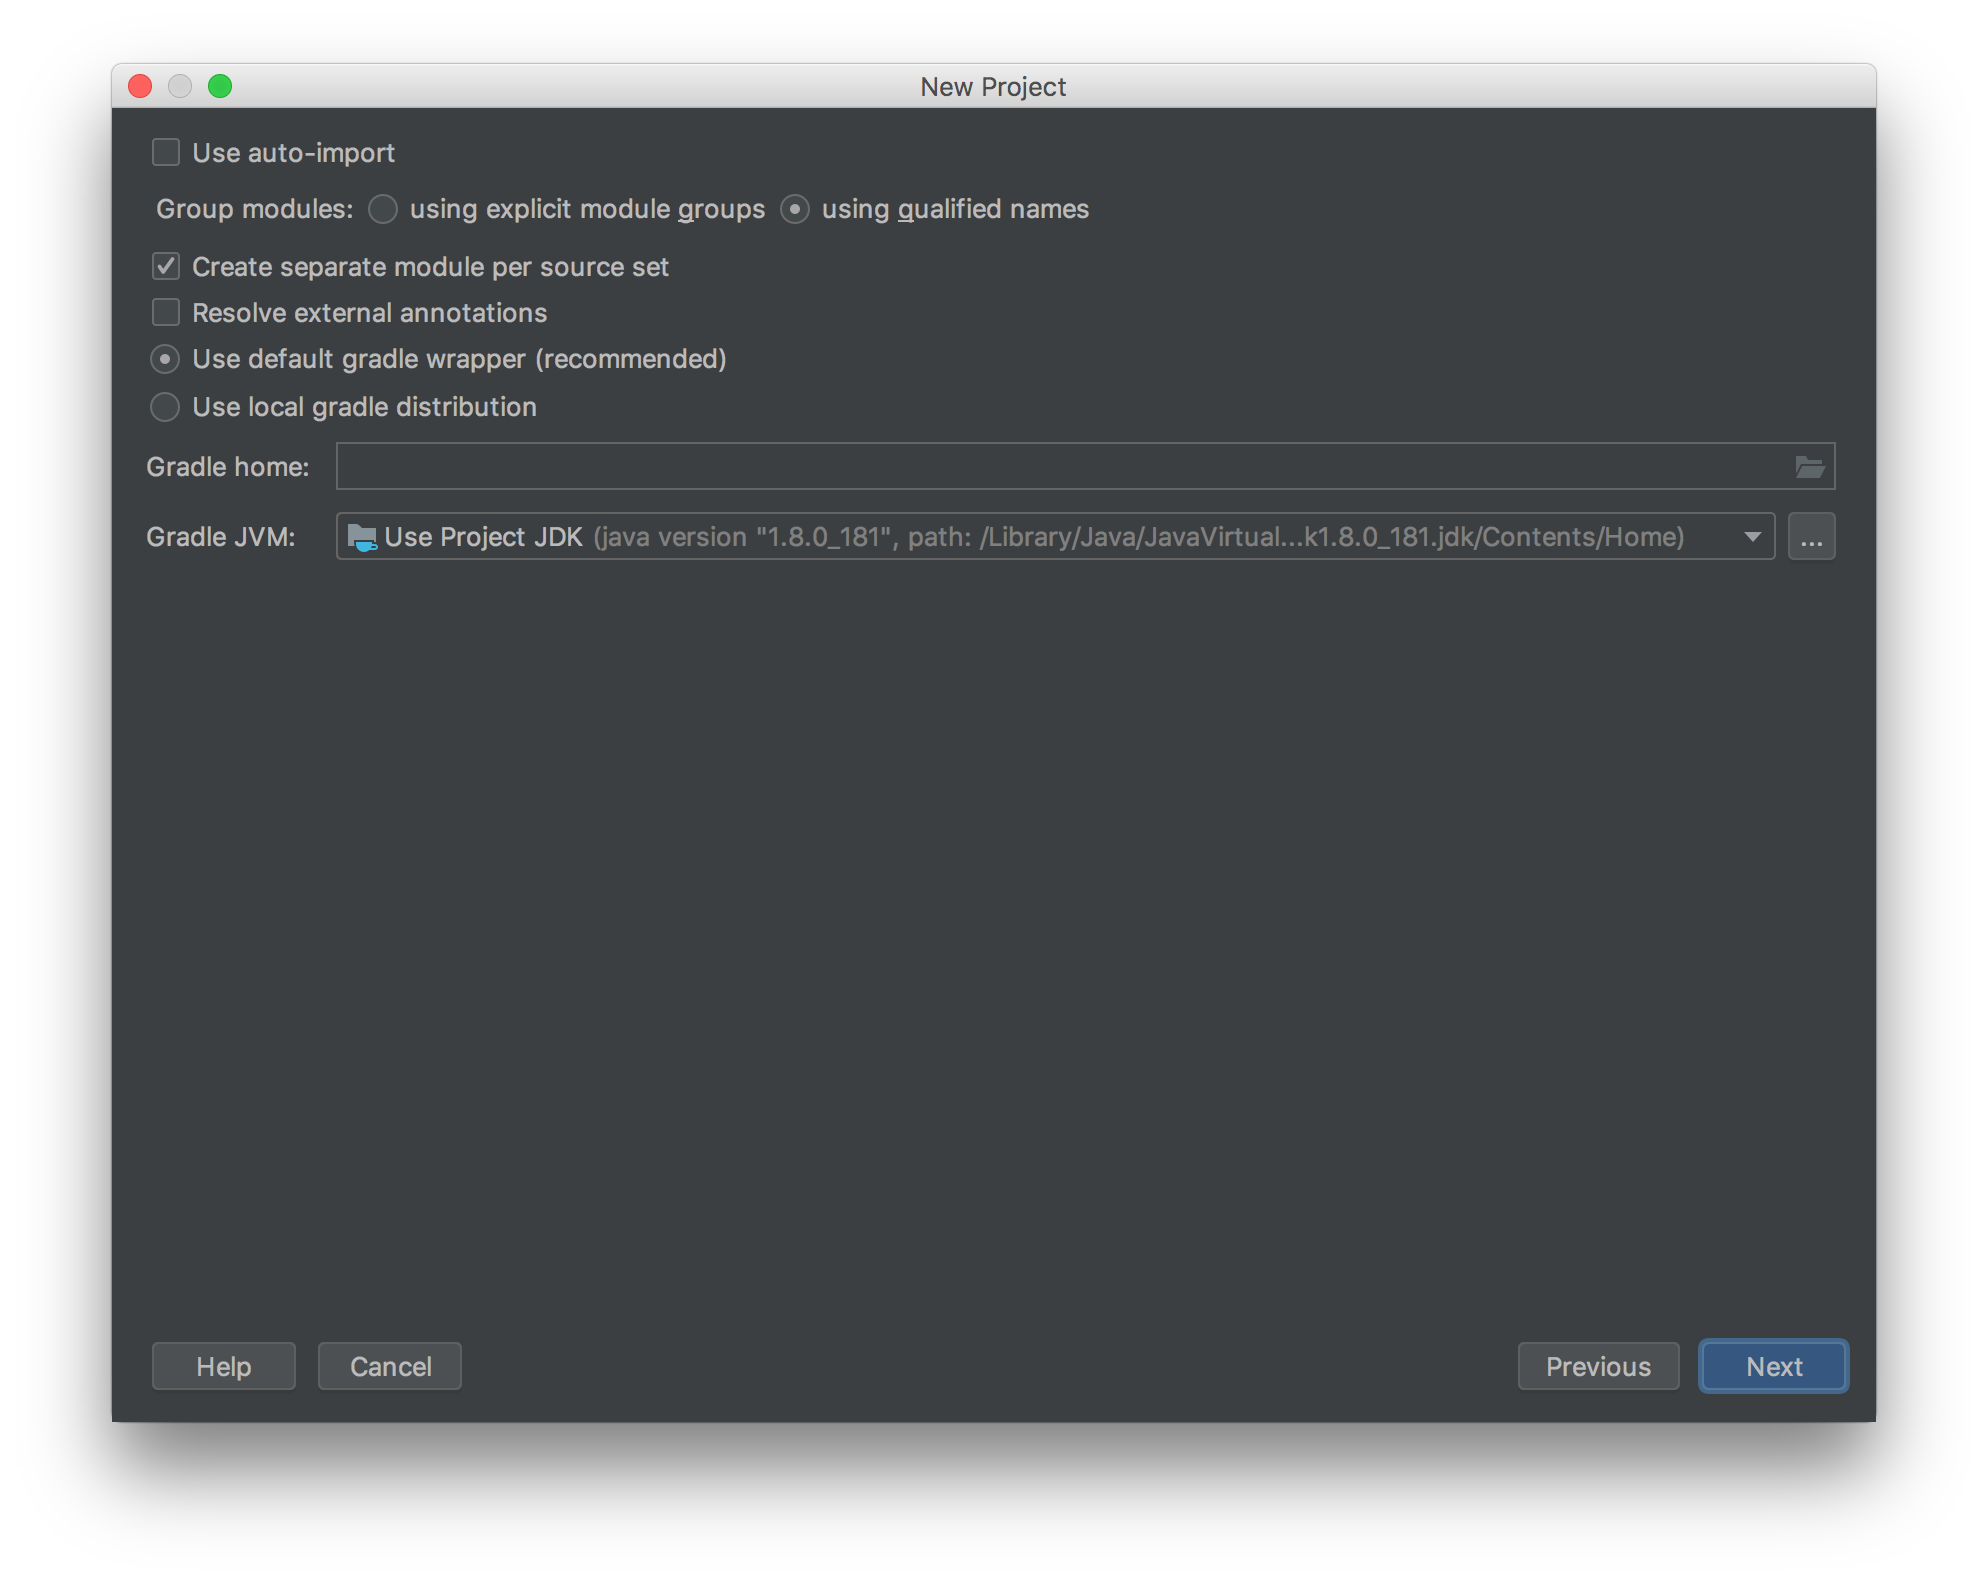
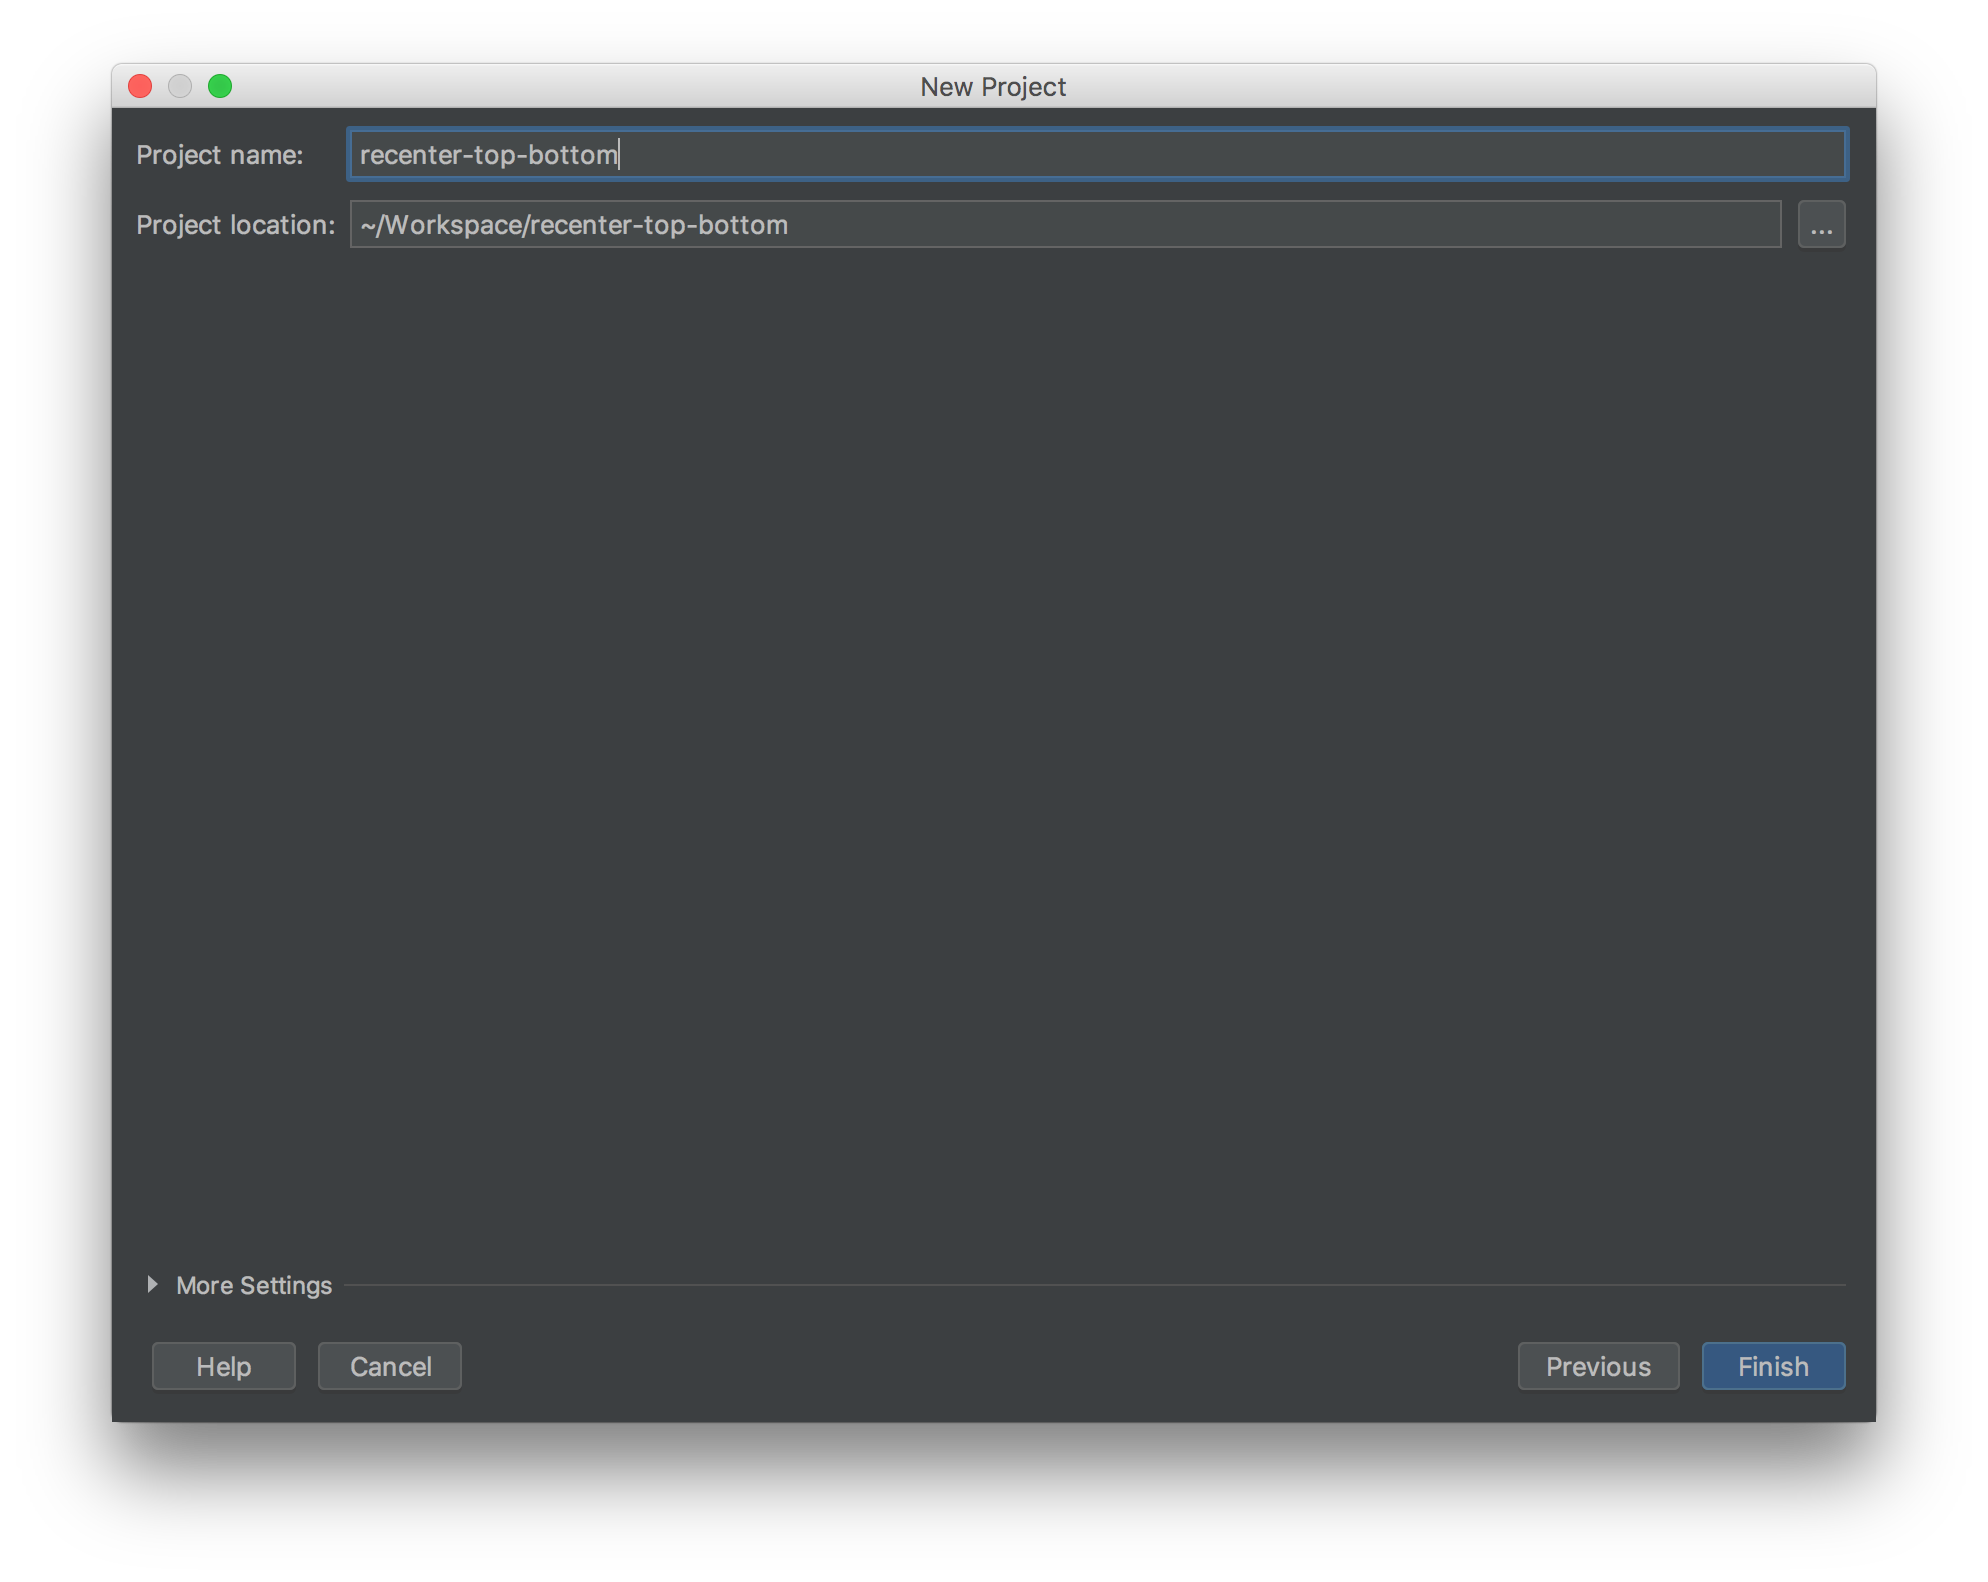
プロジェクトができたらとりあえず.gitignoreを以下のよう作って、 git init && git add . && git commit
$ cat .gitignore
.gradle
/build/
多分最初のセットアップがバックグラウンドで走る。このセットアップが終わったら基本的な設定が問題ないことをプラグインを実行して確認する。多分セットアップ時間かかるので後でも良い。やり方はRun ConfigurationにPluginという設定があるはずなので、これをRunする(↓の ▶︎ を押す)。

それでIntelliJ Community Editionが起動したら成功。確認できたらこの起動したIntelliJは普通に終了する。
次は、プロジェクトの src/main/resources/META-INF/plugin.xml にこのプラグインのメタ情報が入っているので、これを更新していく。以下に説明していくが、順番はこの通りじゃなくて良い。
プラグインの名前を更新。
diff --git a/src/main/resources/META-INF/plugin.xml b/src/main/resources/META-INF/plugin.xml
index ada0ad1..4cb9ca3 100644
--- a/src/main/resources/META-INF/plugin.xml
+++ b/src/main/resources/META-INF/plugin.xml
@@ -1,6 +1,6 @@
 <idea-plugin>
     <id>io.github.takc923.recenter-top-bottom</id>
-    <name>Plugin display name here</name>
+    <name>recenter-top-bottom</name>
     <vendor email="support@yourcompany.com" url="http://www.yourcompany.com">YourCompany</vendor>

     <description><![CDATA[
作者情報を更新。emailは入れていいけどプラグインを公開した時に一緒に公開されちゃう。
diff --git a/src/main/resources/META-INF/plugin.xml b/src/main/resources/META-INF/plugin.xml
index 4cb9ca3..1f5fc55 100644
--- a/src/main/resources/META-INF/plugin.xml
+++ b/src/main/resources/META-INF/plugin.xml
@@ -1,7 +1,7 @@
 <idea-plugin>
     <id>io.github.takc923.recenter-top-bottom</id>
     <name>recenter-top-bottom</name>
-    <vendor email="support@yourcompany.com" url="http://www.yourcompany.com">YourCompany</vendor>
+    <vendor url="https://github.com/takc923">takc923</vendor>

     <description><![CDATA[
     Enter short description for your plugin here.<br>
プラグインの説明入力。フォーマットはHTML。
diff --git a/src/main/resources/META-INF/plugin.xml b/src/main/resources/META-INF/plugin.xml
index 1f5fc55..3e68fb6 100644
--- a/src/main/resources/META-INF/plugin.xml
+++ b/src/main/resources/META-INF/plugin.xml
@@ -4,8 +4,8 @@
     <vendor url="https://github.com/takc923">takc923</vendor>

     <description><![CDATA[
-    Enter short description for your plugin here.<br>
-    <em>most HTML tags may be used</em>
+    <p>This plugin scroll like recenter-top-bottom of emacs.</p>
+    <p>Default keymap is C-l</p>
     ]]></description>

     <!-- please see http://www.jetbrains.org/intellij/sdk/docs/basics/getting_started/plugin_compatibility.html
JetBrains IDEの特定のプロダクト専用のプラグインでなければ全てのプロダクトで有効にする。
diff --git a/src/main/resources/META-INF/plugin.xml b/src/main/resources/META-INF/plugin.xml
index 3e68fb6..c27fbcb 100644
--- a/src/main/resources/META-INF/plugin.xml
+++ b/src/main/resources/META-INF/plugin.xml
@@ -8,11 +8,7 @@
     <p>Default keymap is C-l</p>
     ]]></description>

-    <!-- please see http://www.jetbrains.org/intellij/sdk/docs/basics/getting_started/plugin_compatibility.html
-         on how to target different products -->
-    <!-- uncomment to enable plugin in all products
     <depends>com.intellij.modules.lang</depends>
-    -->

     <extensions defaultExtensionNs="com.intellij">
         <!-- Add your extensions here -->
詳細は削除してる行にあるように以下のページを参照。
IntelliJ Pluginにはextensionというプラグインが他のプラグインの機能を呼び出す機能があるけど、最初使わないだろうから消しておく。
diff --git a/src/main/resources/META-INF/plugin.xml b/src/main/resources/META-INF/plugin.xml
index c27fbcb..75739aa 100644
--- a/src/main/resources/META-INF/plugin.xml
+++ b/src/main/resources/META-INF/plugin.xml
@@ -10,10 +10,6 @@

     <depends>com.intellij.modules.lang</depends>

-    <extensions defaultExtensionNs="com.intellij">
-        <!-- Add your extensions here -->
-    </extensions>
-
     <actions>
         <!-- Add your actions here -->
     </actions>
詳細は以下のページ参照。
ここで一旦plugin.xml終わり。
次はbuild.gradleを開く。セットアップが終わっていれば以下のように "You can ..." というメッセージが出ているはずなので、Okする。

そしたら gradle/wrapper/gradle-wrapper.properties が更新されるのでcommitしておく。
diff --git a/gradle/wrapper/gradle-wrapper.properties b/gradle/wrapper/gradle-wrapper.properties
index 115e6ac..3c1be35 100644
--- a/gradle/wrapper/gradle-wrapper.properties
+++ b/gradle/wrapper/gradle-wrapper.properties
@@ -1,5 +1,6 @@
+#Sun Nov 25 18:01:00 JST 2018
 distributionBase=GRADLE_USER_HOME
 distributionPath=wrapper/dists
-distributionUrl=https\://services.gradle.org/distributions/gradle-4.10-bin.zip
 zipStoreBase=GRADLE_USER_HOME
 zipStorePath=wrapper/dists
+distributionUrl=https\://services.gradle.org/distributions/gradle-4.10-all.zip
IntelliJのプラグイン、言語は基本的にJavaかKotlinなんだけど、とりあえずKotlinにしておく。
build.gradleを以下のように更新すればKotlinが使える。kotlinのバージョンはKotlin Pluginのバージョンに合わせる。多分ずれてたら該当箇所がhighlightされてずれてることを教えてくれる。
diff --git a/build.gradle b/build.gradle
index 332002b..24a95c2 100644
--- a/build.gradle
+++ b/build.gradle
@@ -1,8 +1,19 @@
+buildscript {
+    repositories {
+        mavenCentral()
+    }
+    dependencies {
+        classpath "org.jetbrains.kotlin:kotlin-gradle-plugin:1.3.10"
+    }
+}
+
 plugins {
     id 'java'
     id 'org.jetbrains.intellij' version '0.3.12'
 }

+apply plugin: 'kotlin'
+
 group 'io.github.takc923'
 version '0.1-SNAPSHOT'
で、いよいよプラグインのコードを追加する。流れとしては com.intellij.openapi.actionSystem.AnAction を継承したアクションクラスを作りそこにコード本体を書き、そのアクションをplugin.xmlで登録する、という感じ。この記事ではアクションのコードの解説は行わなず実装する際の参考情報を後述することにとどめる。
ここではplugin.xmlのみ解説する。この解説で作るプラグインの設定は以下。classが実装したActionのクラス。idは自分で決めた識別子。多分ユニークであればなんでも良いのでclass名と同じとかで良いと思う。textがそのアクションの名前になる。descriptionがその説明。デフォルトのキーボードショートカットが必要ない場合は、keyboard-shortcutタグはいらない。キーボードショートカットの詳細は後述。
diff --git a/src/main/resources/META-INF/plugin.xml b/src/main/resources/META-INF/plugin.xml
index 75739aa..3947807 100644
--- a/src/main/resources/META-INF/plugin.xml
+++ b/src/main/resources/META-INF/plugin.xml
@@ -11,6 +11,10 @@
     <depends>com.intellij.modules.lang</depends>

     <actions>
-        <!-- Add your actions here -->
+        <action id="RecenterTopBottomAction" class="RecenterTopBottomAction" text="recenter-top-bottom" description="scroll recenter, top and bottom">
+            <keyboard-shortcut first-keystroke="ctrl L" keymap="Mac OS X 10.5+"/>
+            <keyboard-shortcut first-keystroke="ctrl L" keymap="Mac OS X"/>
+            <keyboard-shortcut first-keystroke="ctrl L" keymap="$default"/>
+        </action>
     </actions>
 </idea-plugin>
\ No newline at end of file
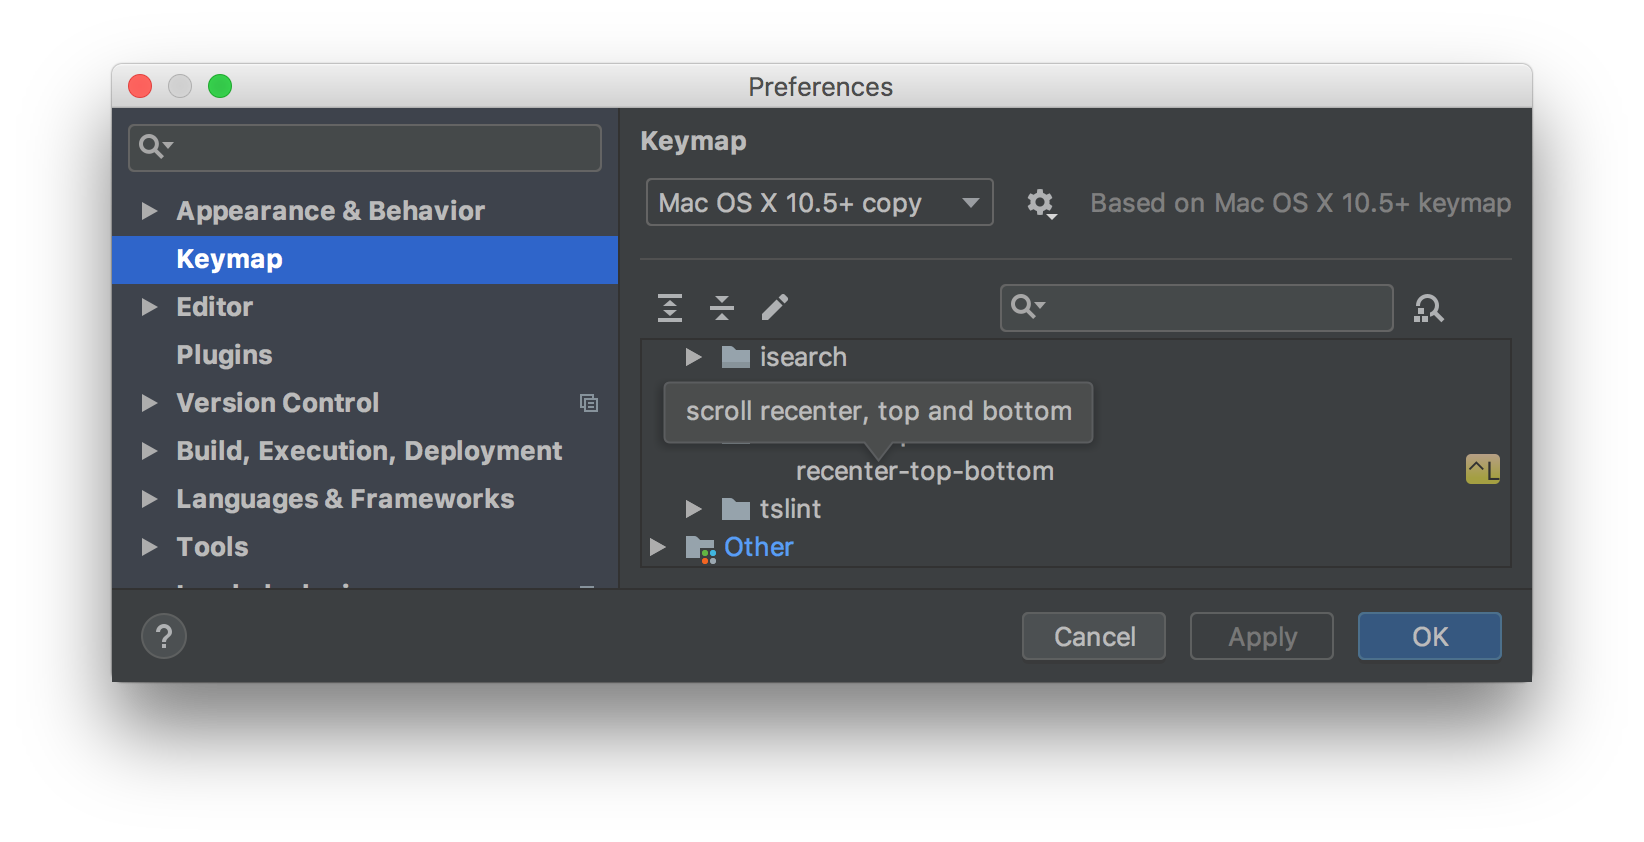
この設定だと最終的に完成してインストールした時こんな感じになる。
開発中はActionのコードを更新しては最初にやったようにプラグインを実行して動作確認をして、というのを繰り返すことになる。
プラグインの本体のコードが完成したら、サポートするIntelliJのバージョンを設定する。plugin.xmlのidea-versionタグのsince-buildプロパティを設定する。例えば、2018.3からサポートするなら2018.3の下3桁の183を入力する。これを設定する上で、以下のページにまとまっているIntelliJの後方互換性のない変更を参考にする。
このプラグインは2018.3で入った変更に依存しているので、183にしている。
またbuild.gradleのintellij.updateSinceUntilBuildをfalseにする。これをやっておかないと、build.gradleのintellij.versionの値でsince-buildが上書きされてしまう。(もちろんそれでよければそのままで良い)
diff --git a/src/main/resources/META-INF/plugin.xml b/src/main/resources/META-INF/plugin.xml
index 3947807..d416267 100644
--- a/src/main/resources/META-INF/plugin.xml
+++ b/src/main/resources/META-INF/plugin.xml
@@ -9,6 +9,7 @@
     ]]></description>

     <depends>com.intellij.modules.lang</depends>
+    <idea-version since-build="183" />

     <actions>
         <action id="RecenterTopBottomAction" class="RecenterTopBottomAction" text="recenter-top-bottom" description="scroll recenter, top and bottom">
diff --git a/build.gradle b/build.gradle
index 24a95c2..b8b9e94 100644
--- a/build.gradle
+++ b/build.gradle
@@ -29,6 +29,7 @@ dependencies {

 intellij {
     version '2018.3'
+    updateSinceUntilBuild false
 }
 patchPluginXml {
     changeNotes """
buildバージョンについての詳細はここ参照。
change noteを更新
diff --git a/build.gradle b/build.gradle
index b8b9e94..f9f6a32 100644
--- a/build.gradle
+++ b/build.gradle
@@ -32,7 +32,5 @@ intellij {
     updateSinceUntilBuild false
 }
 patchPluginXml {
-    changeNotes """
-      Add change notes here.<br>
-      <em>most HTML tags may be used</em>"""
+    changeNotes """Initial release"""
 }
\ No newline at end of file
version設定。
diff --git a/build.gradle b/build.gradle
index f9f6a32..d34c693 100644
--- a/build.gradle
+++ b/build.gradle
@@ -15,7 +15,7 @@ plugins {
 apply plugin: 'kotlin'

 group 'io.github.takc923'
-version '0.1-SNAPSHOT'
+version '0.1'

 sourceCompatibility = 1.8
これでコードが完成。
プロジェクトルートディレクトリで以下のコマンドでbuildしてzipファイルを作る。
$ ./gradlew buildPlugin
成果物は build/distributions/ にある。
$ ls -la build/distributions/recenter-top-bottom-0.1.zip
-rw-r--r--  1 takc923  staff  6729 Dec 12 01:47 build/distributions/recenter-top-bottom-0.1.zip
できたらこれを以下のページからアップロードする。
ファイル、好みのライセンス文書のURLを入力、カテゴリを適当に選択してUpload。

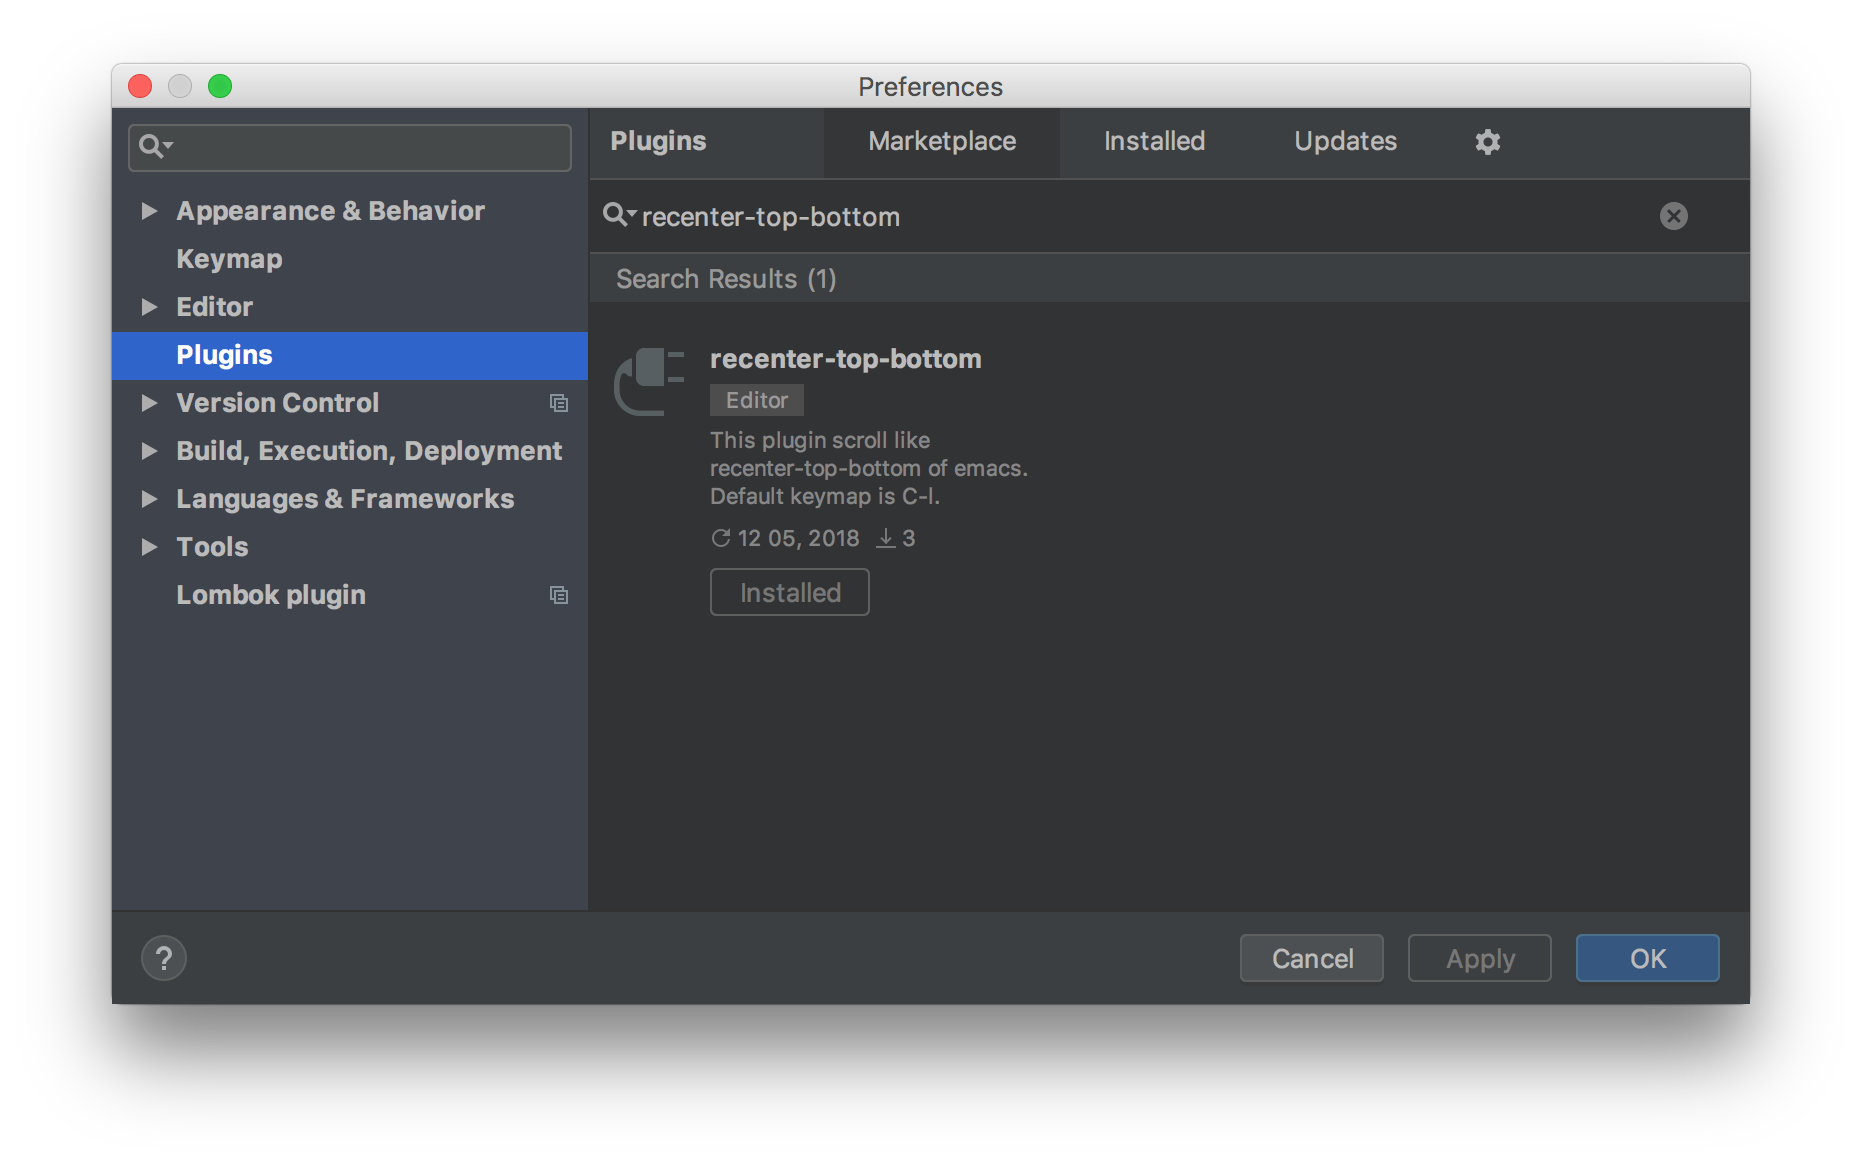
そしたらアップロードされ、JetBrainsの審査待ちになり、審査が終わったら晴れて誰でも使えるようになる。こんな感じに。
個別の詳細
キーボードショートカット
plugin.xmlのactionタグの中のkeyboard-shortcutタグでキーボードショートカットを追加できる。チュートリアルのキーボードショートカット設定部分を再掲。
diff --git a/src/main/resources/META-INF/plugin.xml b/src/main/resources/META-INF/plugin.xml
index 75739aa..3947807 100644
--- a/src/main/resources/META-INF/plugin.xml
+++ b/src/main/resources/META-INF/plugin.xml
@@ -11,6 +11,10 @@
     <depends>com.intellij.modules.lang</depends>

     <actions>
-        <!-- Add your actions here -->
+        <action id="RecenterTopBottomAction" class="RecenterTopBottomAction" text="recenter-top-bottom" description="scroll recenter, top and bottom">
+            <keyboard-shortcut first-keystroke="ctrl L" keymap="Mac OS X 10.5+"/>
+            <keyboard-shortcut first-keystroke="ctrl L" keymap="Mac OS X"/>
+            <keyboard-shortcut first-keystroke="ctrl L" keymap="$default"/>
+        </action>
     </actions>
 </idea-plugin>
\ No newline at end of file
ここでわざわざMacの2つとデフォルトの設定がある。これは、keymap="$default"だけだとMacにもキーボードショートカットが設定されるが、control + lではなくcommand + lになってしまう。ここら辺どうしてそうなるのかちゃんと把握してないけど、それを防ぐためにこのチュートリアルではMacの行も書いている。
first-keystrokeの書き方の詳細は以下を参照。
キーの一覧は↓ここら辺参照。↑に書いてある通り、例えばVK_SEMICOLONだとVK_を除いたSEMICOLONが使える(はず)。
さらなる詳細は公式ドキュメントを参照。
Pluginの更新
プラグインの更新は初回のpublishの時のようにプラグインのページのUploadから出来る。
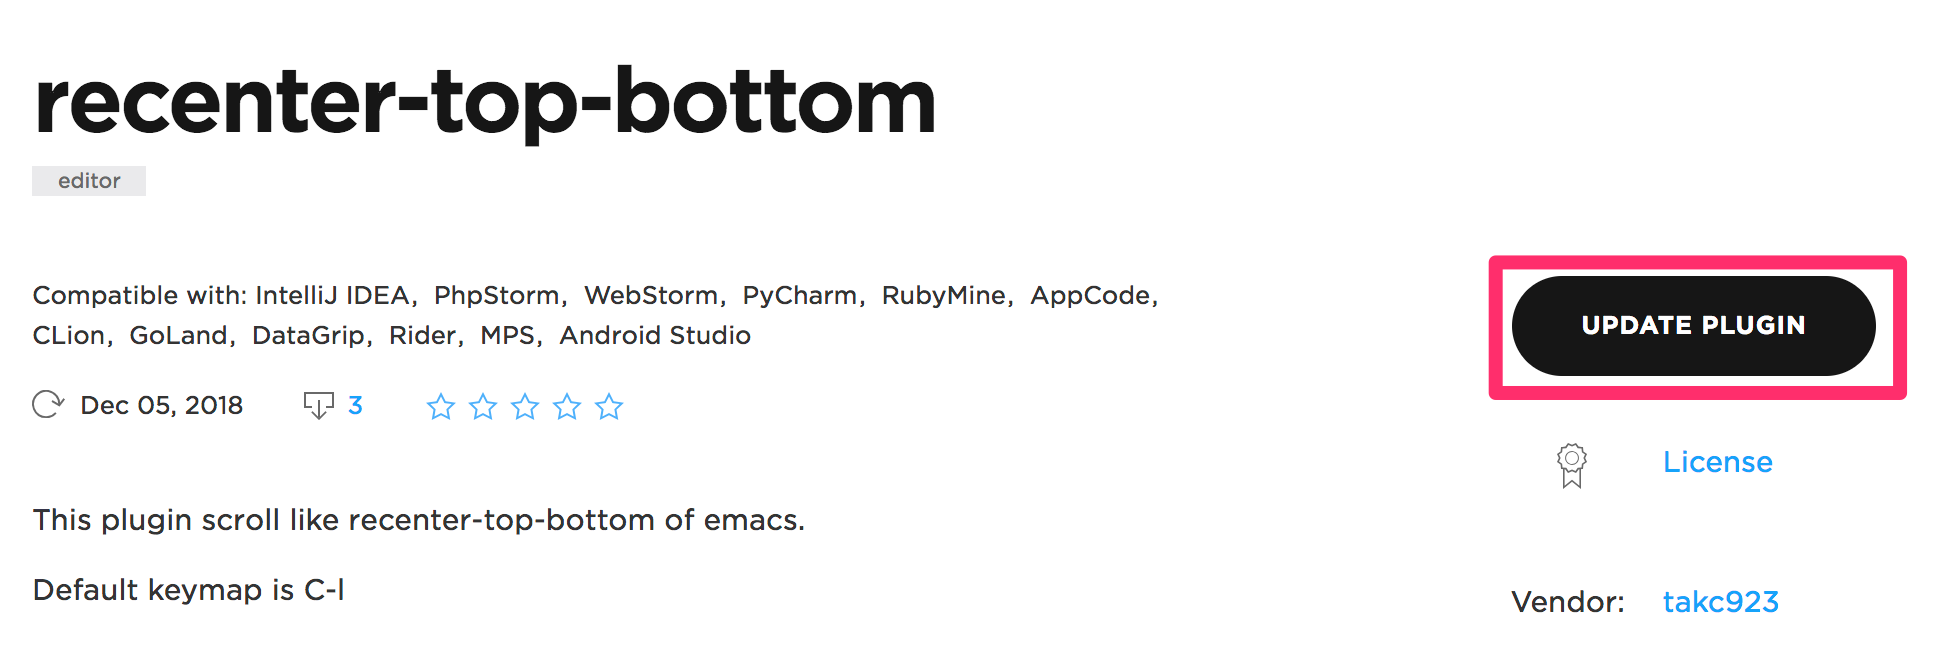
が、コマンドラインからでも出来る。
やり方はプロジェクトルートディレクトリで以下のような内容の gradle.properties と言う名前のファイルを作る。YOUR_*_HEREは各々のユーザネーム、パスワードで変更する。
intellijPublishUsername=YOUR_USERNAME_HERE
intellijPublishPassword=YOUR_PASSWORD_HERE
で、build.gradleに以下の記述を追加する。
publishPlugin {
    username intellijPublishUsername
    password intellijPublishPassword
}
でプロジェクトルートディレクトリで以下のコマンドを実行すると更新される。
$ ./gradlew publishPlugin
詳細は以下のページを参照すると良い、んだけれども
このページに罠があり、ページの通りにgradle.propertiesの内容をintellijPublishUsername="YOUR_USERNAME_HERE"のようにするとユーザネームがYOUR_USERNAME_HEREではなく"YOUR_USERNAME_HERE"になってしまい、認証エラーが出るので注意。
GroupId, ArtifactId, Version
IntelliJプラグイン固有のものではないが一応。これはプラグインのidentifierになるもの。GroupIdはドメインの逆順にしたものを使ってuniqueにするのが慣習になっていて、自分でドメイン持ってなかったらio.github._username_とかにしておけばいいと思う。ArtifactIdがプラグインの名前を表すもの。Versionはバージョン。
バージョンについてる-SNAPSHOTは開発中のやつにつくと思っておけばいい。
詳細はここらへん参照
- https://docs.oracle.com/cd/E50629_01/core/MAVEN/maven_version.htm#A1000676
- https://maven.apache.org/guides/mini/guide-naming-conventions.html
intellij.version
プラグインを実行すると、build.gradleのintellij.versionの値で指定したバージョンのIntelliJが起動する。このバージョンは以下のページのcom.jetbrains.intellij.ideaのVersionが指定できる。
Actionのコードを書くときの参考情報
とりあえず以下のActionに関する公式ドキュメントを読む。
- http://www.jetbrains.org/intellij/sdk/docs/basics/plugin_structure/plugin_actions.html
- http://www.jetbrains.org/intellij/sdk/docs/tutorials/build_system/prerequisites.html#running-a-simple-plugin
- http://www.jetbrains.org/intellij/sdk/docs/basics/action_system.html
これだと実際に書くには全然足らないので、自分が書こうとしているプラグインの機能と似ているプラグインなりIntelliJの機能のコードを参考にすると良い。
- IntelliJ Community Editionのソースコード
- Pluginのレポジトリ
- https://plugins.jetbrains.com/
- たいていのプラグインは詳細ページにソースコードのリンクも記載してくれてる
IntelliJのソースコード読むときは、以下のファイルらへんから該当のアクション探して、そのclassのソースコード読むと良い。
- https://github.com/JetBrains/intellij-community/blob/ef3d6f84f9af8d80758d091ae9ca445e4a0a34ce/platform/platform-resources/src/idea/ExternalSystemActions.xml
- https://github.com/JetBrains/intellij-community/blob/ef3d6f84f9af8d80758d091ae9ca445e4a0a34ce/platform/platform-resources/src/idea/VcsActions.xml
- https://github.com/JetBrains/intellij-community/blob/ef3d6f84f9af8d80758d091ae9ca445e4a0a34ce/platform/platform-resources/src/idea/LangActions.xml
- https://github.com/JetBrains/intellij-community/blob/ef3d6f84f9af8d80758d091ae9ca445e4a0a34ce/platform/platform-resources/src/idea/PlatformActions.xml
あとはそのソースコード読むなりコピペするなり以下の公式ドキュメント読むなりして頑張ってください。
あとがき
JetBrains IDEのプラグインの作り方を解説しました。これ読んでプラグインを作る人が一人でも増えてJetBrains IDEがより使いやすくなれば嬉しいです。

