FlutterPluginに関する備忘録
はじめに
本田技研工業 RoadMovies+チームのフロントエンドを担当している樋口と申します。
今回はTechブログ第七弾の投稿となります。
RoadMoviesの概要説明はTechブログ第二弾に記載していますので、ぜひご覧ください。
簡単に自己紹介
私はスマートフォンアプリ「RoadMovies+」の内製化開発に取り組んでいます。
入社後はしばらく自動車の機能開発を担当しており、プログラミングの経験自体は約1年ちょっとになります。
現在RoadMovies+はFlutterで開発されていますが、一部の機能はネイティブで実装する必要があり、 Flutterのプラグインを作成しました。その際の手順や調べたことを備忘のためまとめておきます。
そもそもPlugin packageって何?
Flutterは3種類のPackageがあり、Plugin packagesはその中の一種である。
Dart packageとの違いは1つ以上のプラットフォーム固有の実装が入っていることらしい。

公式のドキュメント:https://docs.flutter.dev/packages-and-plugins/developing-packages
Plugin packageを作る
作り方はDart packageを作る時と大差はなく、以下のようなコマンドで作成できる。
flutter create --template=plugin --platforms=android,ios -i swift [プラグインの名前]
templeteオプションにpluginを指定してあげるとPlugin packageとしてパッケージを作成してくれる。オプションで対応するプラットフォームや各プラットフォームで使用する言語も指定できる。
今回はプラグインの名前を「test_flutter_plugin」にして実行。
出来上がったプラグインをAndroidStudioで開いてみるとこんな感じ。

プラットフォーム固有のコードが含まれているのが分かる。
デフォルトでOSのバージョンをネイティブ側で取得してDart側で表示するようなコードが用意されてる。
DartからiOS側の処理を呼び出す
折角なのでiOS側でバッテリーの残量を取得し、Dart側で表示するといった実装を追加する。
Dartからプラットフォーム側の処理を呼び出したり、プラットフォーム側からDartの処理を呼び出したりするためのAPIとしてMethodChannelというものが用意されている。
呼び出しの方法は大まかに以下の流れ
- Dart側で通信チャンネルを作成し、プラットフォーム側にメッセージを送信する。
- プラットフォーム側はチャンネルからのメッセージを受け取って処理を実行し、結果をDart側に返する。
Dart側の実装
[プラグイン名]/lib/[プラグイン名]_method_channel.dartを以下のように編集
class MethodChannelTestFlutterPlugin extends TestFlutterPluginPlatform {
/// The method channel used to interact with the native platform.
@visibleForTesting
  final methodChannel = const MethodChannel('test_flutter_plugin');

  @override
  Future<String?> getPlatformVersion() async {
    final version =
        await methodChannel.invokeMethod<String>('getPlatformVersion');
    return version;
  }

  @override
  Future<double?> getBatteryLevel() async {
    final text = await methodChannel.invokeMethod<double>('getBatteryLevel');
    return text;
  }
通信チャンネルをMethodChannel([任意のチャンネル名])で作成し、バッテリーの残量を取得するためのメソッドgetBatteryLevelを追加。
プラットフォーム側へのメッセージ送信は通信チャンネルの.invokeMethodで可能。
Platform側の実装
Xcodeから[プラグイン名]/example/ios/Runner.xcworkspaceを開くと以下のようなファイル構成になっており、
Pods/Development Pods/[プラグイン名]/../../example/ios/.symlinks/plugins/hello/ios/Classes
配下のファイルに実装を追加する。

今回はTestFlutterPlugin.swiftを以下のように編集
public class TestFlutterPlugin: NSObject, FlutterPlugin {
  public static func register(with registrar: FlutterPluginRegistrar) {
    let channel = FlutterMethodChannel(name: "test_flutter_plugin", binaryMessenger: registrar.messenger())
    let instance = TestFlutterPlugin()
    registrar.addMethodCallDelegate(instance, channel: channel)
  }

  public func handle(_ call: FlutterMethodCall, result: @escaping FlutterResult) {
      switch call.method{
      case "getPlatformVersion": result("iOS " + UIDevice.current.systemVersion)
      case "getBatteryLevel": do {
          // バッテリーのモニタリングをenableにする
          UIDevice.current.isBatteryMonitoringEnabled = true

          result(UIDevice.current.batteryLevel)
      };
      default:
          result(FlutterMethodNotImplemented)
      }
  }
}
通信チャンネル名が”test_flutter_plugin”のメソッドが呼ばれた際に、handle()の処理が呼ばれるようになっている。
呼ばれたメソッド名はcall.methodで取得でき、プラットフォーム側で呼ぶ処理を分岐できる。
ちなみにUIDevice.current.batteryLevelはバッテリーの残量を0~1.0のDoubleの値を返し、取得に失敗した場合は-1を返す。また、取得するためにはバッテリーのモニタリングを許可する必要がある。
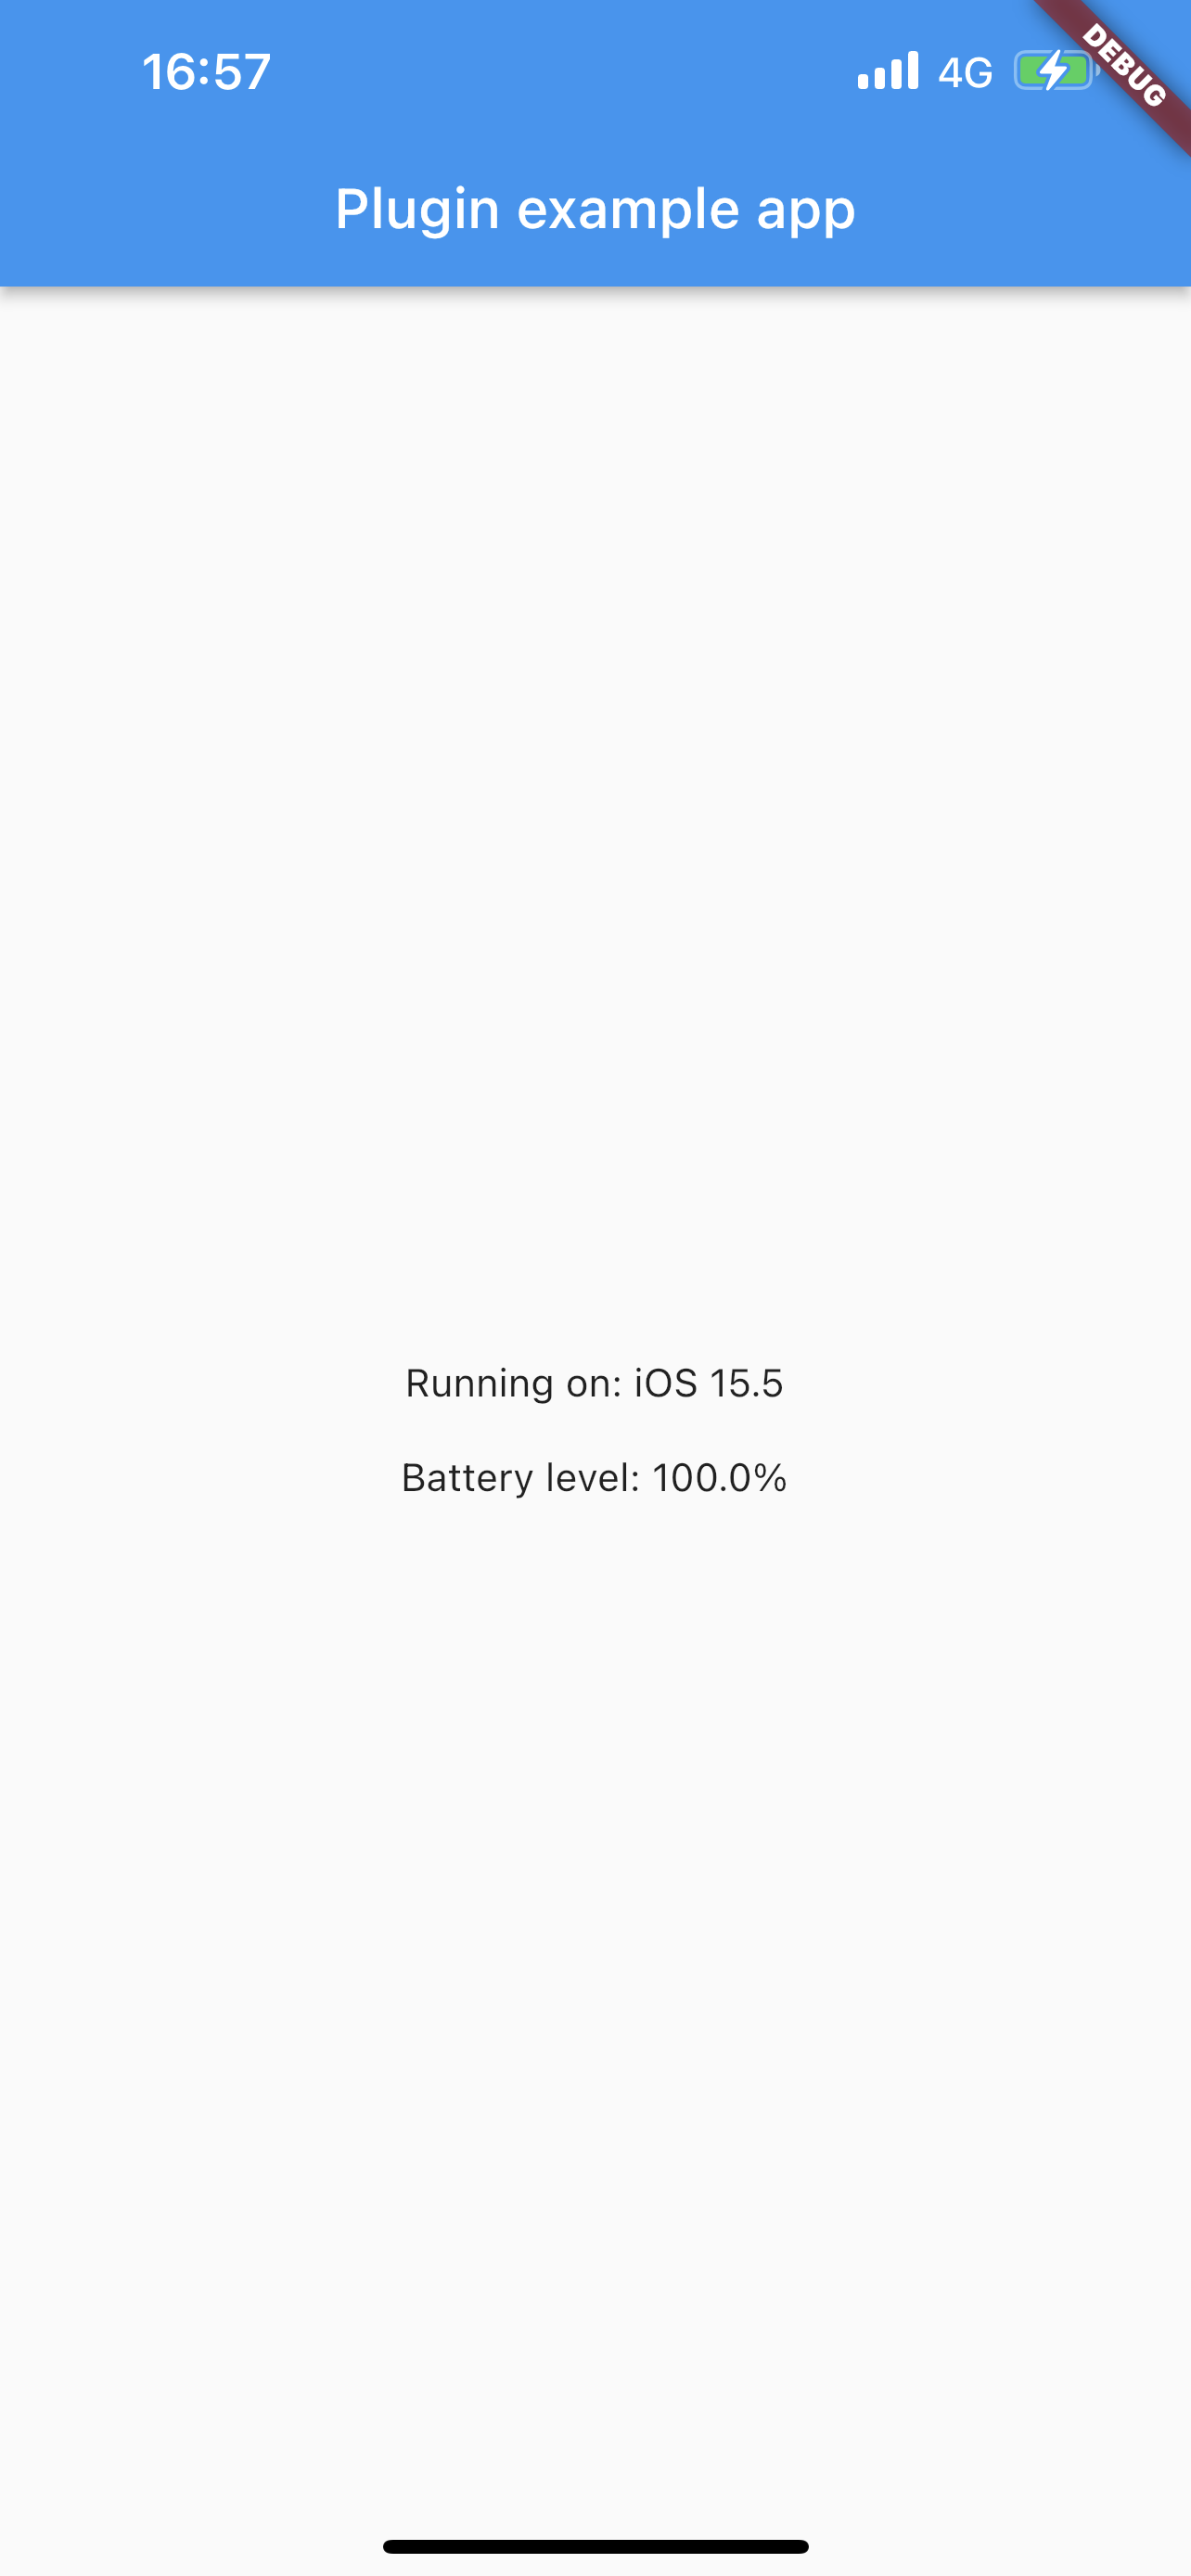
バッテリー残量を表示してみる
exampleアプリで表示できるか確認してみる。
[プラグイン名]/example/lib/main.dartを以下のように編集する。
void main() {
  runApp(const MyApp());
}

class MyApp extends StatefulWidget {
  const MyApp({super.key});

  @override
  State<MyApp> createState() => _MyAppState();
}

class _MyAppState extends State<MyApp> {
  String _platformVersion = 'Unknown';
  final _testFlutterPlugin = TestFlutterPlugin();
  double _batteryLevel = -1;

  @override
  void initState() {
    super.initState();
    initPlatformState();
  }

  // Platform messages are asynchronous, so we initialize in an async method.
  Future<void> initPlatformState() async {
    String platformVersion;
    double batteryLevel;
    // Platform messages may fail, so we use a try/catch PlatformException.
    // We also handle the message potentially returning null.
    try {
      platformVersion = await _testFlutterPlugin.getPlatformVersion() ??
          'Unknown platform version';
      // [追加箇所1] バッテリー残量の取得
      batteryLevel =
          await MethodChannelTestFlutterPlugin().getBatteryLevel() ?? -1;
    } on PlatformException {
      platformVersion = 'Failed to get platform version.';
      batteryLevel = -1;
    }

    // If the widget was removed from the tree while the asynchronous platform
    // message was in flight, we want to discard the reply rather than calling
    // setState to update our non-existent appearance.
    if (!mounted) return;

    setState(() {
      _platformVersion = platformVersion;
      // [追加箇所2] バッテリーのステート更新
      _batteryLevel = batteryLevel;
    });
  }

  @override
  Widget build(BuildContext context) {
    return MaterialApp(
      home: Scaffold(
        appBar: AppBar(
          title: const Text('Plugin example app'),
        ),
        body: Center(
		  // [追加箇所3] バッテリーの残量をOSバージョンと並べて表示
          child: Column(
            mainAxisAlignment: MainAxisAlignment.center,
            children: [
              Text('Running on: $_platformVersion\n'),
              Text('Battery level: ${_batteryLevel * 100}%'),
            ],
          ),
        ),
      ),
    );
  }
}
追加した部分は主に3つ
- 先ほど
[プラグイン名]/lib/[プラグイン名]_method_channel.dartで追加した関数をawait MethodChannelTestFlutterPlugin().getBatteryLevel()で実行し、プラットフォーム側から帰ってきた値をbatteryLevelとして取得。 - バッテリーの残量を
setState()で更新 - デフォルトで用意されているOSバージョンの下にバッテリーの残量(%)を並べて表示
まとめ
- Flutterでのプラグインの作成方法を記述した
- MethodChannelでDartからプラットフォームの処理を呼んでみた
- バッテリーの残量をプラットフォーム側で取得し、Dart側で表示してみた
