PDF-LIBを使えば、Google Apps ScriptでPDFを操作できます。Apache Licence 2.0のオープンソースです。ポイントは、PDF-LIBのコードからApps Scriptで使えない部分を削除することと、Googleドライブで扱える形式に変換すること、です。
ただし、日本語フォントで文字を入力する方法は分かりませんでした。
これから、PDF-LIBをコピーしたコード、PDF-LIBを使ってGoogleドライブから読み書きするコード、動作をテストするコード、をそれぞれ書いていきます。
PDF-LIBのコードからApps Scriptで使えない部分を削除する
最初に、PDF-LIBのソースコードをコピーして、Apps Scriptから使えるようにします。まず、Googleドライブ上でApps Scriptのファイルを作ります。右クリックしてMoreからGoogle Apps Scriptを選びましょう。

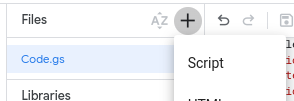
作ったファイルを開いて、スクリプトエディターを開き、新しいスクリプトを追加します。Filesの右にあるプラスボタンからスクリプトを選択します。
ファイル名は何でもいいのですが今回はPdfLibにしましょう。PdfLib.gsとして保存されます。
次に、PDF-LIBのソースコードをPdfLib.gsに貼り付けます。function myFunction { }と書いてあるのは消します。そして、 https://unpkg.com/pdf-lib/dist/pdf-lib.min.js をタブで開き、これをすべてコピーしてPdfLib.gsに貼り付けます。
ここからが重要です。PdfLib.gs上で1つだけ文字列を置換します。以下の変換前の文字列を空白にします。
| 変換前 | 変換後 |
|---|---|
| On(e.start,"options.start",[[Object,"{ x: number, y: number }"]]),On(e.end,"options.end",[[Object,"{ x: number, y: number }"]]), |
Ctrl + Hで文字列を置換できます。置換したら、Code.gsを保存しましょう。正しく保存できればOKです。なお、コードの量が多いため、保存には少々時間がかかります。
Googleドライブで扱える形式に変換する
次に、PDFファイルをGoogleドライブに保存したり、Googleドライブから読み込めるよう、コードを追加します。
さらにスクリプトエディターでスクリプトを追加します。今回はPdfにしましょう。Pdf.gsとして保存されます。Pdf.gsに次のコードを記述します。
// Apps ScriptにはsetTimeoutがないので作っておく。
function setTimeout(func, delayMillis) {
  func();
}

/**
 * PDFDocumentを生成する。PDFLib.PDFDocument.create()の代わりに使う。
 * @returns {PDFLib.PDFDocument} PDFDocument
 */
async function createPdfDocument() {
  return await PDFLib.PDFDocument.create();
}

async function getBlob_(pdfDoc) {
  const base64String = await pdfDoc.saveAsBase64();
  const data = Utilities.base64Decode(base64String);
  return Utilities.newBlob(data).setContentType(MimeType.PDF);
}

/**
 * PDFDocumentをGoogleドライブに保存する。PDFLib.PDFDocument.saveAsBase64()の代わりに使う。
 * @param {PDFLib.PDFDocument} pdfDoc PDFDocument
 * @param {String} filename オプション。ファイル名。デフォルトは unnamed.pdf。
 * @param {String} folderId オプション。保存先のフォルダーID。
 * @returns {DriveApp.File} DriveApp.File
 */
async function savePdfDocument(pdfDoc, filename = 'unnamed.pdf', folderId) {
  const blob = await getBlob_(pdfDoc);
  if (filename) blob.setName(filename);
  if (folderId) {
    return DriveApp.getFolderById(folderId).createFile(blob);
  }
  return DriveApp.createFile(blob);
}

/**
 * PDFDocumentをGoogleドライブから読み込む。PDFLib.PDFDocument.load()の代わりに使う。
 * @param {String} fileId GoogleドライブのファイルID。
 * @returns {PDFLib.PDFDocument} PDFLib.PDFDocument
 */
async function loadPdfDocument(fileId) {
  const blob = DriveApp.getFileById(fileId).getBlob();
  const bytes = blob.getBytes();
  const base64String = Utilities.base64Encode(bytes);
  return await PDFLib.PDFDocument.load(base64String);
}

/**
 * 指定したGoogleドライブのファイルをPDFDocumentで上書きする。
 * @param {String} fileId 上書きするファイルのファイルID。
 * @param {PDFLib.PDFDocument} pdfDoc PDFLib.PDFDocument
 * @returns {DriveApp.File} DriveApp.File
 */
async function updatePdfDocument(fileId, pdfDoc) {
  const blob = await getBlob_(pdfDoc);
  return Drive.Files.update({ uploadType: 'media' }, fileId, blob);
}
動作するか確認する
最後に、Code.gsに以下のコードを書き込んで、test()を実行しています。結果としてマイドライブにPDFファイルが生成されます。Googleドライブへの保存、読み出し、上書きをそれぞれテストしています。
Googleドライブの操作以外は、PDF-LIBのAPIをご覧ください。
async function test() {
  // PDFLib.PDFDocument.create()の代わり。
  const pdfDoc = await createPdfDocument();

  // PDF-LIB APIを使う。1ページ目に文字と線を描く。
  const page = pdfDoc.addPage();
  const w = page.getWidth();
  const h = page.getHeight();
  page.drawText('Your First PDF File!', { x: 10, y: h / 2 });
  page.drawLine({
    start: { x: 10, y: h / 2 },
    end: { x: w - 20, y: h / 2 }
  });

  // PDFLib.PDFDocument.saveAsBase64()の代わり。
  const file = await savePdfDocument(pdfDoc, 'test.pdf');
  console.log(`PDFファイルを作成しました ${file.getUrl()}`);

  // PDFLib.PDFDocument.load()の代わり。
  const pdfDoc2 = await loadPdfDocument(file.getId());

  // PDF-LIB APIで2ページ目に文字を描く。
  const page2 = pdfDoc2.addPage();
  page2.drawText('The Next Page!', { x: 10, y: h / 2 });

  // ファイルに上書きする。
  await updatePdfDocument(file.getId(), pdfDoc2);
  console.log(`PDFファイルを更新しました ${file.getUrl()}`);
}
なお、async, awaitのつけ忘れには注意が必要です。
- PDF-LIBのAPIには、呼び出すときに
awaitが必要なものがあります。awaitを呼び出す関数は、async functionとして定義する必要があります。 - 例えば
test()はasync function test() {として定義しています。 -
test()の中で、createPdfDocument()、savePdfDocument()、loadPdfDocument()、updatePdfDocument()にそれぞれawaitをつけていることに注意してください。
参考にしたドキュメント