はじめに
この記事はシスコの有志による Advent Calendar の一部として投稿しています。
https://qiita.com/advent-calendar/2018/cisco
ACI, DNA, NSO をはじめ弊社の製品でも GUI をもつ製品が増えてきました。生粋のネットワークエンジニアであれば、GUI なんて邪道だと思う方もいるかと思いますが、設定を GUI から入れなくとも、基本的な装置(インベントリ、電源、温度などの情報)をコマンドを入力せずに、装置の Status を確認できれば便利ではないかと思います。多くの Router や Switch 製品では単体で GUI をもつような製品はまだまだ少ないのが現状かと思います。
IOS-XR の 6.0 以降では、ハイパーバイザーや LXC などの仮想化レイヤ上で IOS XR を稼働するということが実現されました。これにより、システム管理プレーンと Networking OS が分離されたことに加え、 Third party のコンテナを動かすことができるようになりました。
この Third Party のコンテナには LXC や Dcoker を使用することができ、自分好みのアプリケーションをホストすることが可能です。そこで、この記事では Docker を使い IOS-XR に GUI を実装し、その使い勝手を検証してみました。基本的には XRdocs に公開されている情報に従っていますので、興味を持たれた方はそちらを見ていただければより詳しい内容が知れると思います。
また、今回はテスト用に IOS-XR Vagrant を使いましたが、IOS-XR Vagrant 自体に関しても前述の XRdocs をご参照ください。NCS5500 や ASR9000 を好きに使えるようでしたら、そちらを使っても開発することができます。設定方法は前述の XRdocs にも記載されています。
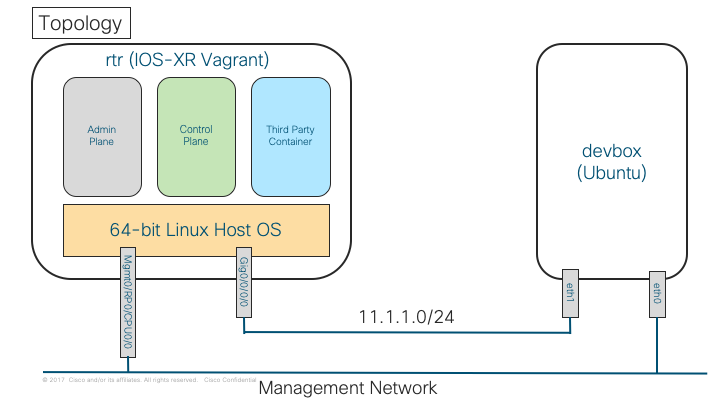
開発環境のトポロジーは XRdocs に倣い、以下のように構築します。
おおまかな、流れは以下のようになります。
- Vagrant を使い開発環境(devbox と rtr)を作成する
- devbox で Docker コンテナのイメージを作成する
- rtr に作成した Docker イメージを転送する
- rtr で Docker コンテナで Web サーバーを立ち上げる
- devbox のブラウザから rtr の GUI を確認する
- ひたすら作り込む
では、実際に作っていきましょう。
1. 開発環境の構築
今回、用意した Vagrantfile は以下のものです。
# -*- mode: ruby -*-
# vi: set ft=ruby :

# All Vagrant configuration is done below. The "2" in Vagrant.configure
# configures the configuration version (we support older styles for
# backwards compatibility). Please don't change it unless you know what
# you're doing.

Vagrant.configure(2) do |config|

   config.vm.define "rtr" do |node|
      node.vm.box =  "IOS-XRv"

      # gig0/0/0 connected to "link1"
      # auto_config is not supported for XR, set to false

      node.vm.network :private_network, virtualbox__intnet: "link1", auto_config: false

      #Source a config file and apply it to XR

      node.vm.provider "virtualbox" do |v|
         v.memory = 5120
      end


    end


    config.vm.define "devbox" do |node|
      node.vm.box =  "ubuntu/trusty64"

      # eth1 connected to link1
      # auto_config is supported for an ubuntu instance

      node.vm.network :private_network, virtualbox__intnet: "link1", ip: "11.1.1.20"

      node.vm.provision "shell" do |s|
          s.path =  "scripts/docker_install.sh"
      end

      node.vm.provider "virtualbox" do |v|
          v.memory = 1024
      end

    end

end
まずは、Vagrant を使って、VM を立ち上げます。
TAKANORO-M-L2BP:cisco-advent-calender takanoro$ tree
.
├── Vagrantfile
└── scripts
    └── docker_install.sh

1 directory, 2 files
TAKANORO-M-L2BP:cisco-advent-calender takanoro$
TAKANORO-M-L2BP:cisco-advent-calender takanoro$ vagrant up
2つの VM (rtr と devbox) が起動してきたことを確認する。
TAKANORO-M-L2BP:cisco-advent-calender takanoro$ vagrant status
Current machine states:

rtr                       running (virtualbox)
devbox                    running (virtualbox)

This environment represents multiple VMs. The VMs are all listed
above with their current state. For more information about a specific
VM, run `vagrant status NAME`.
rtf にログインし、以下の設定を投入する。
TAKANORO-M-L2BP:cisco-advent-calender takanoro$ ssh -p 2223 vagrant@localhost
Password:

RP/0/RP0/CPU0:ios#
RP/0/RP0/CPU0:ios#configure terminal
Wed Dec  5 13:56:37.288 UTC
RP/0/RP0/CPU0:ios(config)#hostname vNCS5500
RP/0/RP0/CPU0:ios(config)#!
RP/0/RP0/CPU0:ios(config)#interface GigabitEthernet0/0/0/0
RP/0/RP0/CPU0:ios(config-if)#ip address 11.1.1.10/24
RP/0/RP0/CPU0:ios(config-if)#no shutdown
RP/0/RP0/CPU0:ios(config-if)#commit
2. Docker イメージの作成
今回作成した Dockerfile は以下のものです。
# Base image
FROM ubuntu:16.04

#
ENV MyName cisco

# Package Install
RUN apt-get update && \
    apt-get install -y wget && \
    apt-get install -y python && \
    apt-get install -y iputils-ping &&\
    apt-get install -y net-tools && \
    apt-get install -y python-psutil && \
    apt-get install -y ssh && \
    apt-get install -y iproute2 && \
    apt-get install -y python-pip && \
    apt-get install -y vim && \
    apt-get install -y sudo

# User Setting
RUN useradd -m $MyName
RUN adduser $MyName sudo
RUN adduser $MyName users
RUN echo "$MyName:$MyName" | chpasswd


# Working Directory
WORKDIR /home/$MyName

# Install Library for BDB
RUN pip install flask
RUN pip install requests
RUN pip install pexpect
devbox にログインして、Docker イメージをビルドします。
TAKANORO-M-L2BP:cisco-advent-calender takanoro$ vagrant ssh devbox
Welcome to Ubuntu 14.04.5 LTS (GNU/Linux 3.13.0-161-generic x86_64)

//snip//

root@vagrant-ubuntu-trusty-64:~# ls -l
total 4
-rw-r--r-- 1 root root 829 Dec  5 14:07 Dockerfile
root@vagrant-ubuntu-trusty-64:~#
root@vagrant-ubuntu-trusty-64:~# docker build -f ~/Dockerfile -t xr-gui:1.0 .
Sending build context to Docker daemon  10.24kB
Step 1/11 : FROM ubuntu:16.04

//snip//

root@vagrant-ubuntu-trusty-64:~# docker images
REPOSITORY          TAG                 IMAGE ID            CREATED             SIZE
xr-gui              1.0                 0b9a501c8b0b        2 minutes ago       503MB
ubuntu              16.04               a51debf7e1eb        2 weeks ago         116MB
root@vagrant-ubuntu-trusty-64:~#
3. rtr に作成した Docker イメージを転送する
まずは Docker image をセーブする。
root@vagrant-ubuntu-trusty-64:~# docker save xr-gui > xr-gui.tar
root@vagrant-ubuntu-trusty-64:~# ls
Dockerfile  xr-gui.tar
root@vagrant-ubuntu-trusty-64:~# cp xr-gui.tar /home/vagrant/
次に、rtr から devbox へ ping できることを確認する。
RP/0/RP0/CPU0:vNCS5500#ping 11.1.1.20
Thu Dec  6 01:31:52.381 UTC
Type escape sequence to abort.
Sending 5, 100-byte ICMP Echos to 11.1.1.20, timeout is 2 seconds:
!!!!!
Success rate is 100 percent (5/5), round-trip min/avg/max = 2/2/5 ms
ここで、scp で xr-gui.tar を取ってくる前に以下の設定を入れておく。これを入れないと途中でセッションがタイムアウトしてしまします。
RP/0/RP0/CPU0:vNCS5500#configure terminal
Thu Dec  6 01:23:55.593 UTC
RP/0/RP0/CPU0:vNCS5500(config)#line default exec-timeout 0
RP/0/RP0/CPU0:vNCS5500(config)#commit
しかし、このままだと、ホストからは到達性がありません。
RP/0/RP0/CPU0:vNCS5500#bash
Thu Dec  6 01:26:34.407 UTC
[vNCS5500:~]$
[vNCS5500:~]$ ip route
default dev fwdintf  scope link  src 10.0.2.15
10.0.2.0/24 dev Mg0_RP0_CPU0_0  scope link  src 10.0.2.15
なので、以下の設定を入れます。
RP/0/RP0/CPU0:vNCS5500#configure terminal
Thu Dec  6 01:27:03.178 UTC
RP/0/RP0/CPU0:vNCS5500(config)#tpa
RP/0/RP0/CPU0:vNCS5500(config-tpa)#address-family ipv4
RP/0/RP0/CPU0:vNCS5500(config-tpa-vrf-afi)#update-source gigabitEthernet 0/0/0/0
RP/0/RP0/CPU0:vNCS5500(config-tpa-vrf-afi)#commit
Thu Dec  6 01:27:27.991 UTC
RP/0/RP0/CPU0:vNCS5500(config-tpa-vrf-afi)#end
今度は、devbox への経路が見えるようになるので、ssh して xr-gui.tar が置いてあるか確認します。
RP/0/RP0/CPU0:vNCS5500#bash
Thu Dec  6 01:32:08.536 UTC
[vNCS5500:~]$ ip route
default dev fwdintf  scope link  src 11.1.1.10
10.0.2.0/24 dev Mg0_RP0_CPU0_0  scope link  src 10.0.2.15
[vNCS5500:~]$ ssh vagrant@11.1.1.20
vagrant@11.1.1.20's password:

//snip//

Last login: Thu Dec  6 01:28:50 2018 from 11.1.1.10
vagrant@vagrant-ubuntu-trusty-64:~$ ls
xr-gui.tar
devbox から xr-gui.tar を取得する。
RP/0/RP0/CPU0:vNCS5500#bash
Thu Dec  6 01:49:38.314 UTC
[vNCS5500:~]$ scp vagrant@11.1.1.20:/home/vagrant/xr-gui.tar /misc/app_host/
vagrant@11.1.1.20's password:
xr-gui.tar                                                                               100%  497MB 120.2KB/s 1:10:34
[vNCS5500:~]$
[vNCS5500:~]$ ls -l /misc/app_host/
total 509096
lrwxrwxrwx 1 root root        14 Dec  6 01:05 app_host -> /misc/app_host
drwxr-xr-x 2 root root      4096 Dec  6 01:05 app_hosting_apply_cmd
drwxr-xr-x 5 root root      4096 May 25  2018 app_repo
drwx-----x 9 root root      4096 May 25  2018 docker
srw-rw---- 1 root root         0 Dec  6 01:05 docker.sock
drwxr-xr-x 5 root root      4096 May 25  2018 etc
drwx------ 2 root root     16384 May 25  2018 lost+found
drwxrwxr-x 2 root sudo      4096 May 25  2018 scratch
drwxr-xr-x 3 root root      4096 May 25  2018 var
-rw-r--r-- 1 root root 521266176 Dec  6 03:00 xr-gui.tar
4. Web サーバーを立ち上げる
まずは取得した xr-gui.tar を load し、Docker イメージを作成します。
[vNCS5500:~]$ cd /misc/app_host/
[vNCS5500:/misc/app_host]$ ls -l
total 509096
lrwxrwxrwx 1 root root        14 Dec  6 01:05 app_host -> /misc/app_host
drwxr-xr-x 2 root root      4096 Dec  6 01:05 app_hosting_apply_cmd
drwxr-xr-x 5 root root      4096 May 25  2018 app_repo
drwx-----x 9 root root      4096 May 25  2018 docker
srw-rw---- 1 root root         0 Dec  6 01:05 docker.sock
drwxr-xr-x 5 root root      4096 May 25  2018 etc
drwx------ 2 root root     16384 May 25  2018 lost+found
drwxrwxr-x 2 root sudo      4096 May 25  2018 scratch
drwxr-xr-x 3 root root      4096 May 25  2018 var
-rw-r--r-- 1 root root 521266176 Dec  6 03:00 xr-gui.tar
[vNCS5500:/misc/app_host]$
[vNCS5500:/misc/app_host]$ docker load < xr-gui.tar
[vNCS5500:/misc/app_host]$
[vNCS5500:/misc/app_host]$ docker images
REPOSITORY          TAG                 IMAGE ID            CREATED             SIZE
xr-gui              1.0                 aa2d9b7526fc        2 hours ago         503 MB
作成したイメージから Docker コンテナを起動させます。
[vNCS5500:/misc/app_host]$ docker run -itd --name sample -v /var/run/netns/global-vrf:/var/run/netns/global-vrf --cap-add=SYS_ADMIN xr-gui:1.0 bash
90d7ece6caf9cb2c6afded7d59904c5551c8a1933c7506148f93af274fbef86e
[vNCS5500:/misc/app_host]$
[vNCS5500:/misc/app_host]$
[vNCS5500:/misc/app_host]$ docker ps
CONTAINER ID        IMAGE               COMMAND             CREATED             STATUS              PORTS               NAMES
90d7ece6caf9        xr-gui:1.0          "bash"              16 seconds ago      Up 15 seconds                           sample
[vNCS5500:/misc/app_host]$
先程、起動した Docker コンテナの仮想ターミナルを起動する。そこで、適当な index.html を作成し、Web Server を起動する。ip netns exec global-vrf bash を打たないと、コンテナ側からリンクが認識されませんので、ご注意ください。
[vNCS5500:/misc/app_host]$ docker exec -it 90d7ece6caf9 bash
root@90d7ece6caf9:/home/cisco#
root@90d7ece6caf9:/home/cisco# cat index.html
<html lang="en">
    <head>
        <meta charset="utf-8">
        <title>IOS-XR</title>
    </head>
    <body>
        <div>
            <main>
                <p>Hello, world !!</p>
            </main>
        </div>
    </body>
</html>

root@90d7ece6caf9:/home/cisco#
root@90d7ece6caf9:/home/cisco# mkdir /xr-gui/
root@90d7ece6caf9:/home/cisco# cp index.html /xr-gui/
root@90d7ece6caf9:/home/cisco# ls -l /xr-gui/
total 4
-rw-r--r-- 1 root root 240 Dec  6 04:51 index.html
root@90d7ece6caf9:/home/cisco# ip netns exec global-vrf bash
root@90d7ece6caf9:~# cd /
root@90d7ece6caf9:/#
root@90d7ece6caf9:/# python -m SimpleHTTPServer 8080
Serving HTTP on 0.0.0.0 port 8080 ...
5. リモート側からブラウザでアクセスする
devbox 側から rtr の Web Server にアクセスできるかを確認するため、devbox にデスクトップ環境を用意します。まずは、devbox にログインします。
TAKANORO-M-L2BP:cisco-advent-calender takanoro$ vagrant ssh devbox
Welcome to Ubuntu 14.04.5 LTS (GNU/Linux 3.13.0-161-generic x86_64)
ログインしたら、以下のようなコマンドを実行し、少し待ちます。
sudo apt-get update
sudo apt-get upgrade
sudo apt-get install -y ubuntu-desktop
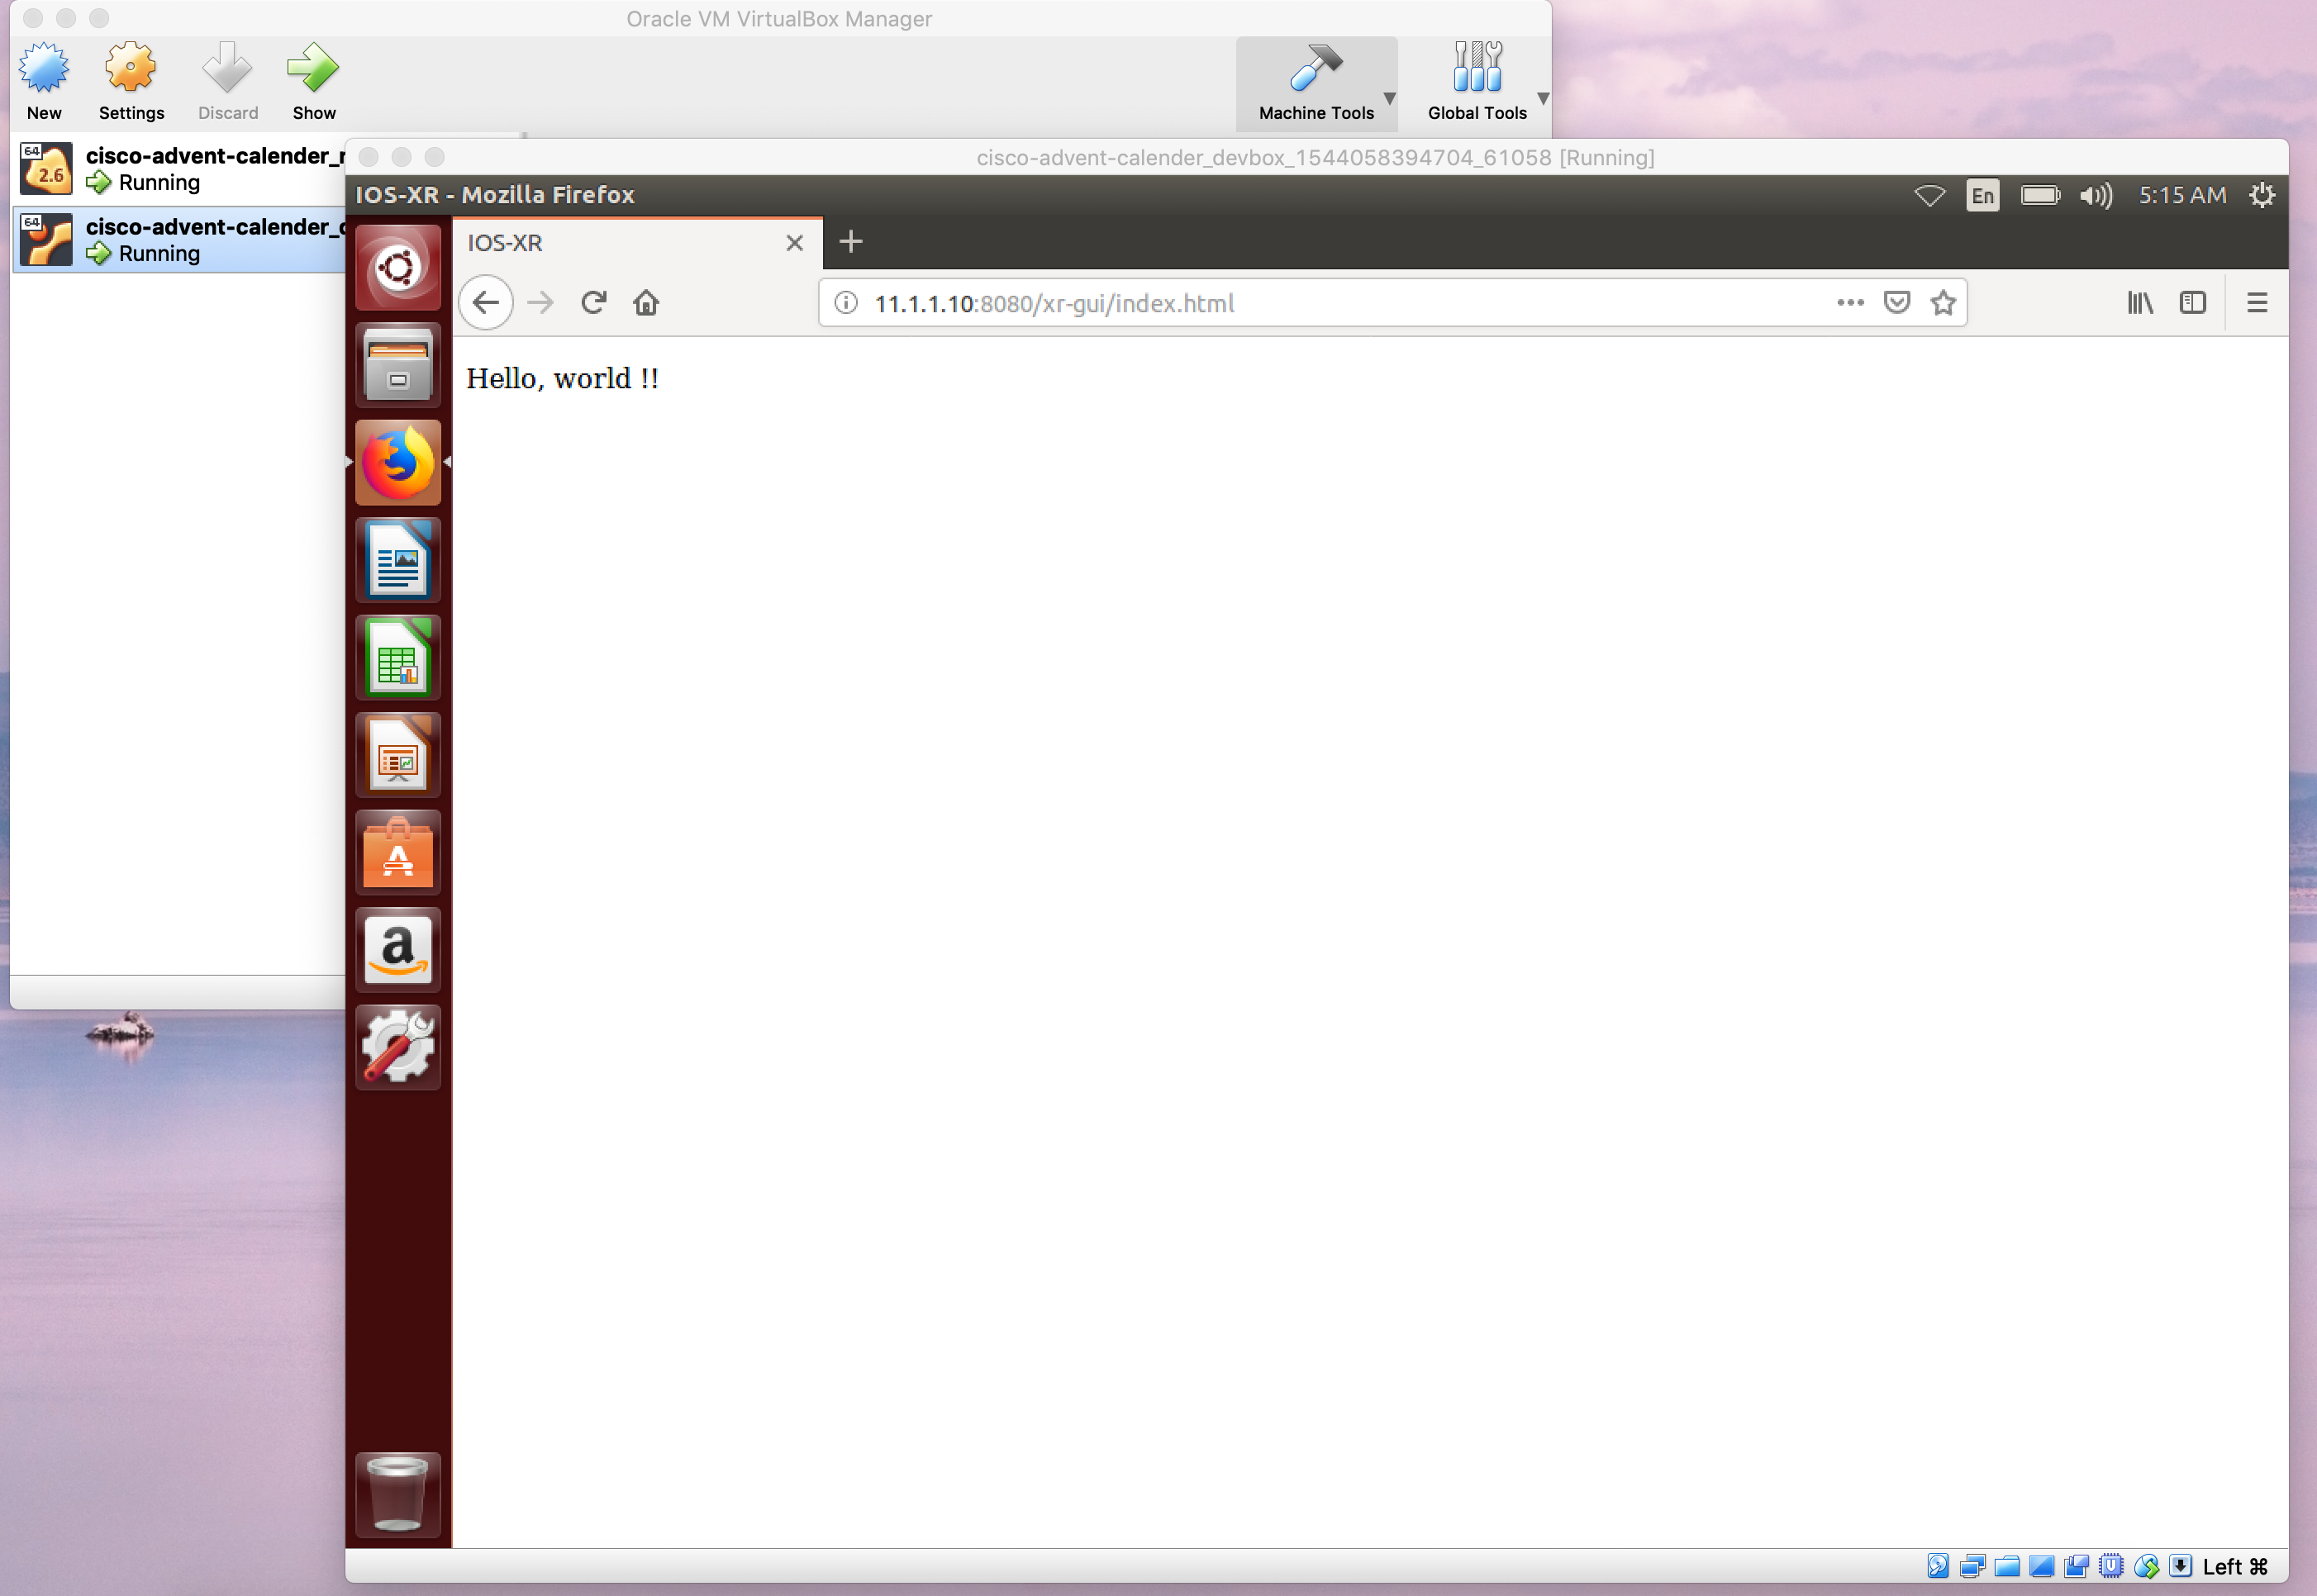
インストールが終了したら、VirtualBox から devbox のデスクトップを立ち上げて、ブラウザから以下の URL にアクセスします。
http://11.1.1.10:8080/xr-gui/index.html
できた !!

6. ひたすら作り込む
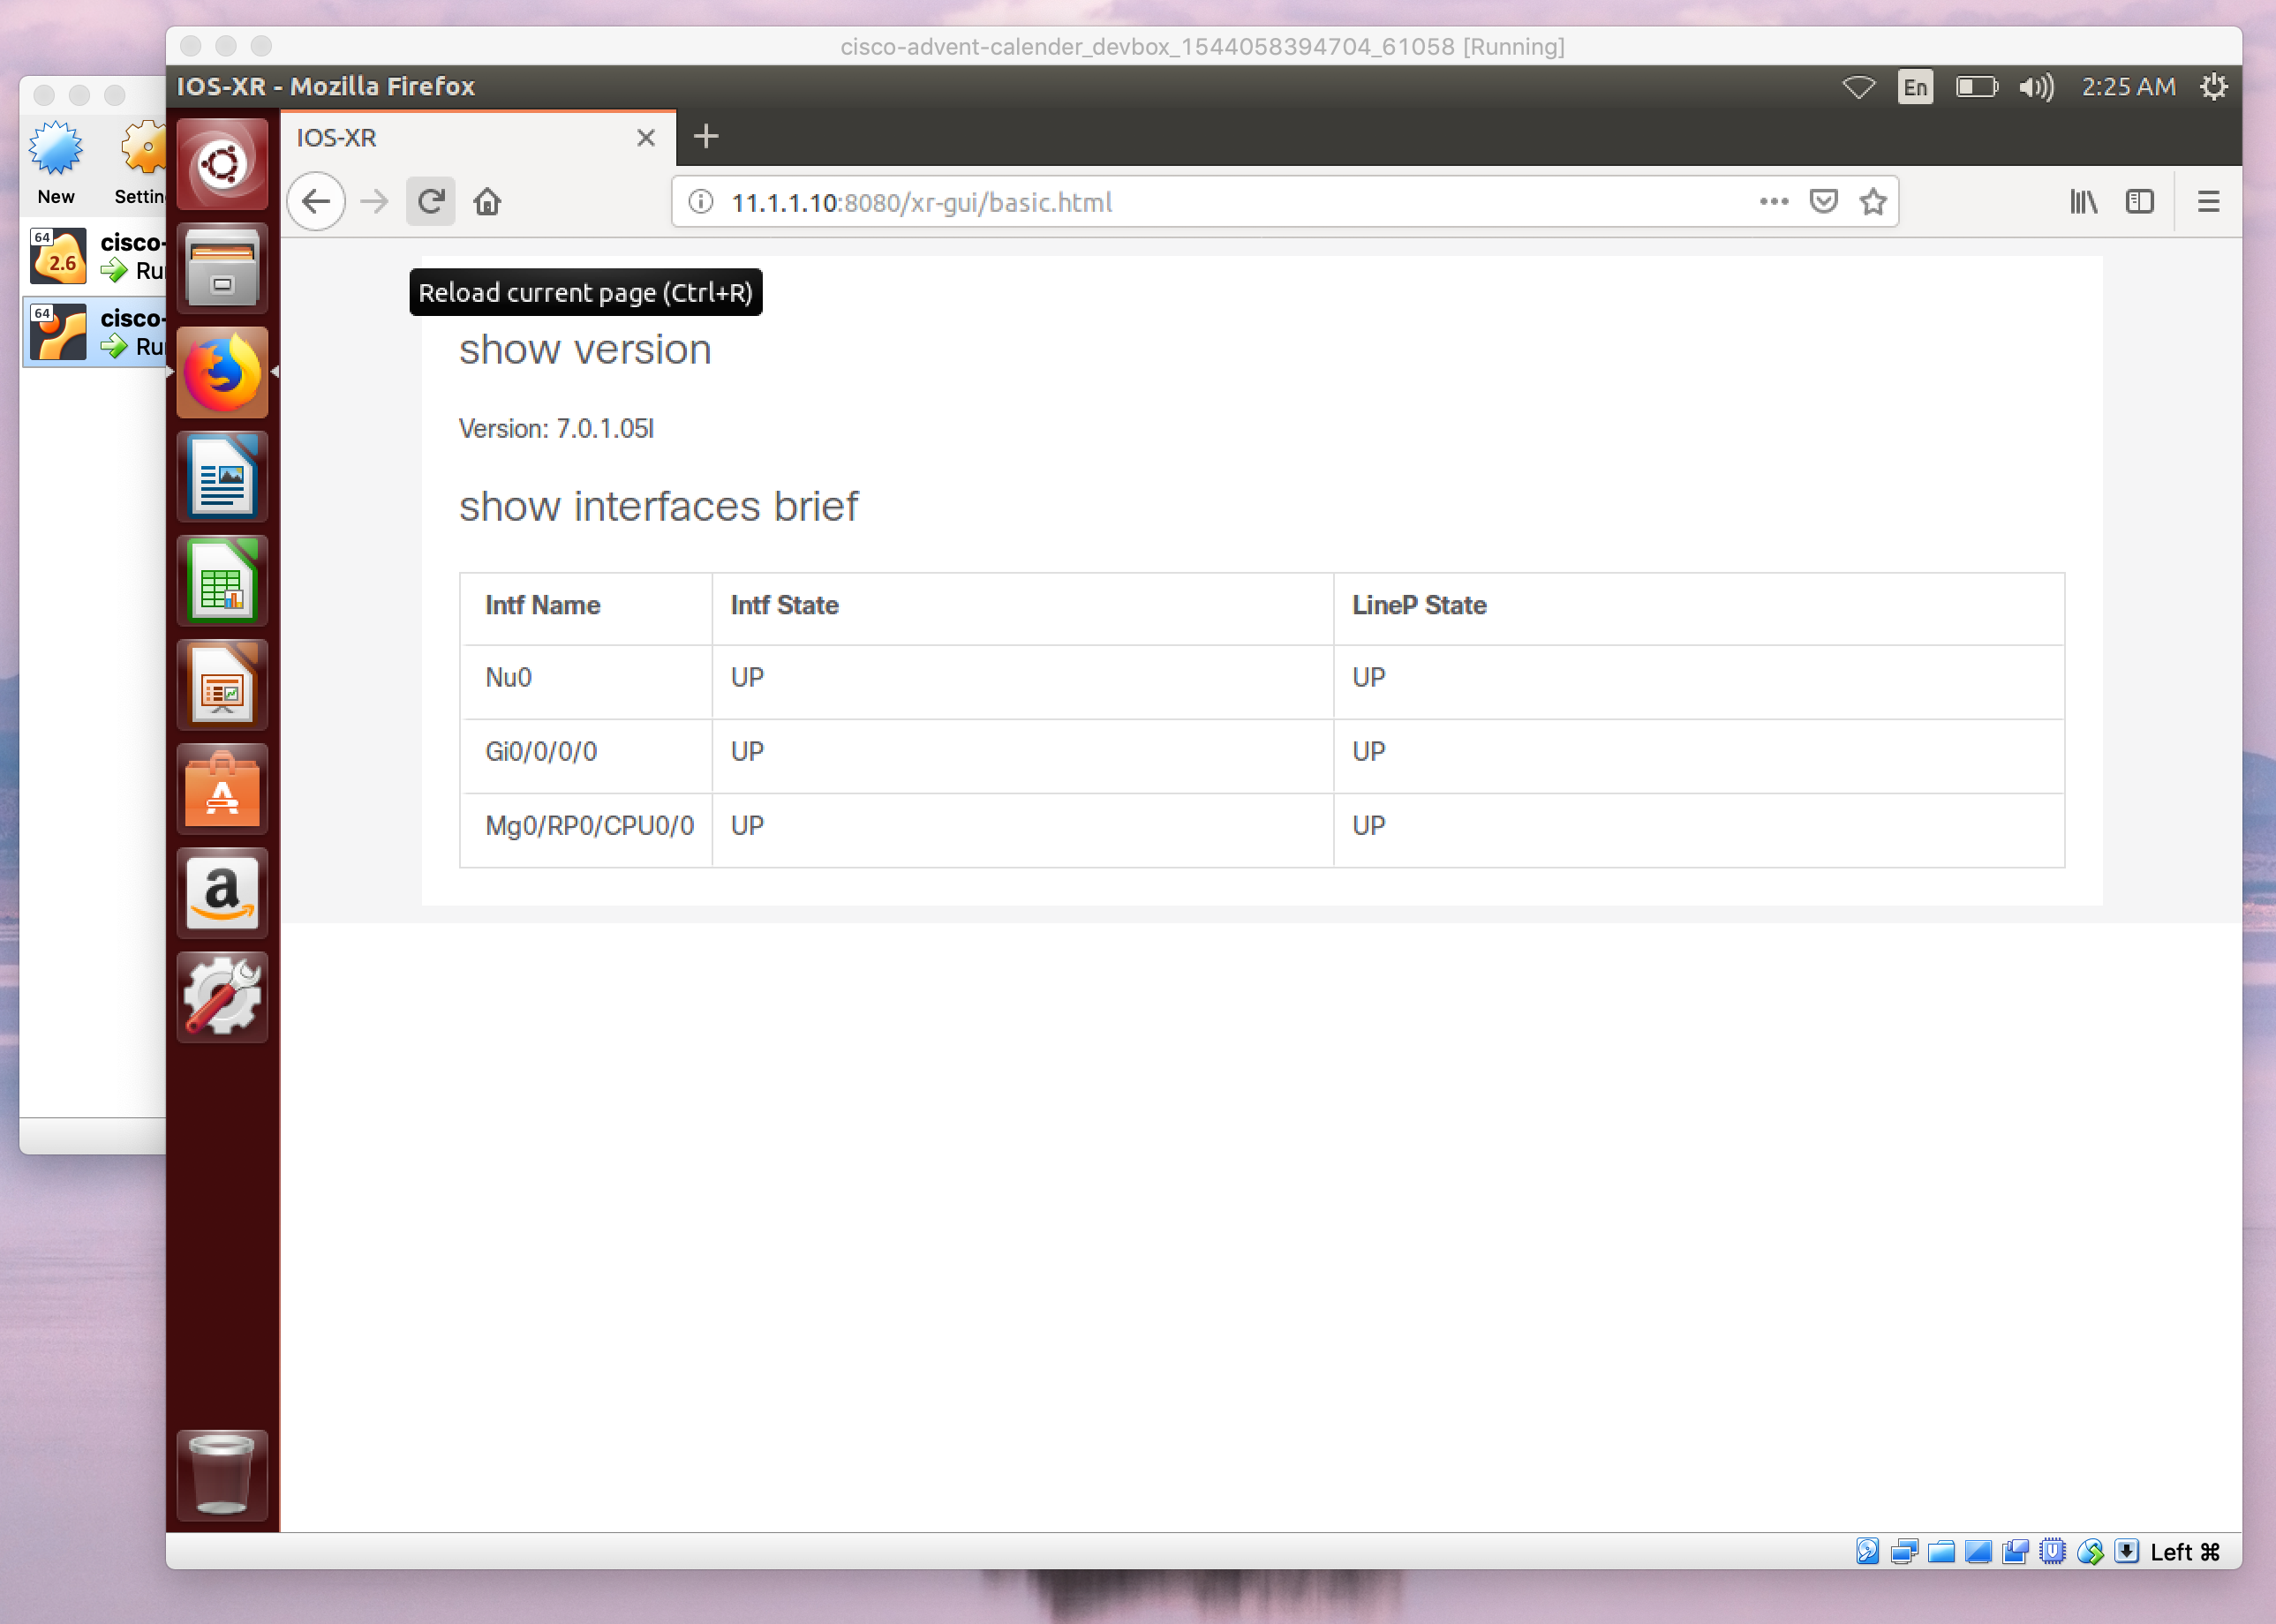
pexpect や paramiko 使ってコマンドの出力結果を取得して、AngulaJS を使ってデータの Binding をしてと考えていたのですが、 ここまで作って力尽きました…。

まとめ
もう少し作り込むつもりでしたが、様々な理由で時間が無くなってしまったので、今回はこのあたりで力尽きてしまいました。ネットワーク機器の OS も進化を続けていて、ますますプログラマブルな機能が充実していくと思います。もちろん、そのまま使うのも良いと思いますが、プログラマビリティなところを活かして、ユーザーのアプリケーションを介入させたり、プロトコルをいち早く実装してみたりといったこと試してみるのも面白いと思います。ぜひとも、ユーザーの視点で面白いものを作ってみてもらえればと思います。
