はじめに
Objective-CでCustomCellを使用してみました。備忘録として作成手順を書き記します。
1.表示する内容を用意する
・適当な画像を4つ用意します。
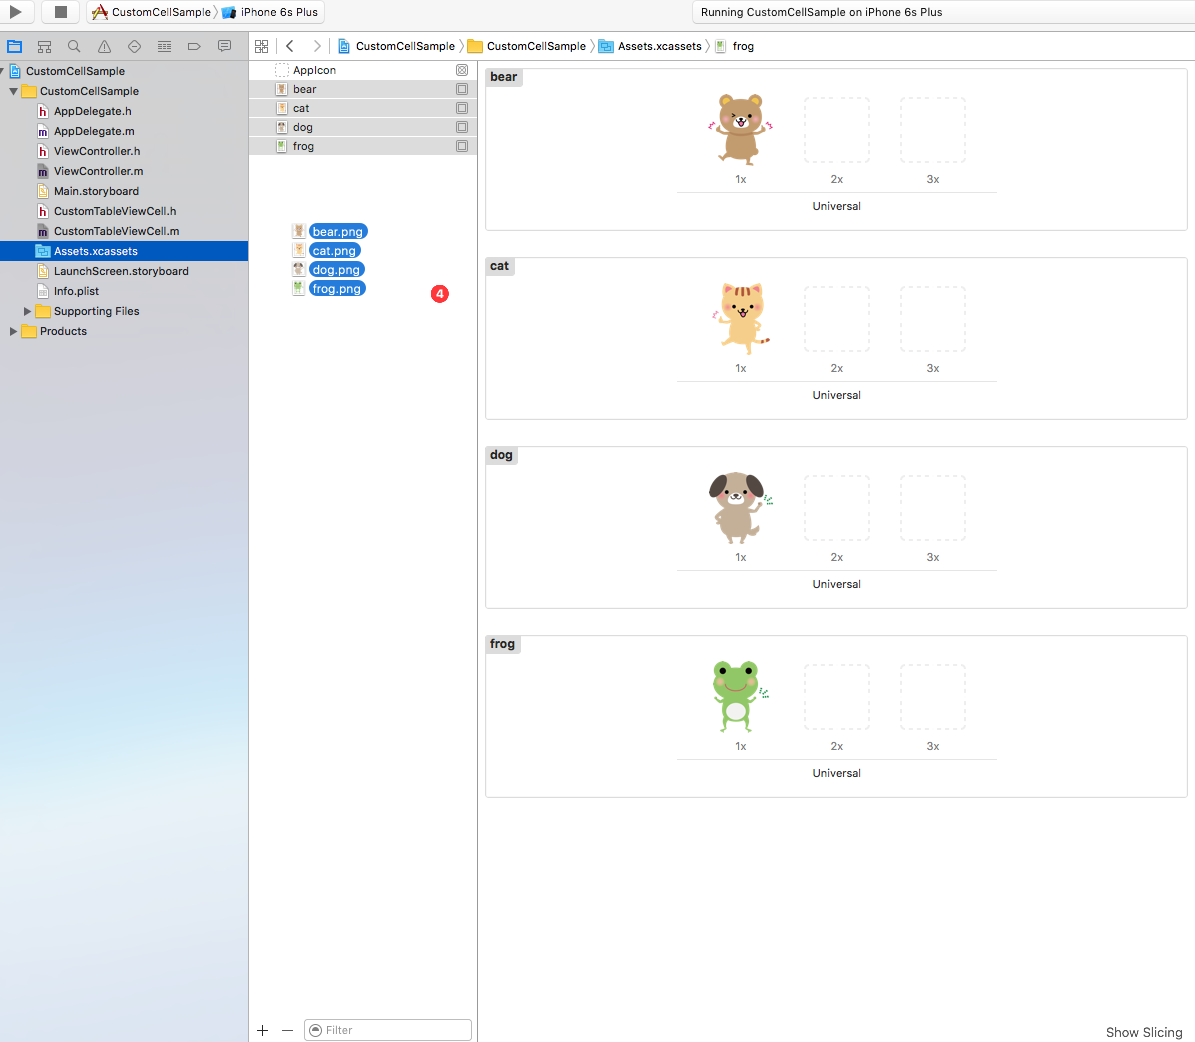
・下記の画像のようにプロジェクト内で画像が使えるように登録します。
Assets.xcassetsを選択し画像をドラック&ドロップします。
「Copy items if needed」にチェックを付けてFinishボタンを押して下さい。
・セルに表示する変数を用意する
・ViewController.mの@interface部分にプロパティを3つ用意します。
@interface ViewController () <UITableViewDelegate,UITableViewDataSource>
@property (strong,nonatomic) NSArray *imageNames;
@property (strong,nonatomic) NSArray *imageTitles;
@property (strong,nonatomic) NSArray *imageDescriptions;
@end
・viewDidLoad内で上記のプロパティを使用しセルに表示させたい内容を代入します。
※ _imageNamesの中身は先程Assets.xcassetsに保存した画像名にします。
※imageNames・imageTitles・imageDescriptionsの要素数はそろえる。
- (void)viewDidLoad {
    [super viewDidLoad];

    _imageNames = @[@"bear",@"cat",@"dog",@"frog"];
    _imageTitles = @[@"クマ",@"ネコ",@"イヌ",@"カエル"];
    _imageDescriptions = @[@"かわいいクマです。",
                           @"かわいいネコです。",
                           @"かわいいイヌです。",
                           @"かわいいカエルです。"];
}
- UITableViewとUITableViewCellを配置・設定
1,TableViewをStoryboardに配置し画面いっぱいに広げ、AutoLayoutを設定。
2,TableViewの子要素になるようにTableViewCellを配置

UITableViewCellをViewControllerのコード内で使用出来るように「Ientifier」を設定します。
ここではIdentiferに「Cell」と設定します。

UITableViewのdelegateとdetaSourceをViewControllerに設定します。
storyboardのTable Viewを選択しcontrolボタンを押したまま「View Controller」画面の上にある3つのボタンのようなものの
1番左のところにドラッグ&ドロップします。
すると下記の画面のように黒いポップアップが表示されます。
表示されたポップアップの「dataSource」と「delegate」を両方選択します。

- UITableViewCellをカスタマイズ
・セルの高さを変更する
下記の画像のようにTableViewの高さを変更(ここでは120)

・オブジェクトを配置
下記の画像のようにオブジェクトを配置(オブジェクトのサイズはいい感じに変更、AutoLayoutは設定していません)

- カスタムセル用のクラスを用意
command+nで新しいファイルを作成する画面を開きます。
「Cocoa Touch Class」を選択しNEXTボタンを押します。
※「Cocoa Touch Class」が見当たらない場合は、すぐ左にあるメニューバーのようなところからiOS -> Sourceと選択すると
「Cocoa Touch Class」が選択出来ます。
次のクラス名を指定する画面で「Subclass of:」と書かれたところを「UITableViewCell」に変更し、「Class:」と書かれたところに「CustomTableViewCell」と入力し、NEXTボタンを押します。
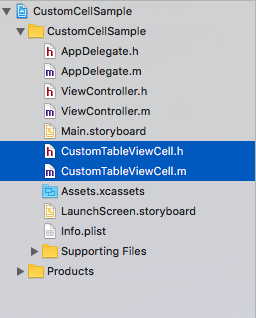
すると以下のようにCustomTableViewCellクラスが作成されます。

・Storyboardのオブジェクトを紐付ける
先ほど配置したUIImageViewやUILabelを、今作成したCustomTableViewCellクラスと紐付けます。
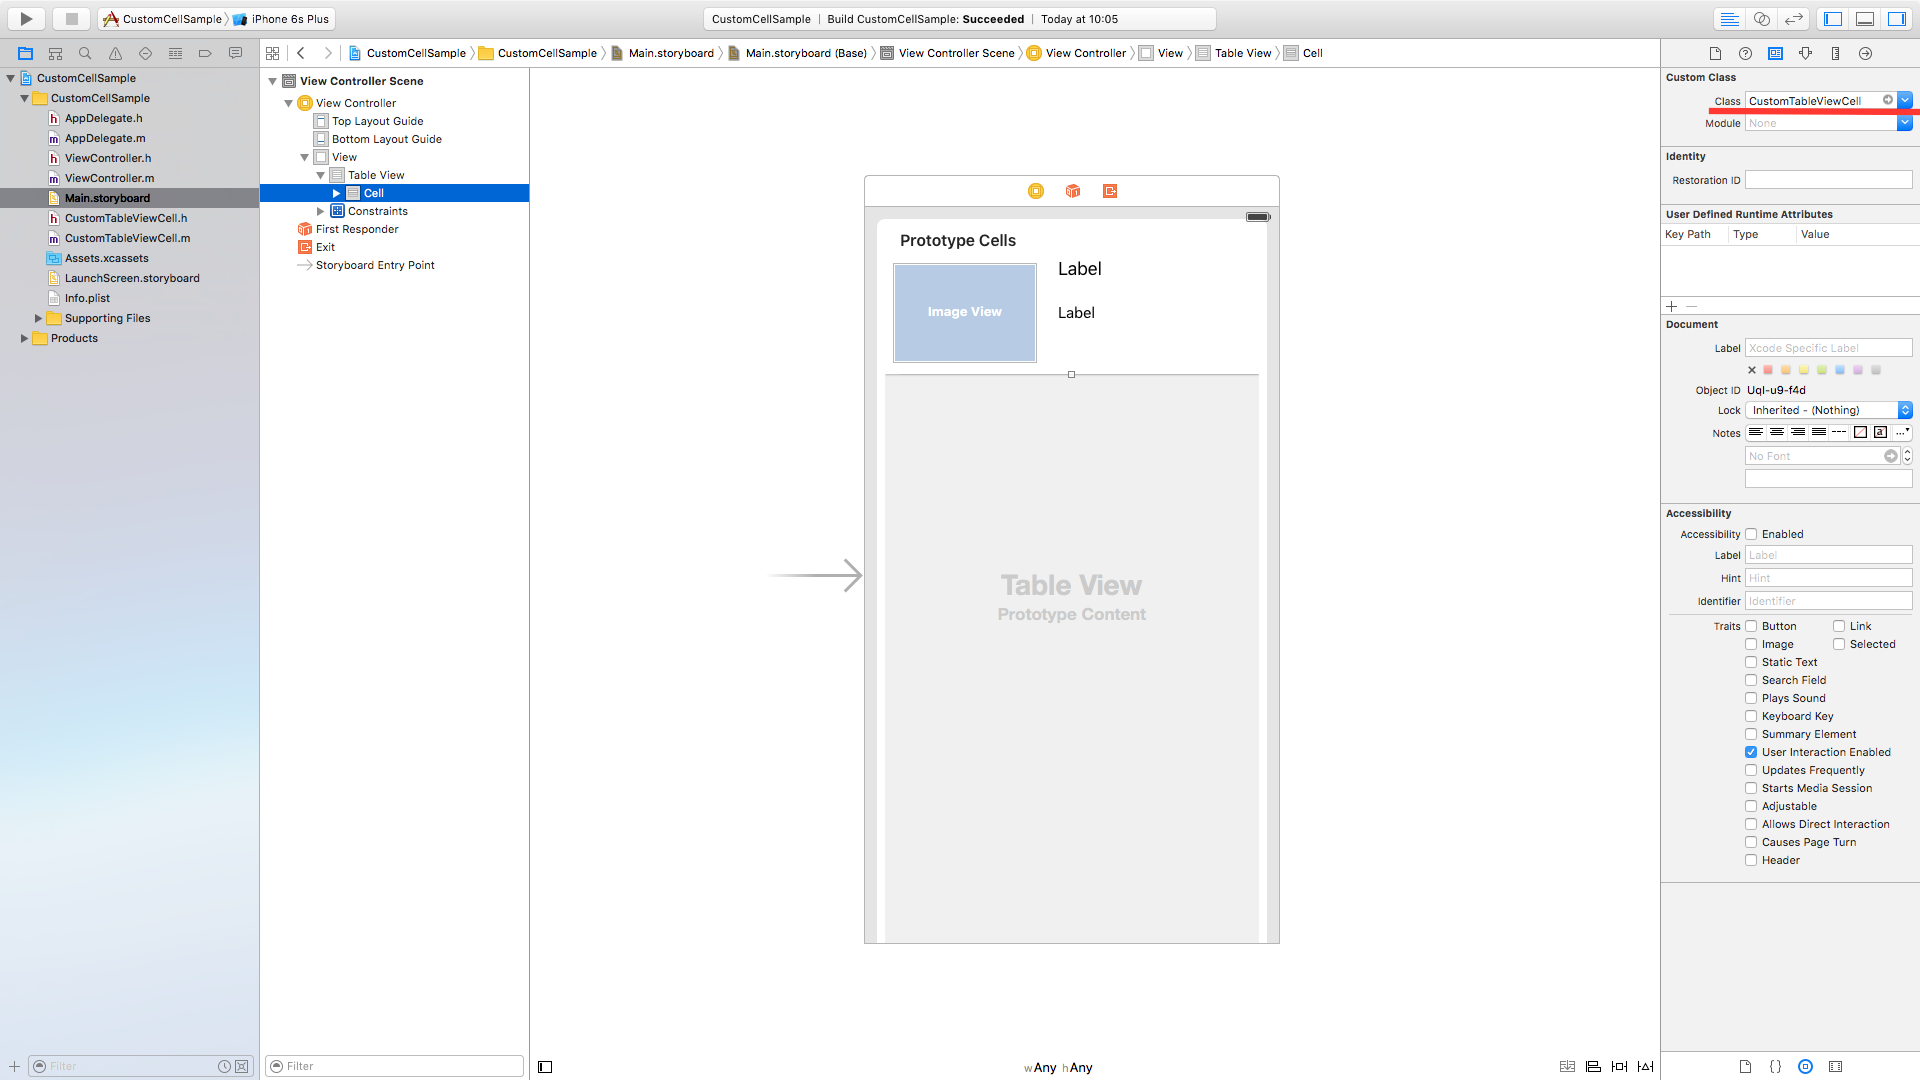
紐付けるためには、最初に配置したUITableViewCellを「CustomTableViewCell」クラスに変更する必要があります。
下記の画像のようにUITableViewCellを選択しCustomClassのClassのところに
「CustomTableViewCell」と入力します。

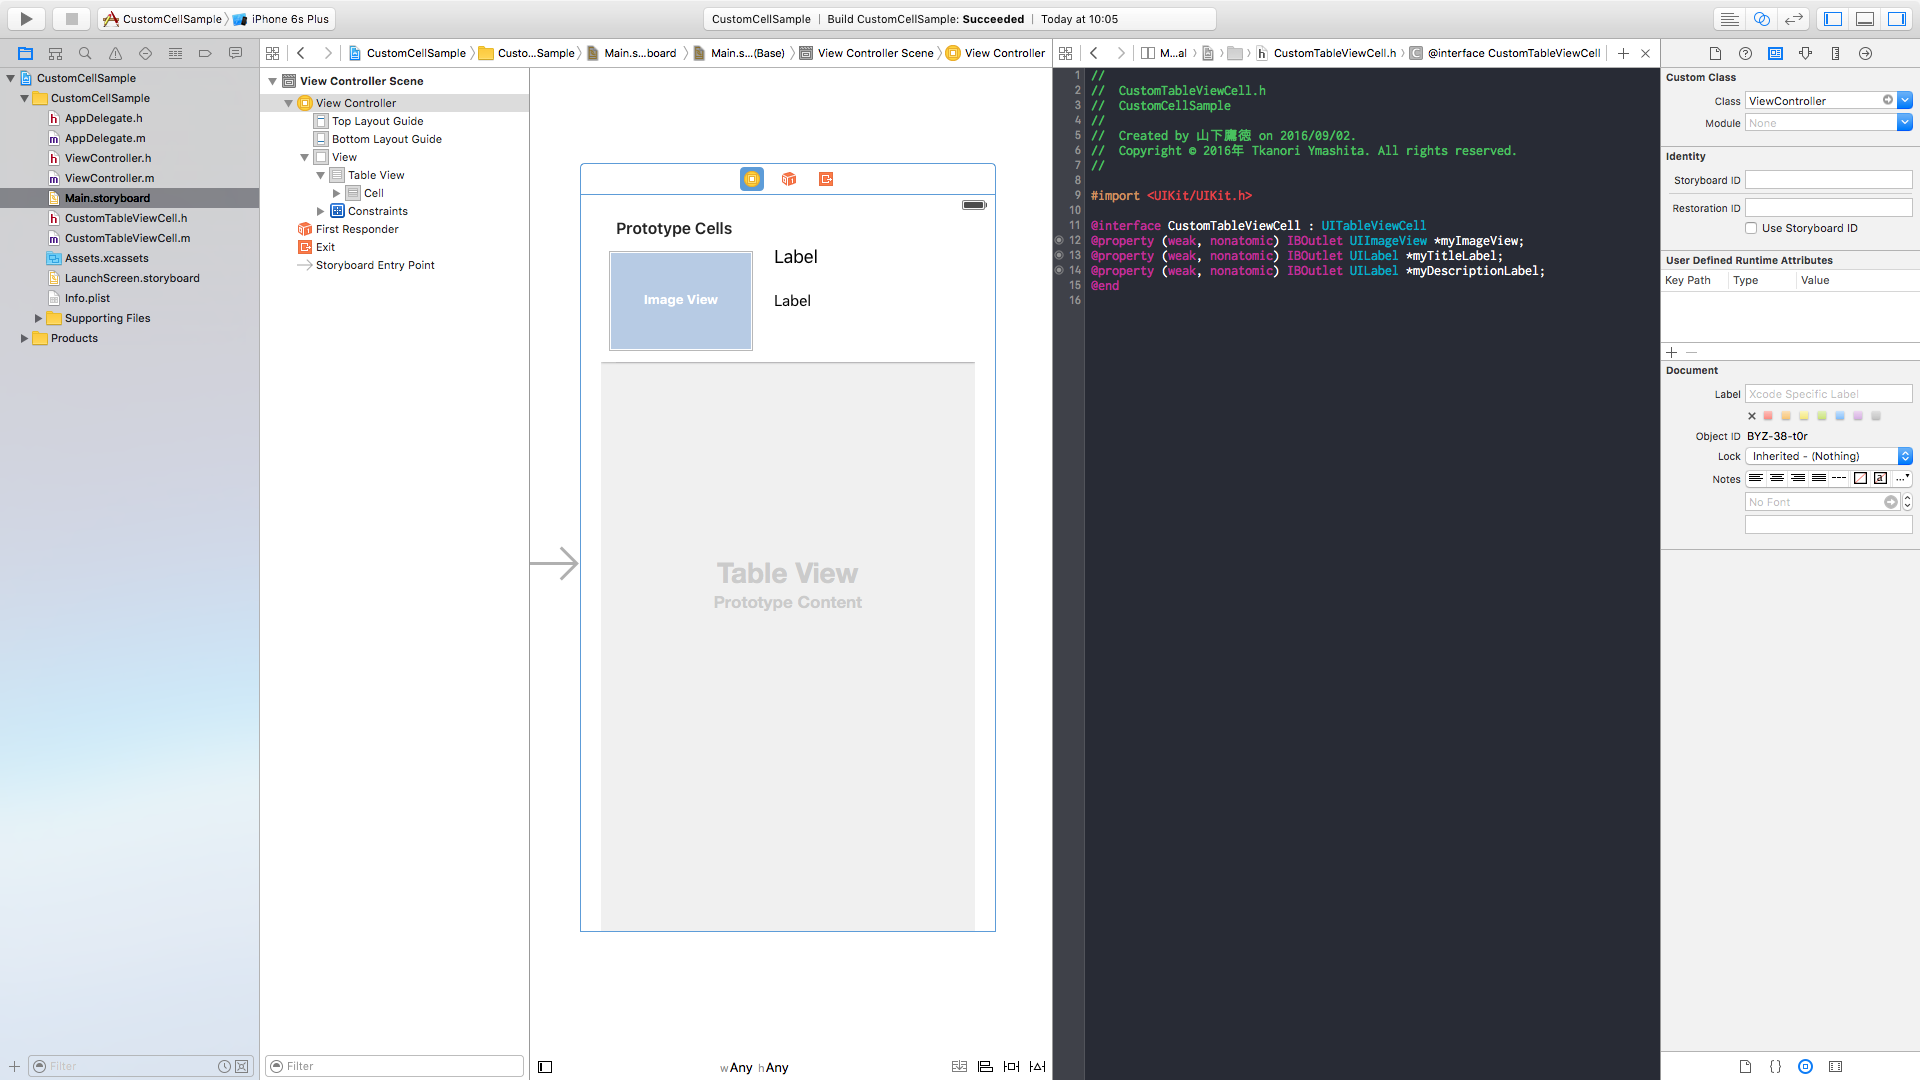
先程配置したオブジェクトをCustomTableViewCell.hファイルに紐付けます。
Controlを押しながら@interface部分にドラッグ&ドロップ
下記の画像のようになります。

- カスタムセルに値を表示する
最終的にViewController.mに下記のように記述しCustomCellを使用することができました。
# import "ViewController.h"
# import "CustomTableViewCell.h"

@interface ViewController () <UITableViewDelegate,UITableViewDataSource>
@property (strong,nonatomic) NSArray *imageNames;
@property (strong,nonatomic) NSArray *imageTitles;
@property (strong,nonatomic) NSArray *imageDescriptions;
@end

@implementation ViewController

- (void)viewDidLoad {
    [super viewDidLoad];

    _imageNames = @[@"bear",@"cat",@"dog",@"frog"];
    _imageTitles = @[@"クマ",@"ネコ",@"イヌ",@"カエル"];
    _imageDescriptions = @[@"かわいいクマです。",
                           @"かわいいネコです。",
                           @"かわいいイヌです。",
                           @"かわいいカエルです。"];
}

- (void)didReceiveMemoryWarning {
    [super didReceiveMemoryWarning];
}

- (NSInteger)tableView:(UITableView *)tableView numberOfRowsInSection:(NSInteger)section {
    return _imageNames.count;
}

- (UITableViewCell *)tableView:(UITableView *)tableView cellForRowAtIndexPath:(NSIndexPath *)indexPath {

    CustomTableViewCell *cell = (CustomTableViewCell*)[tableView dequeueReusableCellWithIdentifier:@"Cell"forIndexPath:indexPath];

    cell.myTitleLabel.text = _imageTitles[indexPath.row];
    cell.myDescriptionLabel.text = _imageDescriptions[indexPath.row];
    cell.myImageView.image = [UIImage imageNamed:_imageNames[indexPath.row]];


    return cell;
}

@end
さいごに
Storyboardでの紐付けやClass設定のところなど、忘れてしまいそうなのでまとめました。
下記のサイトを参考にさせていただきました。ありがとうございます。
参考

