はじめに
複数の画面で同じパーツを使いたい時などに、Nibファイルでパーツを作っておくとレイアウトの使い回しが出来るので非常に便利。StoryBoardからしかレイアウトを作成した事が無い人でも、非常に簡単に実装出来て、かなり便利な機能なので覚えておいた方がいいと思う。(参考サイト抜粋)
ということなのでまさにStoryBoardからしかレイアウトを作成した事が無い人がxibファイルで作成したCustomViewを使用する。
手順1
まずはCustomViewのクラスを作成します。
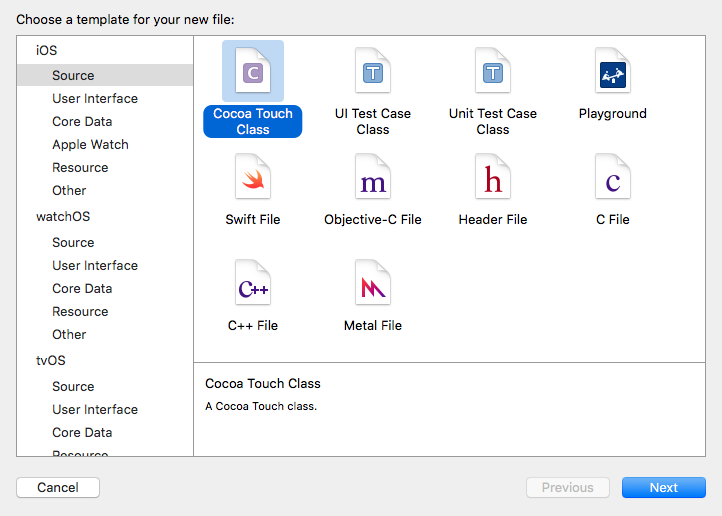
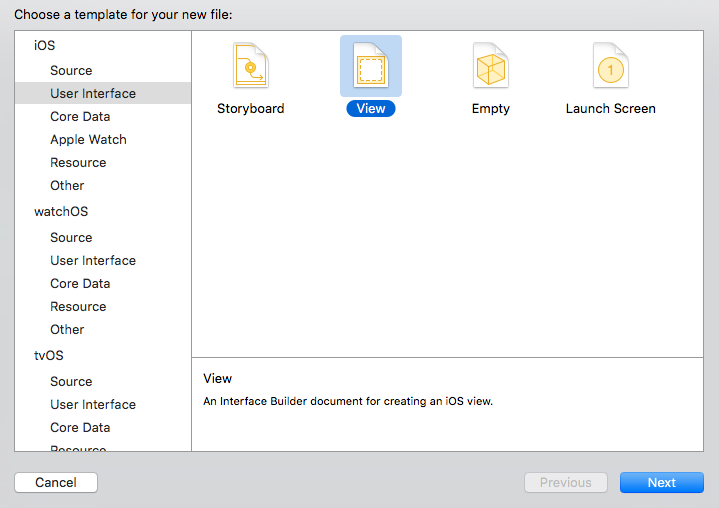
プロジェクトを作成しcommand+N
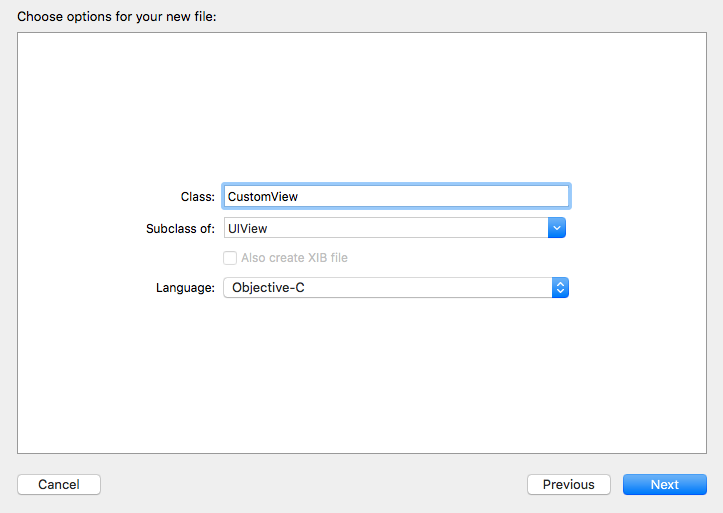
下記の画像の手順でCustomViewクラスを作成。
クラス名を「CustomView」にし、Subclassを「UIView」に変更後、任意のフォルダにクラスを作成。
手順2
xibファイルを作成します。
再びcommand+N
下記の画像の手順でCustomView.xibファイルを作成。
ファイル名は「CustomView.xib」
ここまでで下記の画像のように3つファイルができていると思います。
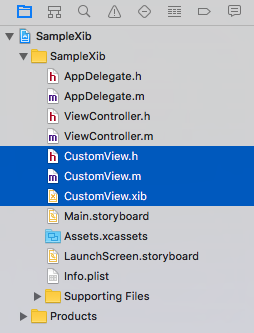
手順3
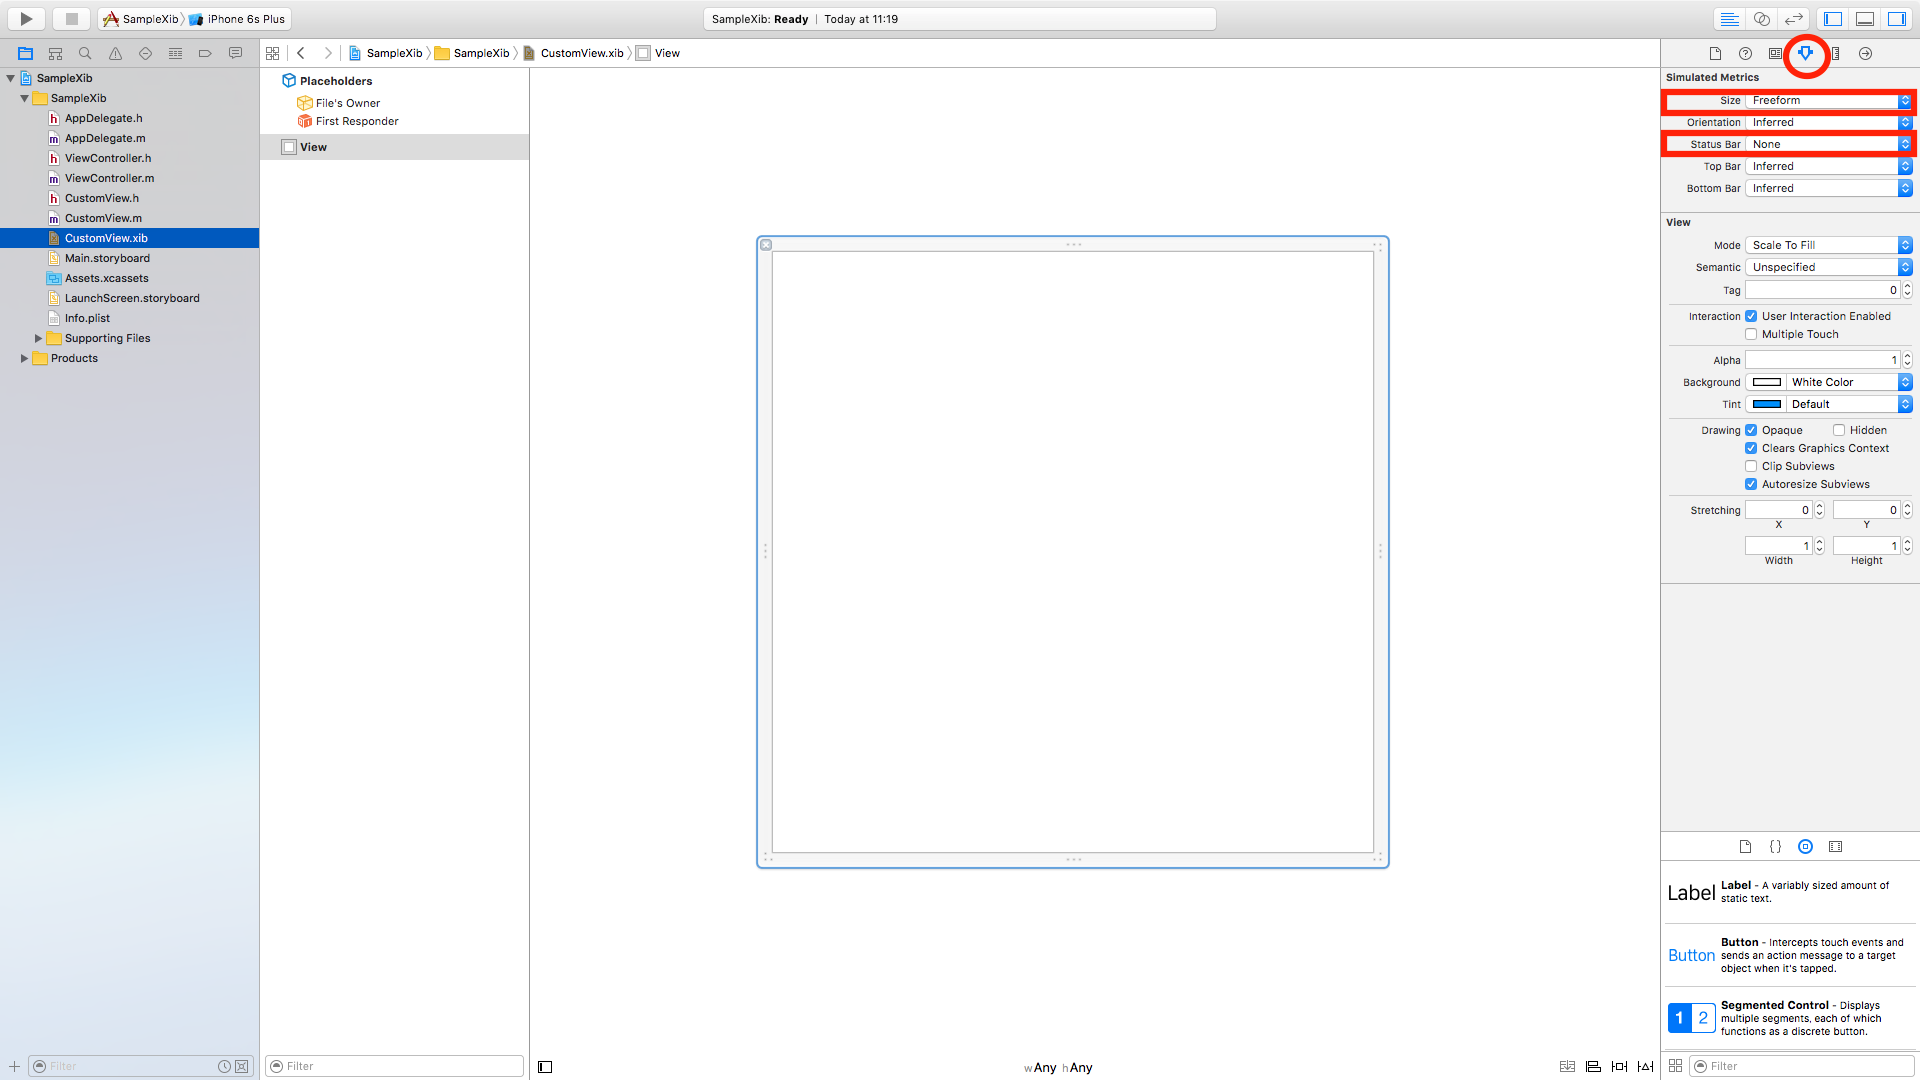
CustomView.xibファイルを選択後
Show the Attributes inspectorを選択
SizeをFreeformに変更
Status BarをNoneに変更
手順4
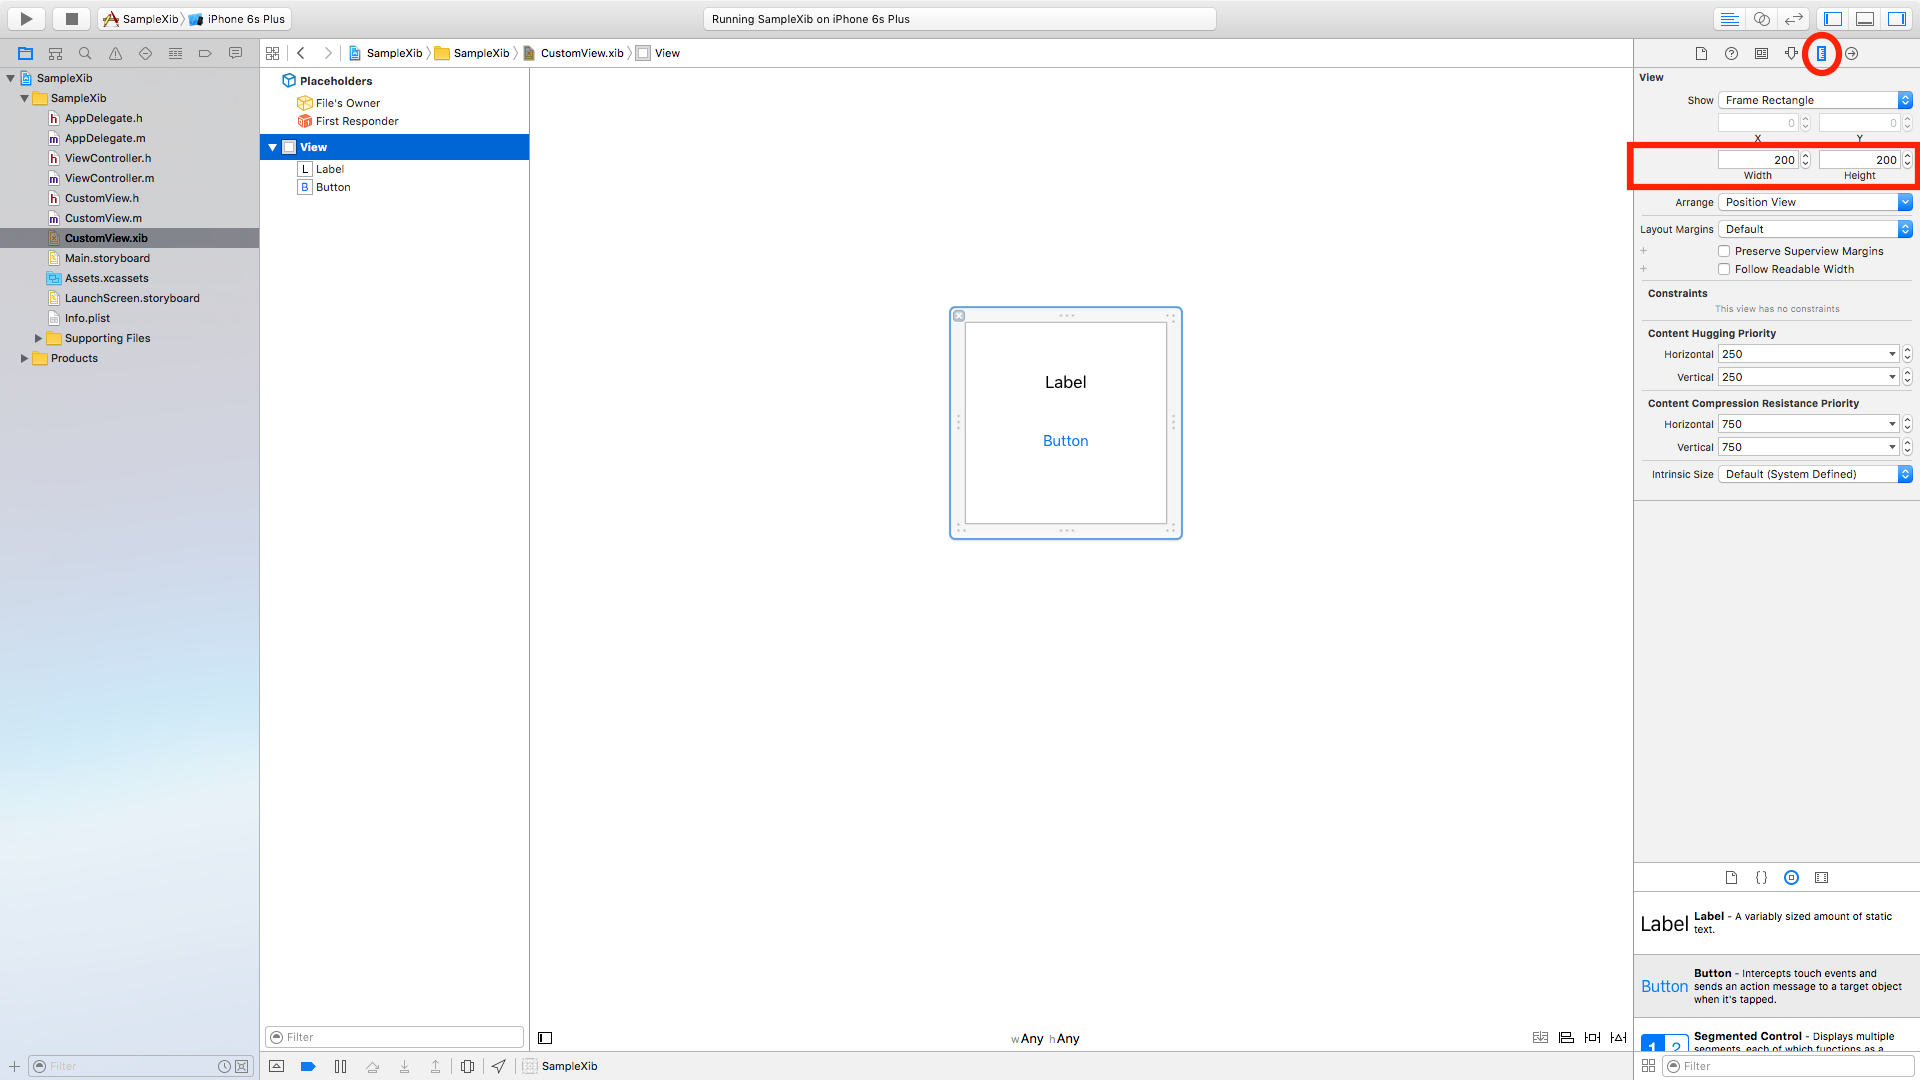
Show the Size inspectorを選択
Width,Heightをそれぞれここでは200に設定
ViewにLabelとButtonのオブジェクトを設置
手順5
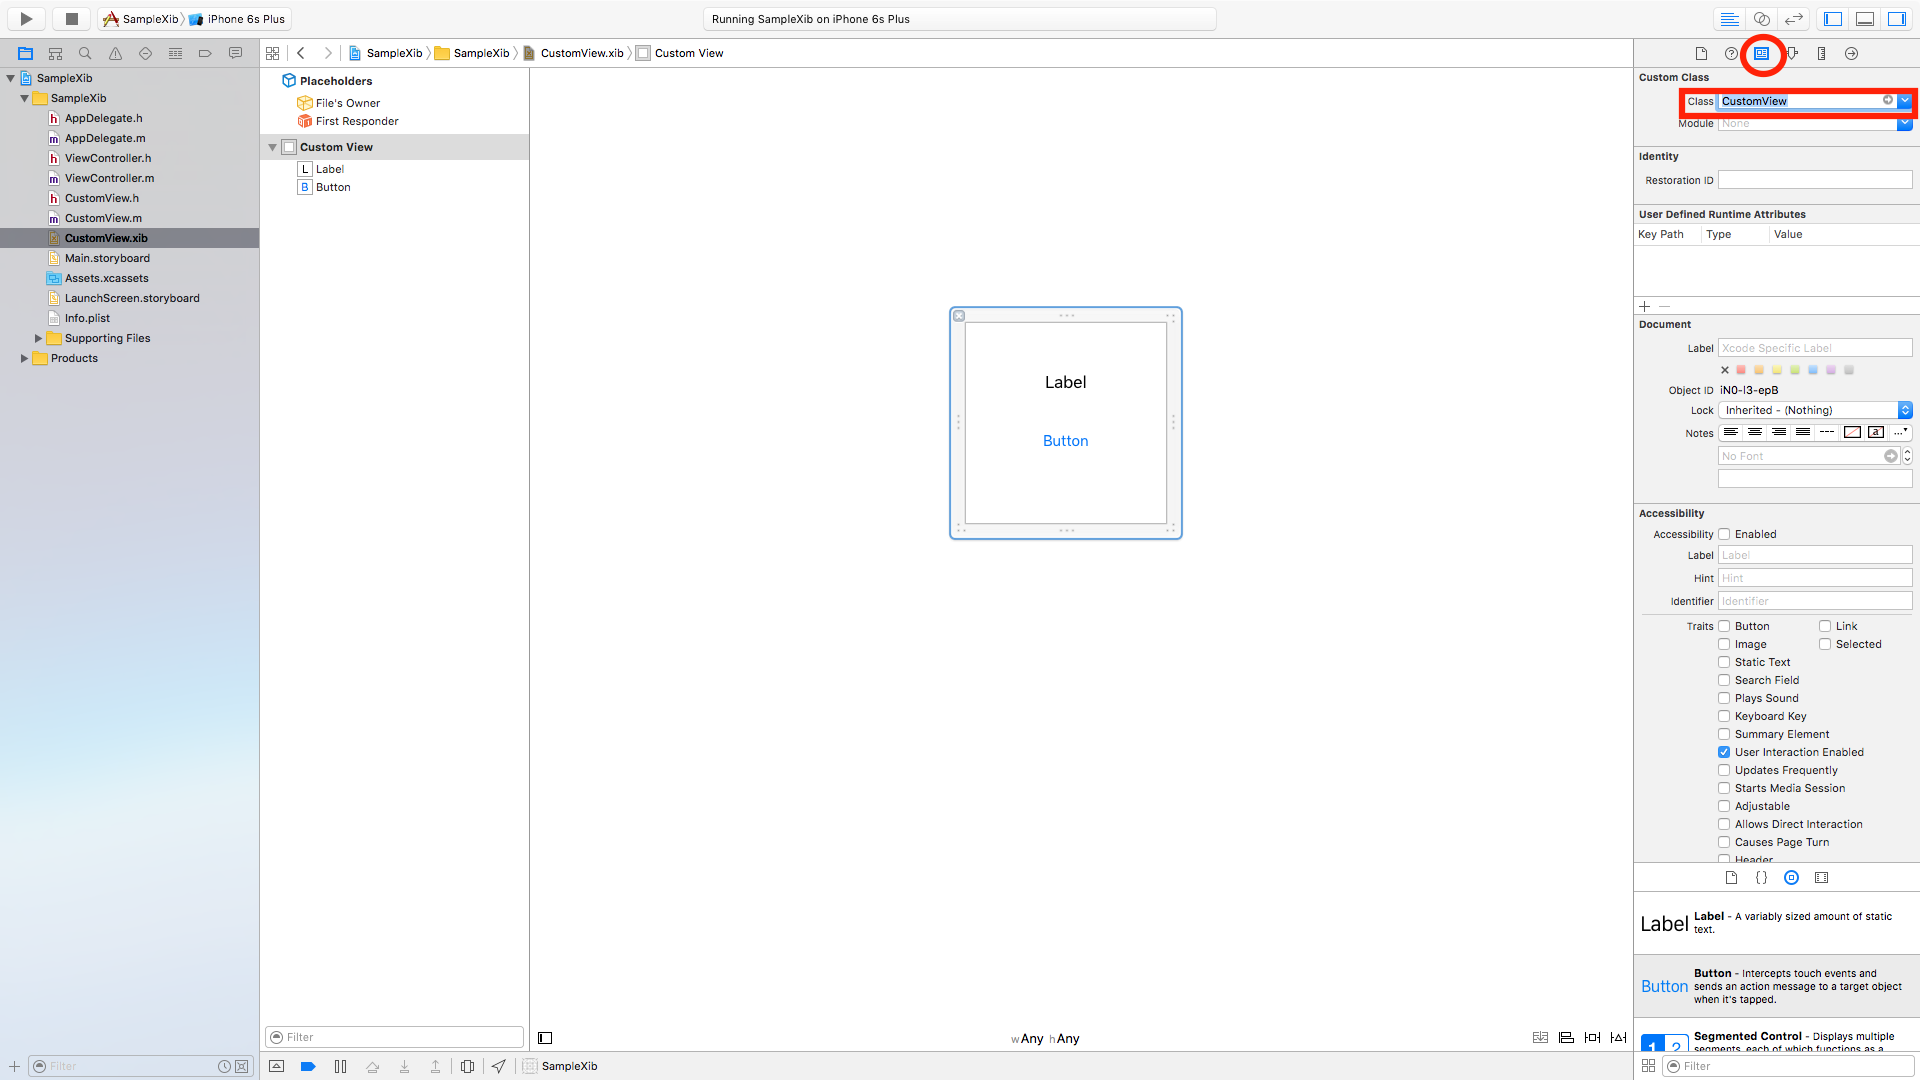
Show the identity inspectorを選択
Custom Classのclassを「CustomView」に変更し、CustomView.xibとCustomView.hクラスを関連付けさせる。
手順6
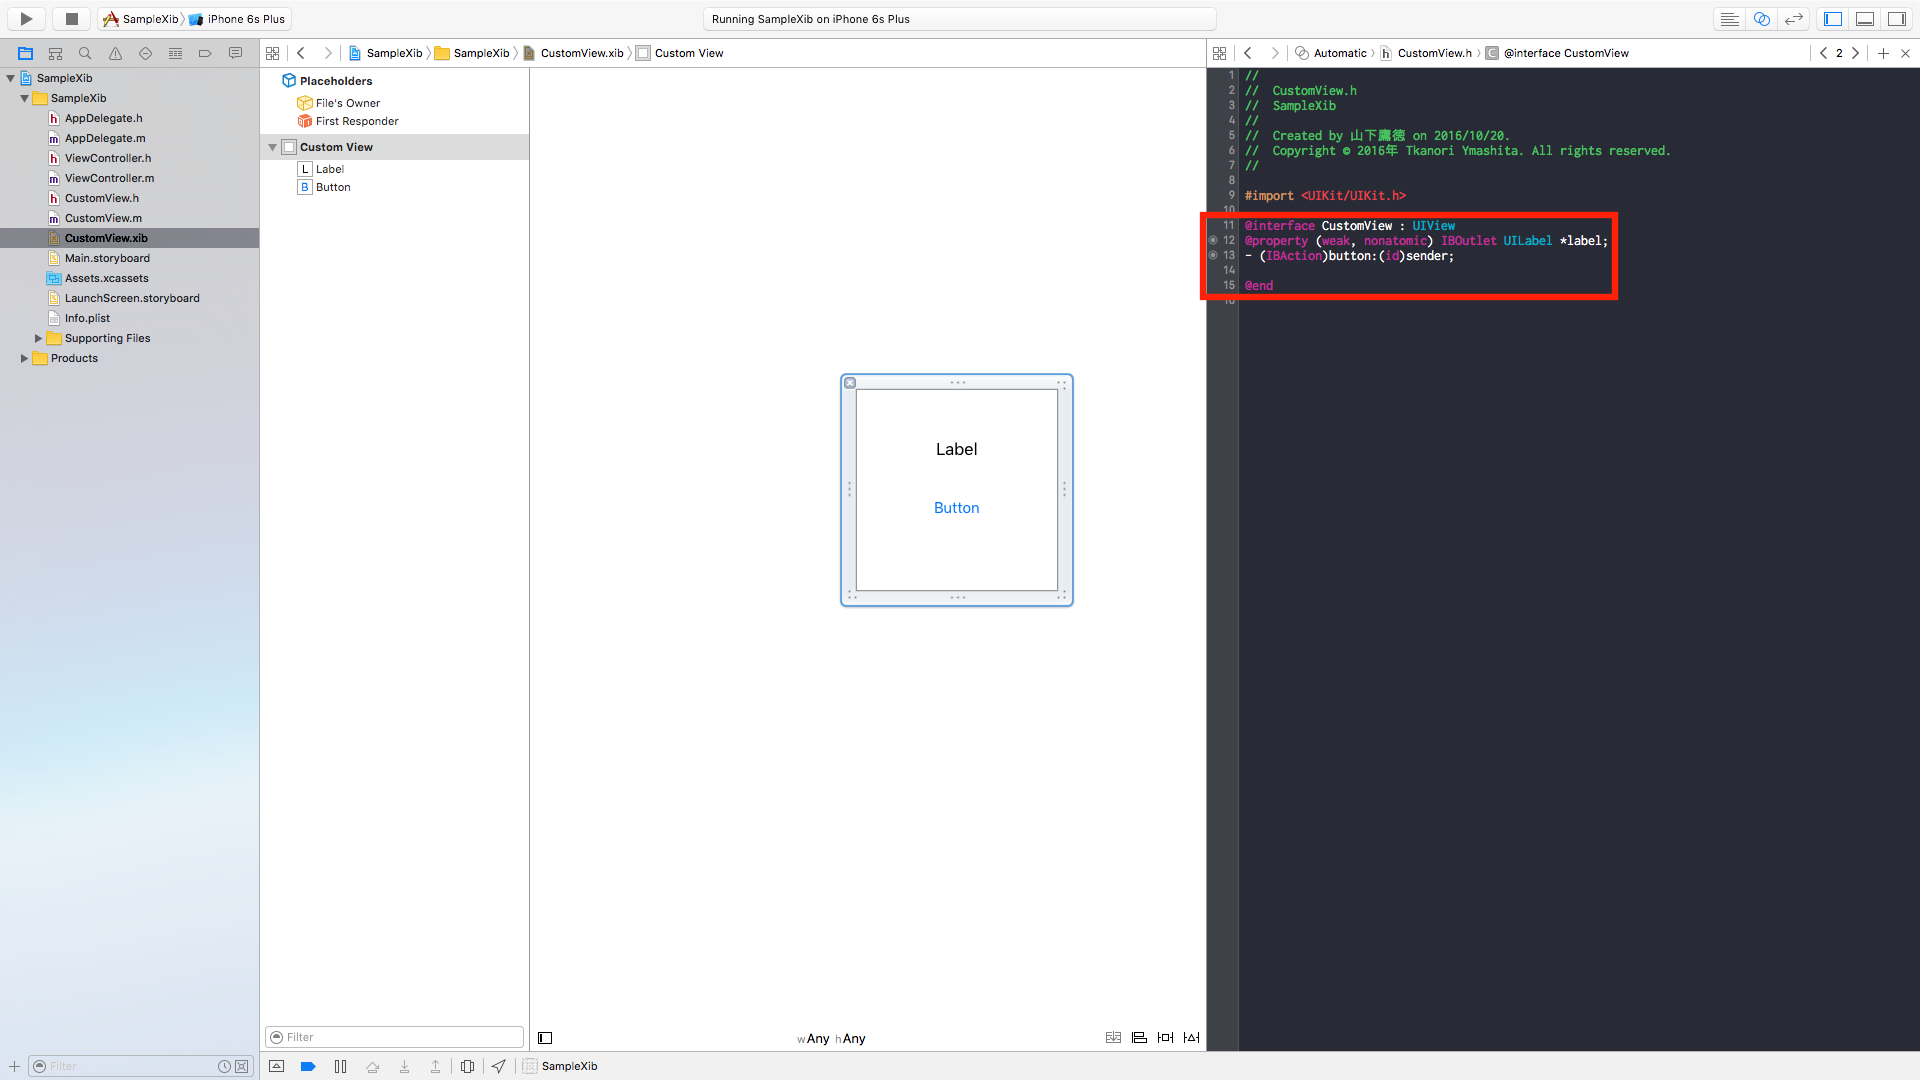
LabelとButtonのオブジェクトをCustomView.hに接続する。
手順7
CustomView.mとViewController.mに下記のコードを記述する。
# import "CustomView.h"

@implementation CustomView

- (id)initWithFrame:(CGRect)frame {
    self = [super initWithFrame:frame];
    if (self) {
        UINib *nib = [UINib nibWithNibName:@"CustomView" bundle:[NSBundle mainBundle]];
        NSArray *array = [nib instantiateWithOwner:self options:nil];
        self = [array objectAtIndex:0];
    }
    return self;
}

- (IBAction)button:(id)sender {
    NSLog(@"ボタンがタップされました");
}
@end
# import "ViewController.h"
# import "CustomView.h"

@interface ViewController ()

@end

@implementation ViewController

- (void)viewDidLoad {
    [super viewDidLoad];
    CustomView *customView = [CustomView new];
    customView.frame = CGRectMake(30,214,260,140);
    [self.view addSubview:customView];
}

- (void)didReceiveMemoryWarning {
    [super didReceiveMemoryWarning];
}

@end
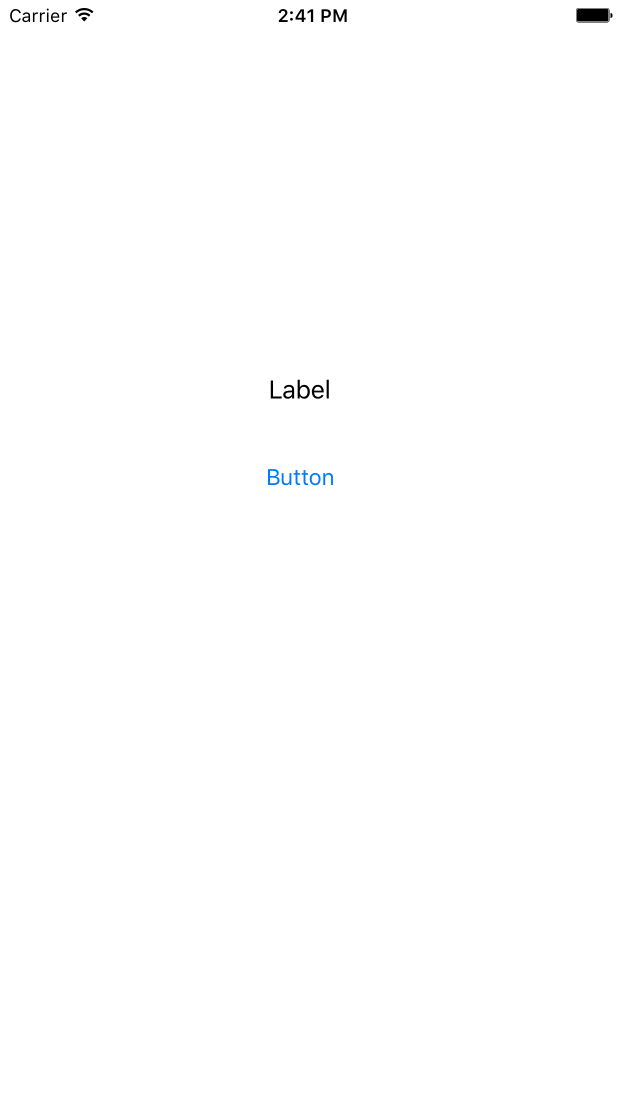
実行結果
さいごに
今までStoryboardのみでLayoutを作成していて、xibの存在は知ってはいたものの何となく敬遠してきましたが、使い方になれれば同じ部品を何度も設置する必要がなく本当に便利なものだと感じました。
参考
