![]() この記事は Salesforce 開発者向けブログキャンペーンへのエントリー記事です。
この記事は Salesforce 開発者向けブログキャンペーンへのエントリー記事です。
はじめに
こんにちは。このエントリでは、Jenkins で Salesforce の CI 環境を構築するときにいつも私がこだわってるポイントを紹介します。
まったくの初心者のかたにはピンとこない内容かもしれません
使いたいプラグイン
私が必ずインストールするプラグインたちです。超おすすめ ![]()
「おい、これも忘れてるぞ
」というものがあれば、ぜひコメント欄へ!!
Locale
まずは見た目を英語にします!(慣れましょう ![]() )
)
そうすると、設定方法やエラー内容がわからないときにググったときにヒットしやすくなります。どうしても日本語だと情報が限られますからね。
NodeJS
便利なコマンドをたくさん使いたいので、Salesforce 開発であっても、Node.js は必須です。
def call() {
  pipeline {
    tools {
      // Node.js を使います
      nodejs nodejsLTS
    }
    stages {
      stage('Install') {
        steps {
          script {
            // npm 経由で Salesforce CLI をインストールします
            sh """
            npm install --global sfdx-cli@7.52.0
            """
          }
        }
      }
    }
  }
}
Blue Ocean
Salesforce でいう LEX みたいなかんじで、Classic よりも見た目がスタイリッシュになります。Jenkins Pipeline の Stage ごとにログを見たいときに便利です。ただし万能ではありませんので、実際には Classic とは行ったり来たりします。
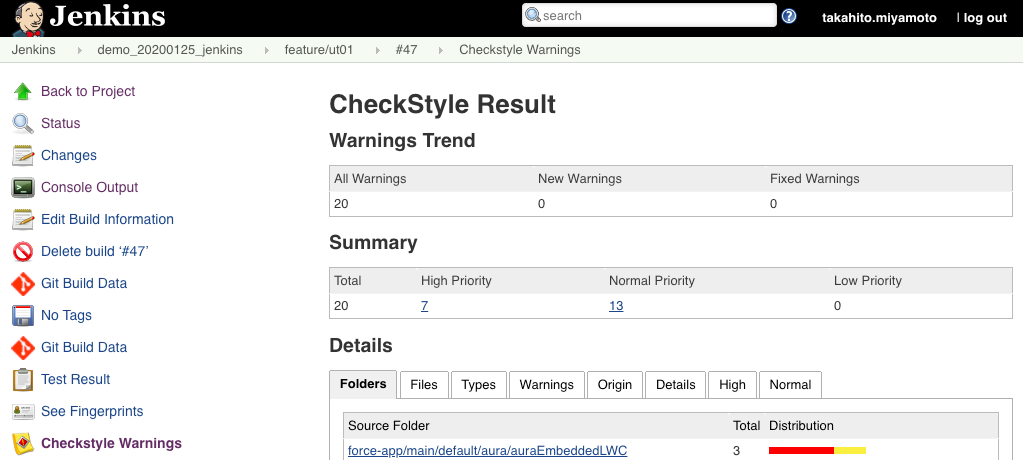
Checkstyle
Salesforce の Aura や LWC の JavaScript を ESLint で静的解析した結果をいろいろな軸で見たいときに便利です。
def call() {
  pipeline {
    stages {
      stage('Code Analysis') {
        steps {
          script {
            // ESLint の結果ファイル `logs/eslint.xml` を読み込みます
            step([
              $class: "CheckStylePublisher",
              pattern: "logs/eslint.xml",
              unstableTotalAll: "0",
              usePreviousBuildAsReference: true
            ])
          }
        }
      }
    }
  }
}
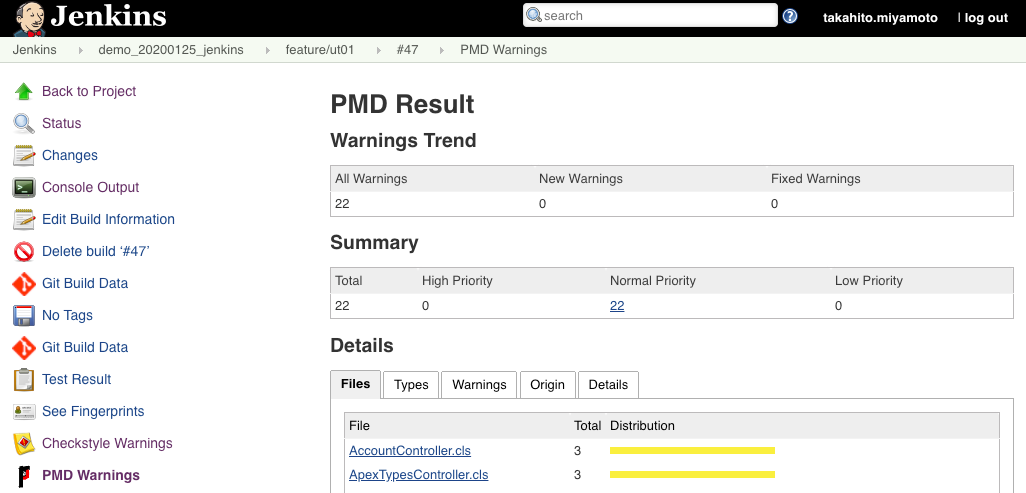
PMD
Salesforce の Apex コード を Apex PMD で静的解析した結果をいろいろな軸で見たいときに便利です。
def call() {
  pipeline {
    stages {
      stage('Code Analysis') {
        steps {
          script {
            // Apex PMD の結果ファイル `logs/pmd.xml` を読み込みます
            step([
              $class: "PmdPublisher",
              pattern: "logs/pmd.xml",
              unstableTotalAll: "0",
              usePreviousBuildAsReference: true
            ])
          }
        }
      }
    }
  }
}
Pipeline Utility Steps
Jenkins Pipeline 内で更に使いたいメソッドがあるときに便利です。たとえば、zip とか readJSON とかですね。
def call() {
  pipeline {
    stages {
      stage('Unit Test') {
        steps {
          script {
            sh """
            sfdx force:apex:test:run --targetusername dev \
            --codecoverage --testlevel RunLocalTests \
            --resultformat json --json --verbose \
            > logs/apextest.json \
            || true
            """
            // .json ファイルを読み取ります
            def json = readJSON(file: "logs/apextest.json")
            def SFDX_TEST_RUN_ID = json.result.summary.testRunId

            // do something...

          }
        }
      }
    }
  }
}
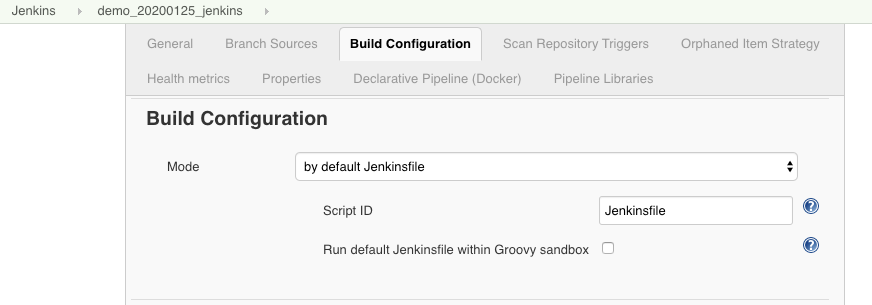
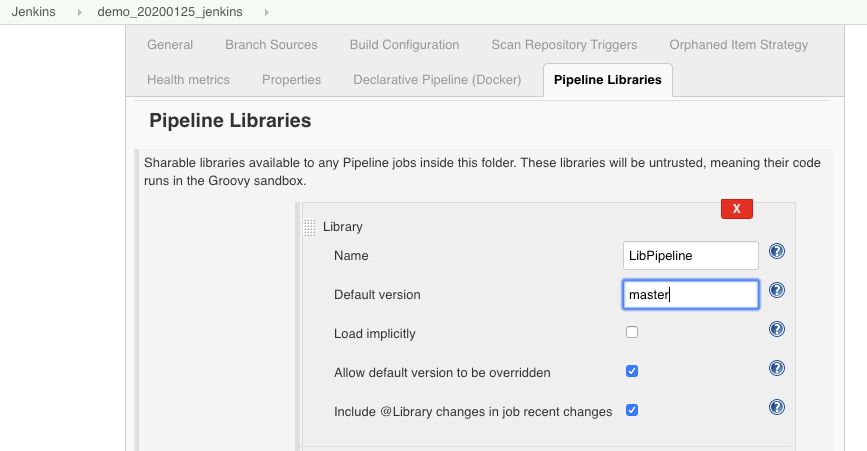
Pipeline: Multibranch with defaults
Multibranch Pipeline を作成する際に、追跡したいリポジトリから Jenkinsfile を分離したいときに便利です。
そもそも分離できると何が嬉しいんでしょうね? 開発の規模が大きくなると Salesforce 開発チームとは別に Jenkins おじさんの面倒を見る専属チームを切り出したくなるものですが、そんなときに便利です。Salesforce 以外にも Java 開発もしていて、Jenkins サーバーは共用したい、とか。これはちょっと上級者向けですかね。
使いたいツール
Salesforce CLI
Salesforce に対して何かいろいろ操作したいので、必須です。常に最新版をインストールするのは危険なので、インストール時にはバージョンを指定し、定期的にバージョンアップしましょう。
npm install --global sfdx-cli@7.52.0
sfpowerkit
Accenture Global の有志メンバが開発している SFDX プラグインです。いろいろなコマンドが用意されているのですが、主に Apex PMD を実行するためにインストールします。
echo y | sfdx plugins:install sfpowerkit
Yarn
Node Module の管理は npm ではなくて Yarn を使います。何と言っても npm install よりも yarn install のほうが高速なので。
たとえば prettier を実行したい場合、npm であれば
npm run prettier
と書くところですが、yarn の場合は
yarn prettier
となります。シンプルですね。
Yarn のインストールを npm 経由で実施しているサンプルコードが散見されますが、Yarn 公式サイト で非推奨とされていますので私は採用しません。
npm install --global yarn
jq
groovy コード内では readJSON がありますが、Shell Script コード内で JSON を操作したい場合に重宝します。
def call() {
  pipeline {
    stages {
      stage('Install') {
        steps {
          script {
            sh """
            # 環境変数 を追加します
            echo 'export YARN_PATH=$HOME/.yarn/bin:$HOME/.config/yarn/global/node_modules/.bin' >> ~/.bash_profile
            echo 'export JQ_PATH=$HOME/tools/bin' >> ~/.bash_profile
            echo 'export PATH=\$YARN_PATH:\$JQ_PATH:$PATH' >> ~/.bash_profile

            # Yarn をインストールします
        if ! test -e \$HOME/.yarn ; then
           curl -o- -L https://yarnpkg.com/install.sh | bash
        fi

            # jq をインストールします
            if ! test -e \$JQ_PATH/jq ; then
              mkdir -p \$JQ_PATH
              curl -o \$JQ_PATH/jq http://stedolan.github.io/jq/download/linux64/jq
              chmod +x \$JQ_PATH/jq
            fi

            # PATH を通します
        . ~/.bash_profile
        which yarn
        which jq

            # Salesforce CLI をインストールします
            npm install --global sfdx-cli@7.52.0

            # sfpowerkit をインストールします
            echo y | sfdx plugins:install sfpowerkit

            # Node Modules をインストールします
            yarn install
            """
          }
        }
      }
    }
  }
}
Prettier
リポジトリ内のコードを綺麗に保つために、コードフォーマットは欠かせません。フォーマットされていないコードが存在するかどうかを prettier --check で検知し、警告を通知するようにします。
{
  "devDependencies": {
    "@prettier/plugin-xml": "0.7.2",
    "prettier": "1.19.1",
    "prettier-plugin-apex": "1.3.0"
  },
  "scripts": {
    "prettier:check": "prettier --check \"**/*.{component,css,cls,cmp,html,js,json,md,page,trigger,xml}\"",
  }
}
設定したい SFDX 環境変数
上記にも少し出てきましたが、他にも設定したい環境変数があるんです。
SFDX_API_VERSION
Apex バージョンをデフォルトで固定します。
echo 'export SFDX_API_VERSION=48.0' >> ~/.bash_profile
SFDX_LOG_LEVEL
Debug Log Level をデフォルトで固定します。
echo 'export SFDX_LOG_LEVEL=fatal' >> ~/.bash_profile
SFDX_MDAPI_TEMP_DIR
sfdx force:source:deploy コマンドを実行中に、メタデータを旧フォーマットで保持しておくディレクトリ名です。
echo 'export SFDX_MDAPI_TEMP_DIR=mdapiTemp' >> ~/.bash_profile
SFDX_JSON_TO_STDOUT
Salesforce CLI コマンドが失敗した場合のメッセージを stderr ではなく stdout に出します。stdout をログファイルに書き出してるときに便利です。
echo 'export SFDX_JSON_TO_STDOUT=true' >> ~/.bash_profile
SFDX_USE_GENERIC_UNIX_KEYCHAIN
Jenkins から Salesforce へ認証する際に必要です。
echo 'export SFDX_USE_GENERIC_UNIX_KEYCHAIN=true' >> ~/.bash_profile
SFDX_IMPROVED_CODE_COVERAGE
Spring '20 新機能
echo 'export SFDX_IMPROVED_CODE_COVERAGE=true' >> ~/.bash_profile
どんな感じでカバレッジに変化があるか検証してみました。
AccountControllerTest.cls と ContactControllerTest.cls はカバレッジ 100% ずつにして、全体としてはカバレッジ 92% として、Apex テストを実行した結果を整理しました。
| テスト対象 | true |
false |
|---|---|---|
| TestAccountController.cls | testRunCoverage: 100% orgWideCoverage: 92% |
testRunCoverage: 92% orgWideCoverage: 92% |
| TestContactController.cls | testRunCoverage: 100% orgWideCoverage: 92% |
testRunCoverage: 92% orgWideCoverage: 92% |
| TestAccountController.cls, TestContactController.cls |
testRunCoverage: 100% orgWideCoverage: 92% |
testRunCoverage: 92% orgWideCoverage: 92% |
| RunLocalTests | testRunCoverage: 92% orgWideCoverage: 92% |
testRunCoverage: 92% orgWideCoverage: 92% |
| RunAllTestsInOrg | testRunCoverage: 92% orgWideCoverage: 92% |
testRunCoverage: 92% orgWideCoverage: 92% |
SFDX_IMPROVED_CODE_COVERAGE=true の場合にちゃんと 100% になってます ![]()
(これまではバグっぽい挙動だったんですね、気づかなかったです ![]() )
)
SFDX_USE_PROGRESS_BAR
Spring '20 新機能
ローカルで sfdx force:source:deploy コマンドを実行しているときは、進捗状況をバーで見たいので true にするのですが、Jenkins では意味をなさないので、無効化します。
echo 'export SFDX_USE_PROGRESS_BAR=false' >> ~/.bash_profile
https://releasenotes.docs.salesforce.com/ja-jp/spring20/release-notes/rn_sf_cli_progress_bar.htm
Salesforce との認証方式
Web ベースフロー sfdx force:auth:sfdxurl:store と JWT ベースフロー sfdx force:auth:jwt:grant があり、どちらでもいいケースも多いのですが、原則として JWT を推奨します。その理由は、JWT ベースフローじゃないとだめなパターンが 1 個あるためです。
- Salesforce 側に IP アドレス制限をしていて、Jenkins サーバーの IP アドレスを固定していない場合、Web ベースフローだと認証失敗してしまう
あえて Web ベースフローを採用するケースを考えるとすれば、証明書が準備できていないけど Jenkins を動かし始めたくて一時的に IP アドレス制限も外せる、というケースでしょうか。たしかに証明書や接続アプリケーションを準備する必要がないのですぐ試せる点は優れてると思いますし、仕事ではなく趣味で開発する範囲でなら十分でしょう。
デプロイコマンドの謎仕様に注意
デプロイには Deploy と Quick Deploy があります。また、デプロイの前にはデプロイ検証 (Validate) をすることが通例です。
# デプロイ一発
sfdx force:source:deploy \
--testlevel RunLocalTests --manifest manifest/package.xml --targetusername dev --json --verbose
# まずはデプロイ検証して jq で <Job ID> を取得
sfdx force:source:deploy --checkonly \
--testlevel RunLocalTests --manifest manifest/package.xml --targetusername dev --json --verbose \
| jq -r '.result.id'
# 検証 OK ならクイックデプロイ
sfdx force:source:deploy --validateddeployrequestid <Job ID>
どちらを採用するのが良いかというと、後者です。
コマンドの実行結果は JSON 構造になっており、そこから jq で id や success などの値を取得して、成功なのか失敗なのかを判定して、次の処理に繋げたいのですが、Deploy の実行結果には、その大事な情報が含まれていないのです!(![]() これが謎仕様)
これが謎仕様)
以前は含まれていたはずなのですが、Progress Bar が表示される新機能の裏に隠れて、いつの間にか含まれなくなってしまいました。復活を願っています
ローカルで実行する分には手動で調整できるので Deploy でも構わないのですが、Jenkins で自動化するには、Quick Deploy じゃないとだめだということを覚えておいてください。
| 種別 | id |
success |
|---|---|---|
| Deploy | ||
| Validate | ||
| Quick Deploy |
{
  "status": 0,
  "result": {
    "deployedSource": [
      {
        "state": "Add",
        "fullName": "LWC_Recipes",
        "type": "CustomApplication",
        "filePath": "force-app/main/default/applications/LWC_Recipes.app-meta.xml"
      },
      ...
    ]
  }
}
{
  "status": 0,
  "result": {
    "checkOnly": true,
    "completedDate": "2020-03-27T06:25:01.000Z",
    "createdBy": "005xxxxxxxxxxxx",
    "createdByName": "User User",
    "createdDate": "2020-03-27T06:24:34.000Z",
    "details": {
      "componentSuccesses": [
        {
          "changed": "false",
          "componentType": "CustomApplication",
          "created": "false",
          "createdDate": "2020-03-27T06:25:00.000Z",
          "deleted": "false",
          "fileName": "sdx_sourceDeploy_xxxxxxxxxxxxx/applications/LWC_Recipes.app",
          "fullName": "LWC_Recipes",
          "id": "02uxxxxxxxxxxxxxxx",
          "success": "true"
        },
        ...
    },
    "done": true,
    "id": "0Afxxxxxxxxxxxxxxx",
    "ignoreWarnings": false,
    "lastModifiedDate": "2020-03-27T06:25:01.000Z",
    "numberComponentErrors": 0,
    "numberComponentsDeployed": 167,
    "numberComponentsTotal": 167,
    "numberTestErrors": 0,
    "numberTestsCompleted": 6,
    "numberTestsTotal": 6,
    "rollbackOnError": true,
    "runTestsEnabled": true,
    "startDate": "2020-03-27T06:24:35.000Z",
    "status": "Succeeded",
    "success": true
  }
}
{
  "status": 0,
  "result": {
    "checkOnly": false,
    "completedDate": "2020-03-27T06:52:36.000Z",
    "createdBy": "005xxxxxxxxxxxx",
    "createdByName": "User User",
    "createdDate": "2020-03-27T06:52:03.000Z",
    "details": {
      "componentSuccesses": [
        {
          "changed": "false",
          "componentType": "CustomApplication",
          "created": "false",
          "createdDate": "2020-03-27T06:25:00.000Z",
          "deleted": "false",
          "fileName": "sdx_sourceDeploy_xxxxxxxxxxxxx/applications/LWC_Recipes.app",
          "fullName": "LWC_Recipes",
          "id": "02uxxxxxxxxxxxxxxx",
          "success": "true"
        },
        ...
    },
    "done": true,
    "id": "0Afxxxxxxxxxxxxxxx",
    "ignoreWarnings": false,
    "lastModifiedDate": "2020-03-27T06:52:36.000Z",
    "numberComponentErrors": 0,
    "numberComponentsDeployed": 167,
    "numberComponentsTotal": 167,
    "numberTestErrors": 0,
    "numberTestsCompleted": 0,
    "numberTestsTotal": 0,
    "rollbackOnError": true,
    "runTestsEnabled": true,
    "startDate": "2020-03-27T06:52:03.000Z",
    "status": "Succeeded",
    "success": true
  }
}
さいごに
ようこそ #DontStopDeploying の世界へ ![]()
これであなたも Jenkins マニアの仲間入りです ![]()
そして Jenkins 以外にもいろいろな CI ツールが世の中にはありますので、折を見ていろいろと戯れていきましょう。
それではまた ![]()


