環境
OS:MacOS Mojave 10.14.15
IDE:Cloud9
ruby:2.6.3
Rails:5.0.7.2
準備
routing作成
まずはルーティングを準備していきます。
resources :aritcles
正しく反映されているか、rails routesコマンドで確認してみましょう。
$ rails routes
Prefix Verb   URI Pattern                  Controller#Action

    articles GET    /articles(.:format)          articles#index
             POST   /articles(.:format)          articles#create
 new_article GET    /articles/new(.:format)      articles#new
edit_article GET    /articles/:id/edit(.:format) articles#edit
     article GET    /articles/:id(.:format)      articles#show
             PATCH  /articles/:id(.:format)      articles#update
             PUT    /articles/:id(.:format)      articles#update
             DELETE /articles/:id(.:format)      articles#destroy
正しく反映されていますね。
しかし、この状態でリクエストを送ろうとすると以下の画像のようにルーティングエラーが発生します。
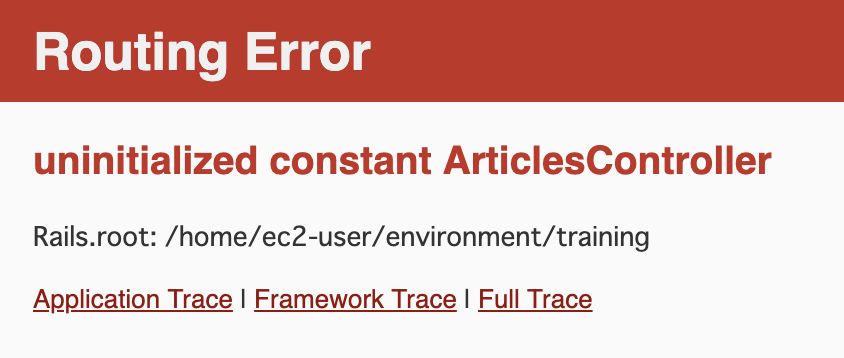
このエラーの原因は「リクエストを処理するためのコントローラーがないため」です。
なので、次はarticlesコントローラーを作成します。
articlesコントローラーの作成
以下のコマンドでarticlesコントローラーを作成します。
$ rails g controller articles
Running via Spring preloader in process 9066
      create  app/controllers/articles_controller.rb
      invoke  erb
      create    app/views/articles
      invoke  test_unit
      create    test/controllers/articles_controller_test.rb
      invoke  helper
      create    app/helpers/articles_helper.rb
      invoke    test_unit
      invoke  assets
      invoke    coffee
      create      app/assets/javascripts/articles.coffee
      invoke    scss
      create      app/assets/stylesheets/articles.scss
articlesコントローラーが作成されました。
しかし、このままではarticlesコントローラーに対するアクションが作成されていないので、URLにリクエストを送っても、Unknow actionエラーが返されてしまいます。
なので、次はactionを指定します。(一旦、newアクションだけを指定していきます。)
class ArticlesController < ApplicationController
  def new

  end
end
/articles/newでアクセスしてみます。
すると、今度は以下のようなエラーが発生します。

ArticlesController#missing a templateはarticlesコントローラーのnewアクションに対応するテンプレート、つまりビューがないために起こるエラーです。
なので、今度は対応するviewを作成します。
$ touch app/views/articles/new.html.erb
エラーは解消されたと思いますが、入力されたデータを送信して管理する場合は、モデルを作成してDBとやり取りする必要が生じてくるので、Articleモデルを作成していきます。
Articleモデルの作成
今回は、articlesテーブルにtitleカラムとcontentカラムを用意したいので以下のコマンドを実行してArticleモデルを作成します。
$ rails g model Article title:string content:text
Running via Spring preloader in process 4656
      invoke  active_record
      create    db/migrate/20190630012101_create_articles.rb
      create    app/models/article.rb
      invoke    test_unit
      create      test/models/article_test.rb
      create      test/fixtures/articles.yml
続いて、出来上がったマイグレーションファイルを実行していきますが、その前に作成したマイグレーションファイルに誤字等ないか確認します。
class CreateArticles < ActiveRecord::Migration[5.0]
  def change
    create_table :articles do |t|
      t.string :title
      t.text :content

      t.timestamps
    end
  end
end
問題なさそうなことが確認できたので以下のコマンドでマイグレーションを実行していきます。
$ rails db:migrate
== 20190630012101 CreateArticles: migrating ===================================
-- create_table(:articles)
   -> 0.0060s
== 20190630012101 CreateArticles: migrated (0.0065s) ==========================
articlesテーブルが作成されたことが確認できたので、次からはそれぞれ機能ごとに必要な処理をモデル、コントローラー、ビューに実装していきます。
※ルーティングは既に揃っているので加えて作成する必要はありません。
記事を投稿・詳細表示する
articleコントローラーにnew,create,showアクションを追加していきます。
class ArticlesController < ApplicationController
  def new
    #空のArticleオブジェクトを生成
    @article = Article.new
  end

  def create
    @article = Article.new(article_params)
    if @article.save
      redirect_to @article #@articleはarticle_path(@article)と同義
    else
      #エラー時は再度、記事登録画面を表示させる
      render :new
    end
  end

  def show
    @article = Article.find(params[:id])
  end

  private
    #ストロングパラメータでpermitに渡された値以外を受け取らないようにする
    def article_params
      params.require(:article).permit(:title,:content)
    end
end
newアクション内で空っぽのArticleクラスのインスタンスを作る理由は、form_forメソッドに空のインスタンス渡された時は、submitした時にcreateアクションが実行されるように設定されているからです。
反対に、空でない場合はupdateアクションが実行されます。
まだこれだけだと、showアクションに対応するviewが足りていないのでそれを作ります。
$ touch app/views/articles/show.html.erb
続けてviewも登録した内容が分かるように書いていきます。
<table>
  <tbody>
        <tr>
            <th>タイトル</th>
            <td><%= @article.title %></td>
        </tr>
        <tr>
            <th>内容</th>
            <td><%= @article.content %></td>
        </tr>
  </tbody>
</table>
ここまで作ったら実際に記事登録画面(article/new)でtitleに「hoge」、contentに「hogehoge」と入力して送信ボタンを押してみましょう。

↑こんな感じでDBに登録された値がうまく表示されていないでしょうか?
記事を一覧表示する
articleコントローラーにindexアクションを追加してallメソッドで登録されている値を全て取り出し@articlesに格納します。
class ArticlesController < ApplicationController
・
・
・
def index
    @articles = Article.all
end
  private
    def article_params
      params.require(:article).permit(:title,:content)
    end
end
indexアクションに対応するviewがないので作成して、登録された値が全て確認できるようにviewを調整します。(次の「記事を編集する」で使用する編集リンクを先に実装しています。したがって、今はエラーが出ても問題ありません)
$ touch app/views/articles/index.html.erb
<table>
  <tbody>
      <tr>
          <th>タイトル</th>
          <th>内容</th>
      </tr>
      <% @articles.each do |article| %>
      <tr>
          <td><%= article.title %></td>
          <td><%= article.content %></td>
          <td><%= link_to '編集',edit_article_path(article) %></td>
      </tr>
      <% end %>
  </tbody>
</table>
適当に記事登録画面で何か追加してみて/articlesにアクセスするとこれまで作成したデータが一覧で表示されます。

記事を編集する
articlesコントローラーにeditアクションとupdateアクションを追加し、それに対応するviewを追加していきます。
class ArticlesController < ApplicationController
 ・
 ・
 ・
  def edit
    @article = Article.find(params[:id])
  end

  def update
    @article = Article.find(params[:id])
    if @article.update(article_params)
      redirect_to @article
    else
      render :edit
    end
  end
  ・
 ・
 ・
  private
    def article_params
      params.require(:article).permit(:title,:content)
    end
end
$ touch app/views/articles/edit.html.erb
<h1>編集画面</h1>
<%= form_for @article do |f| %>
  <p>
    <%= f.label :title, "タイトル" %><br>
    <%= f.text_field :title %>
  </p>

  <p>
    <%= f.label :content, "内容" %><br>
    <%= f.text_area :content %>
  </p>

  <p>
    <%= f.submit %>
  </p>
<% end %>
findメソッドで該当する記事をDBから取り出し、それを@articleに格納して、view(edit.html.erb)のform_forメソッドに渡します。
この時、form_forメソッドに渡されたインスタンス変数には空ではなく値が入っているため、送信ボタンを押下時にはupdateアクションが実行されます。
記事を削除する
articlesコントローラーにdestroyアクションを追加します。
class ArticlesController < ApplicationController
 ・
 ・
 ・
  def destroy
    @article = Article.find(prams[:id])
    if @article.destroy
      redirect_to articles_path
    else
      redirect_to article_path(@article)
    end
  end
 ・
 ・
 ・
end
リンク押下時に削除できるように一覧画面のviewに削除リンクを追加していきます。
<table>
  <tbody>
      <tr>
          <th>タイトル</th>
          <th>内容</th>
      </tr>
      <% @articles.each do |article| %>
      <tr>
          <td><%= article.title %></td>
          <td><%= article.content %></td>
          <td><%= link_to '編集',edit_article_path(article) %></td>
          <td><%= link_to '削除',article_path(article),
                          method: :delete,data: {confirm:'削除してもいいですか?'}%></td>
      </tr>
      <% end %>
  </tbody>
</table>
methodオプションでhttpメソッドをdeleteに指定してあげることで、確認ダイアログのOKボタンが押された時に、destroyアクションが実行されます。
補足
今回は、要点をまとめるために記事を作成したためArticleモデルにバリデーションやリレーションを追加したりや入力箇所(newやedit)の重複部分をパーシャルを使ってまとめたりはしておりません。
なので、その辺りは適宜カスタマイズしていただきますようよろしくお願いします。
最後に
誤っている箇所や追記した方が良い点等ございましたら
編集リクエストやコメントの方でご指摘していただけると幸いです。