概要
結構メジャーな話だと思うのですが、あまり記事が見つからなかったので、書いておきます。
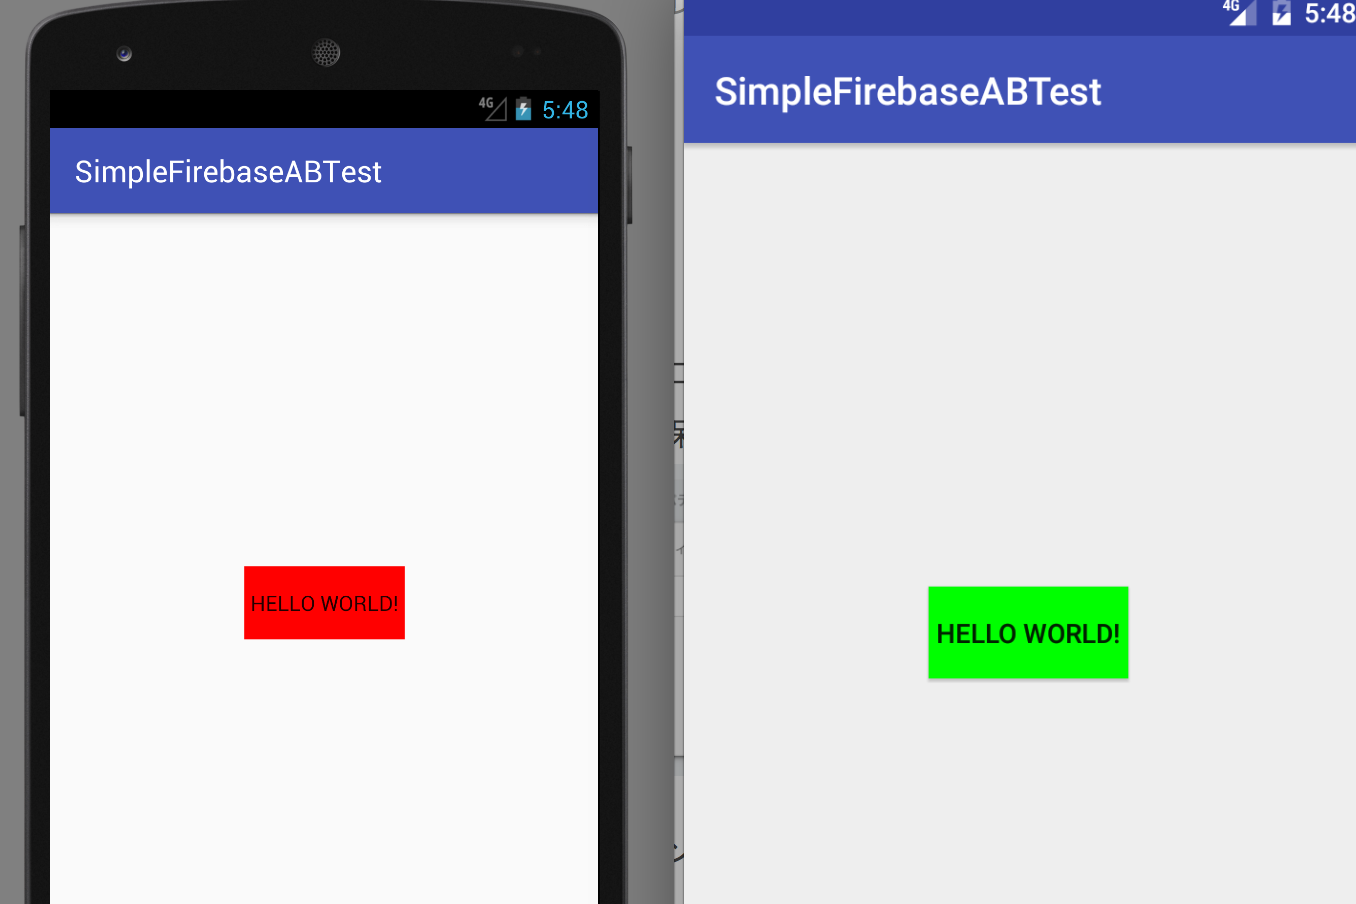
50%のユーザーのボタンの色を変更する簡単なものです。
(Firebaseをすでに知っている方はFirebase Analyticsを楽にしてみるのところから読んでみてください。)
アプリのセットアップ
(もう入っている方は飛ばして大丈夫です)
https://console.firebase.google.com/
から新規のプロジェクトを作成します
アプリを追加します。

対象としたいアプリのパッケージ名などを入力します。
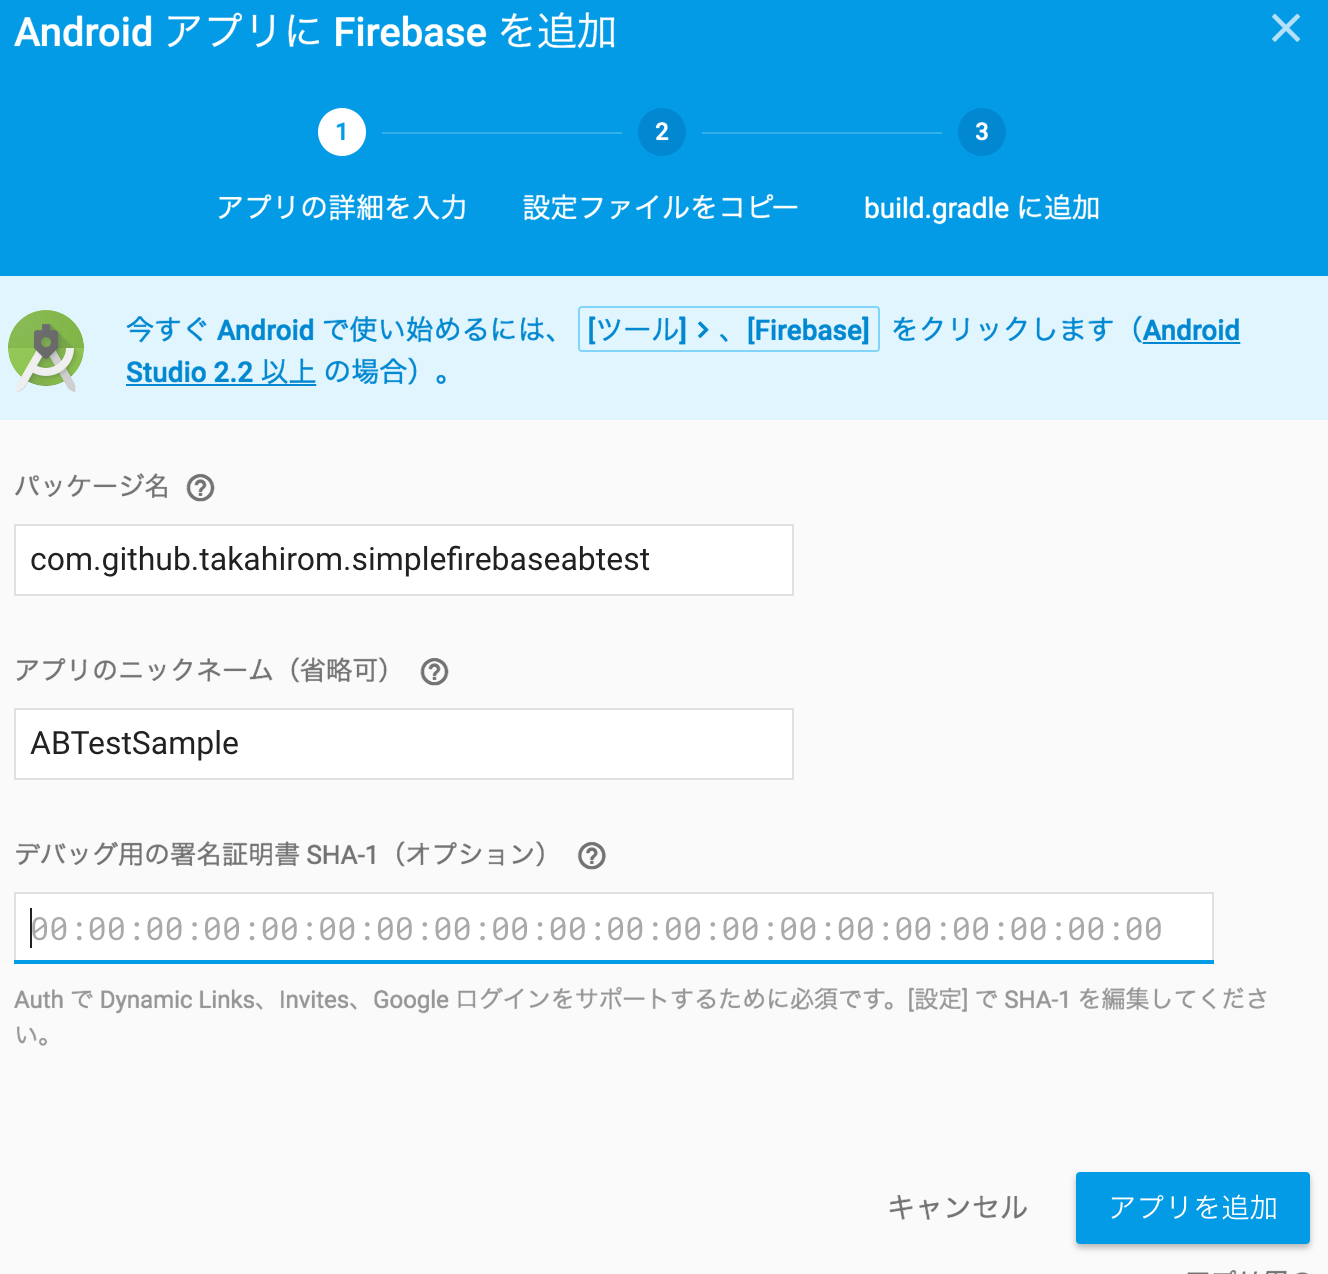
google-services.jsonファイルがダウンロードされるので、プロジェクト/appディレクトリに入れます。
プロジェクト/build.gradleに以下のようにclasspath 'com.google.gms:google-services:3.0.0'を追加してあげます。
buildscript {
    repositories {
        jcenter()
    }
    dependencies {
        classpath 'com.android.tools.build:gradle:xxxxx'

        classpath 'com.google.gms:google-services:3.0.0'
あとは以下の記述をプロジェクト/app/build.gradleの最後に追加してあげます。
apply plugin: 'com.google.gms.google-services'
またRemoteConfigとFirebaseAnalyticsを使うため、以下のように依存関係を追加します。
dependencies {
...
    compile 'com.google.firebase:firebase-core:10.0.1'
    compile 'com.google.firebase:firebase-config:10.0.1'
}
RemoteConfigのA/Bのセットアップ
RemoteConfigのセットアップで50%ずつ色を公開する
左のメニューからRemote Configを選択して、パラーメータを追加をクリックします。

出てきたダイアログでパラメーターキーを入力して、右上の条件の値を追加をクリックします。

新しい条件を追加をクリックして、条件の定義を以下のように追加します。
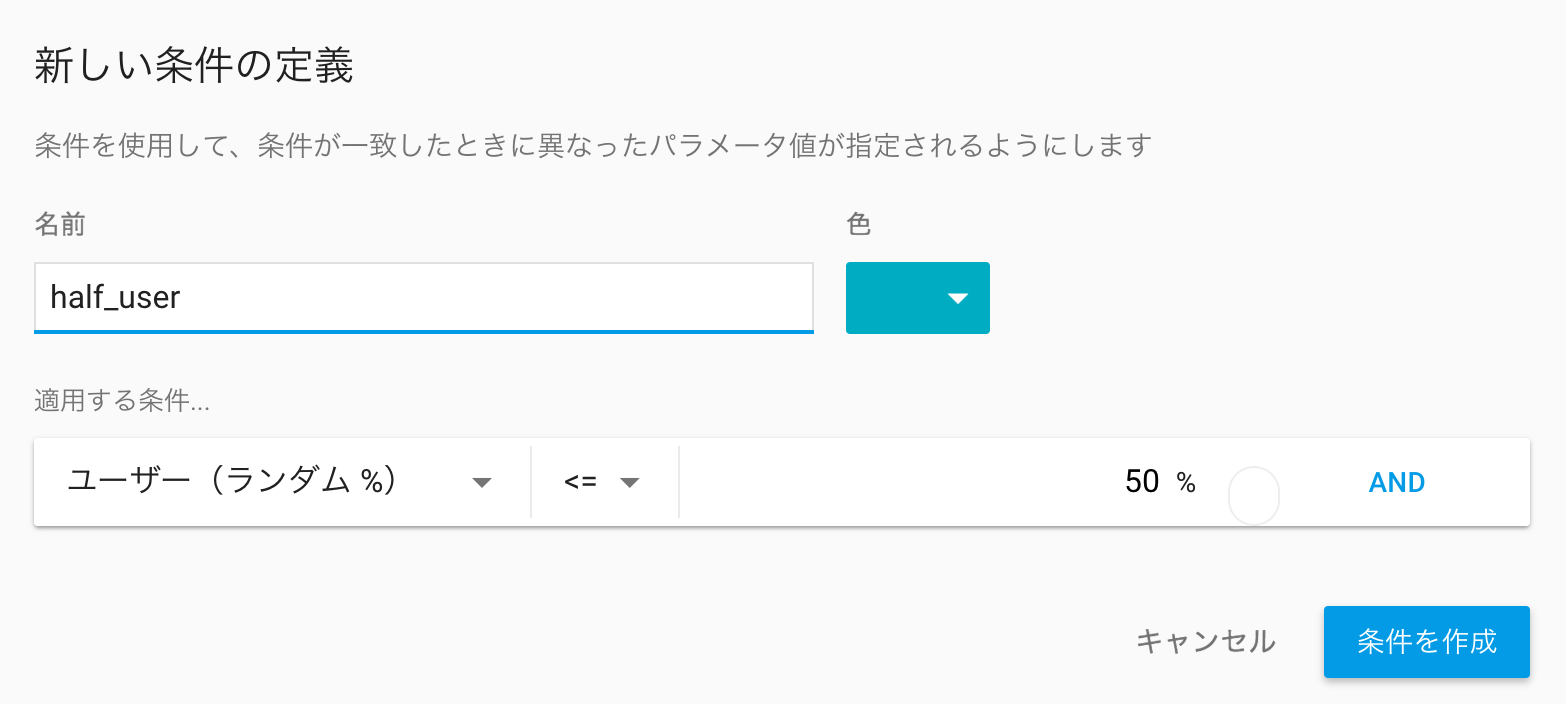
そして以下のように50%のユーザーに値を公開します。
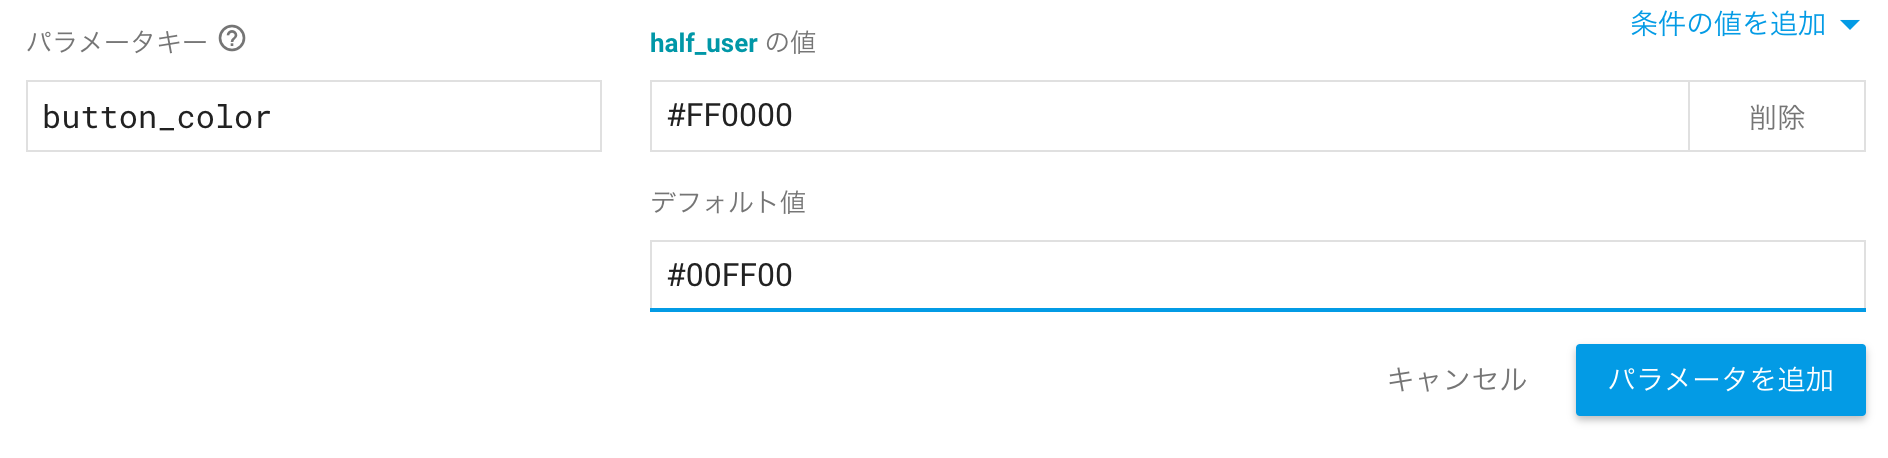
これで50%のユーザーに#FF0000でデフォルト値#00FF00が適応され、変更を公開ボタンを押すことでRemoteConfigに適応されます。

ユーザーがAかBか分かるようにする
FirebaseAnalyticsにはイベントログとユーザープロパティがあります。
今回はABテストのユーザーがAかBかはユーザープロパティを利用します。
イベントログのカスタムパラメーターでAかBかを送信すると、Firebase上ではデータを集計できず、BigQueryというGoogleの別のサービスと連結して利用する必要があります。またBigQueryを利用する場合はFriebaseをBlazeプランにする必要があるため、今回はAかBかを送るのはユーザープロパティを利用します。
ユーザープロパティの作成にはタブ内のユーザープロパティを選択します。
新しいプロパティの追加から、今回はbutton_colorという名前でプロパティをつけられるようにして、保存します。
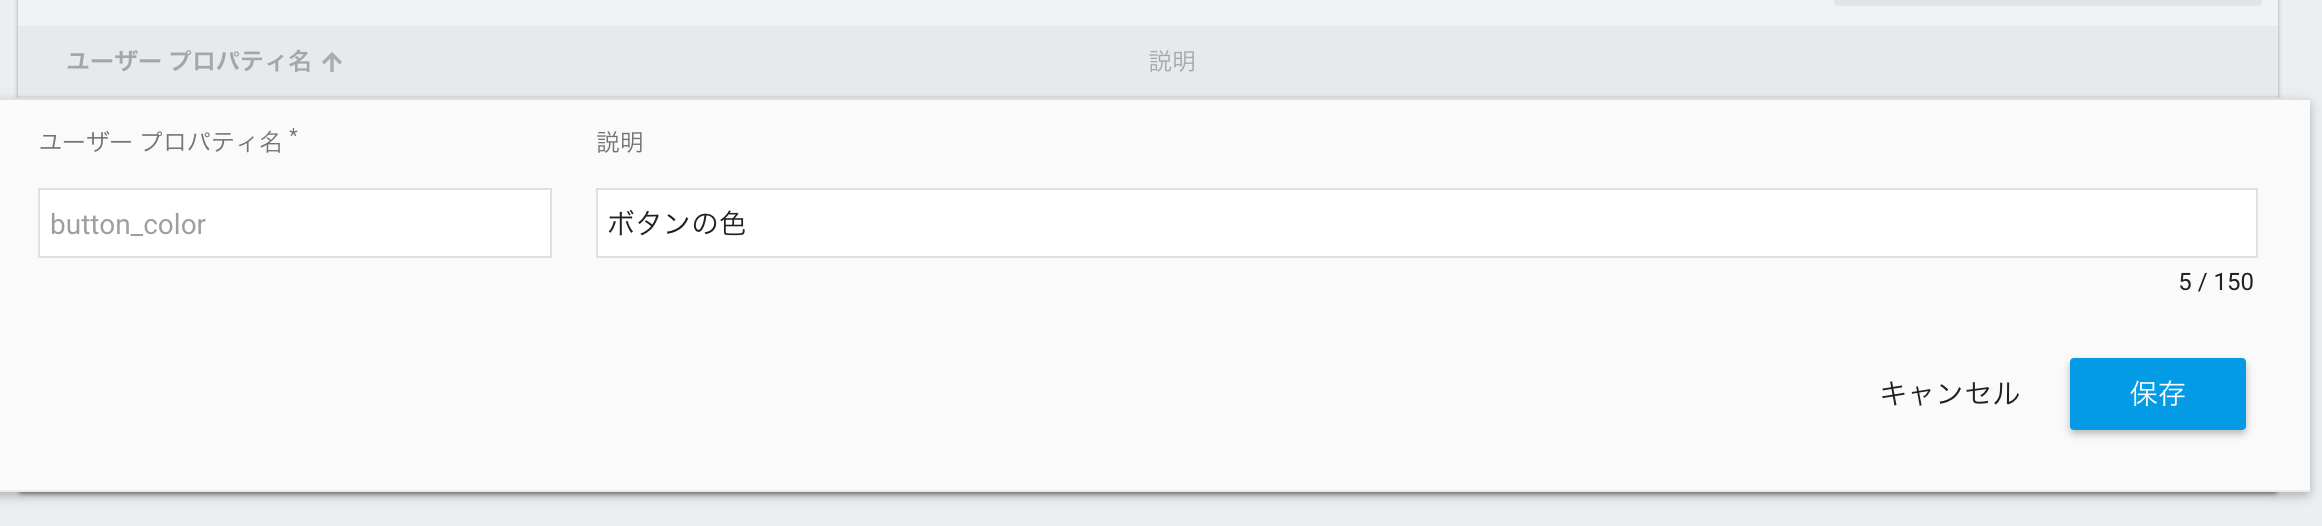
これでコンソール上のセットアップは完了です。
実装
あとは実装するのみです。
デフォルトの値を定義するxml
サーバーから取得失敗したり、取得するまでの間に表示される色を定義します。
<?xml version="1.0" encoding="utf-8"?>

<defaultsMap>
    <entry>
        <key>button_color</key>
        <value>#FFFFFF</value>
    </entry>
</defaultsMap>
ソースコード
コードは以下になります。後述で少し解説を入れます。
public class MainActivity extends AppCompatActivity {

    public static final String REMOTE_CONFIG_BUTTON_COLOR_KEY = "button_color";
    public static final String ANALYTICS_USER_PROPERTY_BUTTON_COLOR_KEY = "button_color";

    private FirebaseRemoteConfig firebaseRemoteConfig;
    private FirebaseAnalytics firebaseAnalytics;

    private Button helloButton;

    @Override
    protected void onCreate(Bundle savedInstanceState) {
        super.onCreate(savedInstanceState);
        setContentView(R.layout.activity_main);

        // FirebaseAnalyticsのインスタンス取得(随時getInstanceしても良いみたい)
        firebaseAnalytics = FirebaseAnalytics.getInstance(this);

        initRemoteConfig();
        initViews();
    }


    @Override
    protected void onResume() {
        super.onResume();

        // ボタンを見たという情報をFirebase Analyticsに送信
        final Bundle bundle = new Bundle();
        bundle.putString(FirebaseAnalytics.Param.CONTENT_TYPE, "button");
        firebaseAnalytics.logEvent(FirebaseAnalytics.Event.VIEW_ITEM, bundle);
    }

    private void initViews() {
        helloButton = (Button) findViewById(R.id.hello_button);
        helloButton.setOnClickListener(new View.OnClickListener() {
            @Override
            public void onClick(View v) {
                Toast.makeText(MainActivity.this, "Button tapped", Toast.LENGTH_SHORT).show();

                // クリックしたらFirebase Analyticsに送信
                // ここではパラメーターとして色は送らず、UserPropertyとして送る
                final Bundle parameter = new Bundle();
                parameter.putString(FirebaseAnalytics.Param.CONTENT_TYPE, "button");
                firebaseAnalytics.logEvent(FirebaseAnalytics.Event.SELECT_CONTENT, parameter);

            }
        });

        // 一度でもRemoteConfigから取得(fetch)完了していたら取得した色を表示
        // 取得されていなければxmlで定義しているデフォルトの色を表示
        applyButtonColor();
    }

    private void applyButtonColor() {
        final String color = getButtonColor();
        helloButton.setBackgroundColor(Color.parseColor(color));

        // FirebaseのUserPropertyで色を送信する
        final String colorForUserProperty = color.replace("#", "");
        firebaseAnalytics.setUserProperty(ANALYTICS_USER_PROPERTY_BUTTON_COLOR_KEY, colorForUserProperty);
    }

    private void initRemoteConfig() {
        firebaseRemoteConfig = FirebaseRemoteConfig.getInstance();
        final FirebaseRemoteConfigSettings.Builder settingBuilder = new FirebaseRemoteConfigSettings.Builder();
        if (BuildConfig.DEBUG) {
            // デバッグビルドのときはDeveloperModeを有効にする
            settingBuilder.setDeveloperModeEnabled(true);
        }
        firebaseRemoteConfig.setConfigSettings(settingBuilder.build());
        // デフォルトの値を設定
        firebaseRemoteConfig.setDefaults(R.xml.remote_config_defaults);

        // キャッシュの保持時間
        long cacheExpiration = 3600; // 一時間
        if (firebaseRemoteConfig.getInfo().getConfigSettings().isDeveloperModeEnabled()) {
            cacheExpiration = 0;
        }

        firebaseRemoteConfig.fetch(cacheExpiration).addOnCompleteListener(new OnCompleteListener<Void>() {
            @Override
            public void onComplete(@NonNull Task<Void> task) {
                if (task.isSuccessful()) {
                    // 取得した値を利用するように設定
                    firebaseRemoteConfig.activateFetched();
                }
                applyButtonColor();
            }
        });
    }

    private String getButtonColor() {
        // RemoteConfigから色の文字列を取得する
        return firebaseRemoteConfig.getString(REMOTE_CONFIG_BUTTON_COLOR_KEY);
    }
}
ソースコード詳細
大雑把に貼りすぎたので、少しずつ紹介していきます。
RemoteConfig
RemoteConfigのセットアップを以下のように行い、FirebaseRemoteConfig#setDefaults()でデフォルトの値を設定します。
また取得完了後にfirebaseRemoteConfig.activateFetched()で取得した値を有効化して、表示を更新します。
ただ非同期での取得なので、それまでユーザーに表示されるのはデフォルトで取得されるxmlで定義している値です。
    private void initRemoteConfig() {
        firebaseRemoteConfig = FirebaseRemoteConfig.getInstance();
        final FirebaseRemoteConfigSettings.Builder settingBuilder = new FirebaseRemoteConfigSettings.Builder();
        if (BuildConfig.DEBUG) {
            // デバッグビルドのときはDeveloperModeを有効にする
            settingBuilder.setDeveloperModeEnabled(true);
        }
        firebaseRemoteConfig.setConfigSettings(settingBuilder.build());
        // デフォルトの値を設定
        firebaseRemoteConfig.setDefaults(R.xml.remote_config_defaults);

        // キャッシュの保持時間
        long cacheExpiration = 3600; // 一時間
        if (firebaseRemoteConfig.getInfo().getConfigSettings().isDeveloperModeEnabled()) {
            cacheExpiration = 0;
        }

        firebaseRemoteConfig.fetch(cacheExpiration).addOnCompleteListener(new OnCompleteListener<Void>() {
            @Override
            public void onComplete(@NonNull Task<Void> task) {
                if (task.isSuccessful()) {
                    // 取得した値を利用するように設定
                    firebaseRemoteConfig.activateFetched();
                }
                applyButtonColor();
            }
        });
    }
RemoteConfigから実際に値を取得にするには以下のようにようにします。
    private String getButtonColor() {
        // RemoteConfigから色の文字列を取得する
        return firebaseRemoteConfig.getString(REMOTE_CONFIG_BUTTON_COLOR_KEY);
    }
Analytics
FirebaseAnalytics#logEvent()でイベントのログを送信しています。
    @Override
    protected void onResume() {
        super.onResume();

        // ボタンを見たという情報をFirebase Analyticsに送信
        final Bundle bundle = new Bundle();
        bundle.putString(FirebaseAnalytics.Param.CONTENT_TYPE, "button");
        firebaseAnalytics.logEvent(FirebaseAnalytics.Event.VIEW_ITEM, bundle);
    }
FirebaseAnalytics#setUserProperty()を使って、ユーザーのプロパティを送信します。
ここではボタンの色を送信しています。
    private void applyButtonColor() {
        final String color = getButtonColor();
        helloButton.setBackgroundColor(Color.parseColor(color));

        // FirebaseのUserPropertyで色を送信する
        final String colorForUserProperty = color.replace("#", "");
        firebaseAnalytics.setUserProperty(ANALYTICS_USER_PROPERTY_BUTTON_COLOR_KEY, colorForUserProperty);
    }
ログが送られているか確認
以下のように確認できるようです(https://firebase.google.com/docs/analytics/android/start/?hl=ja より)
adb shell setprop log.tag.FA VERBOSE
adb shell setprop log.tag.FA-SVC VERBOSE
adb logcat -v time -s FA FA-SVC
ログを見るととれてそうなことが確認できました。
01-07 18:43:29.301 D/FA-SVC  ( 4215): User property set: button_color, 00FF00
01-07 18:43:39.806 V/FA-SVC  ( 4215): Logging event: origin=app,name=view_item,params=Bundle[mParcelledData.dataSize=88]
01-07 18:43:39.882 V/FA-SVC  ( 4215): Saving event, name, data size: view_item, 42
01-07 18:43:39.882 V/FA-SVC  ( 4215): Event recorded: Event{appId='com.github.takahirom.simplefirebaseabtest', name='view_item', params=Bundle[{_o=app, content_type=button}]}
01-07 18:43:40.883 D/FA      (18734): Logging event (FE): select_content, Bundle[{_o=app, content_type=button}]
01-07 18:43:40.887 V/FA-SVC  ( 4215): Logging event: origin=app,name=select_content,params=Bundle[mParcelledData.dataSize=88]
01-07 18:43:40.894 V/FA-SVC  ( 4215): Saving event, name, data size: select_content, 42
01-07 18:43:40.895 V/FA-SVC  ( 4215): Event recorded: Event{appId='com.github.takahirom.simplefirebaseabtest', name='select_content', params=Bundle[{_o=app, content_type=button}]}
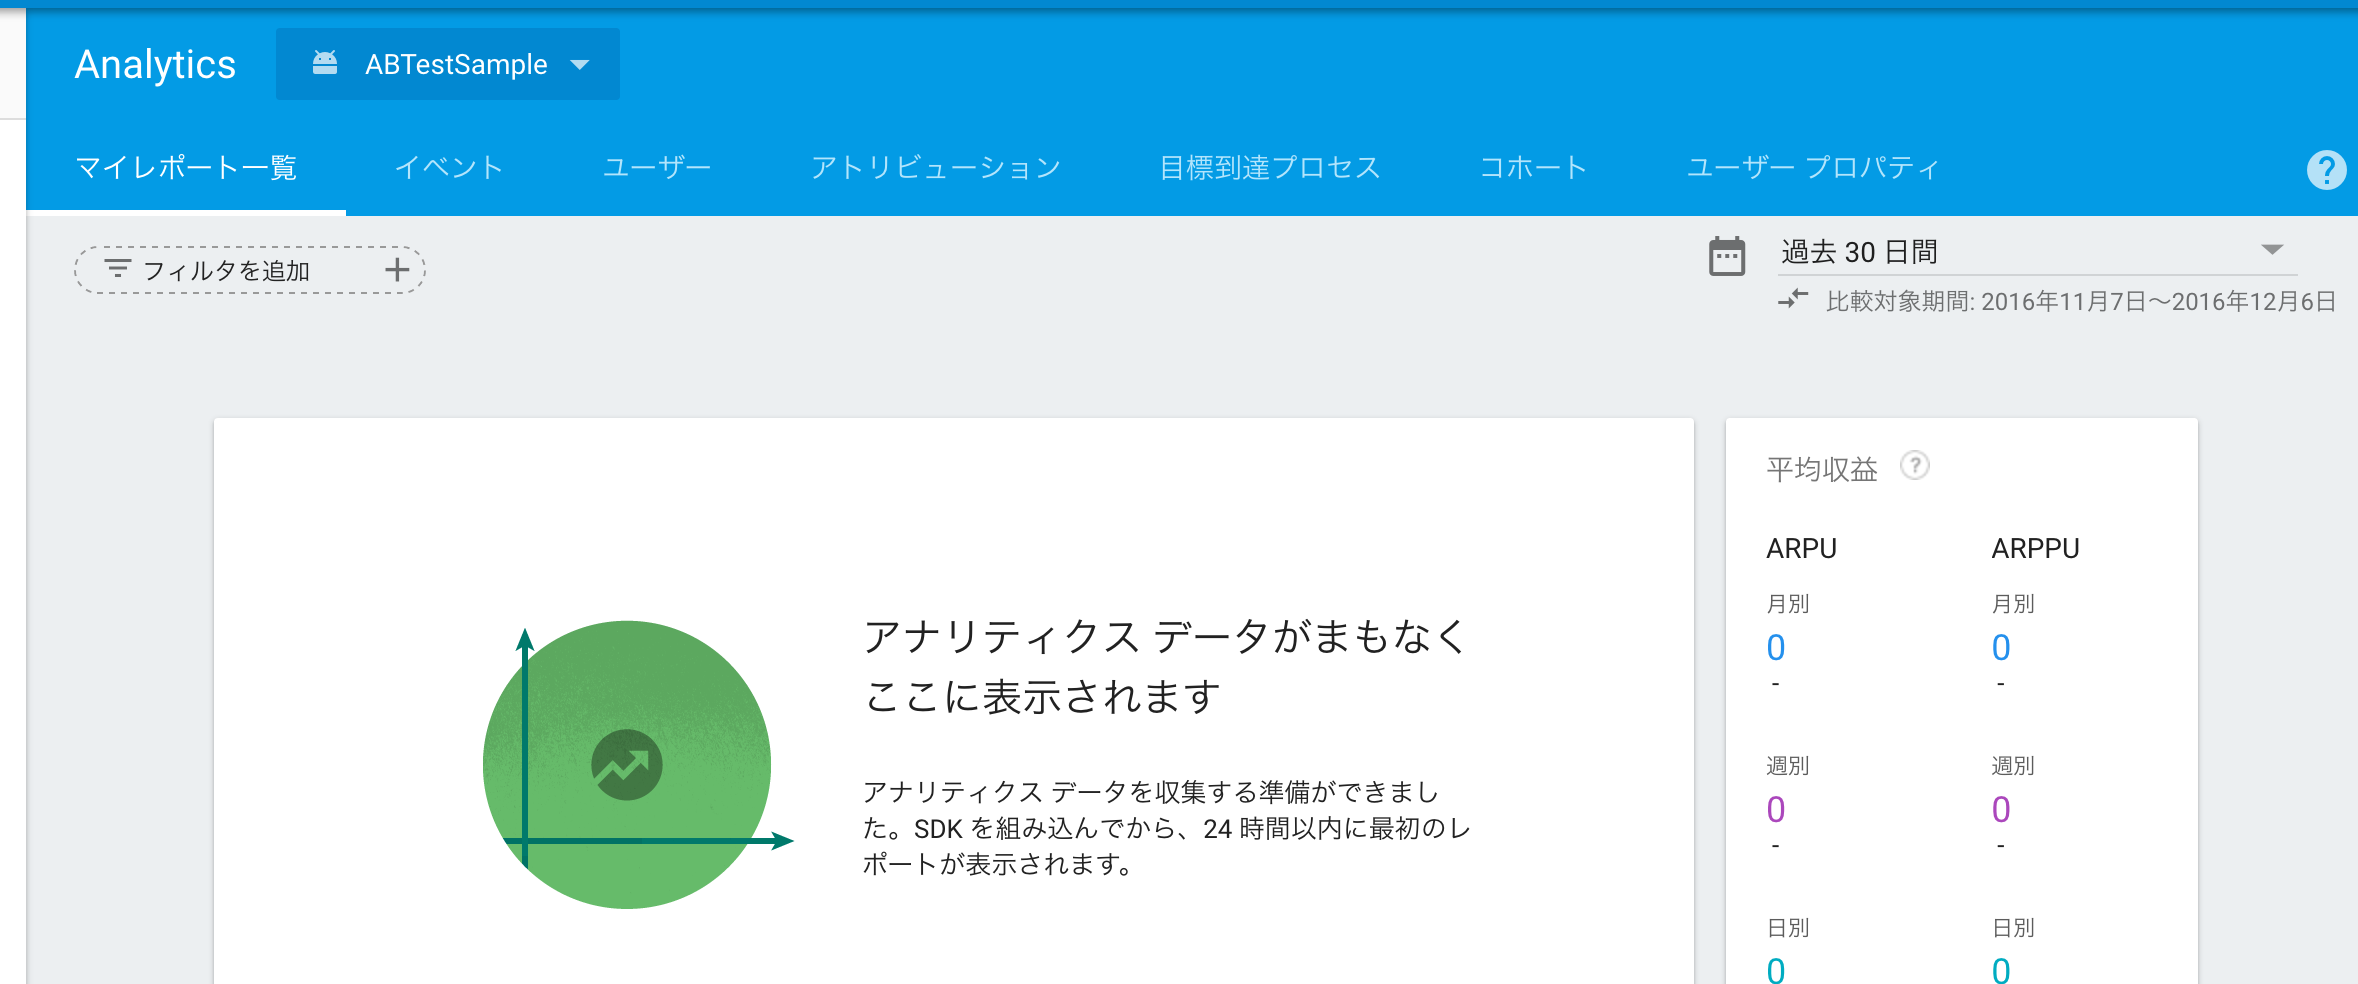
結果計測
まず目標達成プロセスを開いて、以下のように操作を行うことで見ることができます。

この場合だと44.1%のCTR(クリック率)だった色が00FF00、緑色ほうがよさそうですね(今回は全部自分によるクリックですが、、)
ここまでで目的は果たせました。
注意点
前にも書きましたが、イベントのパラメーターでの絞込みはFirebaseのUI上ではできない(Google BigQueryを使う必要があり、BigQueryを使うにはFirebase プロジェクトを Blaze プランにアップグレードする必要がある)ので、なるべくイベントにして、パラメーターは使わないほうが楽にFirebaseのUI上でみることができるかもしれません。
おまけ: Firebase Analyticsを楽に + コードをきれいにしてみる
Transform APIを利用して、Fire AnnotationというかんたんにFirebaseAnalyticsを実装できるAndroidのライブラリを作りました。(年末はTransform APIで遊ぼうという記事があり、これを元に年末に遊んでみました。 )
https://github.com/takahirom/fire-annotation
@FireEventLogというアノテーションをメソッドに付けると、FirebaseのEventLogの送信が可能になります。
    // ボタンを見たという情報をFirebase Analyticsに送信
    @FireEventLog(event = VIEW_ITEM, parameter = CONTENT_TYPE + ":" + "button")
    @Override
    protected void onResume() {
        super.onResume();
    }
クリックのときのイベントも以下のように送ることができます。
    private void initViews() {
        helloButton = (Button) findViewById(R.id.hello_button);
        helloButton.setOnClickListener(new View.OnClickListener() {
            // クリックしたらFirebase Analyticsに送信
            // ここではパラメーターとして色は送らず、UserPropertyとして送る
            @FireEventLog(event = SELECT_CONTENT, parameter = CONTENT_TYPE + ":" + "button")
            @Override
            public void onClick(View v) {
                Toast.makeText(MainActivity.this, "Button tapped", Toast.LENGTH_SHORT).show();
            }
        });
...
@FireUserPropertyでFirebaseのUserPropertyの送信が可能です。
今回のようにボタンの色などを実行時にカスタマイズした値を贈りたい場合はcustomPropertyにクラスを指定して、作成を行うことがで実装が可能です。
    // FirebaseのUserPropertyで色を送信する
    @FireUserProperty(customProperty = CustomUserPropertyCreator.class)
    private void applyButtonColor() {
        final String color = getButtonColor();
        helloButton.setBackgroundColor(Color.parseColor(color));
    }
package com.github.takahirom.simplefirebaseabtest;

import com.github.takahirom.fireannotation.CustomValueCreator;

import java.util.HashMap;
import java.util.Map;

class CustomUserPropertyCreator extends CustomValueCreator<MainActivity> {
    private static final String ANALYTICS_USER_PROPERTY_BUTTON_COLOR_KEY = "button_color";
    @Override
    public Map<String, String> getValue(MainActivity annotatedObject) {
        final HashMap<String, String> userProperty = new HashMap<>();
        userProperty.put(ANALYTICS_USER_PROPERTY_BUTTON_COLOR_KEY, annotatedObject.getButtonColor().replace("#", ""));
        return userProperty;
    }
}
これにより、アノテーションが必要なので、完璧に分離できているわけではありませんが、Activityのメソッドのコード内からFirebaseAnalyticsのコードを分離してきれいにすることができました。
まとめ
RemoteConfigについては気軽にアプリ内の値を変えられるのでとても良いです。基本的に値と言えるものはサーバーに持っておきたいですね。
ただ、どのA/Bテストのツールを使ってもそうなのですが、ネットワークを利用しての非同期での取得であるため、初回起動時にデフォルトの表示を一瞬でもさせないといけない(または待機させる)などを行わなくてはいけません、そこは少し弱い部分だと思います。
Firebase Analyticsはツール上で集計できる部分が少ないなど結構制限がありつつも、最低限の機能はあるので、うまく使っていけば使っていけそうです。