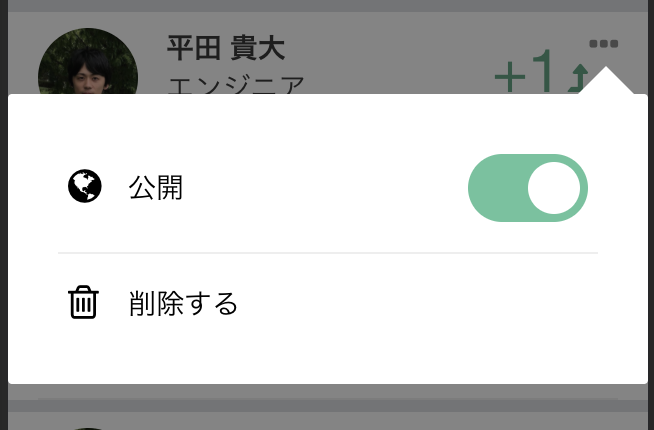
完成図
右上の「・・・」メニューを押した上下にスクロール位置によって出し分けます。

ソースコード
dropdown.vue
<template>
        <transition name="modal" v-on:enter="enter" v-on:before-leave="beforeLeave">
          <div class="transition-wrapper">
              <div class="modal-mask">
                    <div class="modal-wrapper" @click.prevent.self="$emit('close')">
                        <div :id="modalId" class="modal-container">
                          <div class="modal-body">
                              <slot name="body">
                              default body
                              </slot>
                          </div>
                        </div>
                    </div>
              </div>
            <div class="modal-bg">
            </div>
          </div>
        </transition>
</template>

<script>
export default {
  props: ["modalId","event"],
  mounted: function(){
    this.openDropDown(this.event);
  },
  methods: {
    enter: function() {
      $(window).on('touchmove.noScroll', function(e) {
          e.preventDefault();
      });
    },
    beforeLeave: function() {
      $(window).off('.noScroll');
    },
    openDropDown:function(e){
      const id = '#' + this.modalId;
      if(window.innerHeight > (e.pageY-window.pageYOffset)*2){
        $(id).css({
          top: e.pageY-window.pageYOffset+25,
        })
        $(id).addClass('container-down');
        $(id).removeClass('container-up');
      }else{
        $(id).css({
          top: e.pageY-window.pageYOffset-25-$(id).innerHeight(),
        })
        $(id).addClass('container-up');
        $(id).removeClass('container-down');
      }
    }
  }
};
</script>

<style lang="scss" scoped>
.modal-mask {
  position: fixed;
  top: 0;
  left: 0;
  width: 100%;
  height: 100%;
  display: table;
  z-index: 10001 !important;
}

.transition-wrapper {
  transition: opacity 0.3s ease;
}

.modal-bg {
  position: fixed;
  top: 0;
  left: 0;
  background-color: rgba(10, 10, 10, 0.5);
  width: 100%;
  height: 100%;
  z-index: 10000 !important;
}

.modal-wrapper {
  display: table-cell;
  vertical-align: middle;
}

.modal-container {
  width: 100%;
  max-height: 98%;
  margin: 0px auto;
  padding: 0 10px;
  background-color: #fff;
  border-radius: 2px;
  transition: all 0.3s ease;
  font-family: Helvetica, Arial, sans-serif;
  color: black;
  position:absolute;
}

.container-down{
  &:before{
    content: '';
    position: absolute;
    right: 6px;
    top: -14px;
    display: block;
    width: 0;
    height: 0;
    border-right: 15px solid transparent;
    border-bottom: 15px solid white;
    border-left: 15px solid transparent;
  }
}

.container-up{
  &:before{
    content: '';
    position: absolute;
    right: 6px;
    top: 100%;
    display: block;
    width: 0;
    height: 0;
    border-right: 15px solid transparent;
    border-top: 15px solid white;
    border-left: 15px solid transparent;
  }
}

.modal-body {
  margin: 10px 0;
  padding:0 !important;
}

.modal-footer {
  padding: 0 !important;
  text-align: center !important;
  border-top: none;
}

.modal-default-button {
  position: absolute;
  top: 0;
  right: 20px;
  font-size: 30px;
  color: #888888 !important;
}

.modal-back-btn {
  position: absolute;
  top: 3px;
  left: 20px;
  font-size: 30px;
  color: #888888 !important;
}

.modal-header h3 {
  color: #5fa281;
  text-align: center;
  margin: 0;
}

.modal-enter {
  opacity: 1;
}

.modal-leave-active {
  opacity: 0;
}

.modal-enter .modal-container,
.modal-leave-active .modal-container {
  -webkit-transform: scale(1.1);
  transform: scale(1.1);
}
</style>
ポイント
タップイベントをバインドすることで表示位置を取得し、computedのopenDropDownの処理で表示すべき位置(場所と上下)を計算している。
位置は面倒だったので若干ハードコードしちゃってますが、メニューを変えても応用できると思います。
ベースのtemplateやcssはVueの公式のモーダルをベースにしています。
メニューの上下の出し分けはcssのクラスで切り替えています。
最後に
上記ドロップダウンは、こちらのサイトで実装しているのでよければ是非登録して見てくださいw
Procord 一日ひとつ成長する。Procordは、仕事上の成長を記録・共有するストイックネットワーキングサービスです。
