
Vue.jsで時計アプリを作ろう(前編:開発環境の構築)の続きです。
ファイルの整理
まず、src/App.vueの中身を空にします。
src/App.vue
<template>

</template>

<script>

</script>

<style>

</style>
次に、
- src/assets/logo.png
- src/components/HelloWorld.vue
を削除します。
最後にindex.htmlを編集します。
index.html
<!DOCTYPE html>
<html>
  <head>
    <meta charset="utf-8">
    <meta name="viewport" content="width=device-width,initial-scale=1.0">
    <link href="https://fonts.googleapis.com/css?family=Roboto+Mono:700|Teko:600" rel="stylesheet">
    <title>Vue Clock</title>
  </head>
  <body>
    <div id="app"></div>
    <!-- built files will be auto injected -->
  </body>
</html>
コンポーネントの作成
src/componentsディレクトリにClock.vueを作成します。
Clock.vue
<template>
  <div>
    <div class="container">
      <p class="date">{{ year }}/{{ month }}/{{ day }}</p>
      <div class="time">
        <p class="time-item hours">{{ hours }}</p>
        <p class="time-item minutes">{{ minutes }}</p>
        <p class="time-item seconds">{{ seconds }}</p>
      </div>
    </div>
  </div>
</template>

<script>
const zeroPadding = (num, digit) => {
  return (Array(digit).join("0") + num).slice(-digit)
}

export default {
  data() {
    return {
      date: new Date(),
    }
  },
  computed: {
    year() {
      return this.date.getFullYear()
    },
    month() {
      return zeroPadding(this.date.getMonth() + 1, 2)
    },
    day() {
      return zeroPadding(this.date.getDate(), 2)
    },
    hours() {
      return zeroPadding(this.date.getHours(), 2)
    },
    minutes() {
      return zeroPadding(this.date.getMinutes(), 2)
    },
    seconds() {
      return zeroPadding(this.date.getSeconds(), 2)
    },
  },
  mounted() {
    this.setDate()
    setInterval(() => this.setDate(), 1000)
  },
  methods: {
    setDate() {
      this.date = new Date()
    },
  },
}
</script>

<style scoped>
.container {
  background-color: #0e75bd;
  padding: 2%;
}

.date {
  text-align: right;
  color: #fff;
  font-family: 'Teko', sans-serif;
  font-size: 4rem;
  letter-spacing: .1em;
  margin: .0em 0;
  line-height: 1;
}

.time {
  display: flex;
}

.time-item {
  display: flex;
  justify-content: center;
  align-items: center;
  flex: 1 1;
  height: 100px;
  position: relative;
  z-index: 1;
  padding: 0.5em;
  margin: 3px;
  color: #fff;
  font-family: 'Roboto Mono', monospace;
  font-size: 3rem;
  line-height: 1;
  background-color: #33c7da;
  box-sizing: border-box;
}

.time-item:before {
  position: absolute;
  right: 5px;
  bottom: 1px;
  z-index: 1;
  color: #fff;
  font-family: 'Teko', sans-serif;
  font-size: 1.4rem;
  letter-spacing: .05em;
}

.hours:before {
  content: "Hours";
}

.minutes:before {
  content: "Minutes";
}

.seconds:before {
  content: "Seconds";
}
</style>
次に、src/App.vueにコードを追加します。
src/App.vue
<template>
  <div>
    <Clock class="clock"/>
  </div>
</template>

<script>
import Clock from "@/components/Clock"

export default {
  components: {
    Clock,
  },
}
</script>

<style scoped>
.clock {
  width: 80%;
  max-width: 500px;
  margin: 30px auto;
}
</style>

<style>
html {
  font-size: 62.5%;
}

body {
  margin: 0;
}

p {
  margin: 0;
}
</style>
ローカルサーバを起動します。(すでに起動している場合、ファイルを保存すればブラウザが自動更新されます)
$ npm run dev
ブラウザを確認します。
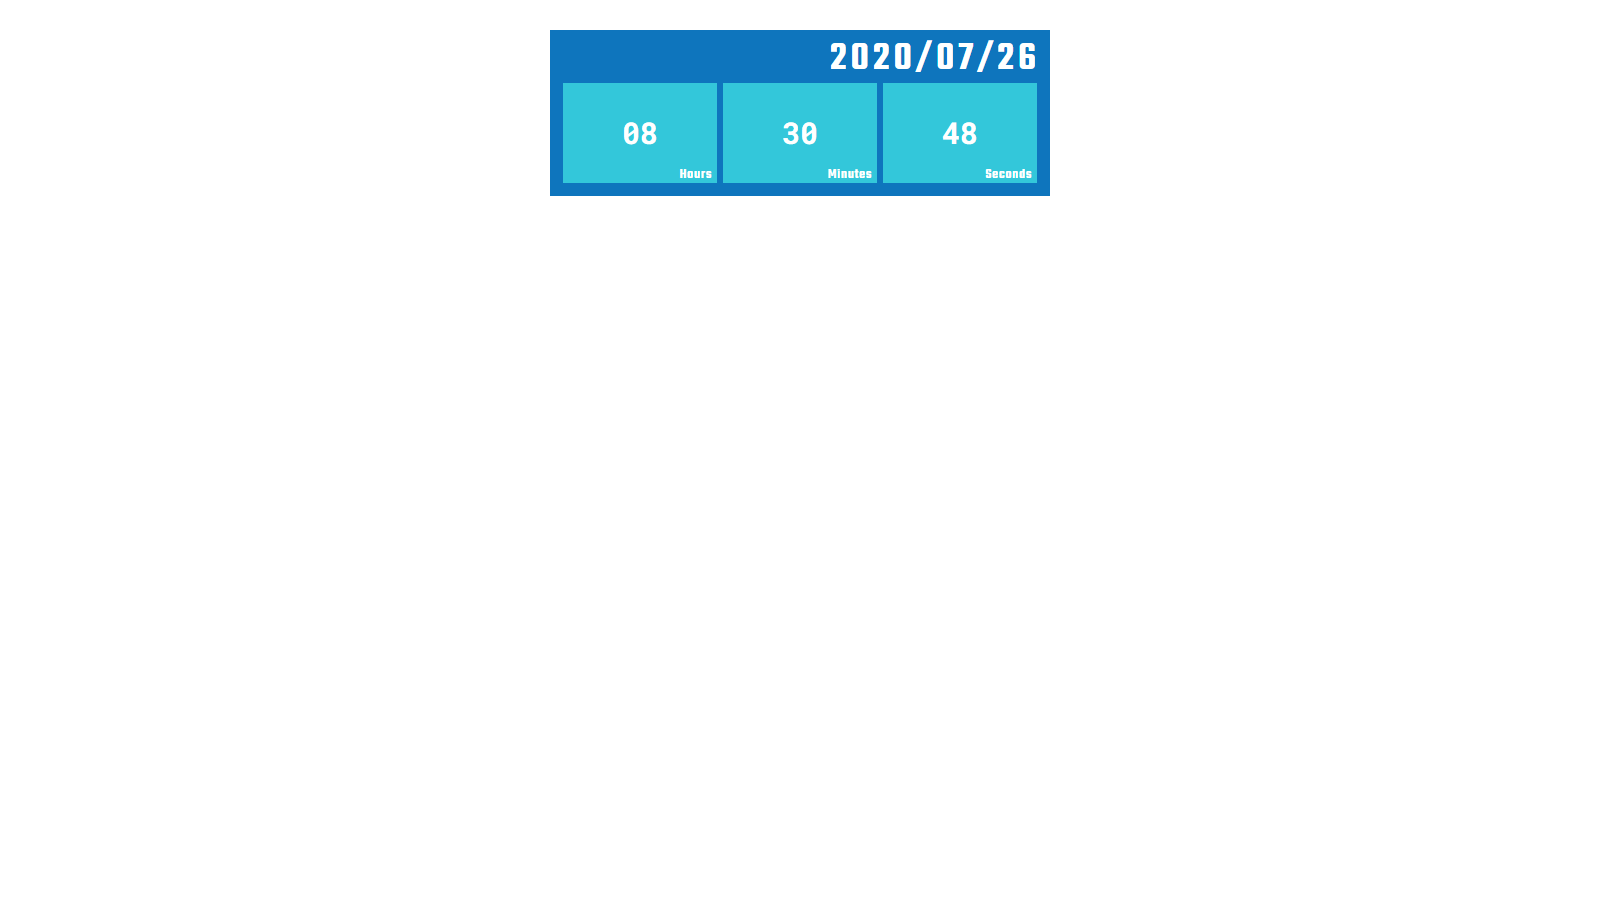
上の画面のように表示されれば、時計アプリは完成です。
ソースコードはこちらで確認できます。