目的
本記事では、snappyHexMesh + OpenFOAM v8 の組み合わせでの風洞数値実験を行うことを目的としています。
分量の関係から、前編(メッシュ生成)、後編(CFDの実行)に分けて解説していきます。
本記事はその後編になります。
前提
$FOAM_TUTORIALS/incompressible/simpleFoam/motorBike
のcaseファイルをもとに風洞解析用のcaseを作成していきます。
cp $FOAM_TUTORIALS/incompressible/simpleFoam/motorBike /workDir/rearWing
のように作業ディレクトリに__reaWing__というディレクトリ名でcaseをコピーしてあり、また、snappyHexMeshにて計算格子ができていることを前提としています。
初期条件 / 境界条件
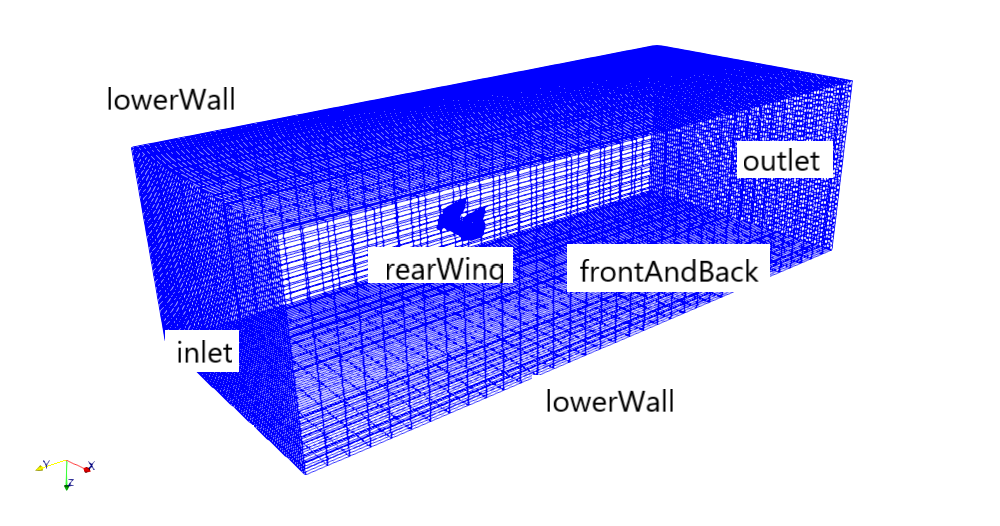
先の作業によりメッシュが切れているのであれば、上図のようなPatchが各面に割り当てられているはずです。
基本はチュートリアルmotorBikeの設定のままで動きます。が、ここでは少し設定を確認しておこうと思います。
{
    //- Set patchGroups for constraint patches
    #includeEtc "caseDicts/setConstraintTypes"

    #include "include/fixedInlet"

    outlet
    {
        type            inletOutlet;
        inletValue      uniform (0 0 0);
        value           $internalField;
    }

    "(lowerWall|upperWall)"
    {
        type            slip;
    }

    rearWing
    {
        type            noSlip;
    }

    #include "include/frontBackUpperPatches"
}
lowerWall, upperWall, __frontAndBack__にはノイマン条件(勾配ゼロ)としています。outlet__は出口境界ですが、その名の通り流出・流入境界条件が与えられています。ただ、inletValue uniform (0 0 0)としていますので、流入は認めていない(逆流が生じるような面に、仮想の壁を置いている)設定になっています。
懸案の入り口境界__inlet__は__0/include__ディレクトリ下の__fixedInlet, __initialConditions__をインクルードして設定するようになっています。
inlet
{
    type  fixedValue;
    value $internalField;
}
flowVelocity         (0 20 0);
pressure             0;
turbulentKE          0.24;
turbulentOmega       1.78;
controlDict
以下に計算実行の設定ファイルである__controlDict__を示します。
application     simpleFoam;
startFrom       latestTime;
startTime       0;
stopAt          endTime;
endTime         5000;
deltaT          1;
writeControl    timeStep;
writeInterval   100;
purgeWrite      0;
writeFormat     binary;
writePrecision  6;
writeCompression off;
timeFormat      general;
timePrecision   6;
runTimeModifiable true;

functions
{
    #include "streamLines"
    #include "cuttingPlane"
    #include "forceCoeffs"
}
ここで、__function objects__にstreamLines, cuttingPlane, forceCoeffsが読み込まれています。特にforceCoeffsは揚力・抗力係数を計算する際に用いるライブラリになります。
system以下に、forceCoeffsというファイルがあり、その中で計算の設定を行います。
forceCoeffs1
{
    type            forceCoeffs;

    libs            ("libforces.so");

    writeControl    timeStep;
    timeInterval    1;

    log             yes;

    patches         (rearWing);
    rho             rhoInf;      // Indicates incompressible
    rhoInf          1;           // Redundant for incompressible
    liftDir         (0 0 1);
    dragDir         (0 1 0);
    CofR            (0.72 0 0);  // Axle midpoint on ground
    pitchAxis       (0 1 0);
    magUInf         20;
    lRef            1.42;        // Wheelbase length
    Aref            0.05;        // Estimated
 }
patchesでどの面の効力を計算するのか、liftDir、dragDirで揚力、抗力の向きを、magUInfで周囲流速、Arefで断面積(投影)を設定します。
なお、設定ファイル等が無い場合は、fundation版のみの機能になりますが、
formGet <ほしいファイル(例えばforceCoeffs)>
とすれば、systemディレクトリ以下にforceCoeffsファイルがソースからコピーされます。
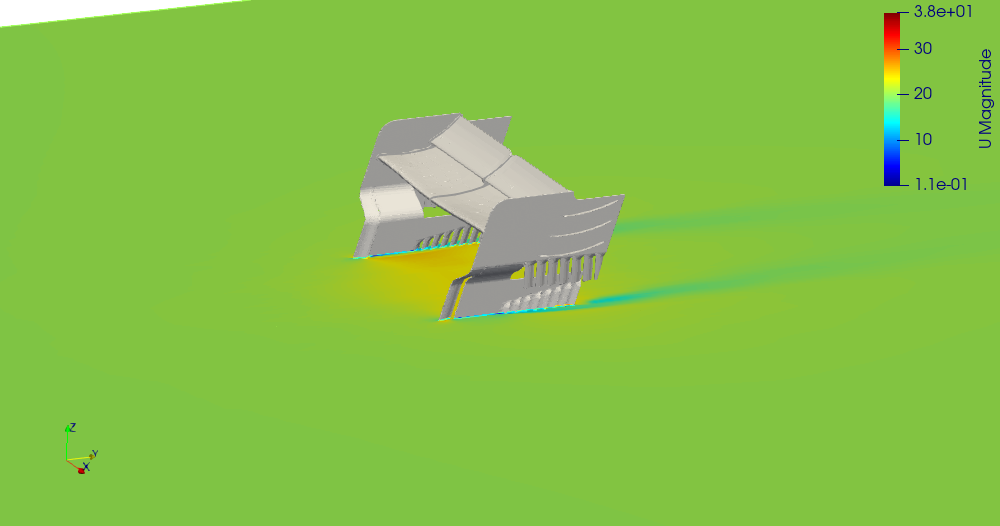
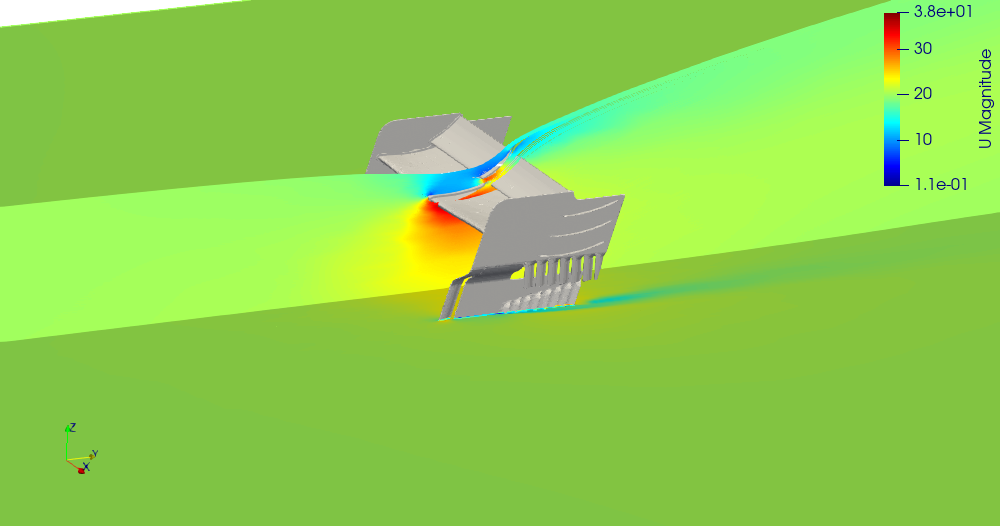
解析結果例
以下は、simpleFoamを実行して得られた速度コンターおよび流線になります。
最後に
この手の情報はネット上にたくさん上がっていて、今更感は否めませんでしたが、ゼミの資料として使えるのでは、ということでまとめてみました。何かしらお役に立てれば幸いです。