本日行うこと
- テーブルから一覧全件表示を行い、1ページ10件ずつの表示にする。
- 上限数を超過した分は別ページに出力させるページング機能を実装する
画面イメージ
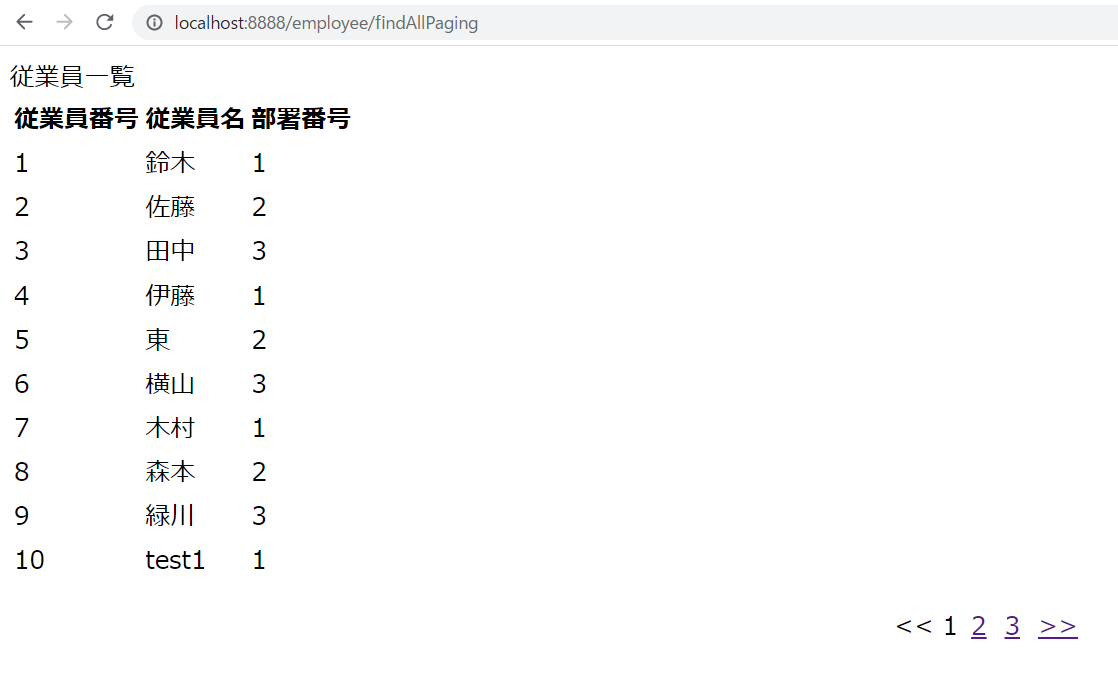
①画面遷移時(ページ番号1)
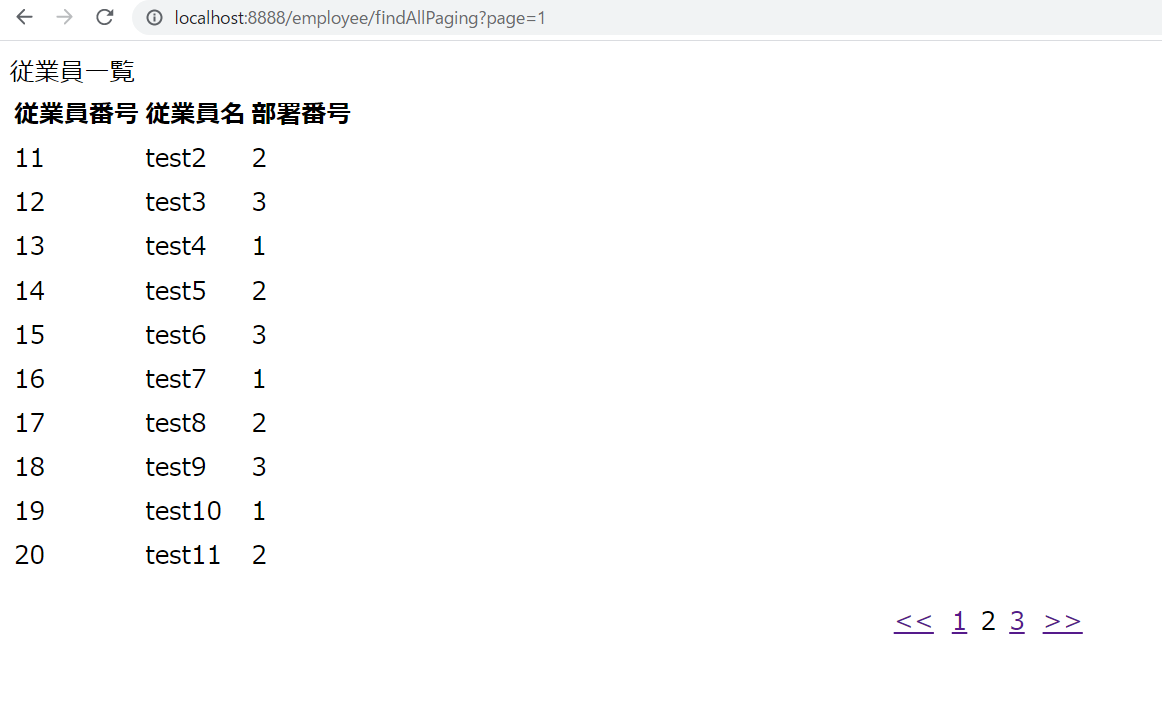
②ページ番号2
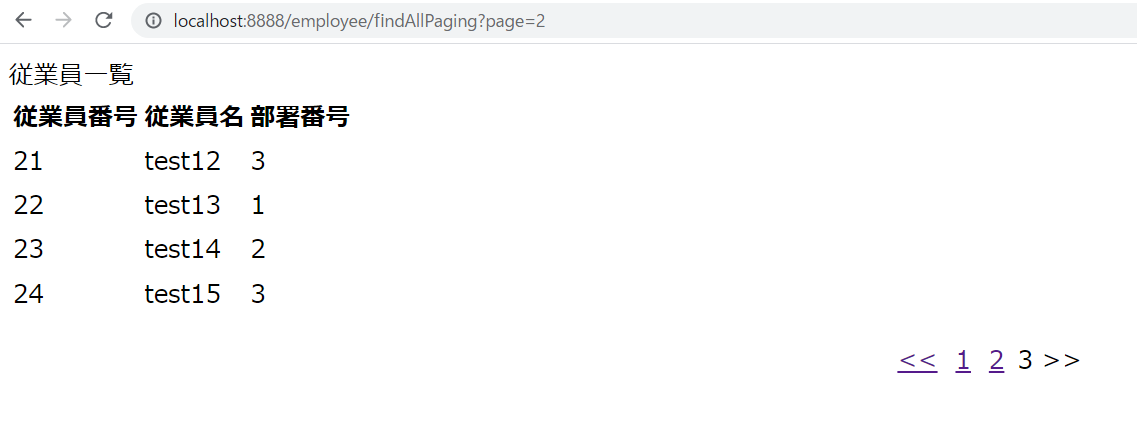
③ページ番号3
ページングを実装する際に必要なこと
- Pageableというページングに必要な情報を管理するインターフェースを利用する
- コントローラーのメソッドにPageableの引数を指定することで利用できる
- Pageableを利用することで、画面ごとに表示件数などを指定できる
- 全てのコントローラーのメソッドでもページングの表示件数を同じにする(10件など)はWebMvcConfigurerインターフェースを実装したクラスを定義する
Configurationクラス
package jp.co.ttt.employee.config;

import java.util.List;

import org.springframework.context.annotation.Configuration;
import org.springframework.data.domain.PageRequest;
import org.springframework.data.web.PageableHandlerMethodArgumentResolver;
import org.springframework.web.method.support.HandlerMethodArgumentResolver;
import org.springframework.web.servlet.config.annotation.WebMvcConfigurer;

// 全てのコントローラーに対して共通処理を行う
@Configuration
public class EmployeeConfig implements WebMvcConfigurer {

	// 設定を補完する情報のことをリゾルバ(resolver)と呼ぶ
	@Override
	public void addArgumentResolvers(List<HandlerMethodArgumentResolver> argumentResolvers) {

		// Pageableに対して設定を行うためのクラスであり、リゾルバ
		PageableHandlerMethodArgumentResolver resolver = new PageableHandlerMethodArgumentResolver();

		// ページ単位に表示する件数を追加(第一引数:ページ番号、第二引数:1ページあたりの表示件数)
		resolver.setFallbackPageable(PageRequest.of(0, 10));

		// 具体的な設定をリゾルバに追加後、リストに追加
		argumentResolvers.add(resolver);
	}
}
ページングを実装するために
- コントローラでページ情報付きの検索を行う
- ビューで検索結果を出力する
Controller
package jp.co.ttt.employee.controller;

import java.util.List;

import org.springframework.beans.factory.annotation.Autowired;
import org.springframework.data.domain.Page;
import org.springframework.data.domain.Pageable;
import org.springframework.stereotype.Controller;
import org.springframework.ui.Model;
import org.springframework.web.bind.annotation.RequestMapping;

import jp.co.ttt.employee.entity.Employee;
import jp.co.ttt.employee.repository.EmployeeRepository;

@Controller
public class EmployeePagingController {

	@Autowired
	EmployeeRepository repository;

	@RequestMapping("/findAllPaging")
	// 引数Pageableの中に「ページ番号」、「1ページあたりの表示件数」などの設定情報が含まれる。
	// ConfigurationクラスでPageable型の引数に関数情報を設定した場合、それらの設定値が含まれる
	// ページ番号「0」と1ページあたりの表示件数「10」
	public String showEmployeePagingList(Model model, Pageable pageable) {

		// 従業員情報を検索(ページ情報つきの検索)
		Page<Employee> pageList = repository.findAll(pageable);

		// 検索結果を保存するためのリストを用意(レコード情報のみを取得)
		// ビューに渡す際、Page型の変数をそのまま渡しても実装可能だが、記載が複雑になるのでレコード情報だけを別にわたすことで可読性があがる。
		List<Employee> employeeList = pageList.getContent();

		// コンソール確認用
		for(Employee employee : employeeList) {
			System.out.println(employee);
		}

		// 従業員情報をリクエストスコープに保存
		model.addAttribute("pages", pageList);
		model.addAttribute("employees", employeeList);

		return "employee/employee_paging_list";
	}
}
ビューの実装
- レコード、ページリンクを出力するためのビューを作成する
- ページリンクはコントローラから渡されたページ情報を基に作成する
HTML
<!DOCTYPE html>
<html xmlns:th="http://www.thymeleaf.org">
<head>
<meta charset="UTF-8">
<title>Insert title here</title>
<link th:href="@{/css/style.css}" rel="stylesheet">
</head>
<body>
<div>従業員一覧</div>
<table>
<tr>
<th>従業員番号</th>
<th>従業員名</th>
<th>部署番号</th>
</tr>
<tr th:each="employee:${employees}">
<td th:text="${employee.id}"></td>
<td th:text="${employee.name}"></td>
<td th:text="${employee.deptNo}"></td>
</tr>
</table>
<!-- ページリンク -->
<ul class="paging">
<li>
<span th:if="${pages.first}"><<</span>
<a th:if="${not pages.first}" th:href="@{${url}(page=0)}"><<</a>
</li>
<!-- 中間のページリンク -->
<li th:each="i:${#numbers.sequence(0, pages.totalPages-1)}">
<span th:if="${i}==${pages.number}" th:text="${i+1}"></span>
<a th:if="${i}!=${pages.number}" th:href="@{${url}(page=${i})}">
<span th:text="${i+1}"></span>
</a>
</li>
<!-- 末尾のページリンク -->
<li>
<span th:if="${pages.last}">>></span>
<a th:if="${not pages.last}" th:href="@{${url}(page=(${pages.totalPages-1}))}">
>>
</a>
</li>
</ul>
</body>
</html>
- pagesはEmployeePagingControllerで作成された情報の変数名
- firstはページ情報が持つフィールド。現在出力されているページが先頭であるか(true or false)
- "@{${url}(page=0)}"はhttp://localhost:8888/employee/findAllPaging?page=0の意味。page=0が1ページ目
- #numbersは数値形式のデータに対する操作を行える。
- #numbersのsequence()メソッドで第一引数から第二引数で指定した数値までの連番を配列形式で作成
- if文では現在出力されているページ番号と配列の要素の値を比較し、同じならリンクは消して数字のみにする(リンクをつけない)
- ページ情報で管理されている番号は0からなので、出力する際は+1する必要あり
画面の装飾
- リンクの>>や<<の位置などを簡易に位置調整
CSS
/** ページリンクのレイアウト **/
.paging {
	text-align: center;
	margin: 15px 0;
	font-size: 1rem;
	list-style-type: none;
}

.paging li {
	display: inline-block;
}

.paging.current, .paging a {
	padding: 0 3px;
}

.paging a {
	display: block;
}
ソースコード
ふりかえり
- ページングの設定もPageableを利用すると簡単に設定することができる