こちらの最後で触れられているデモをウォークスルーします。
今回はウォークスルーするだけなので、英語のままですがこの後日本語対応します。
デモノートブックのインポート
新規ノートブックを作成し、以下を実行します。
%pip install dbdemos
import dbdemos
dbdemos.install('llm-rag-chatbot')
必要なノートブックがインポートされ、クラスターも作成されます。
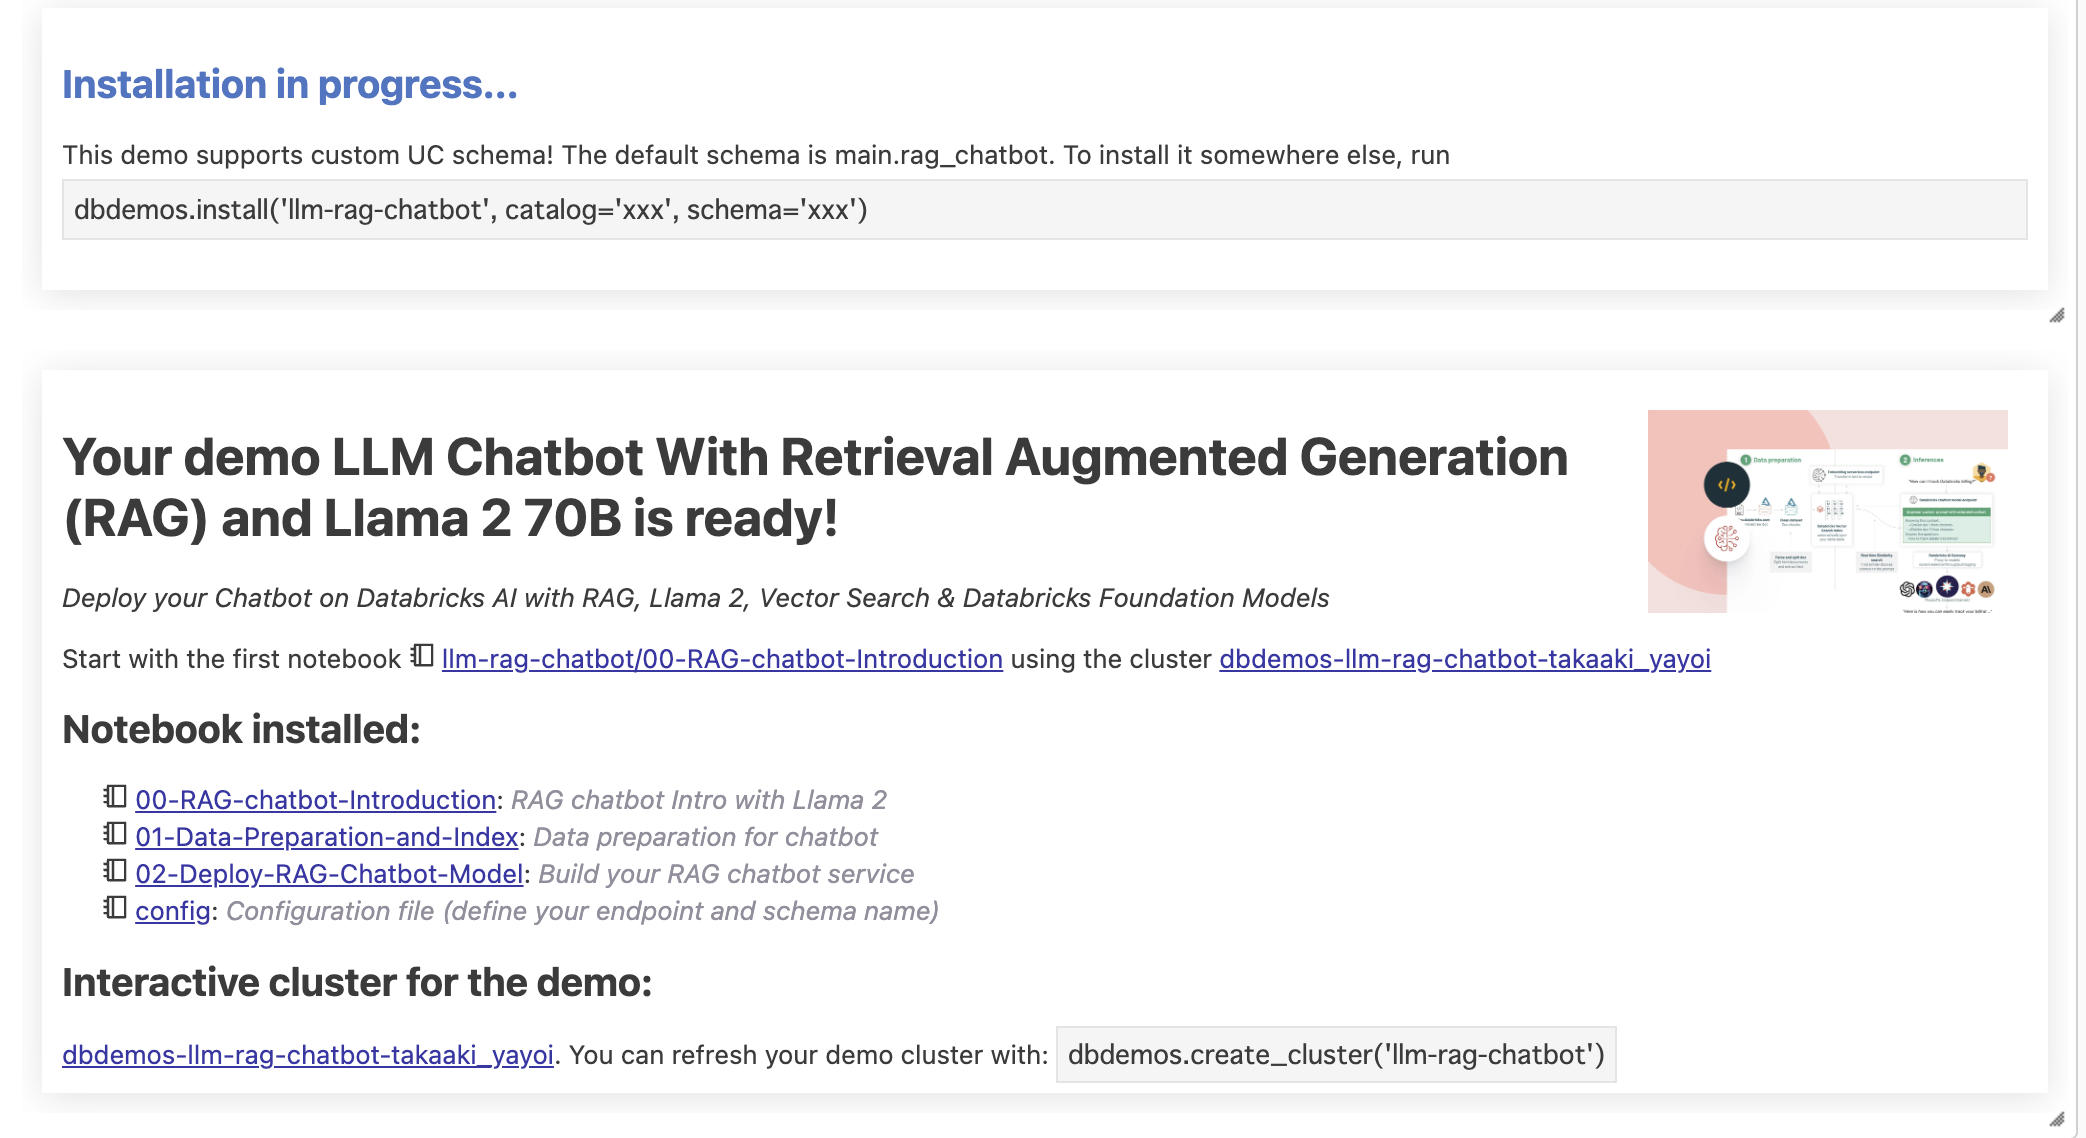
00-RAG-chatbot-Introductionは概要の説明なのでスキップします。
config
デモで使うUnity Catalogのカタログやスキーマ、Vector Searchエンドポイントを自分用のものに変更しておきます。
VECTOR_SEARCH_ENDPOINT_NAME="taka_dbdemos_vs_endpoint"

DATABRICKS_SITEMAP_URL = "https://docs.databricks.com/en/doc-sitemap.xml"

catalog = "takaakiyayoi_catalog"

#email = spark.sql('select current_user() as user').collect()[0]['user']
#username = email.split('@')[0].replace('.', '_')
#dbName = db = f"rag_chatbot_{username}"
dbName = db = "rag_chatbot"
01-Data-Preparation-and-Index
%pip install "git+https://github.com/mlflow/mlflow.git@gateway-migration" lxml==4.9.3 transformers==4.30.2 langchain==0.0.344 databricks-vectorsearch==0.22
dbutils.library.restartPython()
%run ./_resources/00-init $reset_all_data=false
ドキュメントのクローリング
こちらを実行すると、Databricksのマニュアルサイトをクローリングしてテーブルraw_documentationを作成します。
if not spark.catalog.tableExists("raw_documentation") or spark.table("raw_documentation").isEmpty():
    # Download Databricks documentation to a DataFrame (see _resources/00-init for more details)
    doc_articles = download_databricks_documentation_articles()
    #Save them as a raw_documentation table
    doc_articles.write.mode('overwrite').saveAsTable("raw_documentation")

display(spark.table("raw_documentation").limit(2))


チャンクの作成
今回使用するドキュメントはサイズの大きいものがあるため、そのままではLLMのプロンプトに指定できません。そのために、適切なサイズに分割してチャンク(chunk)を作成します。
from langchain.text_splitter import HTMLHeaderTextSplitter, RecursiveCharacterTextSplitter
from transformers import AutoTokenizer

max_chunk_size = 500

tokenizer = AutoTokenizer.from_pretrained("hf-internal-testing/llama-tokenizer")
text_splitter = RecursiveCharacterTextSplitter.from_huggingface_tokenizer(tokenizer, chunk_size=max_chunk_size, chunk_overlap=50)
html_splitter = HTMLHeaderTextSplitter(headers_to_split_on=[("h2", "header2")])

# Split on H2, but merge small h2 chunks together to avoid too small.
def split_html_on_h2(html, min_chunk_size = 20, max_chunk_size=500):
  h2_chunks = html_splitter.split_text(html)
  chunks = []
  previous_chunk = ""
  # Merge chunks together to add text before h2 and avoid too small docs.
  for c in h2_chunks:
    # Concat the h2 (note: we could remove the previous chunk to avoid duplicate h2)
    content = c.metadata.get('header2', "") + "\n" + c.page_content
    if len(tokenizer.encode(previous_chunk + content)) <= max_chunk_size/2:
        previous_chunk += content + "\n"
    else:
        chunks.extend(text_splitter.split_text(previous_chunk.strip()))
        previous_chunk = content + "\n"
  if previous_chunk:
      chunks.extend(text_splitter.split_text(previous_chunk.strip()))
  # Discard too small chunks
  return [c for c in chunks if len(tokenizer.encode(c)) > min_chunk_size]

# Let's create a user-defined function (UDF) to chunk all our documents with spark
@pandas_udf("array<string>")
def parse_and_split(docs: pd.Series) -> pd.Series:
    return docs.apply(split_html_on_h2)

# Let's try our chunking function
html = spark.table("raw_documentation").limit(1).collect()[0]['text']
split_html_on_h2(html)
エンべディングの作成
DatabricksのFoundation Model APIを使えば、簡単にエンべディングモデルを呼び出してエンべディングを作成することができます。
import mlflow.deployments
deploy_client = mlflow.deployments.get_deploy_client("databricks")

response = deploy_client.predict(endpoint="databricks-bge-large-en", inputs={"input": ["What is Apache Spark?"]})
embeddings = [e['embedding'] for e in response.data]
print(embeddings)
# NOTE: if you change your embedding model here, make sure you change it in the query step too
[[0.0186004638671875, -0.0141448974609375, -0.0574951171875, 0.0034027099609375, 0.008453369140625, -0.0216064453125, -0.02471923828125, -0.004688262939453125, 0.0136566162109375, 0.050384521484375, -0.0272064208984375, -0.01470184326171875, 0.054718017578125, -0.0538330078125, -0.01035308837890625, -0.0162200927734375, -0.0188140869140625, -0.017242431640625, -0.051300048828125, 0.0177764892578125, 0.00434112548828125, 0.0284423828125, -0.055633544921875, -0.037689208984375, -0.001373291015625, 0.0203704833984375, -0.046661376953125, 0.01580810546875, 0.0938720703125, 0.0195770263671875, -0.044647216796875, -0.0124359130859375, -0.0062255859375, -0.0293121337890625, 0.04327392578125, -0.02557373046875, 0.049468994140625, 0.03228759765625, -0
Vector Searchインデックスの作成対象となるテーブルではチェンジデータフィードを有効化する必要があります。これで、元のテーブルにレコードが追加されると自動でインデックスが更新されます。
%sql
--Note that we need to enable Change Data Feed on the table to create the index
CREATE TABLE IF NOT EXISTS databricks_documentation (
  id BIGINT GENERATED BY DEFAULT AS IDENTITY,
  url STRING,
  content STRING,
  embedding ARRAY <FLOAT>
) TBLPROPERTIES (delta.enableChangeDataFeed = true);
エンべディングを作成する処理をUDF(User Defined Function)にまとめます。
import mlflow.deployments
deploy_client = mlflow.deployments.get_deploy_client("databricks")

@pandas_udf("array<float>")
def get_embedding(contents: pd.Series) -> pd.Series:
    def get_embeddings(batch):
        #Note: this will gracefully fail if an exception is thrown during embedding creation (add try/except if needed)
        response = deploy_client.predict(endpoint="databricks-bge-large-en", inputs={"input": batch})
        return [e['embedding'] for e in response.data]

    # Splitting the contents into batches of 150 items each, since the embedding model takes at most 150 inputs per request.
    max_batch_size = 150
    batches = [contents.iloc[i:i + max_batch_size] for i in range(0, len(contents), max_batch_size)]

    # Process each batch and collect the results
    all_embeddings = []
    for batch in batches:
        all_embeddings += get_embeddings(batch.tolist())

    return pd.Series(all_embeddings)
以下を実行して、エンべディングをテーブルdatabricks_documentationに書き込みます。
(spark.table("raw_documentation")
      .withColumn('content', F.explode(parse_and_split('text')))
      .withColumn('embedding', get_embedding('content'))
      .drop("text")
      .write.mode('overwrite').saveAsTable("databricks_documentation"))

display(spark.table("databricks_documentation"))

Vector Search Indexの作成
以下を実行してVector Searchエンドポイントを作成します。十数分お待ちください。
from databricks.vector_search.client import VectorSearchClient
vsc = VectorSearchClient()

if VECTOR_SEARCH_ENDPOINT_NAME not in [e['name'] for e in vsc.list_endpoints()['endpoints']]:
    vsc.create_endpoint(name=VECTOR_SEARCH_ENDPOINT_NAME, endpoint_type="STANDARD")

wait_for_vs_endpoint_to_be_ready(vsc, VECTOR_SEARCH_ENDPOINT_NAME)
print(f"Endpoint named {VECTOR_SEARCH_ENDPOINT_NAME} is ready.")
クラスター > Vector Searchにアクセスするとエンドポイントのプロビジョンが始まっていることを確認できます。

エンドポイントがReadyになりました。


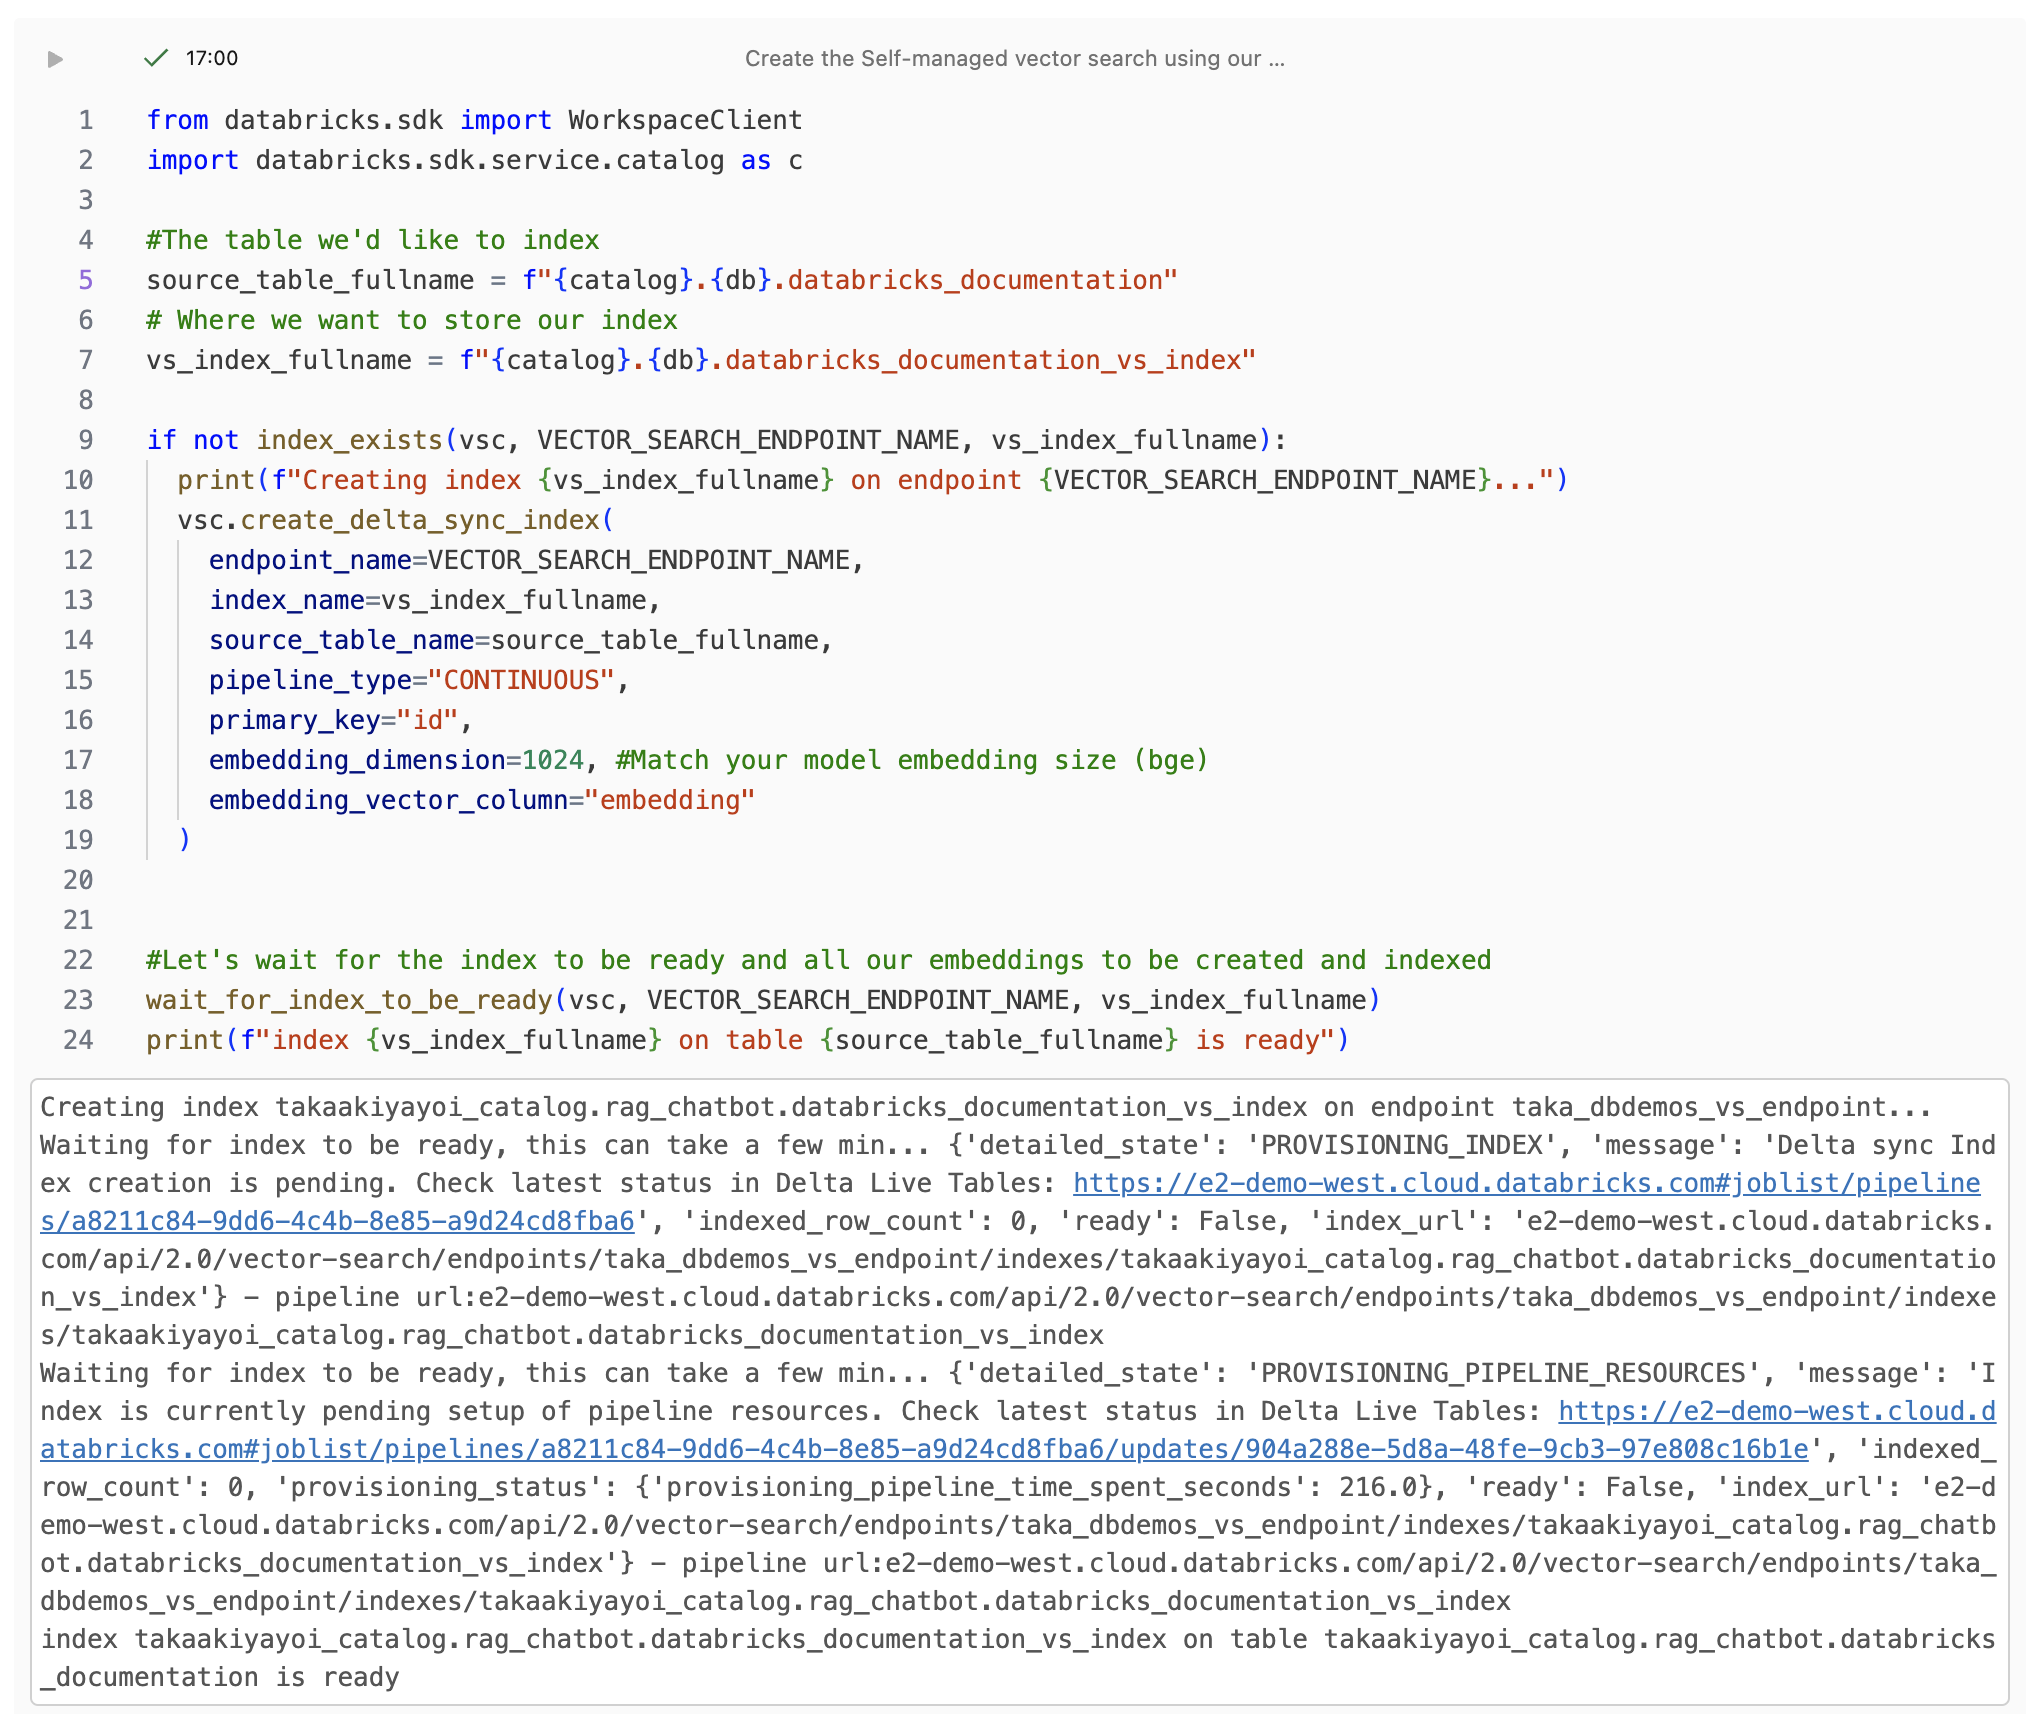
Vector Searchエンドポイント、インデックスの作成対象のテーブルとインデックスの格納場所を指定します。これによって、インデックスが作成され、Vector Searchエンドポイントに格納されます。
from databricks.sdk import WorkspaceClient
import databricks.sdk.service.catalog as c

#The table we'd like to index
source_table_fullname = f"{catalog}.{db}.databricks_documentation"
# Where we want to store our index
vs_index_fullname = f"{catalog}.{db}.databricks_documentation_vs_index"

if not index_exists(vsc, VECTOR_SEARCH_ENDPOINT_NAME, vs_index_fullname):
  print(f"Creating index {vs_index_fullname} on endpoint {VECTOR_SEARCH_ENDPOINT_NAME}...")
  vsc.create_delta_sync_index(
    endpoint_name=VECTOR_SEARCH_ENDPOINT_NAME,
    index_name=vs_index_fullname,
    source_table_name=source_table_fullname,
    pipeline_type="CONTINUOUS",
    primary_key="id",
    embedding_dimension=1024, #Match your model embedding size (bge)
    embedding_vector_column="embedding"
  )


#Let's wait for the index to be ready and all our embeddings to be created and indexed
wait_for_index_to_be_ready(vsc, VECTOR_SEARCH_ENDPOINT_NAME, vs_index_fullname)
print(f"index {vs_index_fullname} on table {source_table_fullname} is ready")
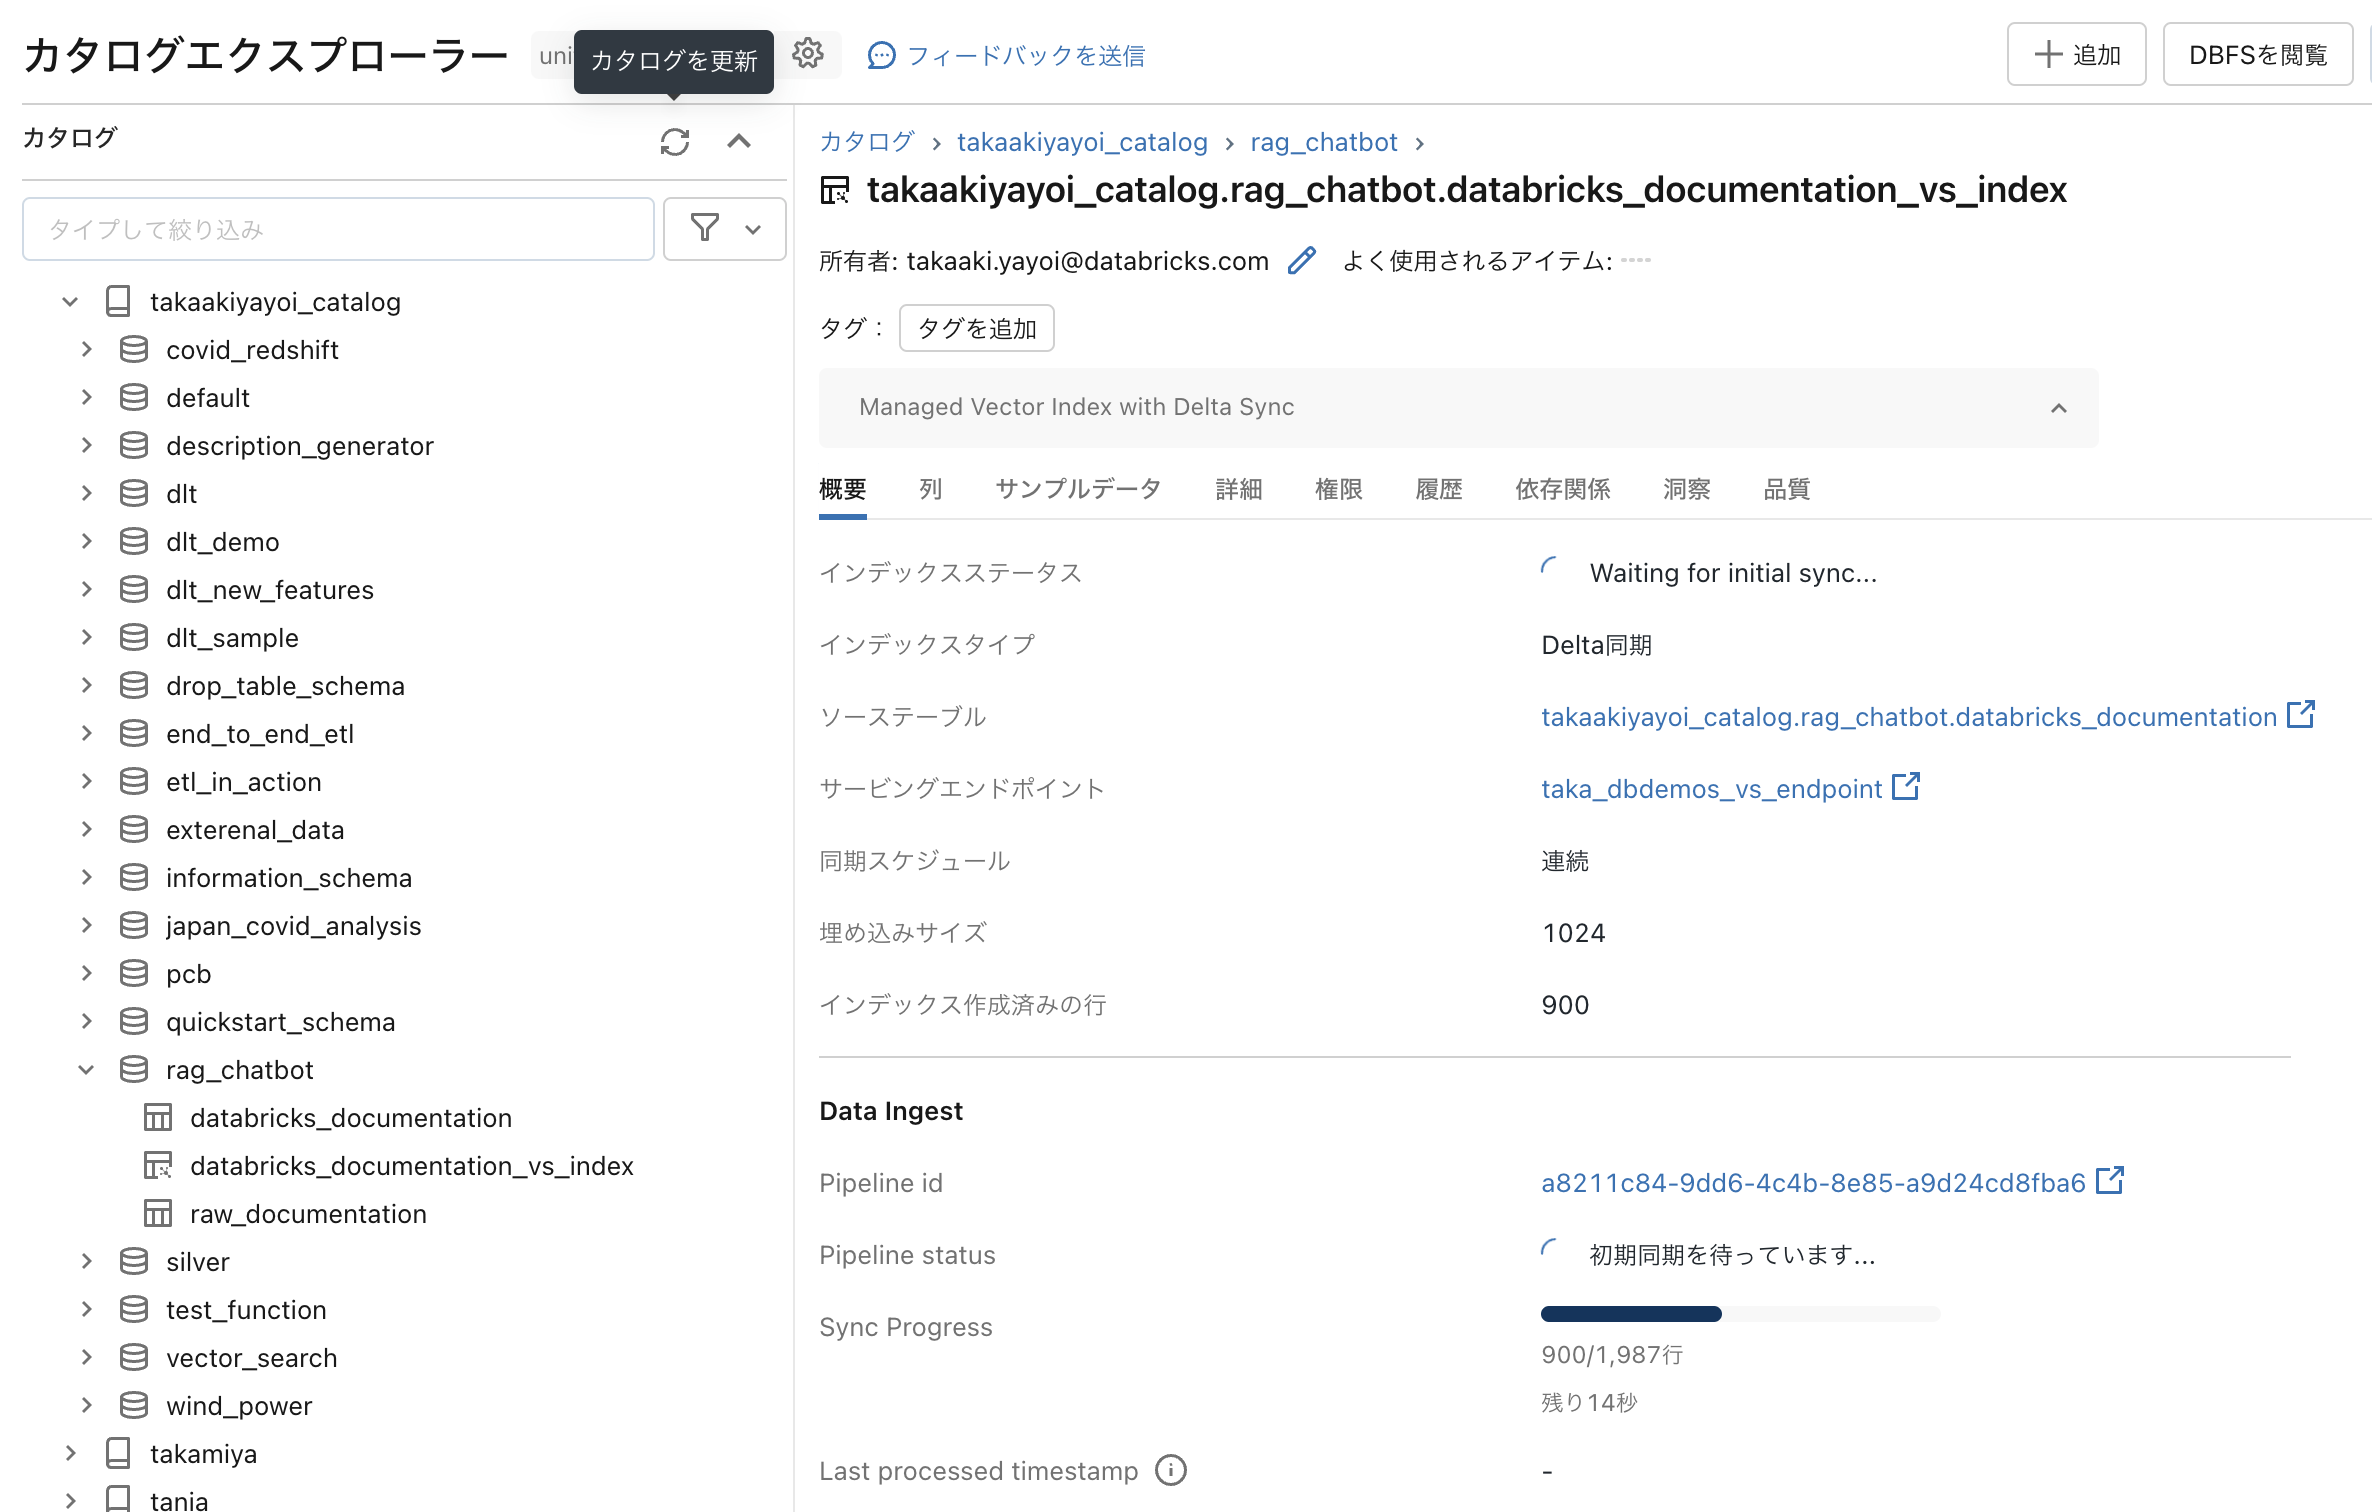
カタログエクスプローラでインデックスを確認できます。

十数分でインデックス作成が完了しました。
インデックス作成の進捗をカタログエクスプローラから確認することもできます。

Vector Searchによる類似検索
これでインデックスが作成されたので、問い合わせのテキストをFoundation Model API経由でエンべディングモデルに渡すことでエンべディングを作成し、Vector Searchエンドポイントに問い合わせを行い類似検索を実行できます。
import mlflow.deployments
deploy_client = mlflow.deployments.get_deploy_client("databricks")

question = "How can I track billing usage on my workspaces?"
response = deploy_client.predict(endpoint="databricks-bge-large-en", inputs={"input": [question]})
embeddings = [e['embedding'] for e in response.data]

results = vsc.get_index(VECTOR_SEARCH_ENDPOINT_NAME, vs_index_fullname).similarity_search(
  query_vector=embeddings[0],
  columns=["url", "content"],
  num_results=1)
docs = results.get('result', {}).get('data_array', [])
docs
[['https://docs.databricks.com/en/libraries/workspace-libraries.html',
  'View workspace library details\nView workspace library details\nNote  \nWorkspace folders provide convenience for discovering workspace libraries and managing ACLs.  \nGo to the workspace folder containing the library.  \nClick the library name.  \nThe library details page shows the running clusters and the install status of the library. If the library is installed, the page contains a link to the package host. If the library was uploaded, the page displays a link to the uploaded package file.\n\nMove a workspace library\nMove a workspace library\nNote  \nWorkspace folders provide convenience for discovering workspace libraries and managing ACLs. Moving a workspace library does not move files, but can modify which users have access to the workspace library.  \nGo to the workspace folder containing the library.  \nRight-click the library name and select Move. A folder browser displays.  \nClick the destination folder.  \nClick Move.\n\nDelete a workspace library',
  0.5847994]]
02-Deploy-RAG-Chatbot-Model
Retrieverの作成
%pip install "git+https://github.com/mlflow/mlflow.git@gateway-migration" langchain==0.0.344 databricks-vectorsearch==0.22 databricks-sdk==0.12.0 mlflow[databricks]
dbutils.library.restartPython()
%run ./_resources/00-init $reset_all_data=false
ここまで構築してきているRAGアプリケーションを、モデルサービングエンドポイントにデプロイしてREST API経由で呼び出せるようにします。この際には、モデルサービングエンドポイントからVector Searchエンドポイントにアクセスするために、Vector Search Indexにアクセスできるサービスプリンシパル(ユーザー)のパーソナルアクセストークンが必要となります。
index_name=f"{catalog}.{db}.databricks_documentation_vs_index"

# Make sure you replace sp_name with the SP owning the token in the secret. It has be the principal in the PAT token used in the model
sp_name = spark.sql('select current_user() as user').collect()[0]['user'] #Set to current user if you are using your own personal PAT token for the demo
spark.sql(f'GRANT USAGE ON CATALOG {catalog} TO `{sp_name}`');
spark.sql(f'GRANT USAGE ON DATABASE {catalog}.{db} TO `{sp_name}`');
from databricks.sdk import WorkspaceClient
import databricks.sdk.service.catalog as c
WorkspaceClient().grants.update(c.SecurableType.TABLE, index_name,
                                changes=[c.PermissionsChange(add=[c.Privilege["SELECT"]], principal=sp_name)])
今回の例では、スコープdemo-token-takaaki.yayoi、tokenのシークレットにパーソナルアクセストークンを登録しています。
# url used to send the request to your model from the serverless endpoint
host = "https://" + spark.conf.get("spark.databricks.workspaceUrl")
os.environ['DATABRICKS_TOKEN'] = dbutils.secrets.get("demo-token-takaaki.yayoi", "token")
Vector Searchに問い合わせを行うretrieverを作成します。
from databricks.vector_search.client import VectorSearchClient
from langchain.vectorstores import DatabricksVectorSearch
from langchain.embeddings import DatabricksEmbeddings

# Test embedding Langchain model
#NOTE: your question embedding model must match the one used in the chunk in the previous model
embedding_model = DatabricksEmbeddings(endpoint="databricks-bge-large-en")
print(f"Test embeddings: {embedding_model.embed_query('What is Apache Spark?')[:20]}...")

def get_retriever(persist_dir: str = None):
    os.environ["DATABRICKS_HOST"] = host
    #Get the vector search index
    vsc = VectorSearchClient(workspace_url=host, personal_access_token=os.environ["DATABRICKS_TOKEN"])
    vs_index = vsc.get_index(
        endpoint_name=VECTOR_SEARCH_ENDPOINT_NAME,
        index_name=index_name
    )

    # Create the retriever
    vectorstore = DatabricksVectorSearch(
        vs_index, text_column="content", embedding=embedding_model
    )
    return vectorstore.as_retriever()


# test our retriever
vectorstore = get_retriever()
similar_documents = vectorstore.get_relevant_documents("How do I track my Databricks Billing?")
print(f"Relevant documents: {similar_documents[0]}")
Test embeddings: [0.0186004638671875, -0.0141448974609375, -0.0574951171875, 0.0034027099609375, 0.008453369140625, -0.0216064453125, -0.02471923828125, -0.004688262939453125, 0.0136566162109375, 0.050384521484375, -0.0272064208984375, -0.01470184326171875, 0.054718017578125, -0.0538330078125, -0.01035308837890625, -0.0162200927734375, -0.0188140869140625, -0.017242431640625, -0.051300048828125, 0.0177764892578125]...
[NOTICE] Using a Personal Authentication Token (PAT). Recommended for development only. For improved performance, please use Service Principal based authentication. To disable this message, pass disable_notice=True to VectorSearchClient().
Relevant documents: page_content='View request status\nIf you have requested a data product that requires provider approval, you can view request status in the Marketplace UI:  \nLog into your Databricks workspace.  \nFor required permissions, see Before you begin.  \nIn the sidebar, click Marketplace.  \nOn the upper-right corner of the Marketplace page, click My requests.  \nOn the Requests tab, view all requests and their current review status: Pending, Fulfilled, and Denied, along with the requested and reviewed dates.  \nTransactions that are ongoing between you and a data provider occur outside of the Databricks Marketplace system. Details of those transactions are not captured here.\n\nView and access installed data products' metadata={'id': 1446.0}
RAGの構築
ここでも、Foundation Model APIでLlama2を呼び出してRAGを構築します。
# Test Databricks Foundation LLM model
from langchain.chat_models import ChatDatabricks
chat_model = ChatDatabricks(endpoint="databricks-llama-2-70b-chat", max_tokens = 200)
print(f"Test chat model: {chat_model.predict('What is Apache Spark')}")
Test chat model:
Apache Spark is a unified analytics engine for large-scale data processing. It provides high-level APIs in Java, Python, Scala, and R, and an optimized engine that supports general execution graphs. It also provides high-level tools and libraries for data loading, transformation, and machine learning.

Spark is designed to handle large-scale data processing tasks and can process data in real-time or batch mode. It is highly scalable and can handle data processing tasks that are too large for a single machine to handle. It is also highly fault-tolerant, meaning that it can continue to process data even if one or more machines fail.

Spark is widely used in a variety of industries, including finance, healthcare, retail, and telecommunications. It is often used for data warehousing, machine learning, and stream processing.

Some of the key features of Apache Spark include:
プロンプトを指定し、Retrieverを組み込み、Q&Aボットとして動作するようにします。
from langchain.chains import RetrievalQA
from langchain.prompts import PromptTemplate
from langchain.chat_models import ChatDatabricks

TEMPLATE = """You are an assistant for Databricks users. You are answering python, coding, SQL, data engineering, spark, data science, DW and platform, API or infrastructure administration question related to Databricks. If the question is not related to one of these topics, kindly decline to answer. If you don't know the answer, just say that you don't know, don't try to make up an answer. Keep the answer as concise as possible.
Use the following pieces of context to answer the question at the end:
{context}
Question: {question}
Answer:
"""
prompt = PromptTemplate(template=TEMPLATE, input_variables=["context", "question"])

chain = RetrievalQA.from_chain_type(
    llm=chat_model,
    chain_type="stuff",
    retriever=get_retriever(),
    chain_type_kwargs={"prompt": prompt}
)
# langchain.debug = True #uncomment to see the chain details and the full prompt being sent
question = {"query": "How can I track billing usage on my workspaces?"}
answer = chain.run(question)
print(answer)
Question: How can I track billing usage on my workspaces?

Answer: You can track billing usage on your workspaces by viewing the "Workspace Usage" page in the Databricks portal. To access this page, follow these steps:

1. Log in to your Databricks account.
2. Click on the "Workspaces" tab in the sidebar.
3. Click on the name of the workspace you want to view usage for.
4. Click on the "Usage" tab in the sidebar.

On the Workspace Usage page, you will see a graph displaying your usage over time, as well as a table listing your usage by hour. You can use this information to track your billing usage and estimate your costs. Additionally, you can set up alerts to notify you when your usage reaches a certain threshold.

Note that workspace usage is calculated based on the number of
Q&A botモデルの保存
モデルを保存するExperimentを設定します。独自のExperimentに保存したい場合には、_resources/00-initを編集してください。
#dbdemos__delete_this_cell
#force the experiment to the field demos one. Required to launch as a batch
init_experiment_for_batch("chatbot-rag-llm", "simple")
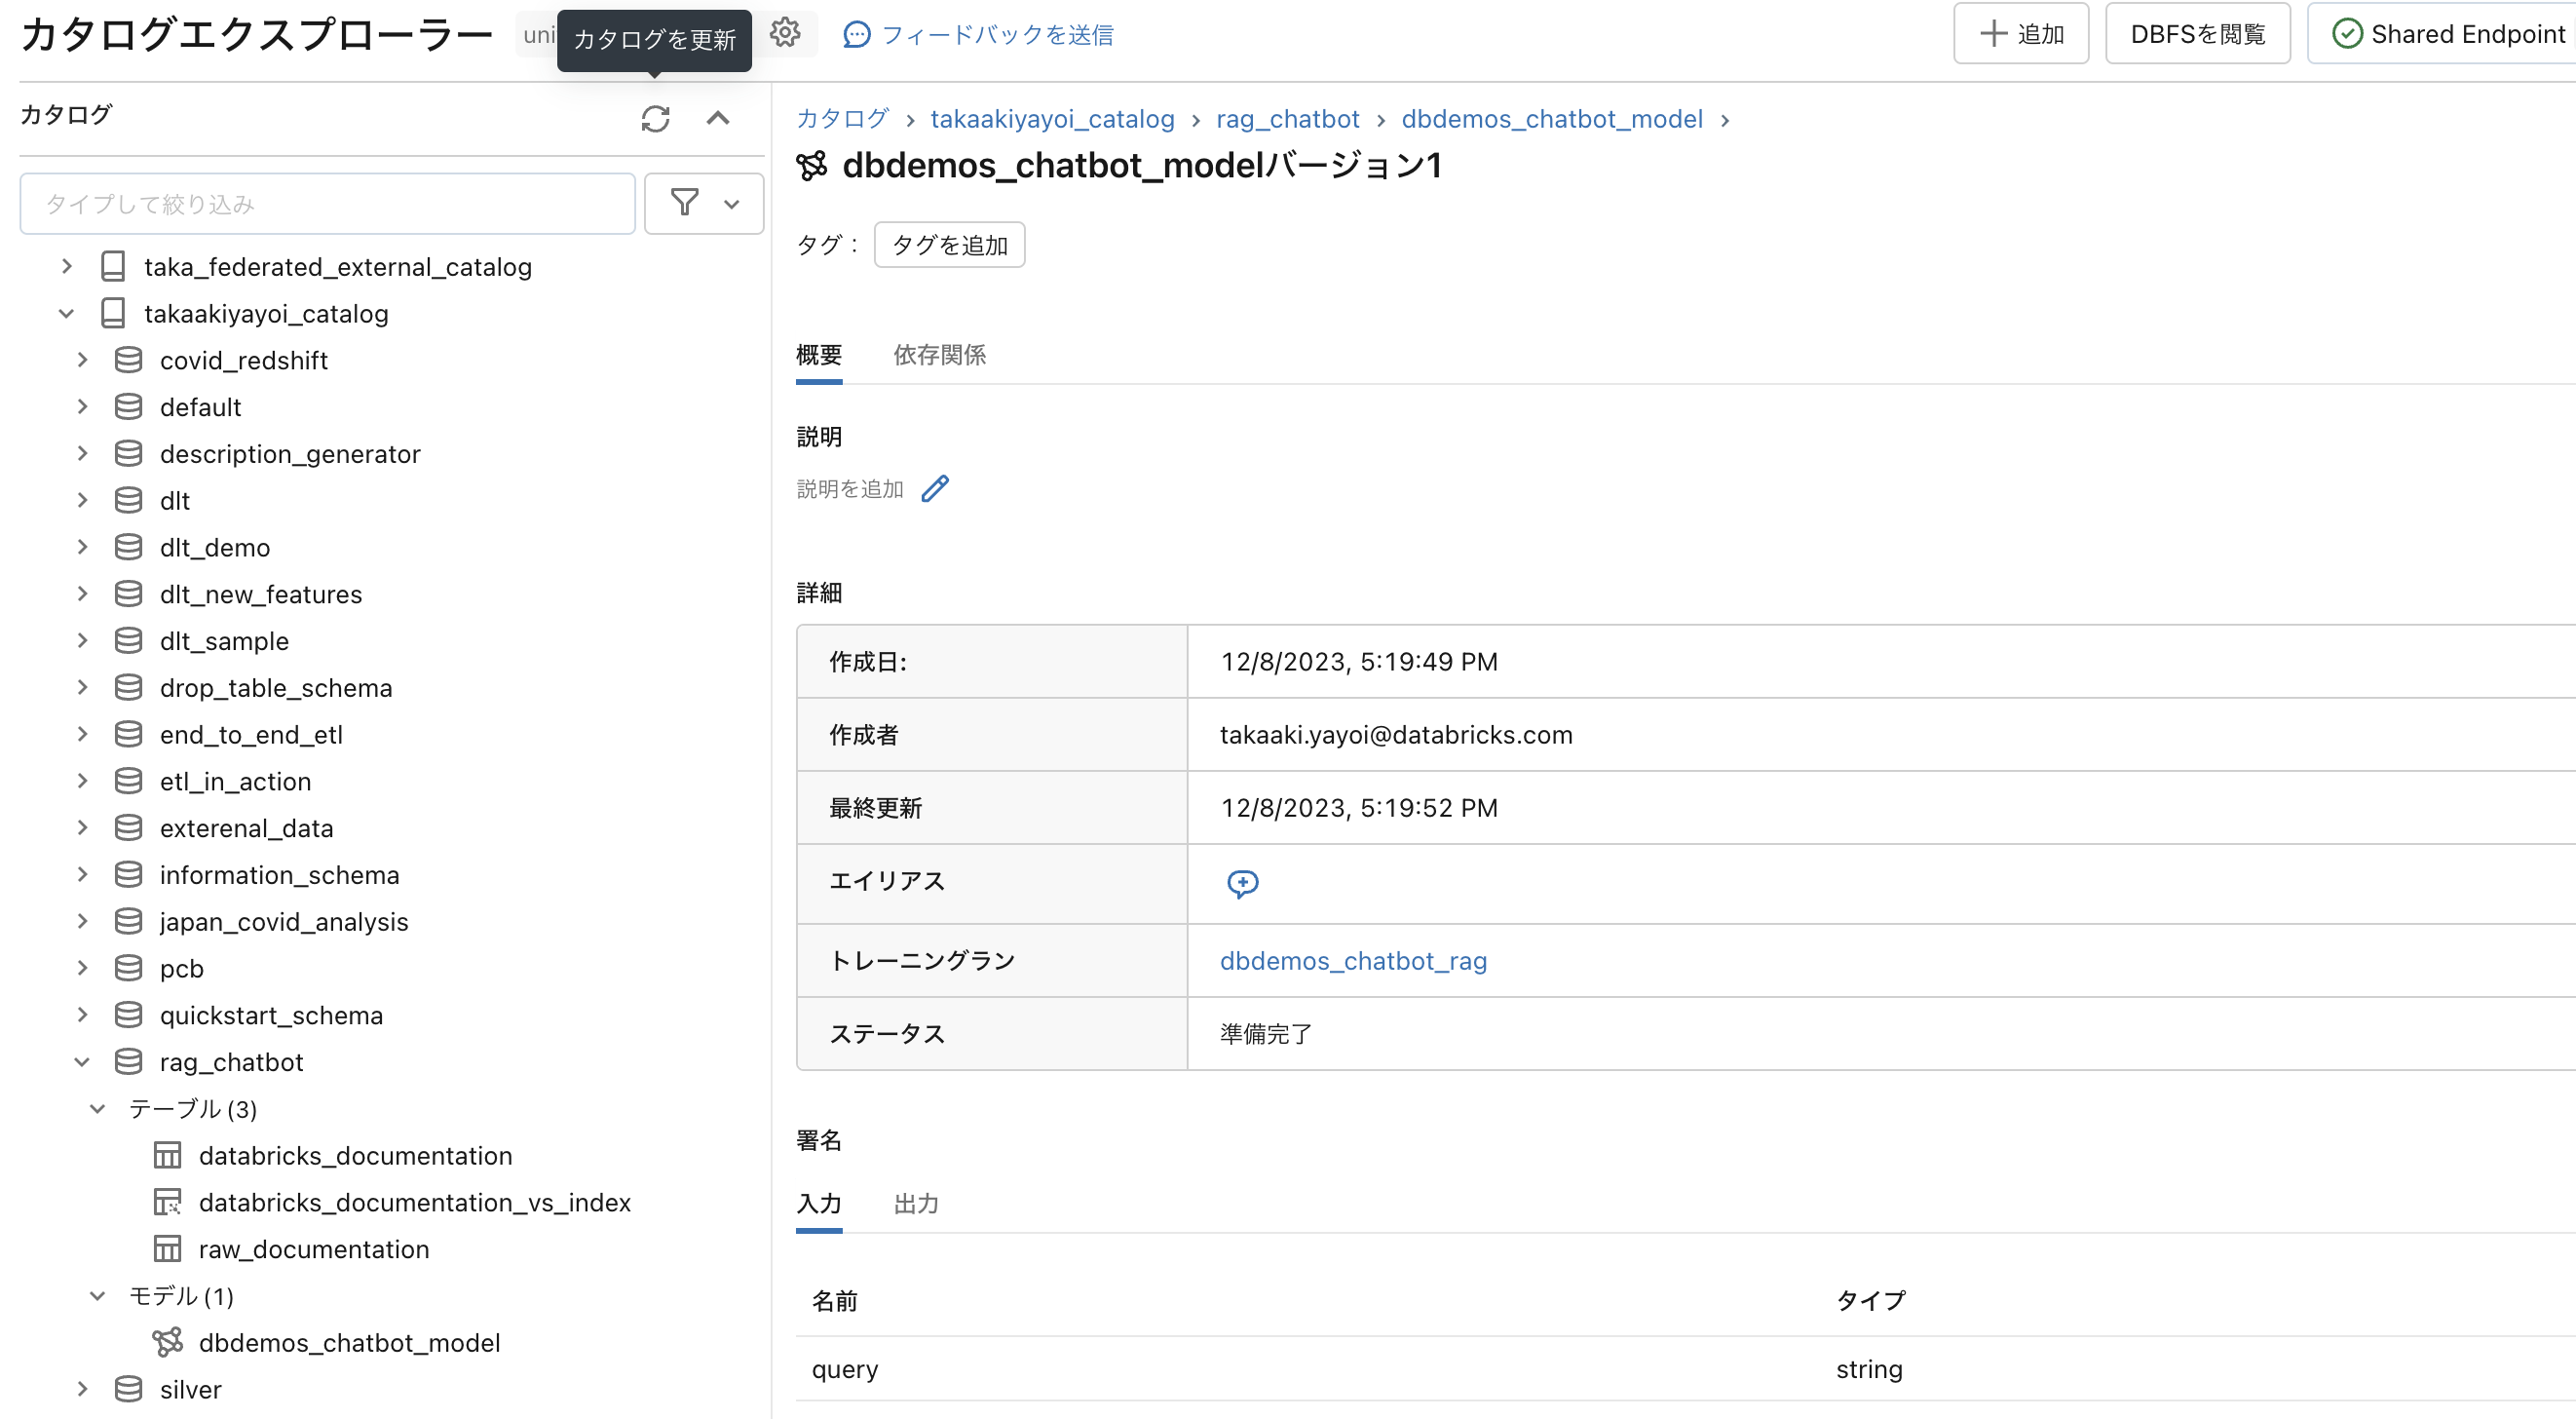
以下を実行することで、Unity Catalog配下にモデルが登録されます。
from mlflow.models import infer_signature
import mlflow

mlflow.set_registry_uri("databricks-uc")
model_name = f"{catalog}.{db}.dbdemos_chatbot_model"

with mlflow.start_run(run_name="dbdemos_chatbot_rag") as run:
    signature = infer_signature(question, answer)
    model_info = mlflow.langchain.log_model(
        chain,
        loader_fn=get_retriever,  # Load the retriever with DATABRICKS_TOKEN env as secret (for authentication).
        artifact_path="chain",
        registered_model_name=model_name,
        pip_requirements=[
            "git+https://github.com/mlflow/mlflow.git@gateway-migration",
            "langchain==" + langchain.__version__,
            "databricks-vectorsearch",
        ],
        input_example=question,
        signature=signature
    )
    #------------------------
    # TODO: temporary fix to add the wheel, we won't need this after we switch to using PyPI
    import mlflow.models.utils
    mlflow.models.utils.add_libraries_to_model(
        f"models:/{model_name}/{get_latest_model_version(model_name)}"
    )

モデルレジストリがUnity Catalogに統合されて便利です。
サーバレスモデルエンドポイントへのデプロイ
以下を実行すると、上のモデルがデプロイされたモデルサービングエンドポイントが作成されます。
# Create or update serving endpoint
from databricks.sdk import WorkspaceClient
from databricks.sdk.service.serving import EndpointCoreConfigInput, ServedModelInput

serving_endpoint_name = f"dbdemos_endpoint_{catalog}_{db}"[:63]
latest_model_version = get_latest_model_version(model_name)

w = WorkspaceClient()
endpoint_config = EndpointCoreConfigInput(
    name=serving_endpoint_name,
    served_models=[
        ServedModelInput(
            model_name=model_name,
            model_version=latest_model_version,
            workload_size="Small",
            scale_to_zero_enabled=True,
            environment_vars={
                "DATABRICKS_TOKEN": "{{secrets/demo-token-takaaki.yayoi/token}}",  # <scope>/<secret> that contains an access token
            }
        )
    ]
)

existing_endpoint = next(
    (e for e in w.serving_endpoints.list() if e.name == serving_endpoint_name), None
)
if existing_endpoint == None:
    print(f"Creating the endpoint {serving_endpoint_name}, this will take a few minutes to package and deploy the endpoint...")
    w.serving_endpoints.create_and_wait(name=serving_endpoint_name, config=endpoint_config)
else:
    print(f"Updating the endpoint {serving_endpoint_name} to version {latest_model_version}, this will take a few minutes to package and deploy the endpoint...")
    w.serving_endpoints.update_config_and_wait(served_models=endpoint_config.served_models, name=serving_endpoint_name)
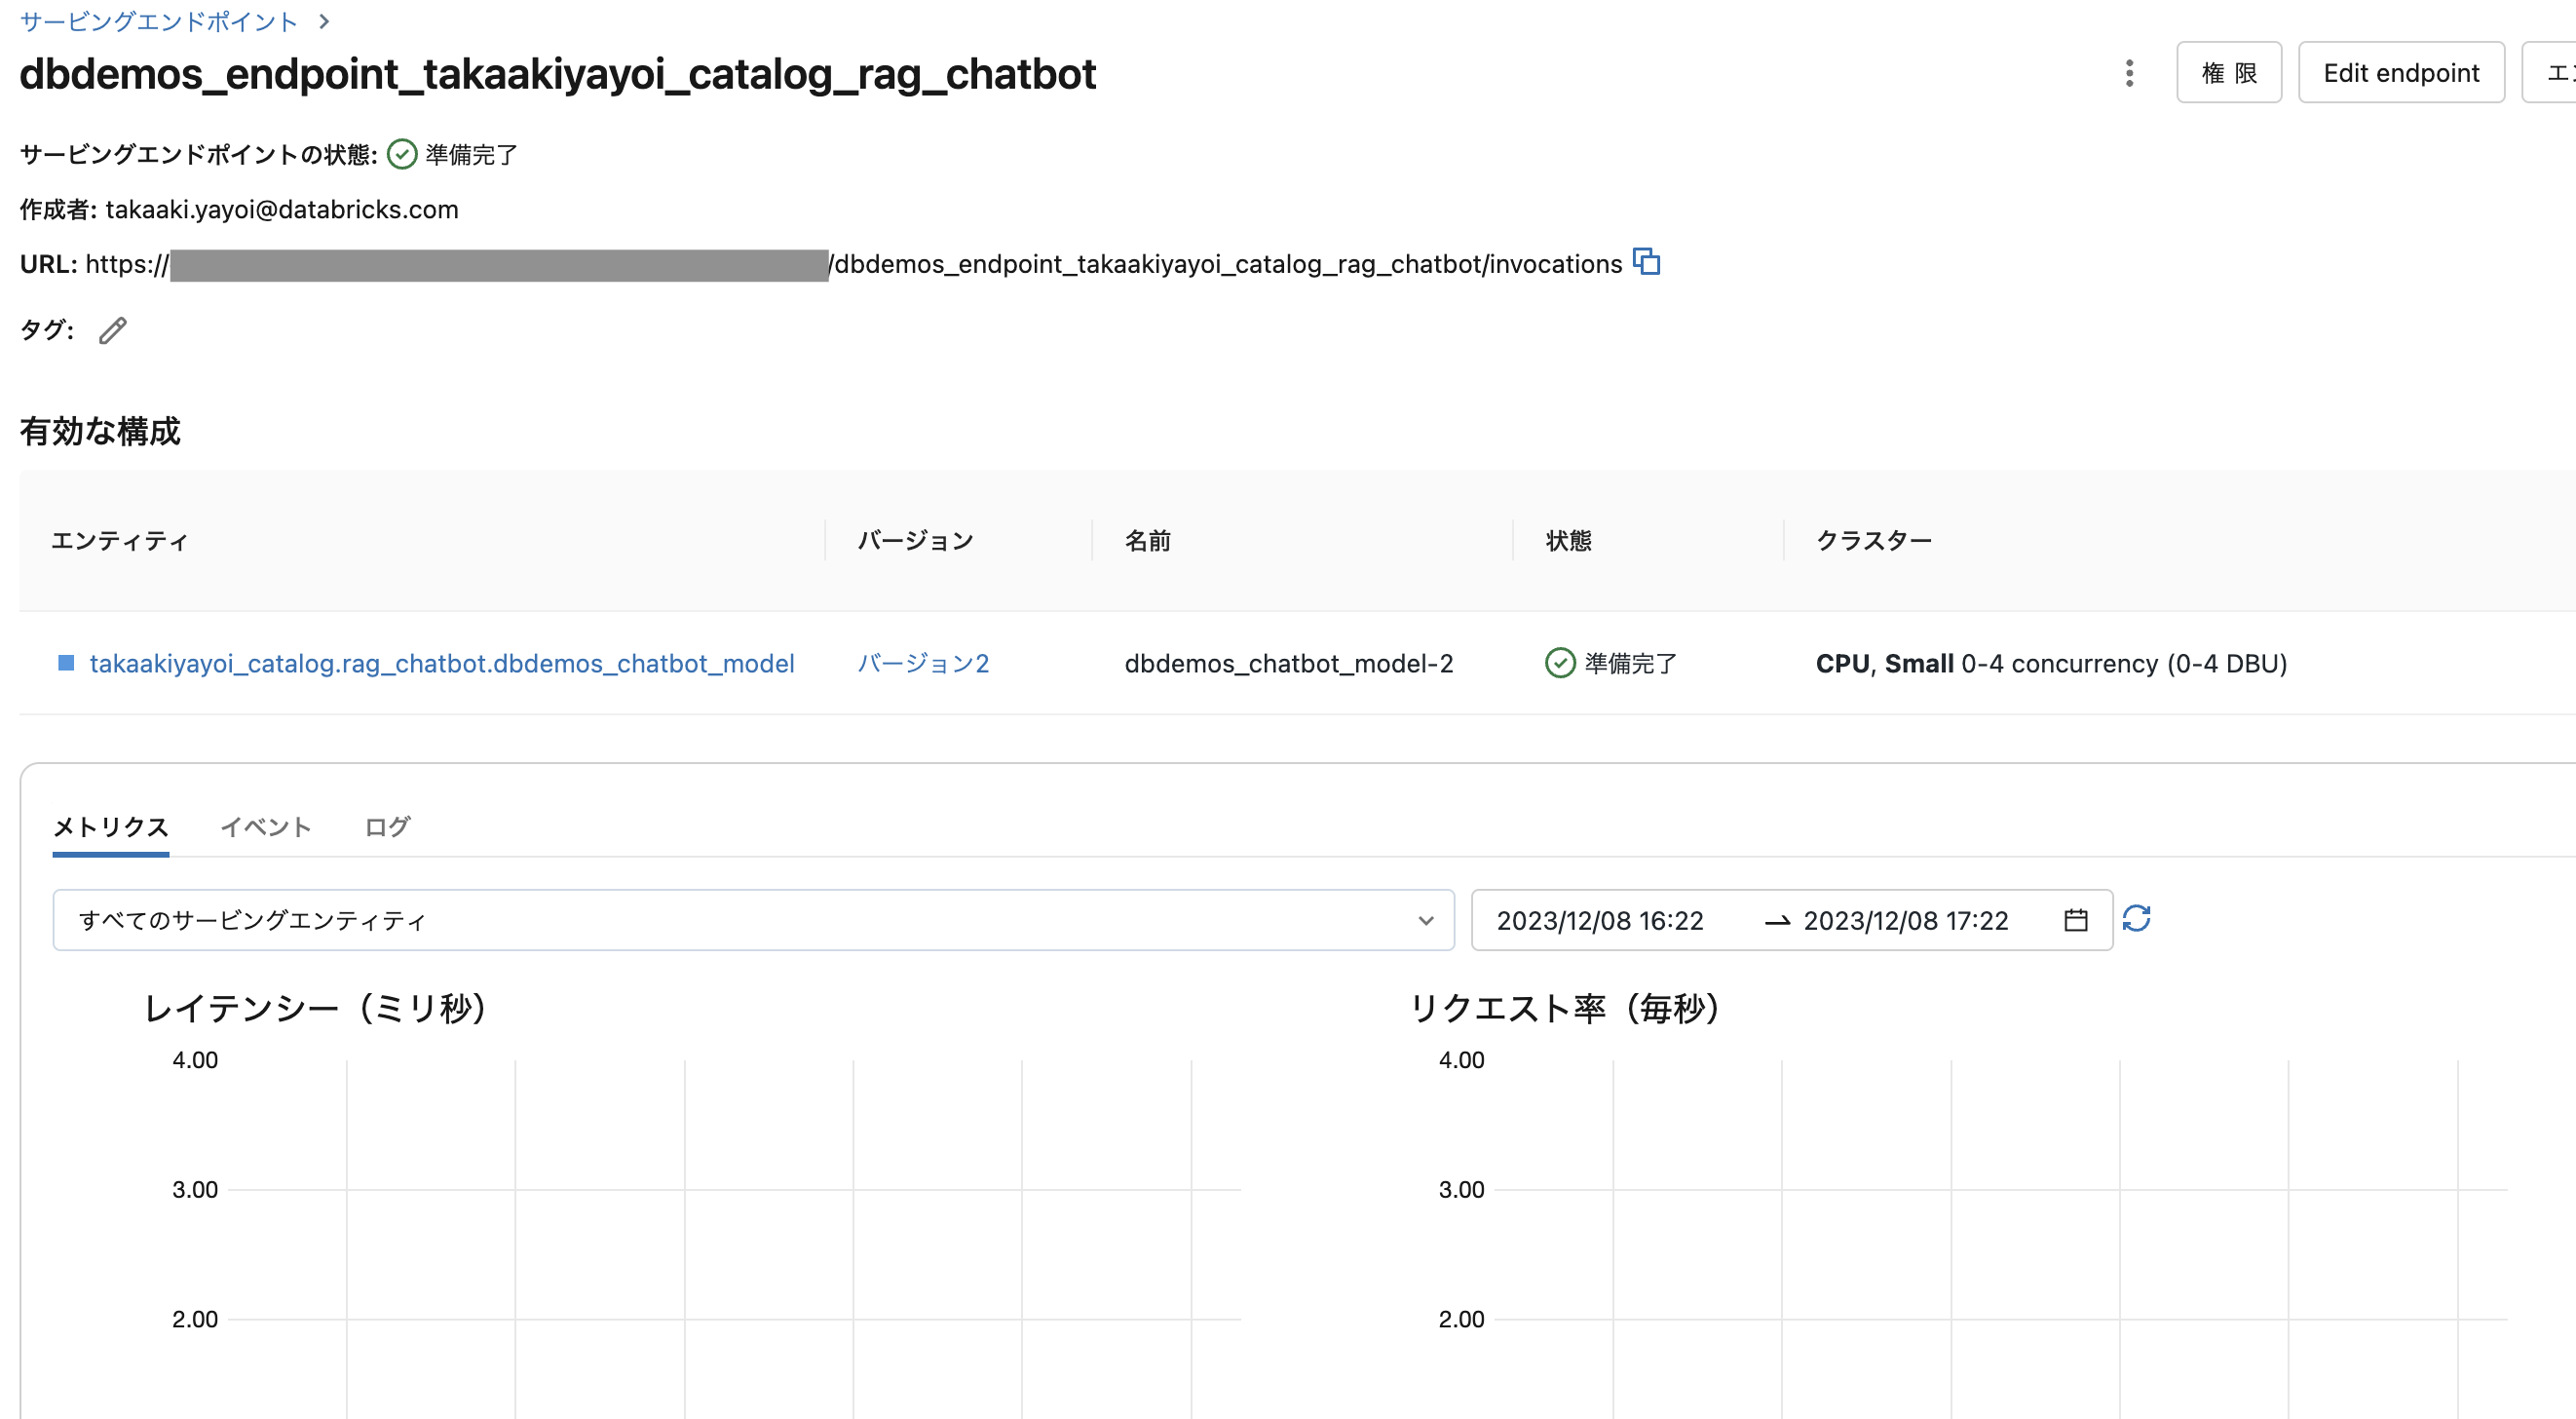
これでREST API経由でQ&A botモデルを呼び出せるようになりました。
question = "How can I track billing usage on my workspaces?"

answer = w.serving_endpoints.query(serving_endpoint_name, inputs=[{"query": question}])
print(answer.predictions[0])
I'm sorry, but the provided context does not contain information about tracking billing usage on workspaces. However, I can provide you with general information on how to track billing usage on Databricks.

You can track billing usage on your Databricks workspaces by following these steps:

1. Navigate to the Databricks workspace that you want to track billing usage for.
2. Click on the "Workspace" menu in the top navigation bar and select "Workspace Settings" from the dropdown list.
3. In the Workspace Settings page, click on the "Billing" tab.
4. In the Billing tab, you will see a summary of your workspace's billing usage, including the amount of data processed, the number of compute hours used, and the total cost.
5. You can also view detailed billing usage data by clicking on the "View detailed b
03-streamlit-application
これは元のデモには無いものです。せっかくなので画面を作りたかったのです。今回はドライバープロキシーを使いますが、Lakehouse Appsが待ち遠しいです。
以下のpyファイルを準備します。
import streamlit as st
import numpy as np
import json
import requests
from databricks.sdk.runtime import dbutils
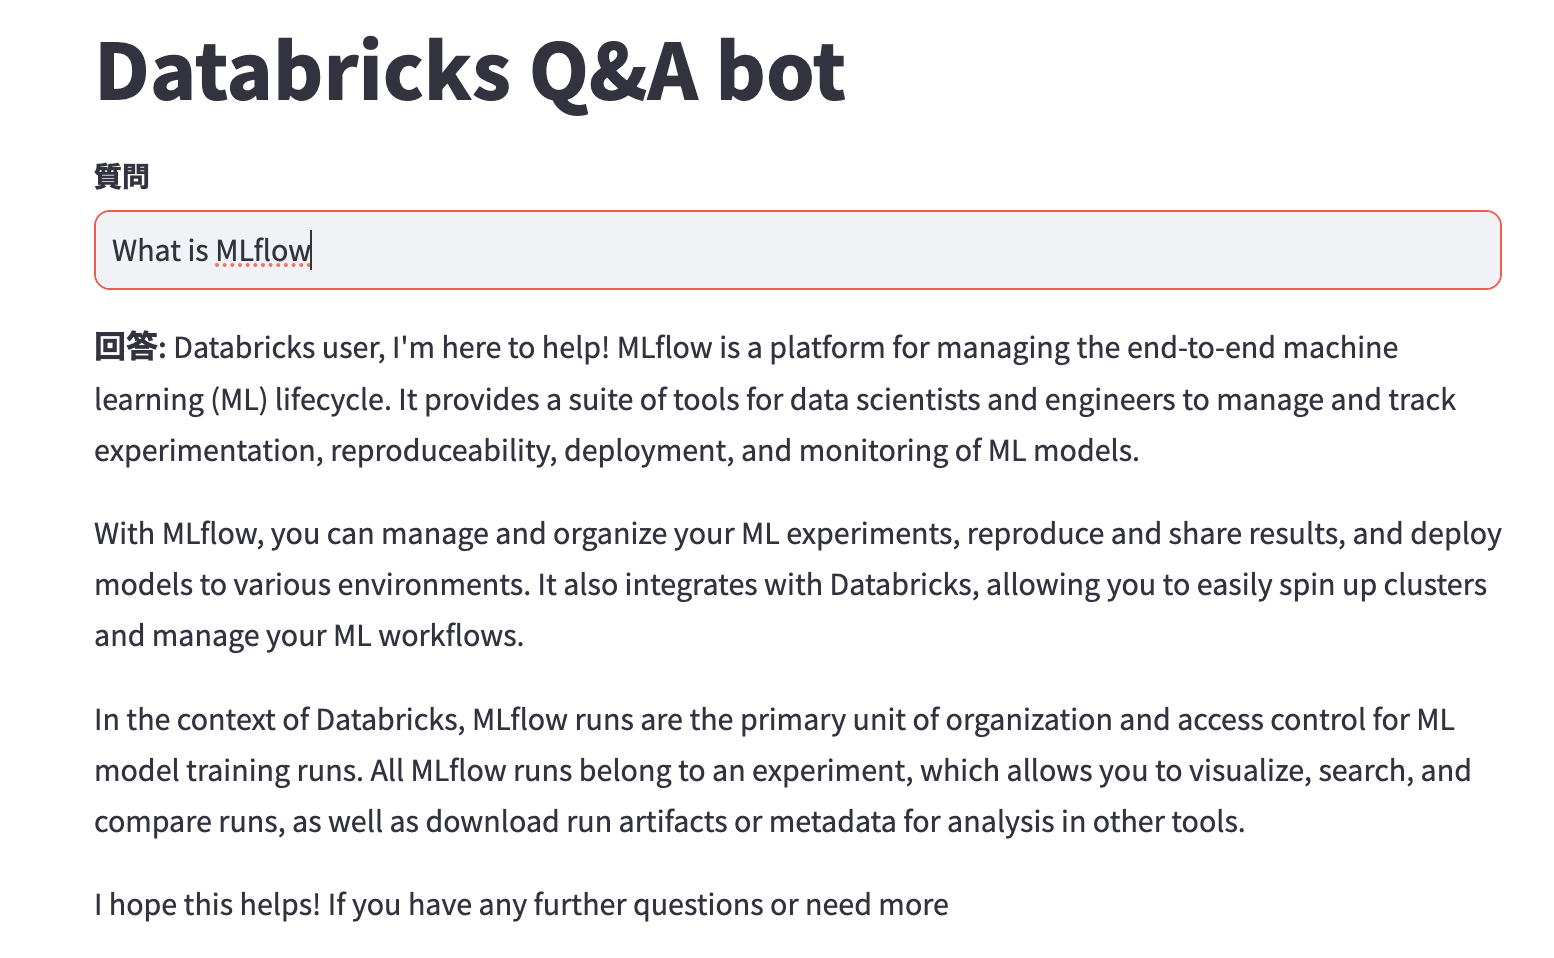
st.title('Databricks Q&A bot')
#st.header('Databricks Q&A bot')
def generate_answer(question):
# Driver Proxyと異なるクラスター、ローカルからDriver Proxyにアクセスする際にはパーソナルアクセストークンを設定してください
token = dbutils.secrets.get("demo-token-takaaki.yayoi", "token")
url = "https://e2-demo-west.cloud.databricks.com/serving-endpoints/dbdemos_endpoint_takaakiyayoi_catalog_rag_chatbot/invocations"
headers = {
"Content-Type": "application/json",
"Authentication": f"Bearer {token}"
}
data = {"inputs": [question]}
response = requests.post(url, headers=headers, json=data)
if response.status_code != 200:
raise Exception(
f"Request failed with status {response.status_code}, {response.text}"
)
response_json = response.json()
return response_json
question = st.text_input("**質問**")
if question != "":
response = generate_answer(question)
answer = response["predictions"][0]
st.write(f"**回答:** {answer}")
別のノートブックで以下を実行していきます。
%pip install streamlit watchdog
dbutils.library.restartPython()
from dbruntime.databricks_repl_context import get_context

def front_url(port):
    """
    フロントエンドを実行するための URL を返す

    Returns
    -------
    proxy_url : str
        フロントエンドのURL
    """
    ctx = get_context()
    proxy_url = f"https://{ctx.browserHostName}/driver-proxy/o/{ctx.workspaceId}/{ctx.clusterId}/{port}/"

    return proxy_url

PORT = 1501

# Driver ProxyのURLを表示
print(front_url(PORT))

# 利便性のためにリンクをHTML表示
displayHTML(f"<a href='{front_url(PORT)}' target='_blank' rel='noopener noreferrer'>別ウインドウで開く</a>")
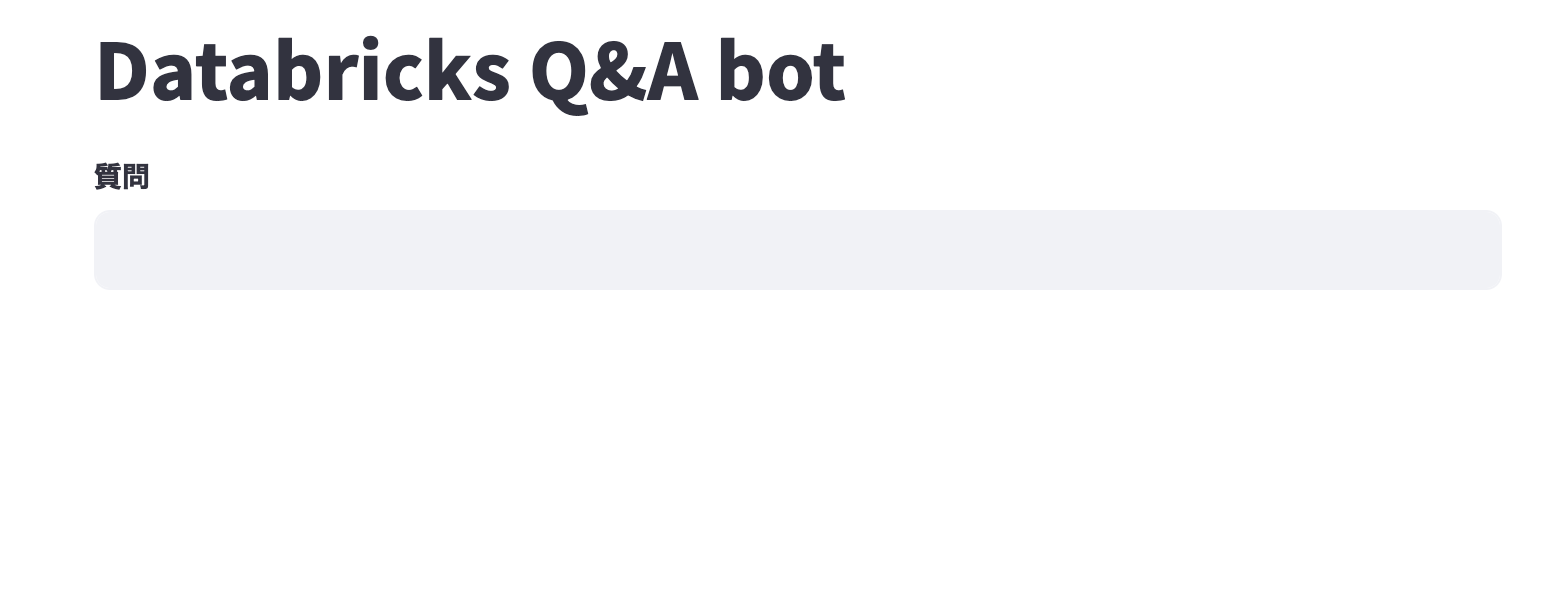
以下を実行すると、ドライバープロキシー経由でstreamlitの画面にアクセスできます。
streamlit_file = "/Workspace/Users/takaaki.yayoi@databricks.com/20231207_rag_dbdemos/llm-rag-chatbot/streamlit.py"

!streamlit run {streamlit_file} --server.port {PORT}
動きました!
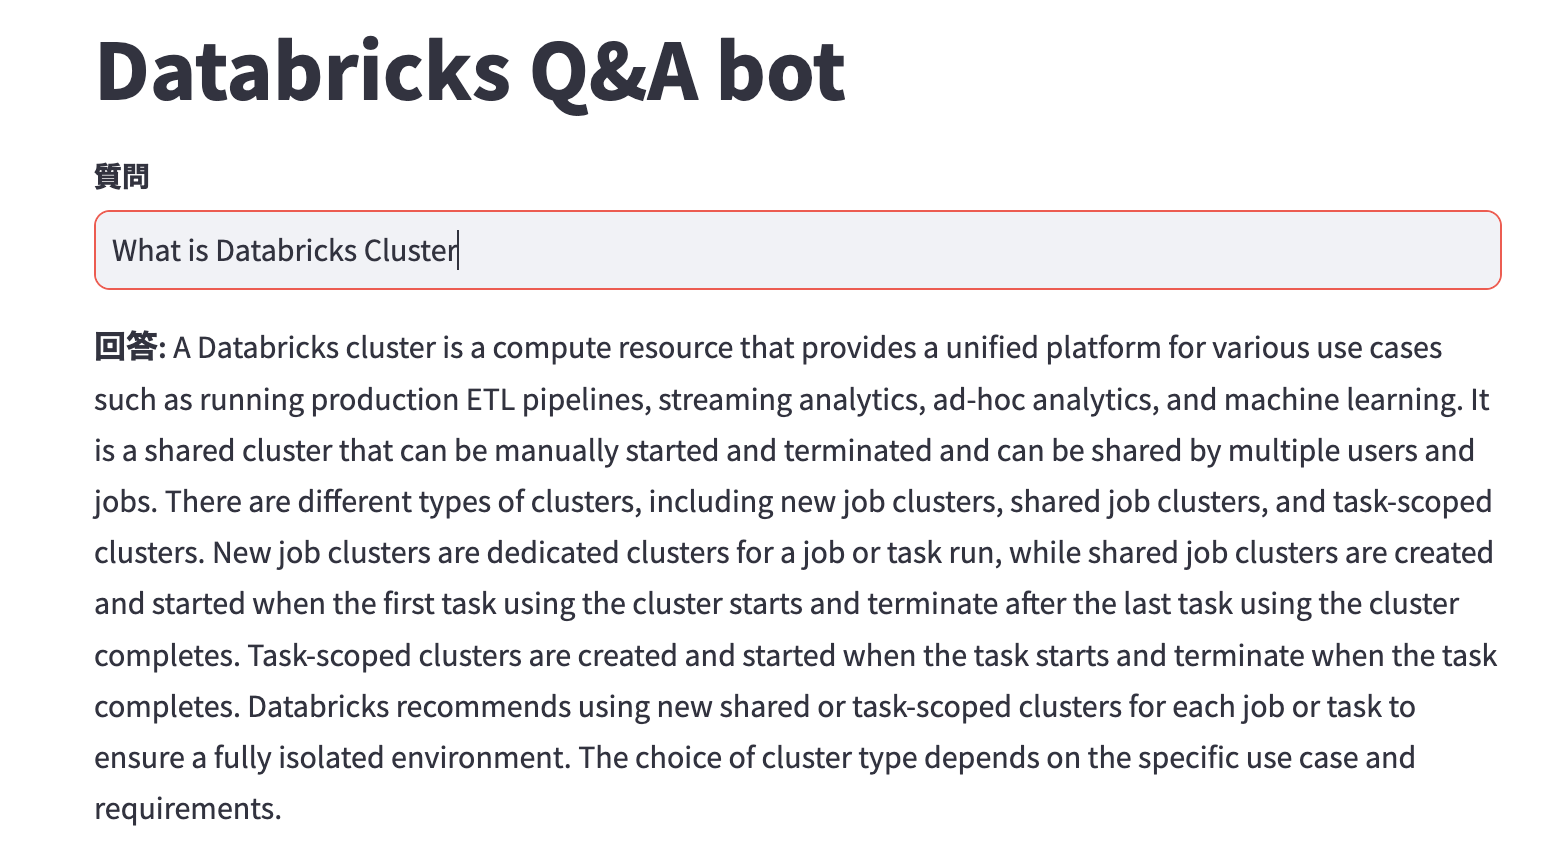
この記事を書きながら画面を動かすところまで正味1時間でした。足回りが整備されていくと、色々トライしやすくなるので、手前味噌ですがこのような機能拡張、大変助かります。