Tensor Input Now Supported in MLflow - The Databricks Blogの翻訳です。
伝統的に、一般的なMLflow Pythonモデルはデータフレームの入出力のみをサポートしていました。表データをベースに構築された伝統的なモデルを取り扱う際には、データフレームは便利なインタフェースとなりますが、多次元の入力、多次元の出力を必要とするディープラーニングモデルにおいては便利なものではありません。新たにリリースされたMLflow 1.14では、ディープラーニング(DL)ではよく用いられる多次元配列構造であるtensorのサポートを追加しました。
以前はディープラーニングをサポートするためには、MLflowユーザーはカスタムアダプタを書くか、ネイティブのフォーマットのモデルを使う必要がありました。しかし、これらの両方のアプローチには重大な欠点があります。ネイティブのフレーバーの利用は抽象化のバリアを破壊し、さらに重要なことに、ネイティブのフレーバーはMLflowのモデルデプロイメントツールで使用することができません。今回の新たなサポートによって、MLflowのユーザーはtensorを利用する際に優れたエクスペリエンスを利用できるようになります。
新たなtensorのサポート
ディープラーニングモデルを有効化するために、MLflow 1.14は以下の変更を導入しました:
-
mlflow.pyfuncのpredictメソッドの入力とアウトプットのタイプでtensorサポートを追加しました。
predict(input: pdf|np.ary|Dict[str, np.ary]) ->
pd.DataFrame| pd.Series| np.ary | Dict[str, np.ary]
```
- サーブされるモデルのREST APIを更新しました。
- モデルのシグネチャにtensorデータタイプを追加しました。
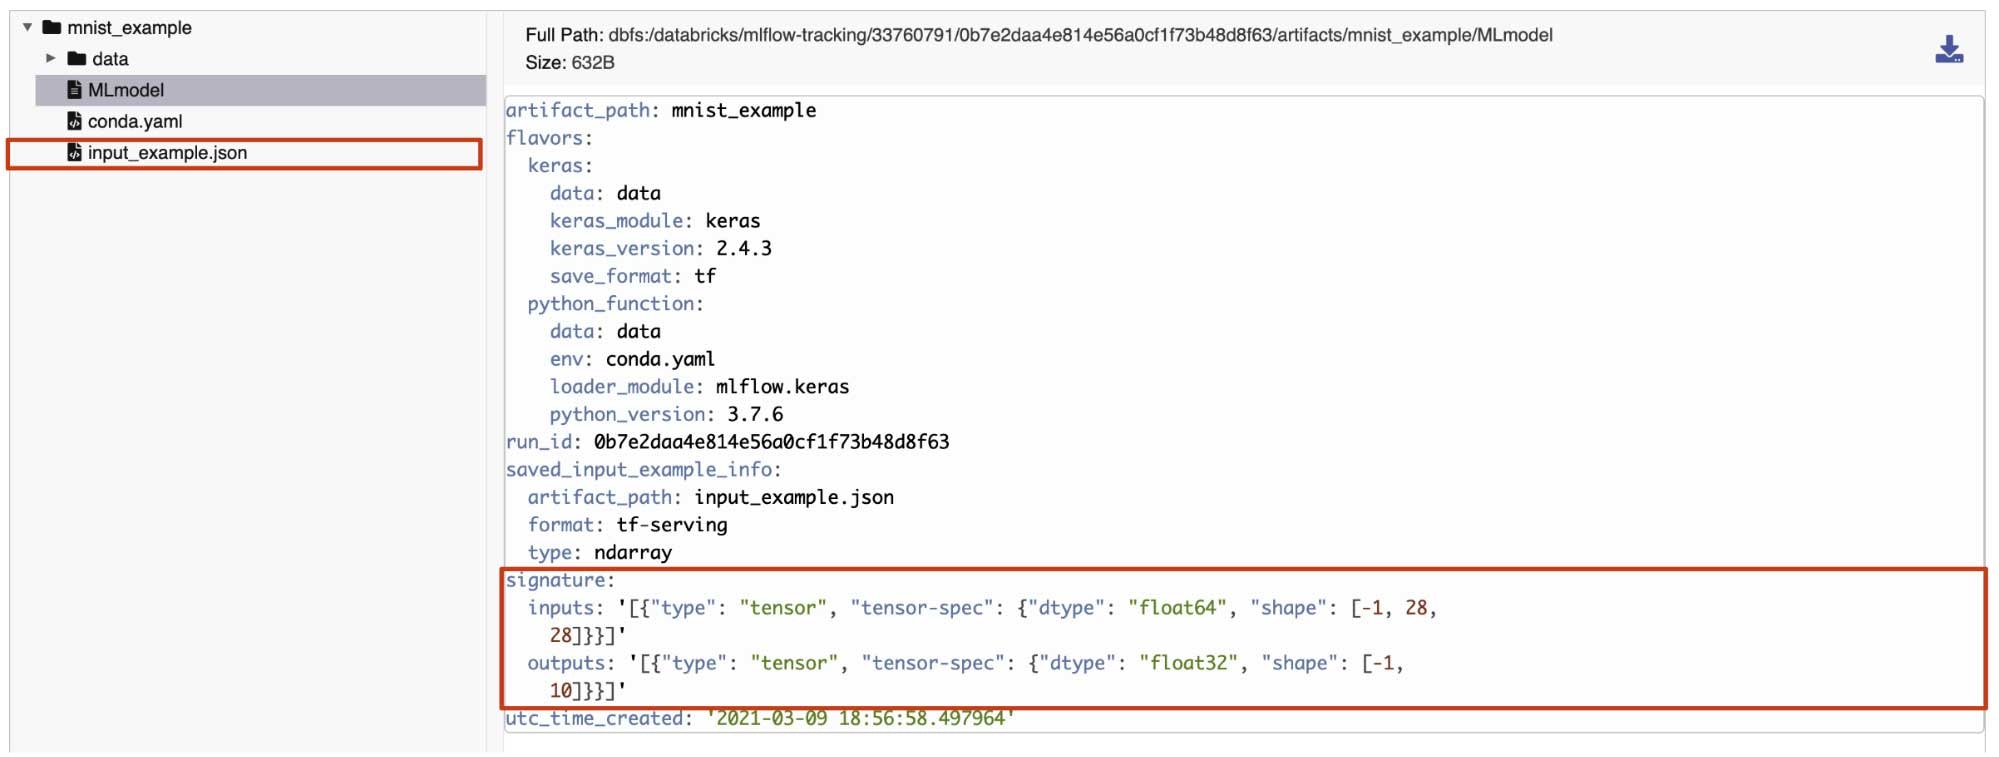
これらの変更でユーザーはMLflowフレームワークでDLモデルを完全に利用し、MLflowのモデルデプロイメントを活用することができます。Databricksでは、ユーザーはDatabricks上のモデルにtensorの入力を渡すことができ、UIでtensorのシグネチャとサンプルを参照することができます。以下のセクションでは、例を通じてそれぞれの変更とハイライトすべき点をご説明します。
tensorで作業する
シンプルな画像分類のサンプルを用いて新たなtensorサポートをデモしましょう。
この例では、MNISTの手書き数字データセットを分類するためのモデルをトレーニングします。
import keras
from keras.layers import Dense, Flatten, Dropout
import numpy as np
import mlflow
import mlflow.keras
from mlflow.models.signature import infer_signature

# Let's prepare the training data!
(train_X, train_Y), (test_X, test_Y) = keras.datasets.mnist.load_data()
trainX, testX = train_X / 255.0, test_X / 255.0
trainY = keras.utils.to_categorical(train_Y)
testY = keras.utils.to_categorical(test_Y)

# Let's define the model!
model = keras.models.Sequential(
    [
      Flatten(),
      Dense(128, activation="relu", name="layer1"),
      Dropout(0.2),
      Dense(10, activation='softmax')
    ]
)
opt = keras.optimizers.SGD(lr=0.01, momentum=0.9)
model.compile(optimizer=opt, loss='categorical_crossentropy', metrics=['accuracy'])

# Let's fit the model!
model.fit(trainX, trainY, epochs=2, batch_size=32, validation_data=(testX, testY))
New
tensorベースのモデルシグネチャを作成するためにMLflowのinfer_signatureを利用できます。
# Create a model signature using the tensor input to store in the MLflow model registry
signature = infer_signature(testX, model.predict(testX))
# Let's check out how it looks
print(signature)
# inputs:
#    [Tensor('float64', (-1, 28, 28))]
# outputs:
#    [Tensor('float32', (-1, 10))]
New
ロギングされたモデルにinput_exampleとして格納したトレーニングデータから単一のtensorデータポイントを使用できます。input_modelは単一のtensorデータポイントに限定されるものでなく、トレーニングデータの一部を格納することも可能です。
# Create an input example to store in the MLflow model registry
input_example = np.expand_dims(trainX[0], axis=0)
トレーニング済みのモデルを、メタデータとしてモデルのシグネチャとinput_example をロギングできます。
# Let's log the model in the MLflow model registry
model_name = 'mnist_example'
registered_model_name = "tensor-blog-post"
mlflow.keras.log_model(model, model_name, signature=signature, input_example=input_example, registered_model_name=registered_model_name)
New
mlflow.pyfuncラッパーを用いてトレーニング済みモデルをロードし、tensorの入力を用いて予測を行いましょう。
# Let's load the model and make a sample prediction!
model_version = "1"
loaded_model = mlflow.pyfunc.load_model(f"models:/{registered_model_name}/{model_version}")
loaded_model.predict(input_example)
MLflowのモデルサービングを用いて、DatabricksのUIからモデルに対するクエリーを確認しましょう。これを行うためには、最初にDatabrikcsにおいて登録されたモデルに対するモデルサービングを有効化します。サービングのエンドポイントとバージョンが起動したら、上のlog_model APIを用いて記録された入力サンプルをロードできます。入力サンプルがロードされれば、Databricks UIを用いてサービングエンドポイントにリクエストを送信することができます。予測値はモデルサービングのページのResponseセクションに表示されます。
また、ユーザーはサービングされているモデルに問い合わせをするためにアプリケーションからREST APIを呼び出すこともできます。tensor入力によるリクエストを行うためには、データはTensorFlow Serving’s API documentationに基づいたフォーマットである必要があります。
MLflowのtensorサポートと使用法の詳細に関しては、docs on MLflow Models、MLflow Model Servingを参照ください。オープンソースのMLflowの詳細、最新のMLflow 1.14の新機能に関してはmlflow.orgを参照してください。上のサンプルを含むノートブックでtensorサポートをトライすることができます。