何をする記事なのか?
複数プロジェクトでtailwind.config.jsの色とかの設定共有したいことありますよね?
GCPのArtifact Registryを利用してプライベートnpmパッケージにすることで、複数のプロジェクトで利用できるようにします。
目指せデザインシステムの第一歩!!
Tailwind CSSのconfigをリポジトリ管理する
リポジトリの構成
tailwind-config/
├── index.js
├── package.json
└── tailwind.config.js
const config = require('./tailwind.config')

module.exports = config
{
  "name": "package名",
  "version": "1.0.0",
  "main": "tailwind.config.js"
}
今回自分が記事のなかでテスト的に作る
package名は@takahal/tailwind-configでいこうと思います
module.exports = {
  theme: {
    colors: {
      'blue': '#1fb6ff',
      'purple': '#7e5bef',
      'pink': '#ff49db',
      'orange': '#ff7849',
      'green': '#13ce66',
      'yellow': '#ffc82c',
      'gray-dark': '#273444',
      'gray': '#8492a6',
      'gray-light': '#d3dce6',
    }
  },
}
npmパッケージをpublishする
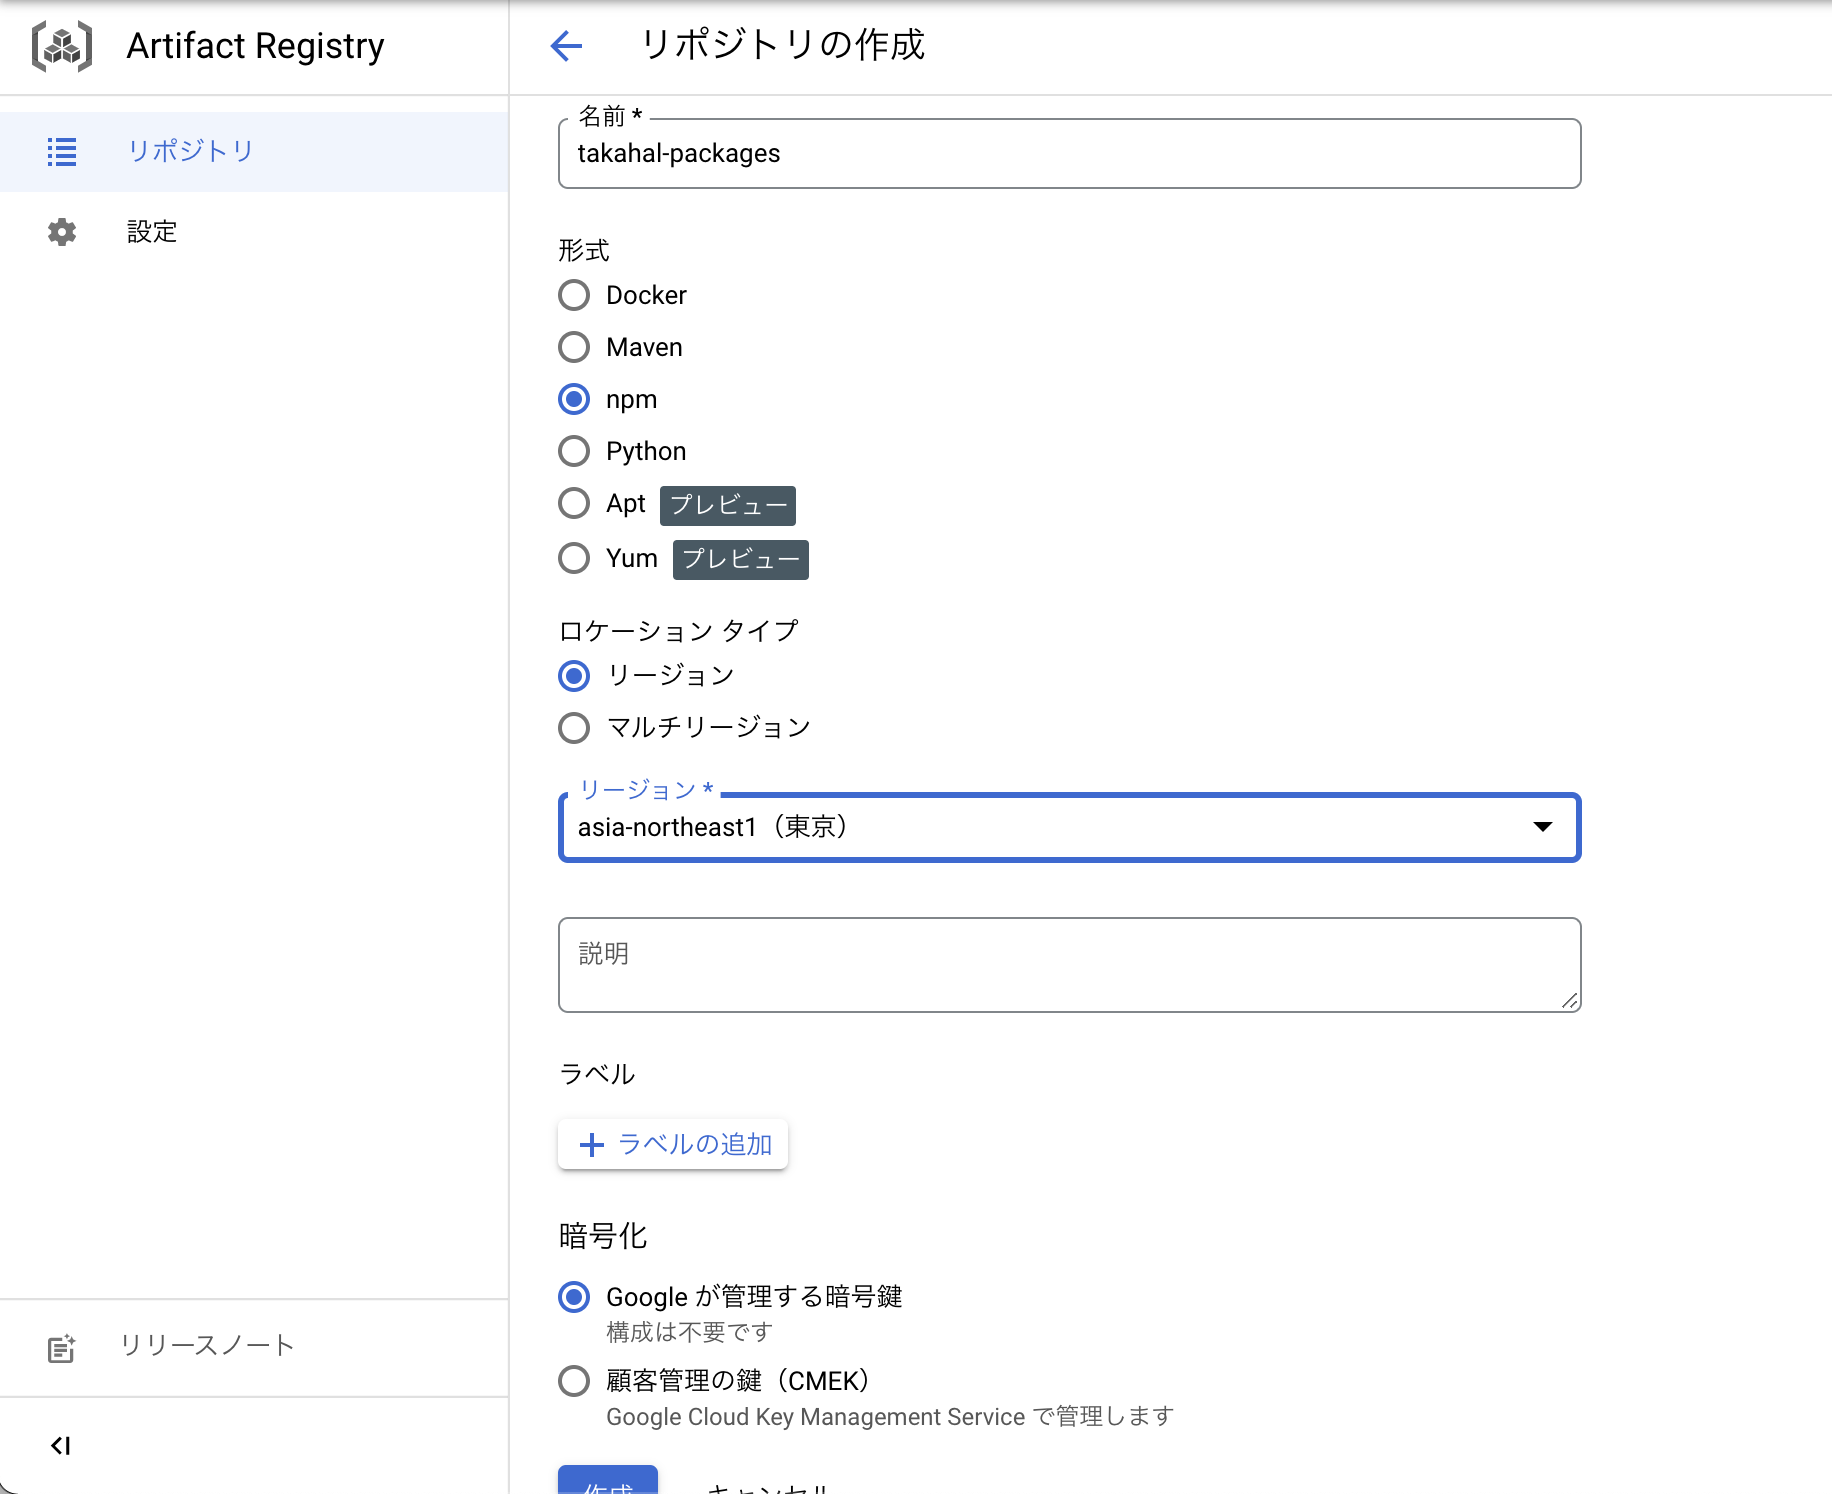
1. GCPのArtifact Registryリポジトリの作成
リポジトリを作成する
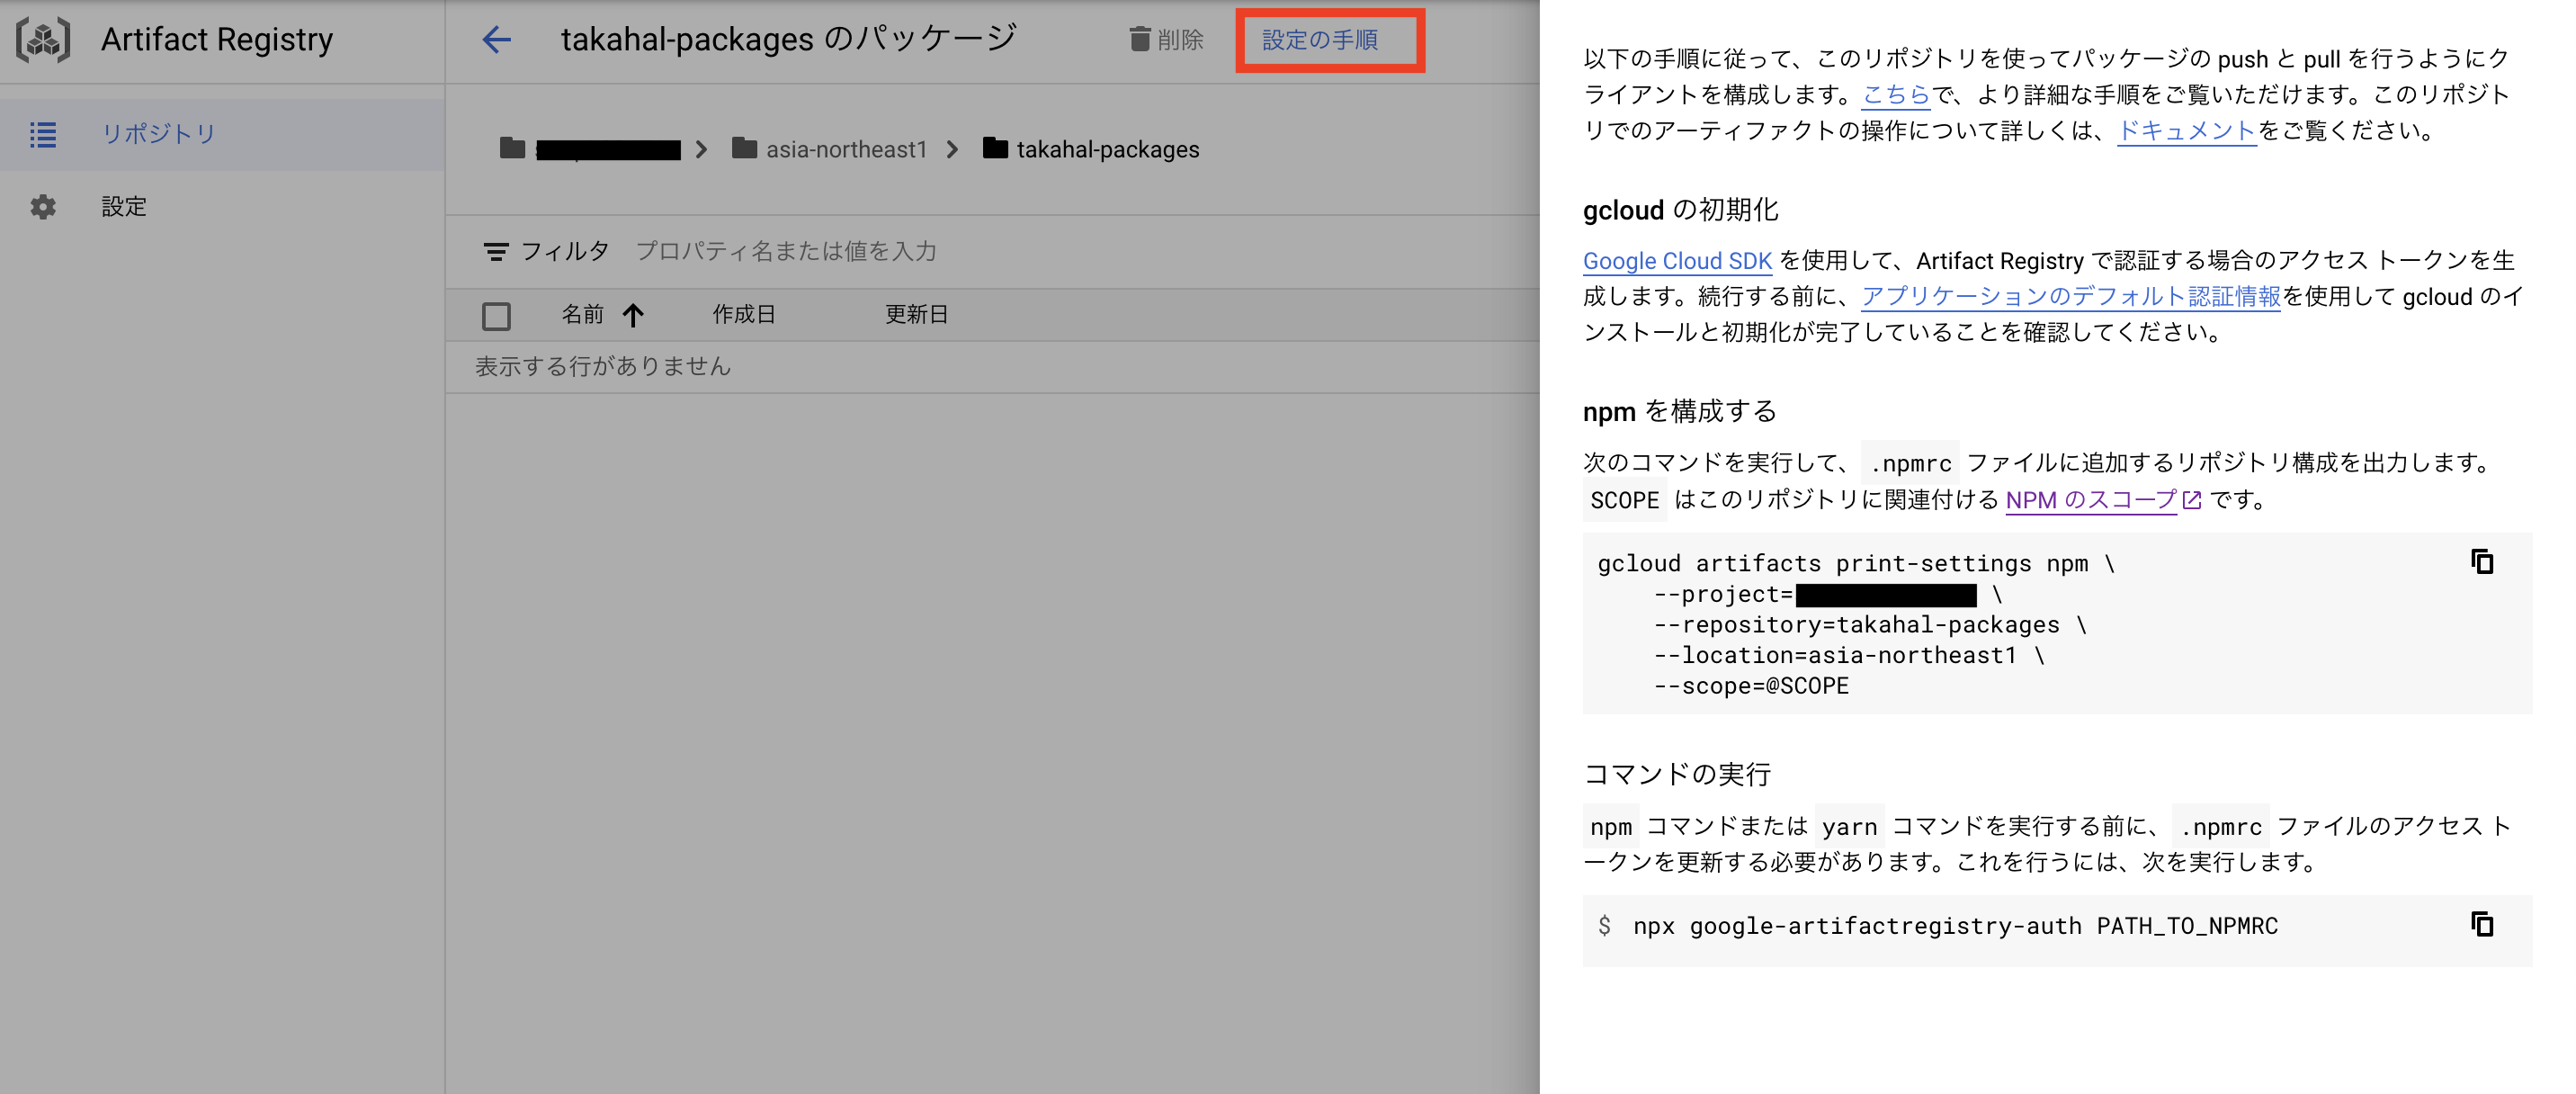
2. tailwind-configのリポジトリに設定を追加
作成したリポジトリを選択すると設定の手順というボタンがあるので押して、出てくる案内に従います。
ここからgcloudのコマンドを利用するので、利用できるようになってない方は設定しましょう
インストール完了したら以下のコマンドで認証を完了させればOKです
$ gcloud auth application-default login
.npmrcの作成
$ gcloud artifacts print-settings npm \
    --project=プロジェクトID \
    --repository=作成したリポジトリ名 \
    --location=リポジトリ作成時に設定したリージョン \
    --scope=@SCOPE
@SCOPEに関しては作成したリポジトリパッケージ名
今回で言うと@takahal/tailwind-configの@takahalの部分です。
実行すると.npmrcに追加するテキストが出力されるので、.npmrcを作成し貼り付けます
貼り付けるのは
# Insert the following snippet into your project .npmrc と書かれている部分です。
以下のような2行が出力されるので、.npmrcに貼り付けます
@SCOPE:registry=https://asia-northeast1-npm.pkg.dev/プロジェクトID/REPOSITRY/
//asia-northeast1-npm.pkg.dev/プロジェクトID/REPOSITRY/:always-auth=true
-
@SCOPE- 今回で言うと
@takahalです。
- 今回で言うと
tailwind-config/
├── .npmrc
├── index.js
├── package.json
└── tailwind.config.js
スクリプトの追加
npmやyarnコマンドを使う前にリポジトリに接続するためのアクセス トークンを更新する必要があるので、実行用のスクリプトを追加します。
"scripts": {
  "artifactregistry-login": "npx google-artifactregistry-auth"
}
Artifact Registryにアップロードする
1. 認証する
リポジトリに接続するためのアクセス トークンを更新する必要があるので、一度追加したスクリプトを実行します。
$ npm run artifactregistry-login

> @takahal/tailwind-config@1.0.0 artifactregistry-login
> npx google-artifactregistry-auth

Retrieving application default credentials...
Retrieving credentials from gcloud...
Success!
実行している時の出力を確認していると、2回認証しているタイミングがあるように見えますね
どちらかで認証が通ればOKです。
- Retrieving application default credentials...
- Retrieving credentials from gcloud...
Retrieving application default credentials...はサービスアカウントのJSONキーファイルを確認し認証します。GOOGLE_APPLICATION_CREDENTIALSという環境変数名で、JSONキーファイルのパスが存在する場合に認証に利用されます。
CIなどからpublishやinstallする場合はこの認証方法を利用すると思います。
GOOGLE_APPLICATION_CREDENTIALS=[path/to/key.json]
Retrieving credentials from gcloud...は、GOOGLE_APPLICATION_CREDENTIALSを用いて認証ができなかった場合 gcloud コマンドセットアップ時にデフォルトで設定されたIAMで認証します。
以下のコマンドを打った時に認証に使ったアカウントです。
$ gcloud auth application-default login
publishするのにArtifact Registry 書き込みの権限が必要なので認証に使うアカウントに付与しておきましょう
GOOGLE_APPLICATION_CREDENTIALSかgcloudの認証どちらを使うかですが、個人的には
CIのなかで操作したい場合は、
サービスアカウントのJOSNキーファイルを利用したGOOGLE_APPLICATION_CREDENTIALS
ローカルリポジトリのなかで操作したい場合は、
gcloudの認証がいいと思います。
2. publishする
$ npm publish

これでプライベートパッケージが公開できました!次は実際にinstallしてみましょう
npmパッケージをinstallする
install先プロジェクトの作成
Tailwind CSSが設定されたプロジェクトを用意します。
今回はNext公式のNext.js + Tailwind CSS Exampleを利用させていただきます。
$ npx create-next-app --example with-tailwindcss with-tailwindcss-app
# or
$ yarn create next-app --example with-tailwindcss with-tailwindcss-app
# or
$ pnpm create next-app -- --example with-tailwindcss with-tailwindcss-app
.npmrcの作成
ここはpublishした時と手順は同じなので説明は省略させていただきます。
$ gcloud artifacts print-settings npm \
    --project=プロジェクトID \
    --repository=作成したリポジトリ名 \
    --location=リポジトリ作成時に設定したリージョン \
    --scope=@SCOPE
@SCOPE:registry=https://asia-northeast1-npm.pkg.dev/プロジェクトID/REPOSITRY/
//asia-northeast1-npm.pkg.dev/プロジェクトID/REPOSITRY/:always-auth=true
スクリプトの追加
"scripts": {
  "artifactregistry-login": "npx google-artifactregistry-auth"
}
認証する
Artifact Registry 読み取りまたはそれ以上の権限をgcloudコマンドで認証したアカウントに付与しておきましょう
$ yarn run artifactregistry-login
installする
$ yarn add -D @SCOPE/tailwind-config
@SCOPEの部分は作成したリポジトリパッケージ名を入れてください
installしたパッケージをTailwind CSSで使う
Presetsを利用します。Presetsを利用することでベースの設定を読み込むことができます。
module.exports = {
  presets: [
    require('@SCOPE/tailwind-config')
  ],
  content: [
    './pages/**/*.{js,ts,jsx,tsx}',
    './components/**/*.{js,ts,jsx,tsx}',
  ],
  theme: {
    extend: {},
  },
  plugins: [],
}
Presetsを利用した状態でサイトを確認するとcolorsのベースの設定が作成したパッケージのものになるので、text-blue-600が読み込まれません
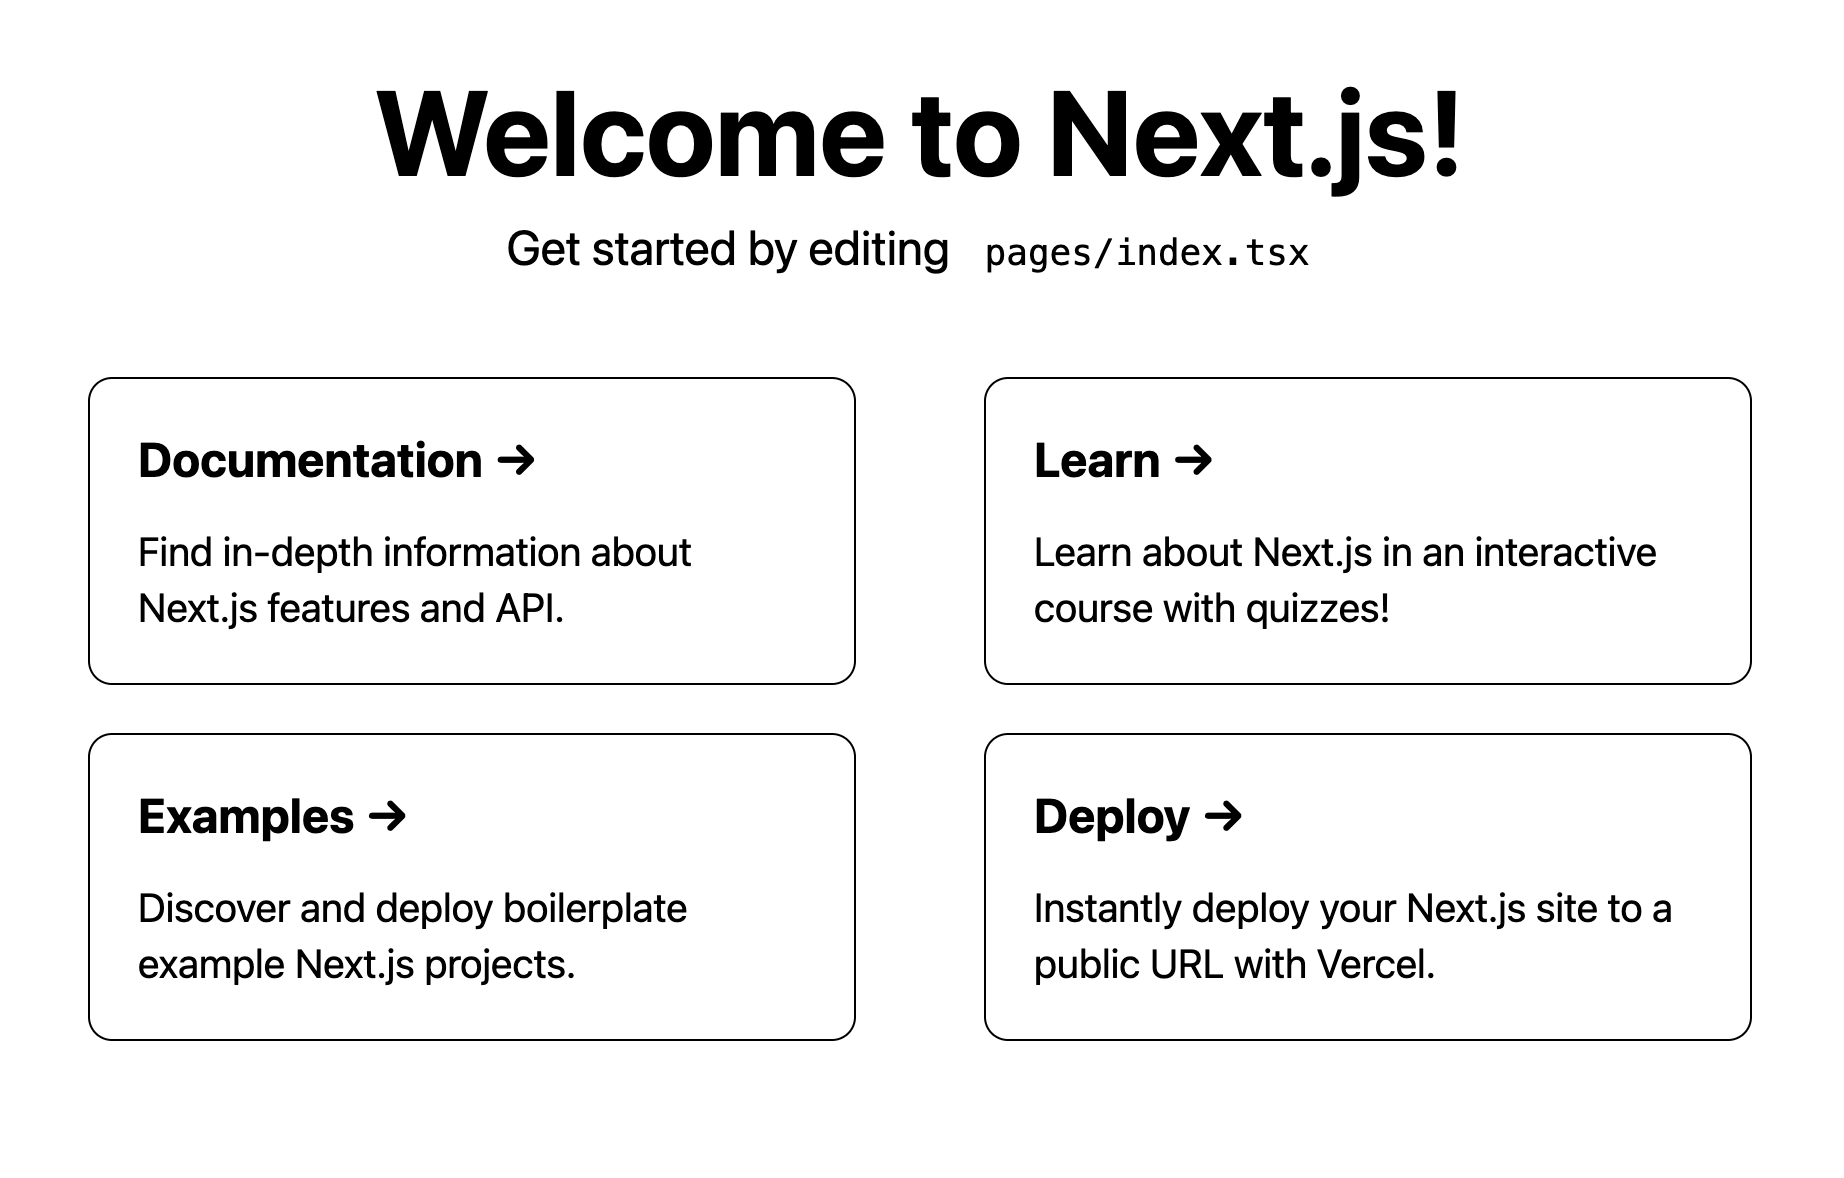
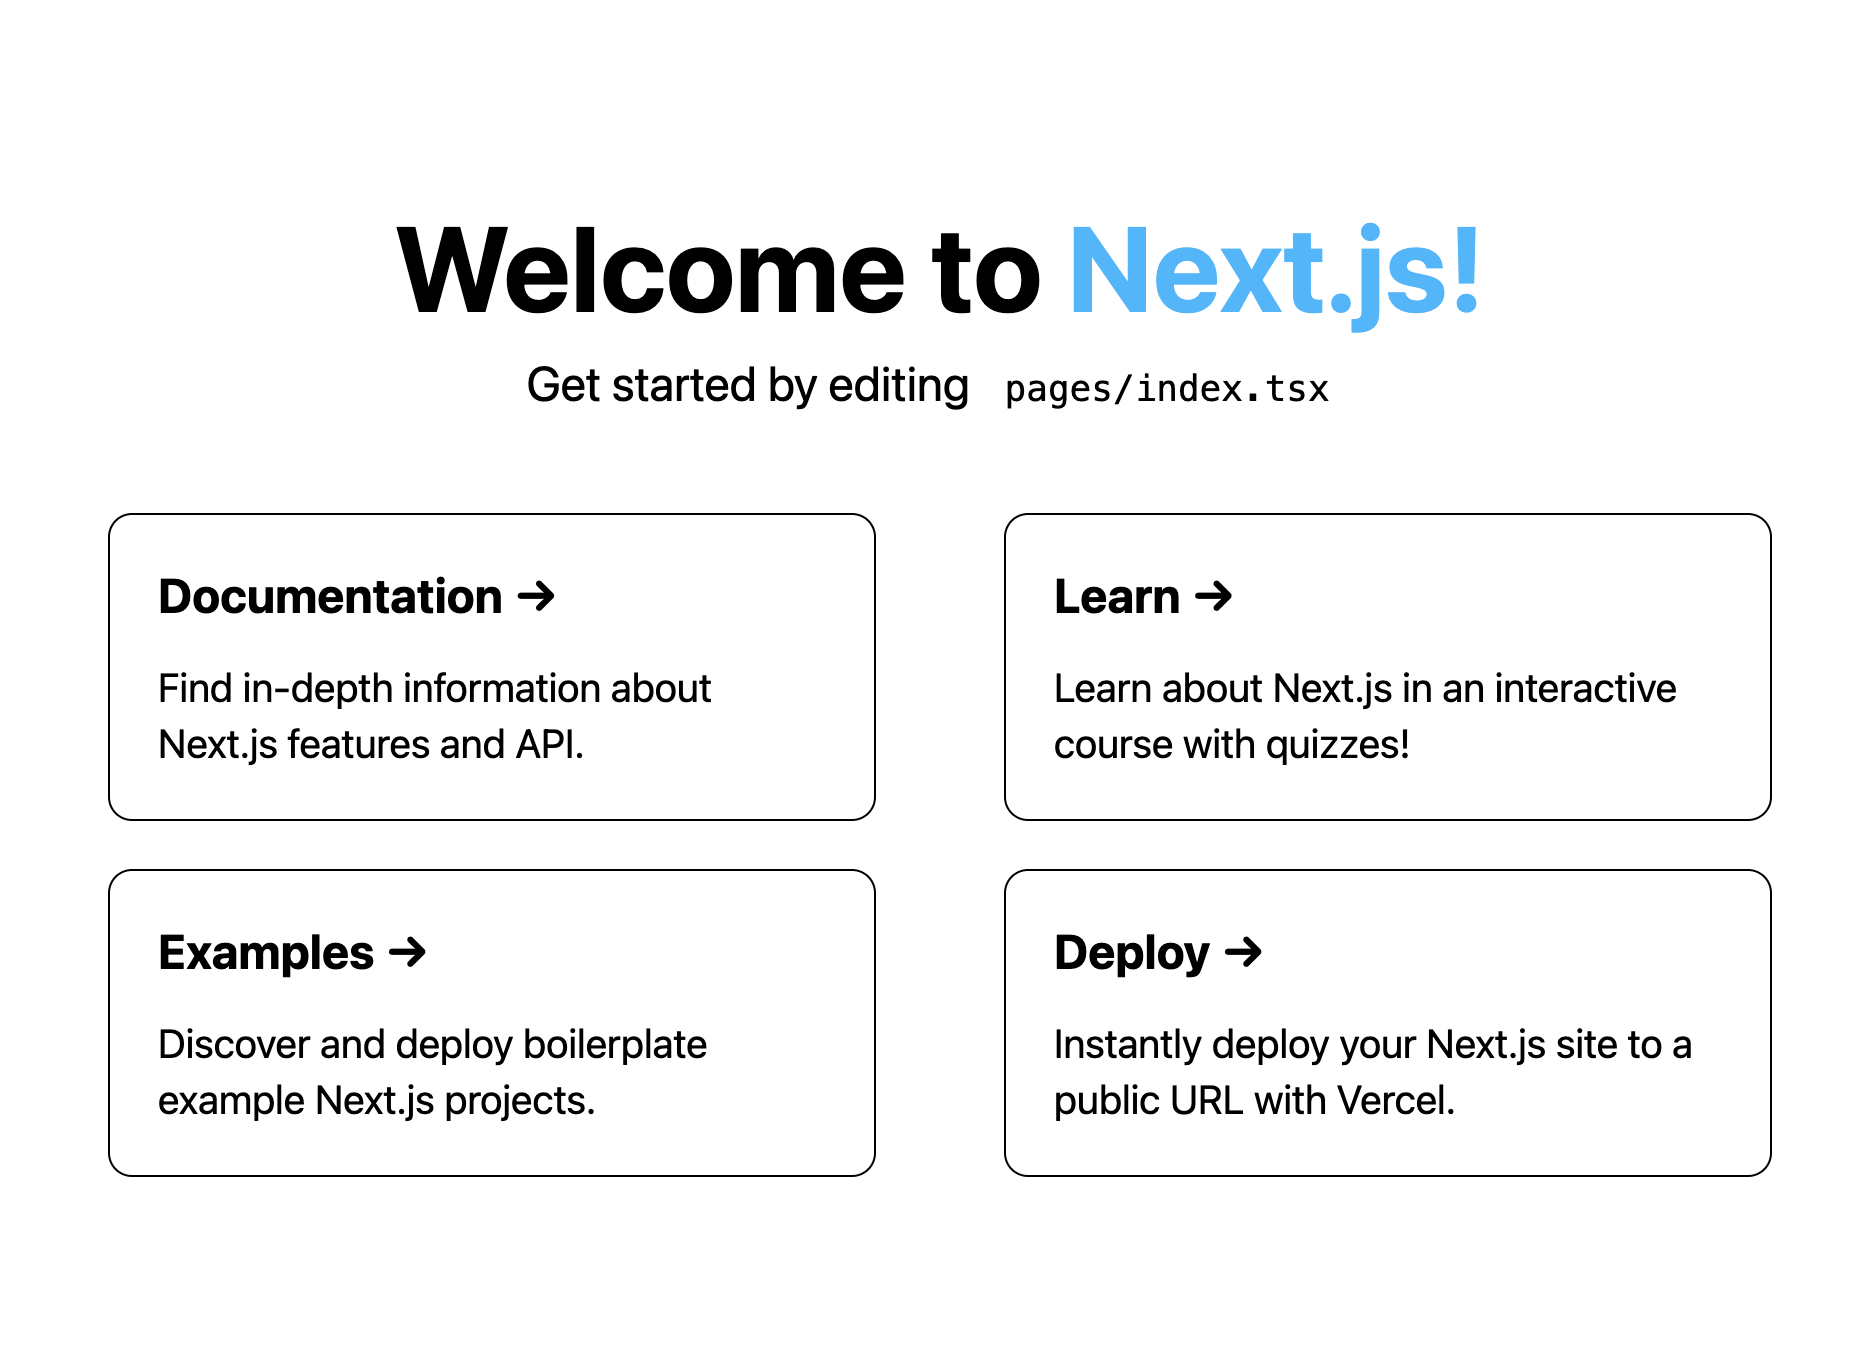
text-blue-600を作成したパッケージで定義しているtext-blueに置き換えます。
import type { NextPage } from 'next'
import Head from 'next/head'
import Image from 'next/image'
const Home: NextPage = () => {
return (
<div className="flex min-h-screen flex-col items-center justify-center py-2">
<Head>
<title>Create Next App</title>
<link rel="icon" href="/favicon.ico" />
</Head>
<main className="flex w-full flex-1 flex-col items-center justify-center px-20 text-center">
<h1 className="text-6xl font-bold">
Welcome to{' '}
<a className="text-blue" href="https://nextjs.org">
Next.js!
</a>
</h1>
<p className="mt-3 text-2xl">
Get started by editing{' '}
<code className="rounded-md bg-gray-100 p-3 font-mono text-lg">
pages/index.tsx
</code>
</p>
<div className="mt-6 flex max-w-4xl flex-wrap items-center justify-around sm:w-full">
<a
href="https://nextjs.org/docs"
className="mt-6 w-96 rounded-xl border p-6 text-left hover:text-blue focus:text-blue"
>
<h3 className="text-2xl font-bold">Documentation →</h3>
<p className="mt-4 text-xl">
Find in-depth information about Next.js features and API.
</p>
</a>
<a
href="https://nextjs.org/learn"
className="mt-6 w-96 rounded-xl border p-6 text-left hover:text-blue focus:text-blue"
>
<h3 className="text-2xl font-bold">Learn →</h3>
<p className="mt-4 text-xl">
Learn about Next.js in an interactive course with quizzes!
</p>
</a>
<a
href="https://github.com/vercel/next.js/tree/canary/examples"
className="mt-6 w-96 rounded-xl border p-6 text-left hover:text-blue focus:text-blue"
>
<h3 className="text-2xl font-bold">Examples →</h3>
<p className="mt-4 text-xl">
Discover and deploy boilerplate example Next.js projects.
</p>
</a>
<a
href="https://vercel.com/import?filter=next.js&utm_source=create-next-app&utm_medium=default-template&utm_campaign=create-next-app"
className="mt-6 w-96 rounded-xl border p-6 text-left hover:text-blue focus:text-blue"
>
<h3 className="text-2xl font-bold">Deploy →</h3>
<p className="mt-4 text-xl">
Instantly deploy your Next.js site to a public URL with Vercel.
</p>
</a>
</div>
</main>
<footer className="flex h-24 w-full items-center justify-center border-t">
<a
className="flex items-center justify-center gap-2"
href="https://vercel.com?utm_source=create-next-app&utm_medium=default-template&utm_campaign=create-next-app"
target="_blank"
rel="noopener noreferrer"
>
Powered by{' '}
<Image src="/vercel.svg" alt="Vercel Logo" width={72} height={16} />
</a>
</footer>
</div>
)
}
export default Home
色も定義したものに変わってますね!
プロジェクト間で共通で設定したいものをパッケージ化し、Presetsで読み込む
プロジェクト固有で設定したいものは、プロジェクト単位でextendを使って定義するみたいな使い方になると思います。
サービス間のブランディングを守る際にデザインシステムとして定義してある色などの設定しか使えないというのは、ブランディングを守る上で有効だと思います。
まとめ
デザインシステムの第一歩としてTailwind CSSのconfigをnpmパッケージにしました。
プライベートパッケージを作成する方法としては、GitHub Packagesや,GitLab Package Registryを利用するのもありだと思いますが今回は、GCPのArtifact Registryで作成してみました。
Artifact Registryは初めて利用しましたが、publish/install/認証 も簡単ですしArtifact Registryのリポジトリ作成自体の設定も迷うことなかったので非常に使いやすいものでした。
Tailwind CSS自体も今回作ったパッケージをPresetsで読み込むと、プロジェクト間の共通の設定をベースにすることができるので、初回のTailwind CSSのセットアップも楽になるしサービスで守りたいブランディングみたいなのも守りやすくなると思います。
Figma + Style Dictionary + GitHubでスタイル生成!みたいなのにも挑戦してみようと思います。
参考