はじめに
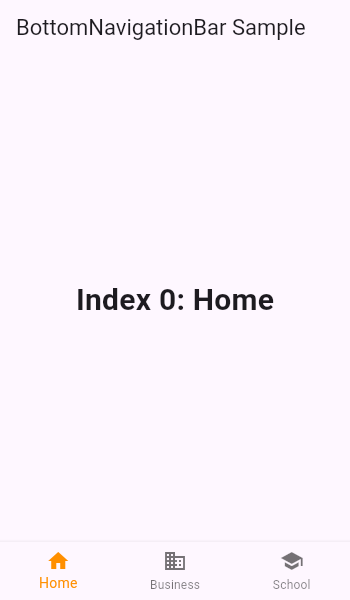
前回は、Flutterを始めてみてBottomNavigationBarを付けてみました。
今回は、BottomNavigationBarとFlutter公式のwebview_flutterを使って行こうと思います。

前回: flutterを始めたのでとりあえず bottomNavigationBarつけてみる
動作環境
- OS: macOS Catalina(10.15.4)
- Xcode: Version 11.1
- Android Studio: Version 4.0
webview_flutterを使えるようにする
1. iOSのInfo.plistに追加する
<key>io.flutter.embedded_views_preview</key>
<string>YES</string>
2. pubspec.yaml を編集
webview_flutter: ^0.3.0
webview_flutterを追加し
$ flutter pub get
3.import
import 'package:webview_flutter/webview_flutter.dart';
画面作成する
コード全体像
// Flutter code sample for BottomNavigationBar
// This example shows a [BottomNavigationBar] as it is used within a [Scaffold]
// widget. The [BottomNavigationBar] has three [BottomNavigationBarItem]
// widgets and the [currentIndex] is set to index 0. The selected item is
// amber. The `_onItemTapped` function changes the selected item's index
// and displays a corresponding message in the center of the [Scaffold].
//
// 
import 'package:flutter/material.dart';
import 'package:webview_flutter/webview_flutter.dart';
void main() => runApp(MyApp());
/// This Widget is the main application widget.
class MyApp extends StatelessWidget {
static const String _title = 'Flutter Code Sample';
@override
Widget build(BuildContext context) {
return MaterialApp(
title: _title,
home: MyStatefulWidget(),
);
}
}
class MyStatefulWidget extends StatefulWidget {
MyStatefulWidget({Key key}) : super(key: key);
@override
_MyStatefulWidgetState createState() => _MyStatefulWidgetState();
}
class _MyStatefulWidgetState extends State<MyStatefulWidget> {
int _selectedIndex = 0;
WebViewController _webViewController;
List<String> _urlList = [
'https://www.google.com/',
'https://www.yahoo.co.jp/',
'https://qiita.com/'
];
bool isLoading = true;
final key = UniqueKey();
// BottomNavigation 切り替えで動作
void _onItemTapped(int index) {
setState(() {
_selectedIndex = index;
_webViewController.loadUrl(_urlList[index]);
});
}
@override
Widget build(BuildContext context) {
return Scaffold(
appBar: AppBar(
title: const Text('WebView Sample'),
),
body: Stack(
children: <Widget>[
WebView(
initialUrl: _urlList[_selectedIndex],
key: key,
javascriptMode: JavascriptMode.unrestricted,
onWebViewCreated: (WebViewController webViewController) {
_webViewController = webViewController;
},
onPageStarted: (finish) {
setState(() {
isLoading = true;
});
},
onPageFinished: (finish) {
setState(() {
isLoading = false;
});
},
),
// ページ読み込み中の時はIndicatorを出す
isLoading ? Center( child: CircularProgressIndicator())
: Stack(),
]),
bottomNavigationBar: BottomNavigationBar(
items: const <BottomNavigationBarItem>[
BottomNavigationBarItem(
icon: Icon(Icons.business),
title: Text('Home'),
),
BottomNavigationBarItem(
icon: Icon(Icons.business),
title: Text('Business'),
),
BottomNavigationBarItem(
icon: Icon(Icons.school),
title: Text('School'),
),
],
currentIndex: _selectedIndex,
selectedItemColor: Colors.amber[800],
onTap: _onItemTapped,
),
);
}
}
BottomNavigationBarに関しては公式のコードそのまま使わせてもらっています。
webview_flutter
body 部分を見ていきましょう
body: Stackと宣言するとWidgetを重ねることができます。
今回だと画面読み込み時にCircularProgressIndicatorというよくある画面グルグルとWebViewですね
body: Stack(
      children: <Widget>[
        // WebView
        WebView(
          initialUrl: _urlList[_selectedIndex],
          key: key,
          javascriptMode: JavascriptMode.unrestricted,
          onWebViewCreated: (WebViewController webViewController) {
            _webViewController = webViewController;
          },
          onPageStarted: (finish) {
            setState(() {
              isLoading = true;
            });
          },
          onPageFinished: (finish) {
            setState(() {
              isLoading = false;
            });
          },
        ),
        // CircularProgressIndicator
        isLoading ? Center( child: CircularProgressIndicator())
            : Stack(),
      ]),
1.ページ表示
initialUrlで初期表示のwebサイトのURLを指定します。
// 今回だと initialUrl: 'https://www.google.com/
WebView(
  initialUrl: _urlList[_selectedIndex]
2.画面切り替え
ここの部分で、webview作成完了した後に作成したwebviewを操作するためにwebViewControllerをセットしてます。
          onWebViewCreated: (WebViewController webViewController) {
            _webViewController = webViewController;
          },
_onItemTappedはナビゲーション切り替え時に動作し、その際に今ナビゲーションがどの位置かをセットし
onWebViewCreatedでセットしたwebviewのloadUrl('URL')でwebviewで表示してるサイトを切り替えます
  int _selectedIndex = 0;
  WebViewController _webViewController;
  List<String> _urlList = [
    'https://www.google.com/',
    'https://www.yahoo.co.jp/',
    'https://qiita.com/'
  ];

  bool isLoading = true;

  final key = UniqueKey();

  // BottomNavigation 切り替えで動作
  void _onItemTapped(int index) {
    setState(() {
      _selectedIndex = index;
      _webViewController.loadUrl(_urlList[index]);
    });
  }
3.画面読み込み開始時と完了時の状態を判定
onPageStartedで読み込み開始時
onPageFinishedで読み込み完了時
をisLoadingにboolを入れています
          onPageStarted: (finish) {
            setState(() {
              isLoading = true;
            });
          },
          onPageFinished: (finish) {
            setState(() {
              isLoading = false;
            });
3.ローディングをつける
body: Stack のなかに webviewと一緒に記載することで、isLoadingが trueの時は画面中央にローディングが表示され
そうじゃない時はwebviewの画面が見えるようになります。
// ページ読み込み中の時はIndicatorを出す
        isLoading ? Center( child: CircularProgressIndicator())
            : Stack(),
最後に
Flutterを初めて見てまだまだ慣れないところが多いのでもっと頑張って行こうと思います。
ネイティブアプリを学生時代にアプリを何個か作ったのですがその時は、画面パーツを配置それに対してコードを書という流れだったのですが、
コードでパーツを配置しそれに対する処理を書くとなるとどうかけば正解なのか知識が足りないところがあるので
この方がいいよ等ありましたら教えてくださるとありがたいです。