Unityで開発しててデバッグ時に、ブレークポイントを置いて処理を追ったり変数の中身を見たい時があったので備忘録的に記事にいたします。
環境
- Windows10
- Unity Hub 2.4.5
- Unity 2020.3.25f1
- Android Studio 2020.3.1
- Visual Studio Enterprise 2022
1. PCと実機を繋ぐ
実機とPCを繋いでおきます。
Android側の設定は以下の記事をご参照下さい。
2. Unity側の設定
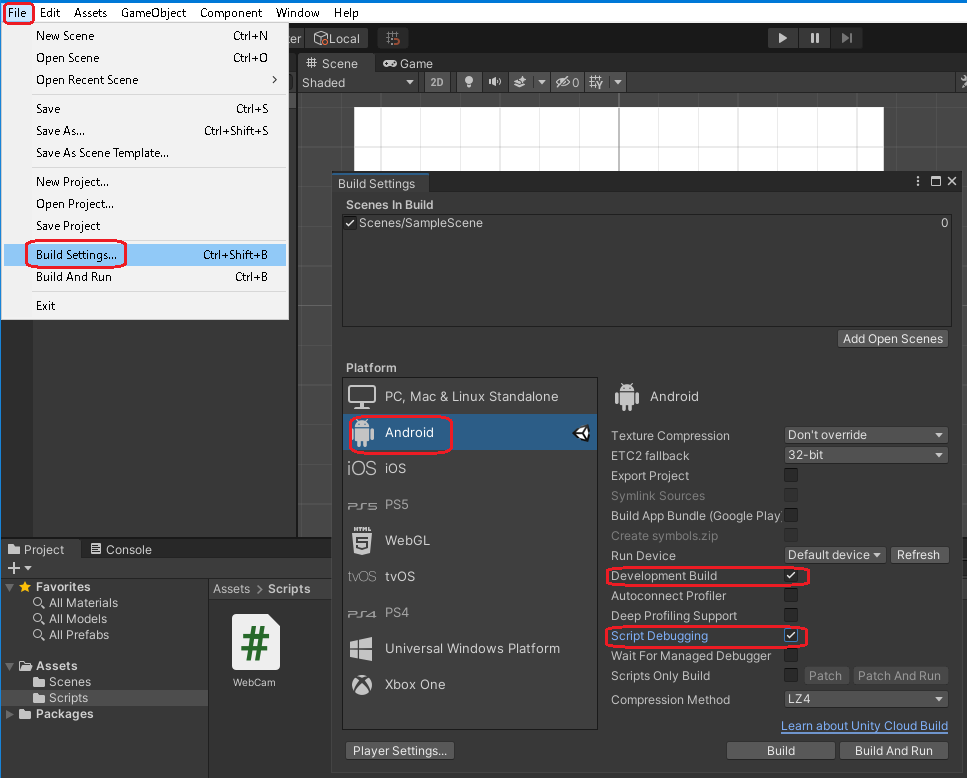
File > Build Settings > Android (もしくは ctr + shift + B)から
「Development Build」 と 「Script Debugging」 にチェックを入れます。
設定ができたら、「Build And Run」しておきます。
3. Visual Studio側の操作
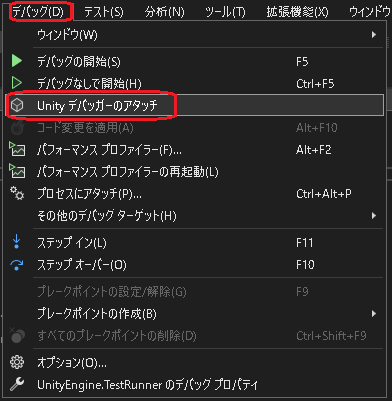
実機側でアプリが起動していれば、Visual Studioのツールバーから
デバッグ > Unityデバッガーのアタッチ を開きます。
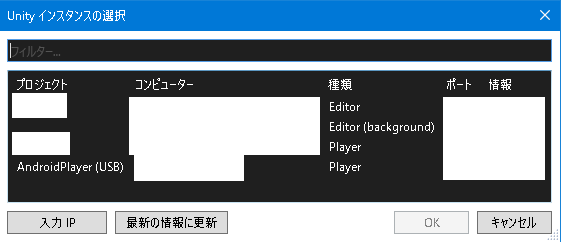
すると「Unityインスタンスの選択」が出てきます。
動作中のポートが選択できるので、 「プロジェクト: AndroidPlayer(USB)、コンピューター: 現在繋いでいる端末名」を選択して「OK」を押します。
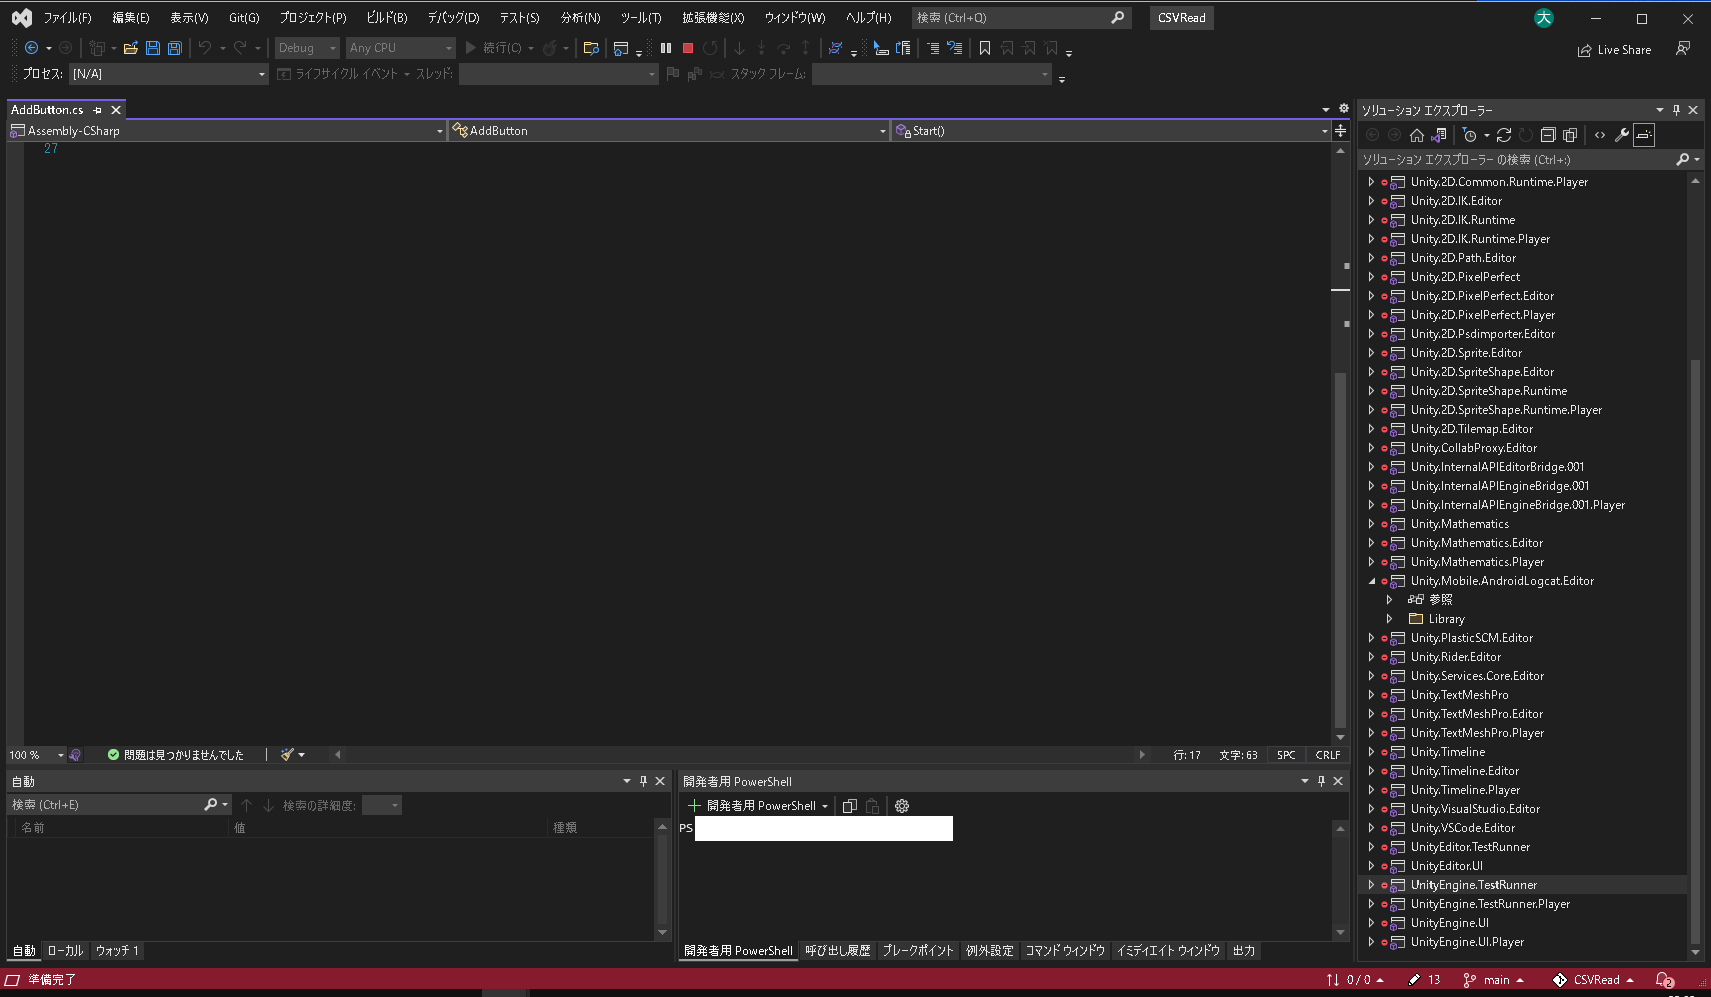
するとデバッグモードになり全体的に赤くなります。
4. ブレークポイントを置く
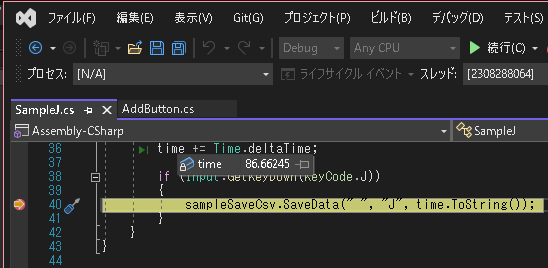
この状態になったら、ブレークポイントを置きたいファイルを開いて、ブレークポイントを置けば、その処理になった時に止まります。
その状態で変数の上にマウスオーバーすると、値が確認できたり、
イミディエイトウィンドウで関数を貼り付けて実行したりができます。
うまくいかない時
うまくいかない時は、「Build And Run」からやり直してみましょう。
Unity上で動かしてスクリプトデバッグする方法
最後に、Unity上でPlayボタンを押した時にも、スクリプトデバッグをしたい時の方法です。
Visual Studio側の「Unityにアタッチ」を押せば同じようにブレークポイントで止めることができます。
以上です。
ご拝読有難うございました。
