概要
画面遷移はアプリとして基本的な動作なのに、頭の中でちょっと整理できていないので覚え書き。
ファイル構成
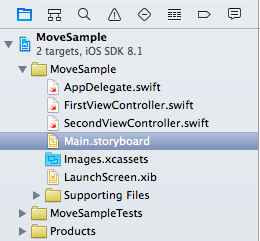
まずは、ファイル構成。UIViewControllerを継承した FirstViewController SecondViewControllerを作成する。
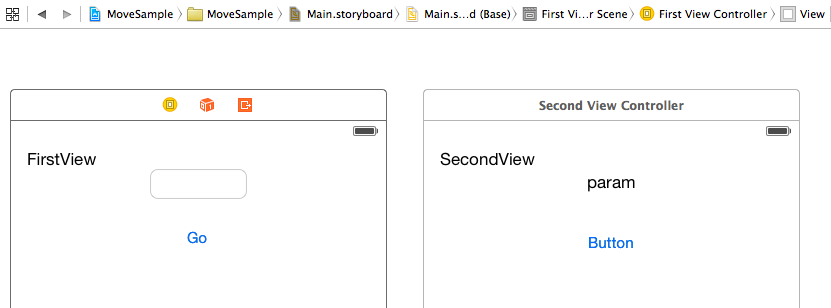
Storyboardで、2つのViewControllerを配置し、ラベルとテキストボックスを適当に配置する。
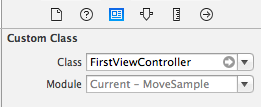
そして、それぞれのカスタムクラスを割り当てる。
セグエの作成
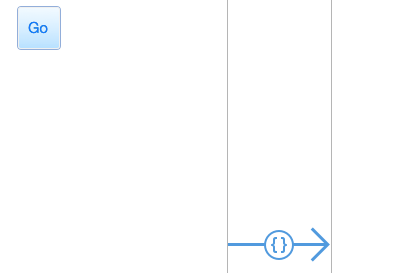
FirstViewControllerに配置したGoボタンからsegueを伸ばして、SecondViewControllerへセグエ(custome)を作成する。
画面遷移(FirstView → SecondView)
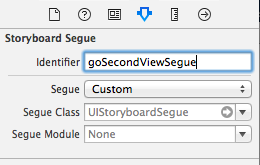
作成したセグエにidentifier名を設定する。ここでは、goSecondViewSegueとする。
ここまでで、実行してGoボタンを押してみるとFirstViewからSecondViewへ画面遷移するはずである。とても簡単。
画面遷移(SecondView → FirstView)
しかし、このままだと戻れないので、Backボタンを押すとFirstViewへ戻るように設定してやる。
その為に、FirstViewController内に、戻ってきた時にコールされるメソッドを定義してやる。
そうすると、Backボタンを右クリックにてSecondViewにあるExitボタンへ伸ばすと、FirstViewControllerに定義したメソッドが表示されるので設定する。ここでは、backFromSecoundViewというメソッドにした。
    /*
     * SecondViewから戻ってきた時の処理
     */
    @IBAction func backFromSecondView(segue:UIStoryboardSegue){
        NSLog("FirstViewController#backFromSecondView")
    }
FirstViewControllerに定義するのがミソである。結構この方法がややこしく忘れやすい。
そこで実行するとBackボタンから戻ることができるはずである。
ソースコード
ここまでのソースコードは下記。
import UIKit

class FirstViewController: UIViewController {

    override func viewDidLoad() {
        super.viewDidLoad()
    }

    /*
     * SecondViewから戻ってきた時の処理
     */
    @IBAction func backFromSecondView(segue:UIStoryboardSegue){
        NSLog("FirstViewController#backFromSecondView")
    }
}
import UIKit

class SecondViewController: UIViewController {

    override func viewDidLoad() {
        super.viewDidLoad()

    }
}
パラメータの受け渡し
たいていのアプリでは画面遷移の時には、必ずパラメータの受け渡しが必要となってくる。
そこで今回はFirstViewのテキストボックスに入力した値(String)をSecondViewで表示してみる。
まずはSecondViewControllerに、パラメータ受取用のプロパティ変数を宣言しておく。初期化処理の時にデータが表示ラベルとバインドするように代入する。
import UIKit

class SecondViewController: UIViewController {

    @IBOutlet weak var paramLabel: UILabel!

    //パラメータ受取用プロパティ
    var param:String = "init param"

    override func viewDidLoad() {
        super.viewDidLoad()
        //パラメータのバインド
        self.paramLabel.text = self.param
    }
}
パラメータを送信するFirstViewController側では、セグエで画面遷移する前に呼ばれるprepareForSegue(segue: UIStoryboardSegue, sender: AnyObject?)メソッドをoverrideしてパラメータを設定する。
遷移先であるSecondViewControllerをインスタンス化して画面で入力したテキストボックスの値を設定する。
    /*
     * 画面遷移
     */
    override func prepareForSegue(segue: UIStoryboardSegue, sender: AnyObject?){
        var secondViewController:SecondViewController = segue.destinationViewController as SecondViewController
        secondViewController.param = self.paramText.text
    }
これを実行すると、テキストボックスで入力したデータが、遷移先の画面のラベルに表示される。
ちなみに、入力された値の検証には、shouldPerformSegueWithIdentifier(identifier: String?, sender: AnyObject?)メソッドををoverrideして、問題あればfalseを返すようにするようだ。
    /*
     * 画面遷移の前に実行する検証メソッド
     */
    override func shouldPerformSegueWithIdentifier(identifier: String?, sender: AnyObject?) -> Bool {
        return true
    }
今回はここまで。
Lovely Swift!!!
