Windows10 HomeでHyper-Vを有効にする方法
- 以下をコピーして、メモ帳にペーストして、ファイル名「hyperv.bat」に保存して実行します。
pushd "%~dp0"
dir /b %SystemRoot%\servicing\Packages\*Hyper-V*.mum >hyper-v.txt
for /f %%i in ('findstr /i . hyper-v.txt 2^>nul') do dism /online /norestart /add-package:"%SystemRoot%\servicing\Packages\%%i"
del hyper-v.txt
Dism /online /enable-feature /featurename:Microsoft-Hyper-V-All /LimitAccess /ALL
3.完了したら再起動の確認メッセージが表示されます。
コマンドプロンプト上で「Y」を入力すると再起動します。

4.再起動するとプログラムグループの「Windows管理ツール」内にHyper-Vマネージャーが追加されています
もちろん、Windowsの機能の有効化または無効化で☑を選択後、「OK」ボタンクリックして
仮想環境(Hyper-V)を使えるようになります。
Hyper-Vマネージャーから新規マシンの作成
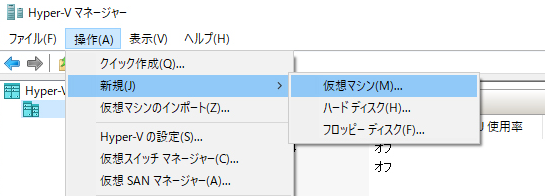
1.Hyper-Vマネージャーの「操作」から「新規」→「仮想マシン」を選択
3.世代の指定
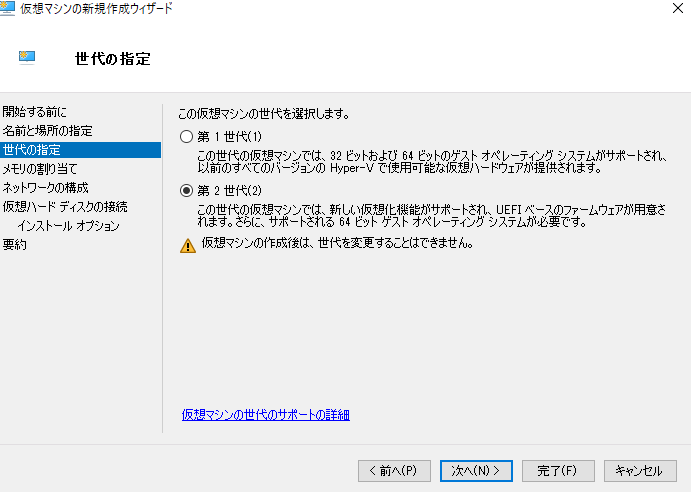
仮想マシン世代詳細
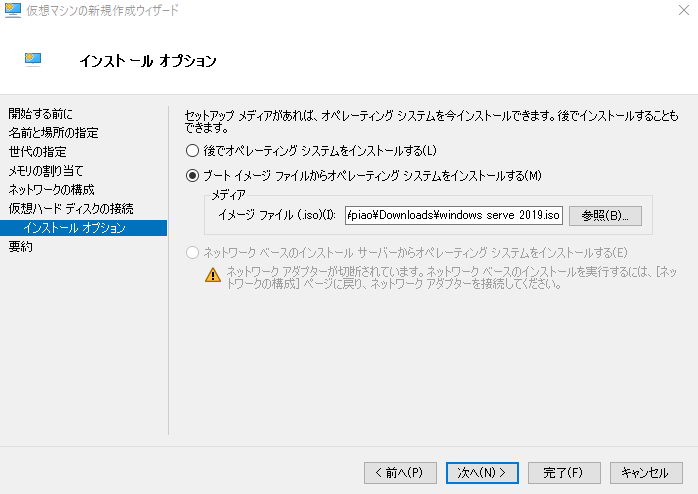
Windows11のイメージファイルはこちらからダウンロードできます。
Windows Server 2019 のイメージファイルはこちらからダウンロードできます。
これで仮想マシンの作成が完了です。
補足
Windows11の場合、一部設定を変更する必要があります。
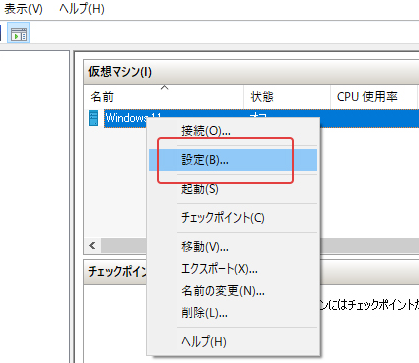
仮想マシンを右クリックし、「設定」を選択。
8.トラステッドプラットフォームモジュール(TPM)の有効化
※通常のPCの場合、UEFIから有効にする必要があります
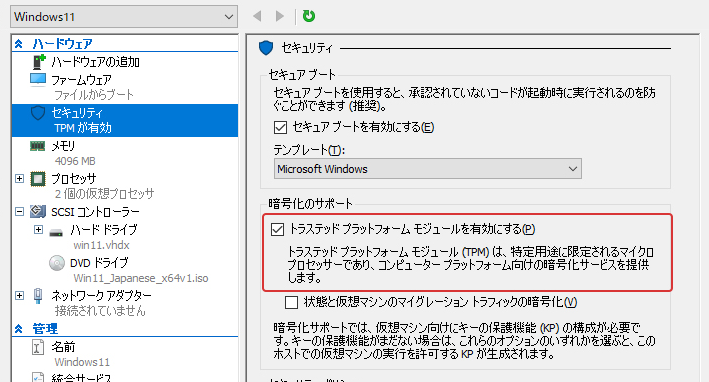
9.プロセッサ
Windows11では2コア以上のCPUが要求されますので、「仮想プロセッサの数」を2以上にする。

仮想マシンの接続と起動
「起動」と「接続」というメニューから操作します。
・「起動」は仮想マシンの電源を入れる
・「接続」は画面(ウインドウ)を表示する
以上。


