今回はWrapの使い方について解説していきます。
対象読者
○Flutter初学者
○Wrapの基本的な使い方を学びたい人
上記の方におすすめです。
では、解説していきます。
公式
公式ドキュメント
公式Youtube
Wrapとは
Wrapとは、ColumnやRowのように指定した子要素を並べてくれるのに加え、画面幅を超えた時はうまく折り返してくれるウィジットです。
例えば下記のようにRow指定して子要素をいくつか指定してみると、
main.dart
Center(
        child: Row(
          children: const [
            Chip(
              avatar: CircleAvatar(
                backgroundColor: Colors.blue,
                child: Text('A'),
              ),
              label: Text('Wrapテスト'),
            ),
            Chip(
              avatar: CircleAvatar(
                backgroundColor: Colors.blue,
                child: Text('B'),
              ),
              label: Text('Wrapテスト'),
            ),
            Chip(
              avatar: CircleAvatar(
                backgroundColor: Colors.blue,
                child: Text('C'),
              ),
              label: Text('Wrapテスト'),
            ),
            Chip(
              avatar: CircleAvatar(
                backgroundColor: Colors.blue,
                child: Text('D'),
              ),
              label: Text('Wrapテスト'),
            ),
          ],
        ),
      ),

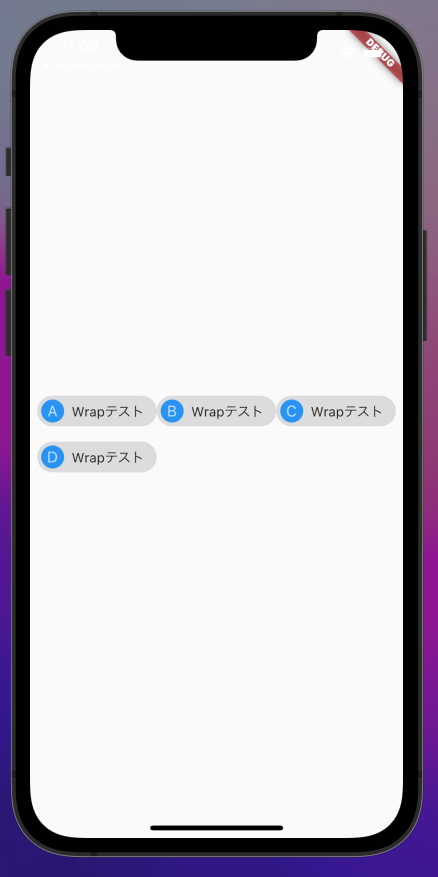
写真のように画面幅を超えてoverflowedエラーが発生してしまいます。
そこで先ほどRowを指定していた部分をWrapに変更してみると、
main.dart
Center(
        child: Wrap( // RowからWrapに変更
          children: const [
            Chip(
              avatar: CircleAvatar(
                backgroundColor: Colors.blue,
                child: Text('A'),
              ),
              label: Text('Wrapテスト'),
            ),
            Chip(
              avatar: CircleAvatar(
                backgroundColor: Colors.blue,
                child: Text('B'),
              ),
              label: Text('Wrapテスト'),
            ),
            Chip(
              avatar: CircleAvatar(
                backgroundColor: Colors.blue,
                child: Text('C'),
              ),
              label: Text('Wrapテスト'),
            ),
            Chip(
              avatar: CircleAvatar(
                backgroundColor: Colors.blue,
                child: Text('D'),
              ),
              label: Text('Wrapテスト'),
            ),
          ],
        ),
      ),
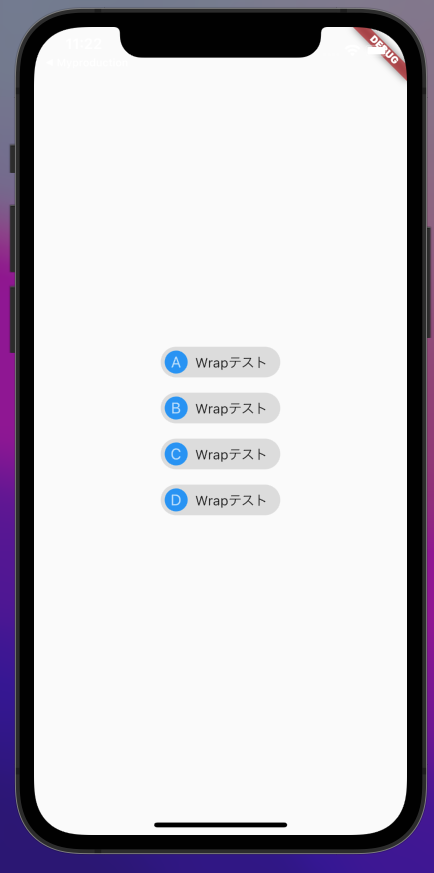
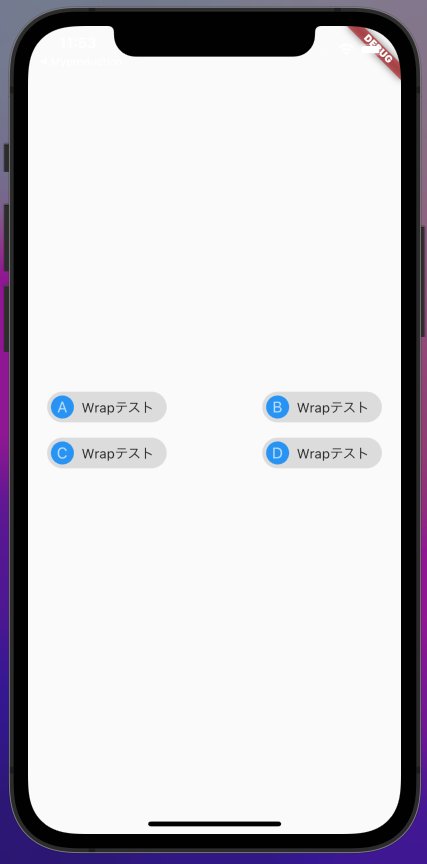
こんな感じで画面幅を超えてしまう子要素をうまく折り返してくれます。
Columnと同じように縦に子要素を並べたい時はderection: Axis.verticalを指定します。
        child: Wrap(
          direction: Axis.vertical,
その他のプロパティ(一部)
○alignment
子要素の配置を変更することができます。
        child: Wrap(
          alignment: WrapAlignment.center,
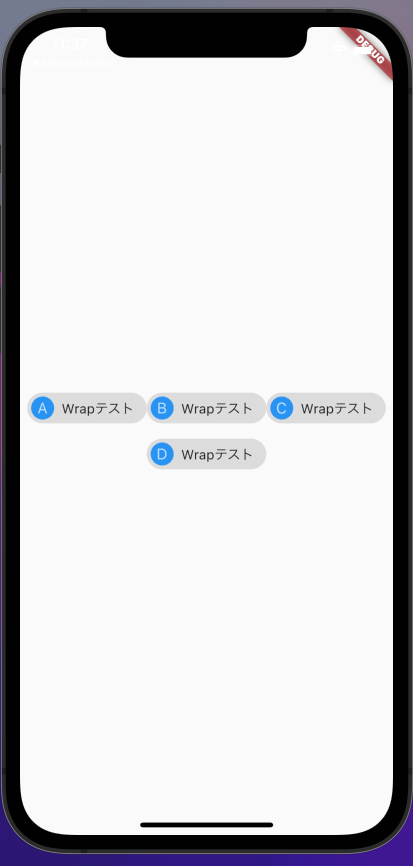
○runSpacing
折り返した行(列)間の幅を指定します。
        child: Wrap(
          runSpacing: 100.0,
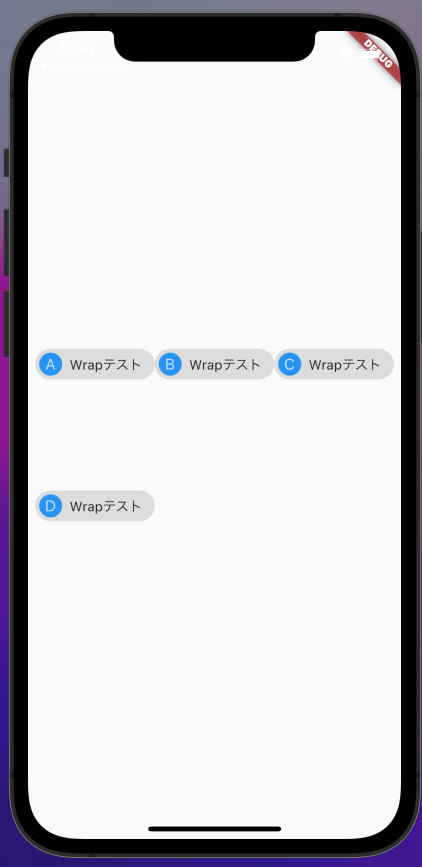
○spacing
子要素間の幅を指定します。
       child: Wrap(
          spacing: 100,
感想
Wrap = 「折り返してくれるウィジット」から「子要素のレイアウトを割と自由に動かすことができるウィジット」という認識に変わりました。やはり普段何気なく使用しているウィジットのドキュメントを見てみるのも大事ですね。