*この記事は初学者向けに書いています。
概要
地図系のアプリを開発する時に場所(地図)検索機能を実装することがあると思いますが、自分のようにプログラミング自体未経験の方にとって、場所検索機能は少しハードルが高いように感じます。Widgetを組んでおしゃれなデザインを作るのとは違って、ちゃんとプログラミングらしく「ロジックを考える」必要があるからです。
そこで今回はFlutterでGoogleMapAPIを用いて場所検索機能を簡単に実装する方法を解説します。Flutterに限らず、考え方は他の言語でも同じだと思うので、Flutter以外の言語を使用している方にも読んでいいただけると嬉しいです。
あくまでも未経験者が書いた記事なので、
他に良い実装方法があればコメントいただけますと幸いです。
今回の完成品は以下の通りです。
 (画質が粗くてすいません...)
処理の流れを考える
何らかの機能を実装するとき、まず処理の流れを整理し、書き出してから実装した方がスムーズにいきます。
今回実装する場所(地図)検索機能の処理の流れは以下の通りです。
1. 検索画面に移動し、検索したい場所を入力
2. PlacesAPIを用いて該当の場所を返却
3. タップした時にGeocodingAPIを用いて場所名から経度・緯度を取得
4. Navigator.popで渡した経度・緯度の場所に画面を移動
では、解説していきます。
(事前にGoogleMapの表示の実装は行っておいてください。)
GoogleMapのサンプルコード
状態管理はデフォルトのStatefulWidgetでsetStateで状態を変更しています。
その他の状態管理パターンを利用する場合は適宜読み替えてください。
class MapSampleState extends State {
  Completer _controller = Completer();


  final CameraPosition _initialCameraPosition = CameraPosition(
    // 最初に描画される位置を指定
    target: LatLng(35.17176088096857, 136.88817886263607),
    zoom: 14.4746,
  );

  @override
  Widget build(BuildContext context) {
    return Scaffold(
      body: GoogleMap(
        compassEnabled: false, // デフォルトのコンパスを削除
        myLocationButtonEnabled: false, // デフォルトの現在地移動ボタンを非表示
        mapType: MapType.normal, // 地図のタイプを指定
        initialCameraPosition: _initialCameraPosition, // 最初に表示される位置を指定
        onMapCreated: (GoogleMapController controller) {
          _controller.complete(controller);
        },
      ),
      floatingActionButton: FloatingActionButton(
        onPressed: () {
// 検索画面へ遷移させる処理
        },
        child: Icon(Icons.search),
      ),
    );
  }
}

▼参考
https://www.nskint.co.jp/2021/06/30/google_flutter_column_2/
1. 検索画面に移動し、検索したい場所を入力
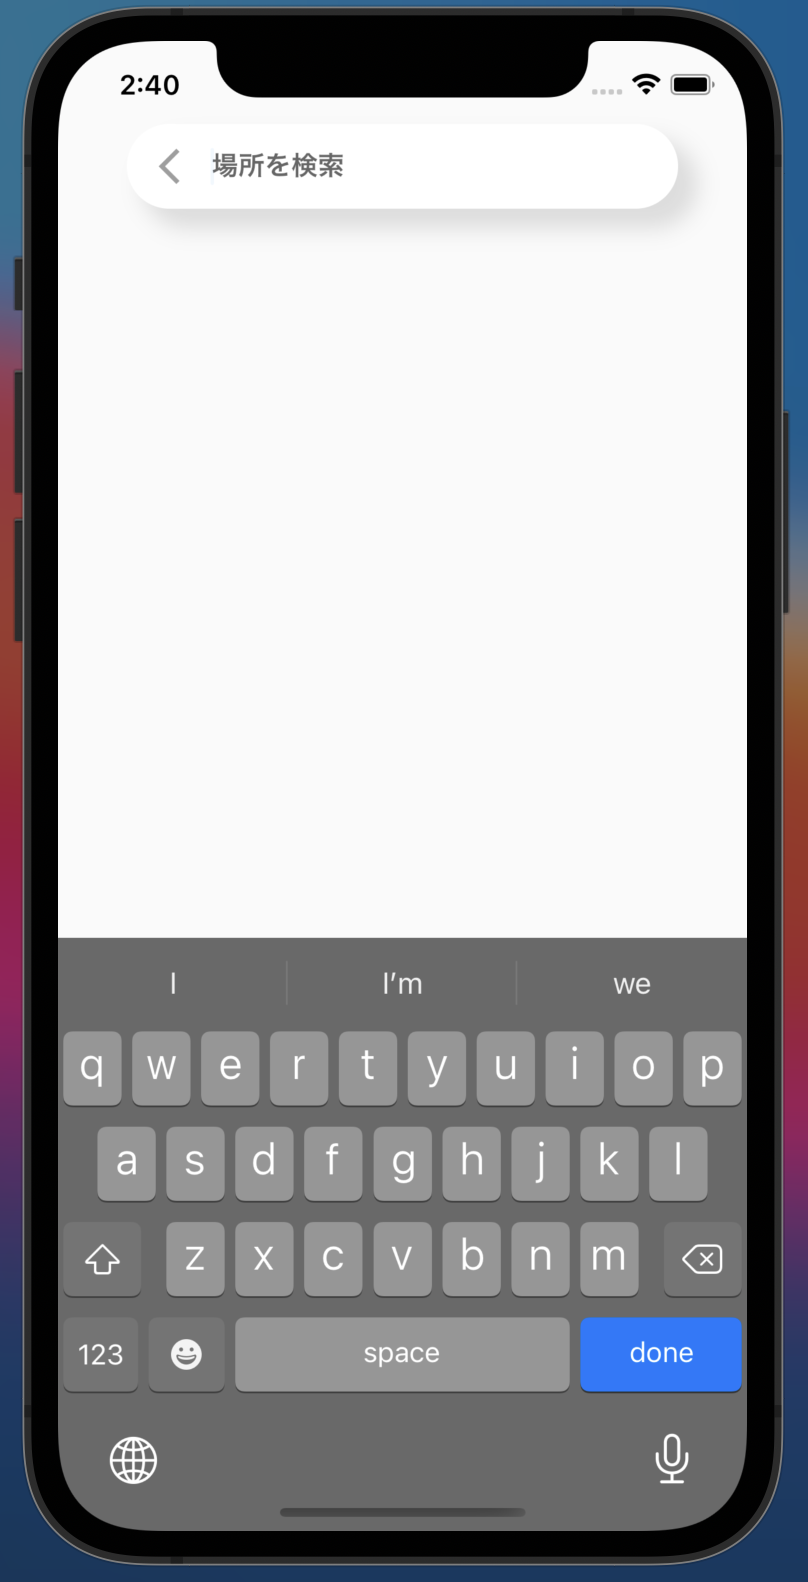
まずは、floatingActionButtonを押した時に遷移する検索画面を作成します。
検索フォームはTextFormFieldで、検索により該当する値をListView.builderで表示させます。
class _SearchPage extends State<SearchPage> {
  @override
  Widget build(BuildContext context) {
    return Scaffold(
      body: SafeArea(
        child: Container(
          width: MediaQuery.of(context).size.width,
          child: Column(
            children: [
              Padding(
                padding: const EdgeInsets.only(bottom: 10.0),
                child: Row(
                  mainAxisAlignment: MainAxisAlignment.center,
                  children: [
                    Container(
                        decoration: BoxDecoration(
                          color: Colors.white,
                          borderRadius: BorderRadius.circular(30),
                          boxShadow: [
                            BoxShadow(
                                color: Colors.black12,
                                blurRadius: 10.0,
                                spreadRadius: 1.0,
                                offset: Offset(10, 10))
                          ],
                        ),
                        child: Container(
                            width: MediaQuery.of(context).size.width * 0.8,
                            alignment: Alignment.centerLeft,
                            child: TextFormField( // 検索フォーム
                              onChanged: (value) {},
                              decoration: InputDecoration(
                                prefixIcon: IconButton(
                                  color: Colors.grey[500],
                                  icon: Icon(Icons.arrow_back_ios_new),
                                  onPressed: () {
                                    Navigator.pop(context);
                                  },
                                ),
                                hintText: '場所を検索',
                                hintStyle: TextStyle(
                                    fontSize: 15, fontWeight: FontWeight.bold),
                                border: InputBorder.none,
                              ),
                            ))),
                  ],
                ),
              ),
              Flexible(
                child: ListView.builder(
                  shrinkWrap: true,
                  itemCount: // 検索結果の配列の長さを指定(配列名.length),
                  itemBuilder: (context, index) {
                    return Card(
                      child: ListTile(
                        title: Text(''),
                        onTap: () async {},
                      ),
                    );
                  },
                ),
              ),
            ],
          ),
        ),
      ),
    );
  }
}
⬇︎ビルドするとこんな感じになります。
2. PlacesAPIを用いて該当の場所を返却
①placesAPIのパッケージをインポート
FlutterでPlacesAPIを利用するために下記のパッケージが用意されています。
まず、placesAPIを利用するために、pubspec.yamlを修正していきます。
dependencies:
  flutter:
    sdk: flutter

  google_maps_flutter: ^2.1.1
  google_place: ^0.4.3 // 追加(バージョンは最新を指定してください。)
追加したらflutter pub getを実行。
②検索するための関数を作成
基本的には公式のドキュメントのReadmeとExampleを読めば分かると思いますが、自分なりに簡略化してわかりやすくしてみました。具体的な説明はコメントアウトしています。
class _SearchPage extends State<SearchPage> {
  late GooglePlace googlePlace;
  List<AutocompletePrediction> predictions = []; // predictionsに検索結果を格納

  @override
  void initState() {
    googlePlace = GooglePlace("YOUR_API_KEY"); // ⬅︎GoogleMapと同じAPIキーを指定。
    super.initState();
  }

  @override
  Widget build(BuildContext context) {
    return Scaffold(
      body: SafeArea(
        child: Container(
          width: MediaQuery.of(context).size.width,
          child: Column(
            children: [
              Padding(
                padding: const EdgeInsets.only(bottom: 10.0),
                child: Row(
                  mainAxisAlignment: MainAxisAlignment.center,
                  children: [
                    Container(
                        decoration: BoxDecoration(
                          color: Colors.white,
                          borderRadius: BorderRadius.circular(30),
                          boxShadow: [
                            BoxShadow(
                                color: Colors.black12,
                                blurRadius: 10.0,
                                spreadRadius: 1.0,
                                offset: Offset(10, 10))
                          ],
                        ),
                        child: Container(
                            width: MediaQuery.of(context).size.width * 0.8,
                            alignment: Alignment.centerLeft,
                            child: TextFormField(
                              onChanged: (value) {
                                if (value.isNotEmpty) {
                                  autoCompleteSearch(value); // 入力される毎に引数にその入力文字を渡し、関数を実行
                                } else {
                                  if (predictions.length > 0 && mounted) { // ここで配列を初期化。初期化しないと文字が入力されるたびに検索結果が蓄積されてしまう。
                                    setState(() {
                                      predictions = [];
                                    });
                                  }
                                }
                              },
                              decoration: InputDecoration(
                                prefixIcon: IconButton(
                                  color: Colors.grey[500],
                                  icon: Icon(Icons.arrow_back_ios_new),
                                  onPressed: () {
                                    Navigator.pop(context);
                                  },
                                ),
                                hintText: '場所を検索',
                                hintStyle: TextStyle(
                                    fontSize: 15, fontWeight: FontWeight.bold),
                                border: InputBorder.none,
                              ),
                            ))),
                  ],
                ),
              ),
              Flexible(
                child: ListView.builder(
                  shrinkWrap: true,
                  itemCount: predictions.length, // 検索結果を格納したpredictions配列の長さを指定
                  itemBuilder: (context, index) {
                    return Card(
                      child: ListTile(
                        title: Text(predictions[index].description.toString()), // 検索結果を表示。descriptionを指定すると場所名が表示されます。
                        onTap: () async {
// 検索した住所を押した時の処理を記載
                        },
                      ),
                    );
                  },
                ),
              ),
            ],
          ),
        ),
      ),
    );
  }
// 検索処理
  void autoCompleteSearch(String value) async {
    final result = await googlePlace.autocomplete.get(value);
    if (result != null && result.predictions != null && mounted) {
      setState(() {
        predictions = result.predictions!;
      });
    }
  }
}
⬇︎ビルドすると住所検索できるようになりました。

Places APIについての詳細は下記を参照してください。
今回はAPIキーを直書きしていますが、
APIキーなどの秘匿情報は環境変数で設定して値を取得するようにしましょう。
▼参考
https://zuma-lab.com/posts/flutter-hiding-api-key-with-dart-define
3. 場所をタップした時にGeocodingAPIを用いて場所名から経度・緯度を取得
GeocodingAPIは住所や郵便番号から経度・緯度を返してくれます。
①geocodingAPIのパッケージをインポート
先ほどのPlacesAPIと同様に、geocodingAPIを利用するために、pubspec.yamlを修正していきます。
dependencies:
  flutter:
    sdk: flutter

  google_maps_flutter: ^2.1.1
  google_place: ^0.4.3
  geocoding: ^2.0.1 // 追加
バージョンは最新を指定してください。
追加したらflutter pub getを実行。
②場所名から経度・緯度を取得
まず、取得した経度と緯度を格納するために配列を宣言
List LatLng = []; // 経度と緯度を格納するための配列
次に検索した場所名から経度・緯度を取得するための処理を追加します。
              Flexible(
                child: ListView.builder(
                  shrinkWrap: true,
                  itemCount: predictions.length,
                  itemBuilder: (context, index) {
                    return Card(
                      child: ListTile(
                        title: Text(predictions[index].description.toString()),
                        onTap: () async {
 List? locations = await locationFromAddress(
                              predictions[index]
                                  .description
                                  .toString()); // locationFromAddress()に検索結果のpredictions[index].description.toString()を渡す

                          setState(() { // 取得した経度と緯度を配列に格納
                            LatLng.add(locations.first.latitude);
                            LatLng.add(locations.first.longitude);
                          });
// Navigator.popで前の画面に戻るときに併せて経度と緯度を渡す。
                          Navigator.pop(
                            context,
                            LatLng,
                          );
                        },
                      ),
                    );
                  },
                ),
              ),
LatLng[0]に経度(latitude)、LatLng[1]に緯度(longitude)が格納されているので、
Navigator.popで前の画面(GoogleMapが表示されている画面)に戻ったときに取得した経度・緯度の場所が中心に来るように処理します。
4. Navigator.popで渡した経度・緯度の場所に画面を移動
最後にマップに戻った時に引数として渡された経度と緯度の場所に画面が来るように処理を追加します。
①Navigator.popした後の処理を追加
Navigator.pushの後に、then()を追加するとNavigator.popで戻ってきた後の処理を書くことができます。
      floatingActionButton: FloatingActionButton(
        onPressed: () {
          Navigator.of(context).push(
            MaterialPageRoute(
              builder: (context) {
                return SearchPage();
              },
            ),
          ).then((value) async { // valueに配列に格納された経度・緯度が格納されています
            await searchLocation(value);
          });
        },
        child: Icon(Icons.search),
      ),
    );
②経度と緯度から画面を移動させる処理を追加
  Future<void> searchLocation(List result) async {
    final GoogleMapController controller = await _controller.future;
    controller.animateCamera(CameraUpdate.newCameraPosition(CameraPosition(
      target: LatLng(result[0], result[1]), // CameraPositionのtargetに経度・緯度の順で指定します。
      zoom: 15,
    )));
  }
以上で場所(地図)検索機能の実装が完了です。
拙い文章力・拙い技術力でこの記事を書いてみましたが、少しでも自分と同じ初学者のためになれば嬉しいなと思います。
Flutterを楽しんでいきましょう!!
Flutter大学について
現在私はFlutter大学という、Flutterのコミュニティに参加しています。
週4回の質問ZOOMやtimes、SpatialChatでの交流など、未経験の方にとってFlutterを学ぶ良い環境が整っているなと感じています。自分みたいにFlutterはおろか、プログラミング自体未経験...だけどアプリ作ってみたい!!って人におすすめです。
宣伝
現在こんなアプリ作っています。


アプリの概要としては、タイトル通り地図上に気軽に思い出を残すことができるアプリです。
旅行の思い出を簡単に見返せるアプリがあったら使いたいな〜という思いから開発することに決めました。
年内までにリリースできるよう頑張ります。