はじめに
最近はFlaskを使用したWeb APIを実装することが多いです。
Web APIを提供する側としては、なるべく手間をかけずにAPIドキュメントも整備したいですよね。
この記事では、marshmallowを利用した入力値の検証/出力値の整形を行いつつ、docstringに記載したSwagger YAMLからSwaggerUIを自動生成する手法を紹介します。
開発環境
サンプルのリポジトリを用意しています。
クローンして以下のコマンドで実行可能です。
$ pipenv install
$ pipenv run dev
 * Serving Flask app "main" (lazy loading)
 * Environment: production
   WARNING: This is a development server. Do not use it in a production deployment.
   Use a production WSGI server instead.
 * Debug mode: on
 * Running on http://127.0.0.1:8080/ (Press CTRL+C to quit)
 * Restarting with stat
 * Debugger is active!
 * Debugger PIN: 325-268-230
解説
marshmallow
marshmallowはオブジェクトのシリアル化をサポートするライブラリです。
今回はmarshmallowを利用して入力値の検証、出力値の整形を行います。
まずは基本となるリクエスト/レスポンスを表すスキーマを定義しましょう。
ここでは、あるユーザーを表すスキーマUserSchemaを定義しています。属性には制約も追加しておきます。
from typing import List, Tuple, Type

from marshmallow import Schema, fields, validate


class UserSchema(Schema):
    user_name = fields.Str(required=True, validate=validate.Length(max=10))
    mail = fields.Str(required=True)
    age = fields.Int(required=False, validate=validate.Range(min=0))


def get_all_schemas() -> List[Tuple[str, Type[Schema]]]:
    """
    定義したスキーマの一覧を返す関数です。
    flasggerに登録してSwagger YAMLで利用可能にするために利用します。
    :return:
    """
    return [(UserSchema.__name__, UserSchema)]
| 属性名 | 説明 | 制約 |
|---|---|---|
| user_name | ユーザーの名前 | 必須/最大10文字 |
| メールアドレス | 必須 | |
| age | 年齢 | 任意/0歳以上 |
flasgger
flasggerはflaskで定義されたビューからOpenAPIの仕様を作成するライブラリです。
またSwaggerUIを追加してくれる機能も備わっています。
先ほど定義したmarshmallowのスキーマを登録して、Swagger YAMLでスキーマを利用できるようにしておきます。
from apispec.ext.marshmallow import MarshmallowPlugin
from apispec_webframeworks.flask import FlaskPlugin
from flasgger import APISpec, Swagger
from flask import Flask

from schema import get_all_schemas

spec = APISpec(
    title="marshmallow-with-flasgger",
    version="0.1.0",
    openapi_version="2.0",
    plugins=[FlaskPlugin(), MarshmallowPlugin()],
)

flask_app = Flask(__name__)
flask_app.config["JSON_AS_ASCII"] = False
flask_app.config["SWAGGER"] = {"uiversion": 3}
flask_app.config["SECRET_KEY"] = "secret key"

_template = spec.to_flasgger(flask_app, definitions=get_all_schemas())  # ここで先ほどのget_all_schemas関数を呼び出しています。
_swag = Swagger(flask_app, template=_template)
エンドポイントのdocstringにSwagger YAML形式でドキュメントを記載します。
ユーザー登録のエンドポイントでリクエストにはUserSchemaを受け取ります。
#/definitions/UserSchemaと記載することでリクエスト/レスポンスでのスキーマの利用が可能になっています。
@flask_app.route("/users", methods=["POST"])
def post_users():
    """
    post user
    ---
    tags:
      - user
    produces:
      - application/json
    parameters:
      - in: body
        name: user
        schema:
          $ref: '#/definitions/UserSchema'
    responses:
      200:
        description: Successful operation
        schema:
          $ref: "#/definitions/UserSchema"
    """
    payload = request.json

    # 入力値の検証を行います。入力値がSchemaと一致しない場合はValidationErrorがraiseされます。
    schema = UserSchema()
    schema.load(payload)

    # バリデーションが完了したら何らかのロジックを実行するでしょう。
    db.Users.save(schema.dump(payload))

    return jsonify(payload)
入力値がSchemaと一致しない場合はValidationErrorがraiseされます。
ValidationErrorはエラーハンドラーでまとめてキャッチしておくと便利です。
@flask_app.errorhandler(ValidationError)
def handle_schema_validation_error(e: ValidationError):
    return jsonify(e.messages), 400
動作確認
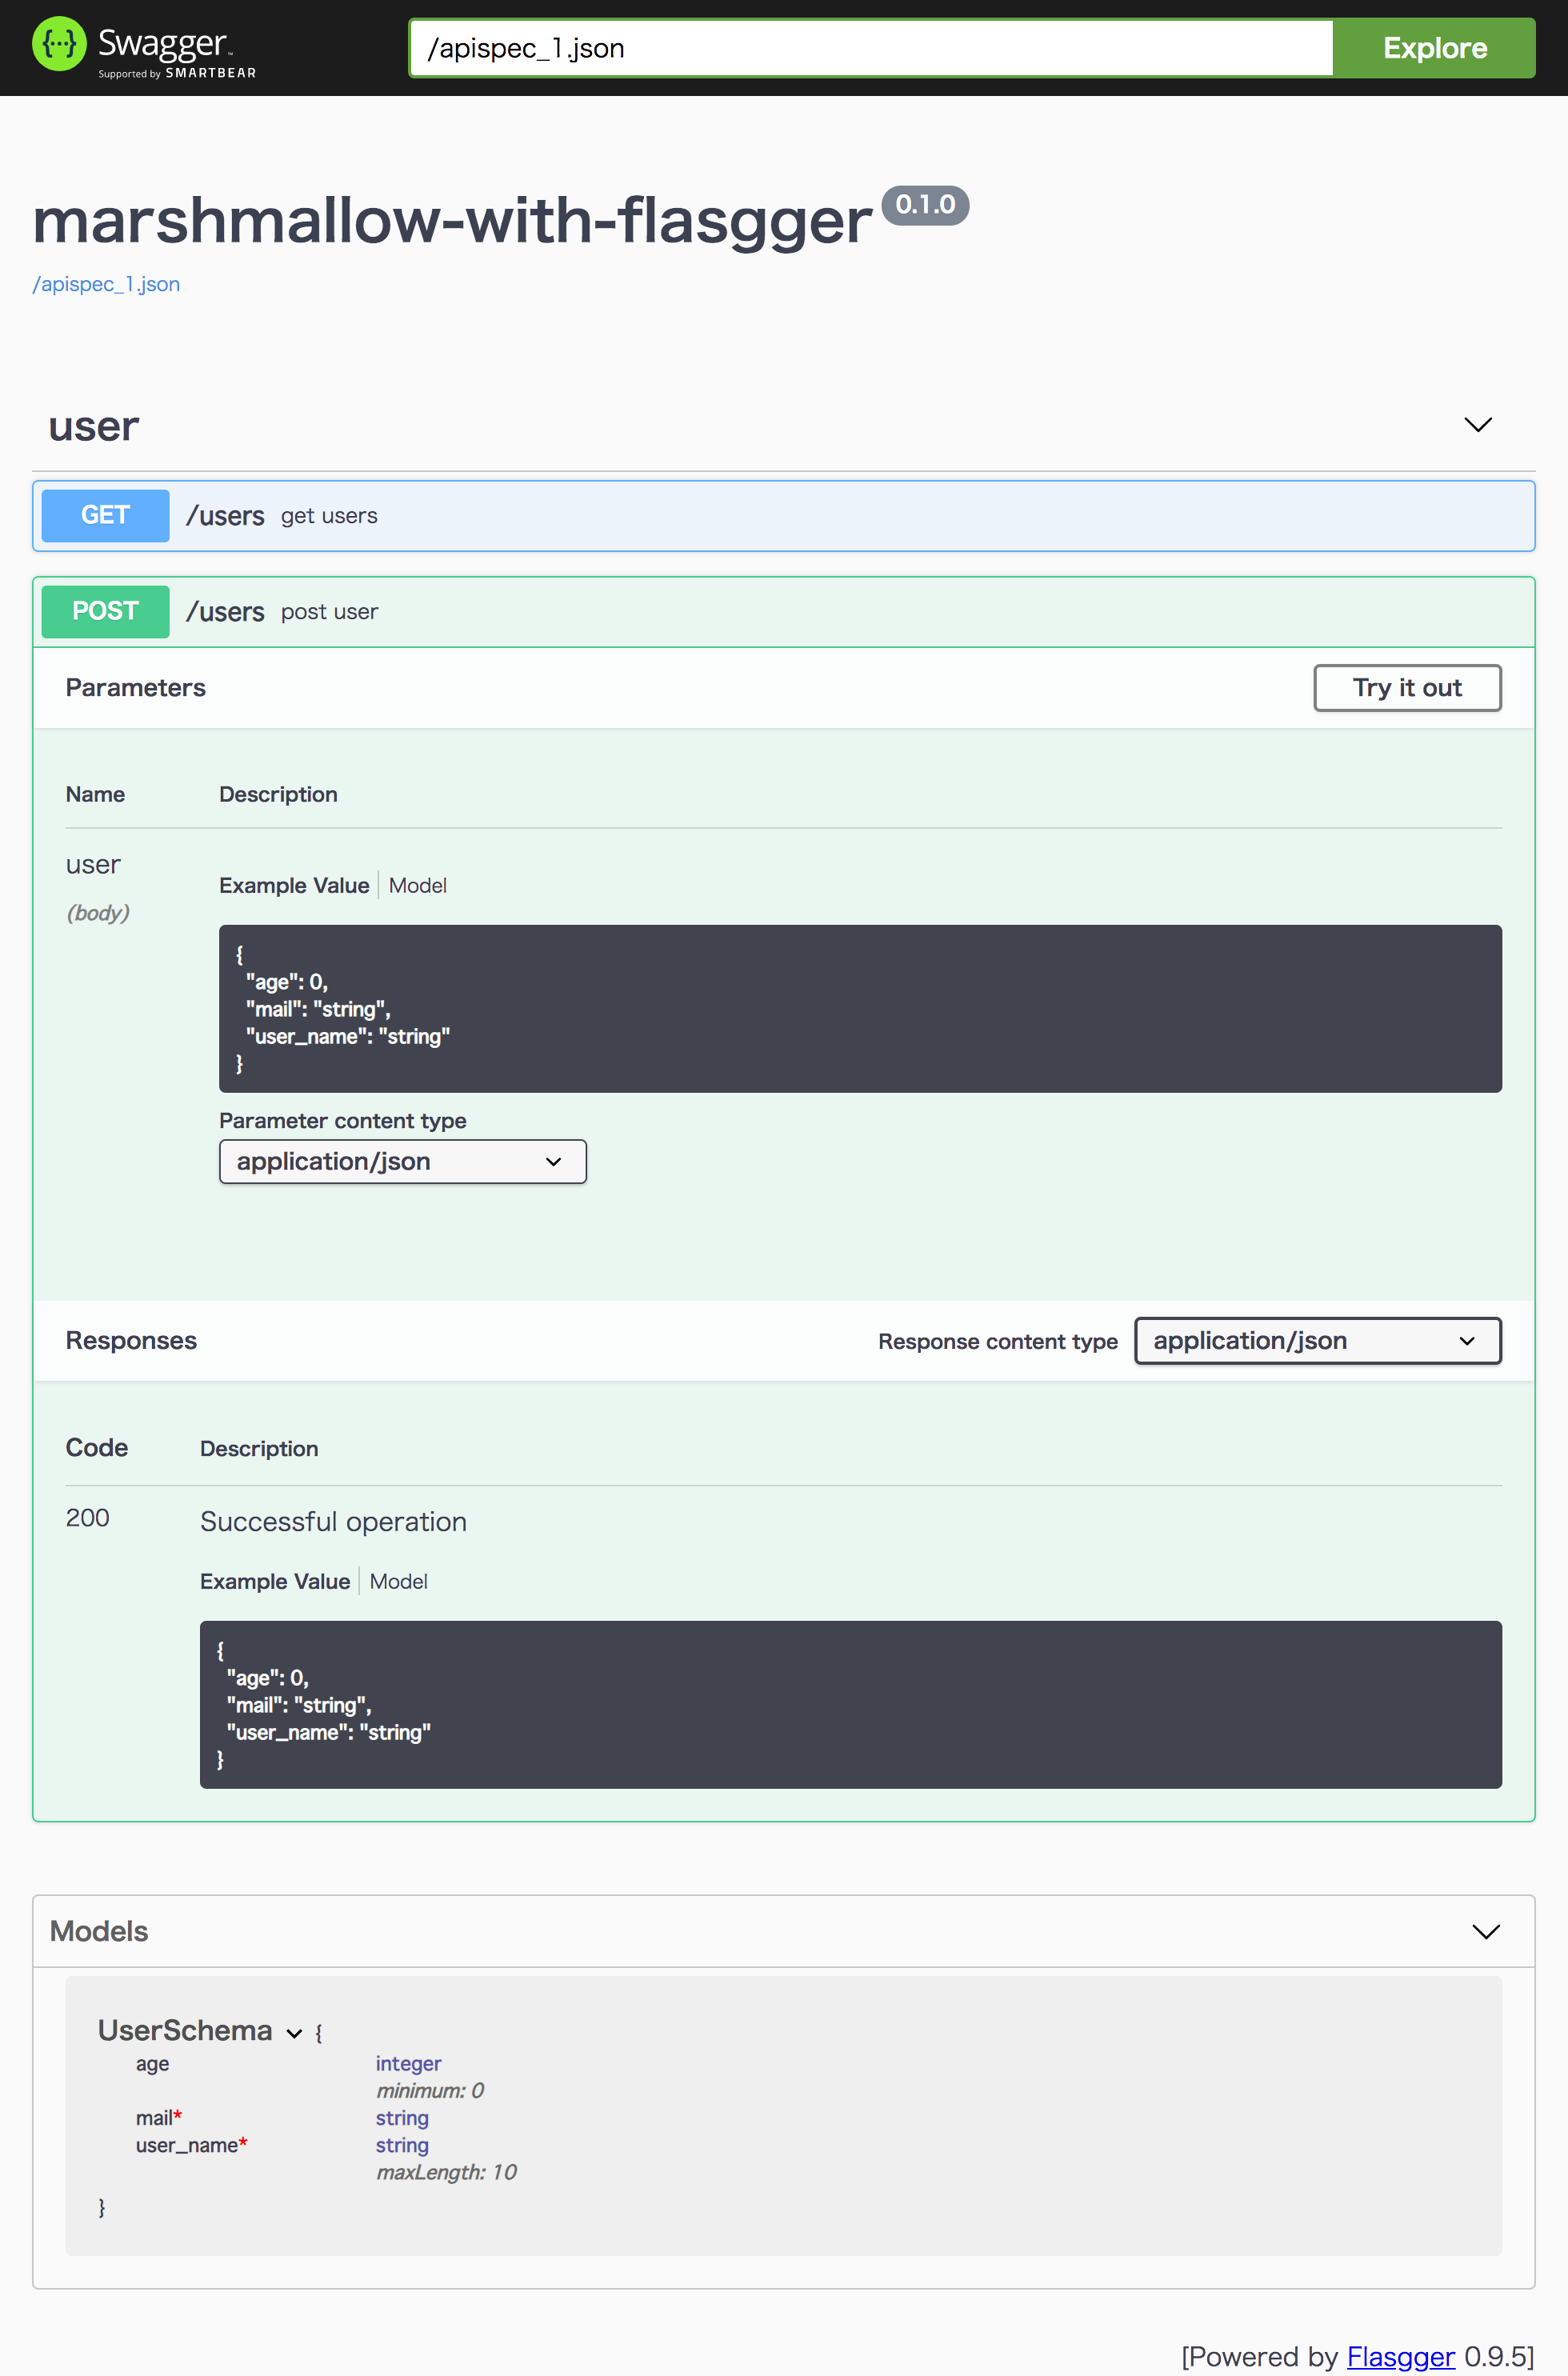
http://localhost:8080/apidocs/ にアクセスします。
flaskのビュー、marshmallowで定義されたスキーマから自動生成されたSwaggerUIのページを確認できます。
入力値の検証のために定義したUserSchemaの制約が、ドキュメントにも自動的に反映されていることがわかります。
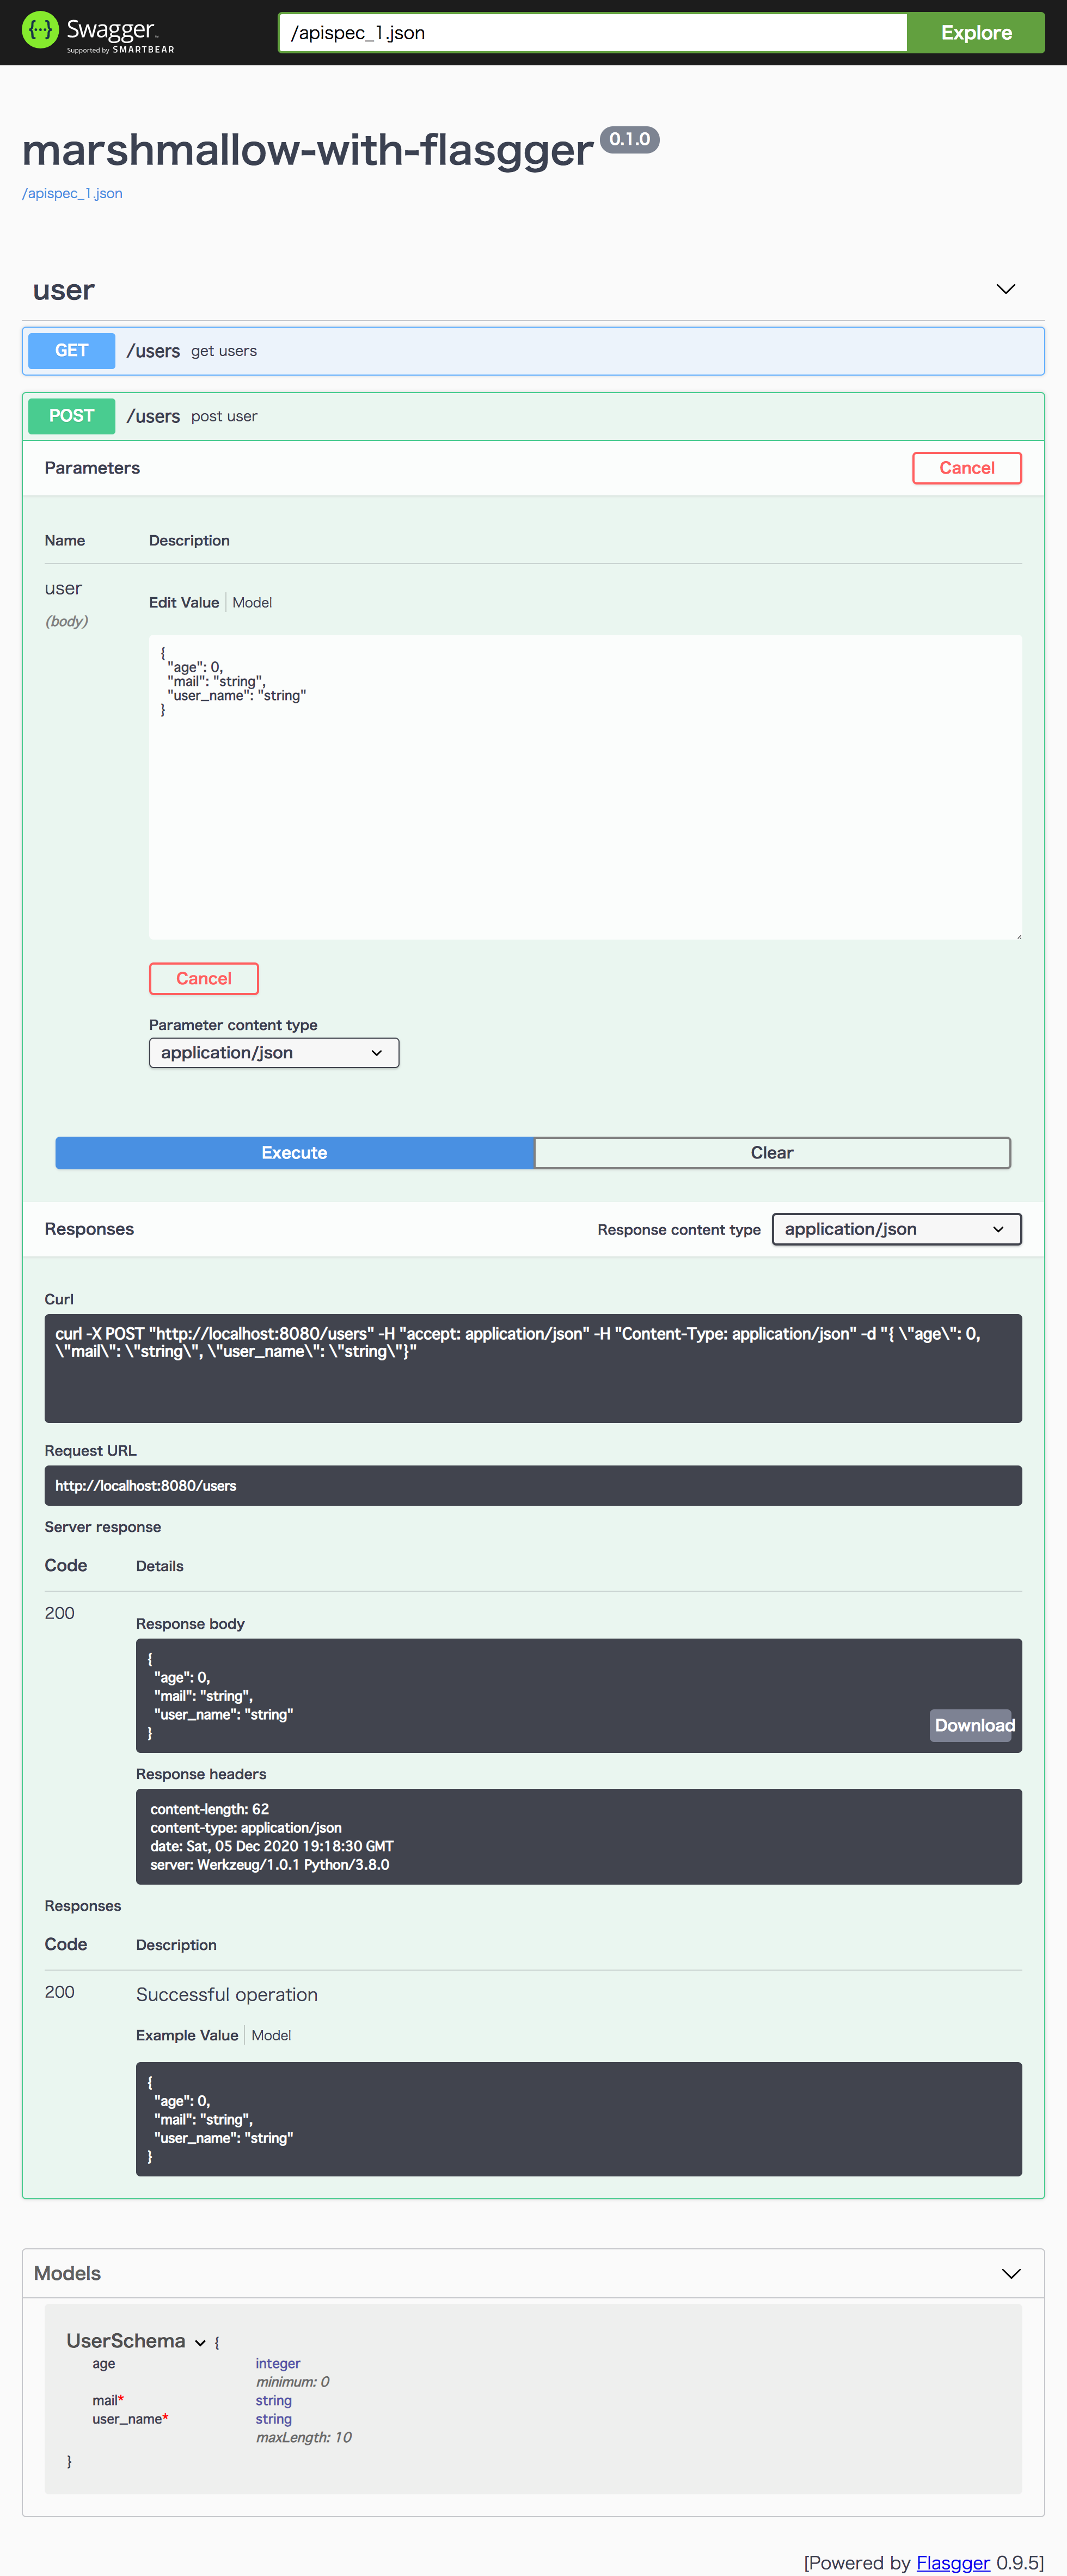
リクエストを投げてみる
Try it out でリクエストを送信してみます。
実行画面ではdocstringで定義した#/definitions/UserSchemaからリクエストの雛形が作成されるので便利です。Executeで送信が可能です。
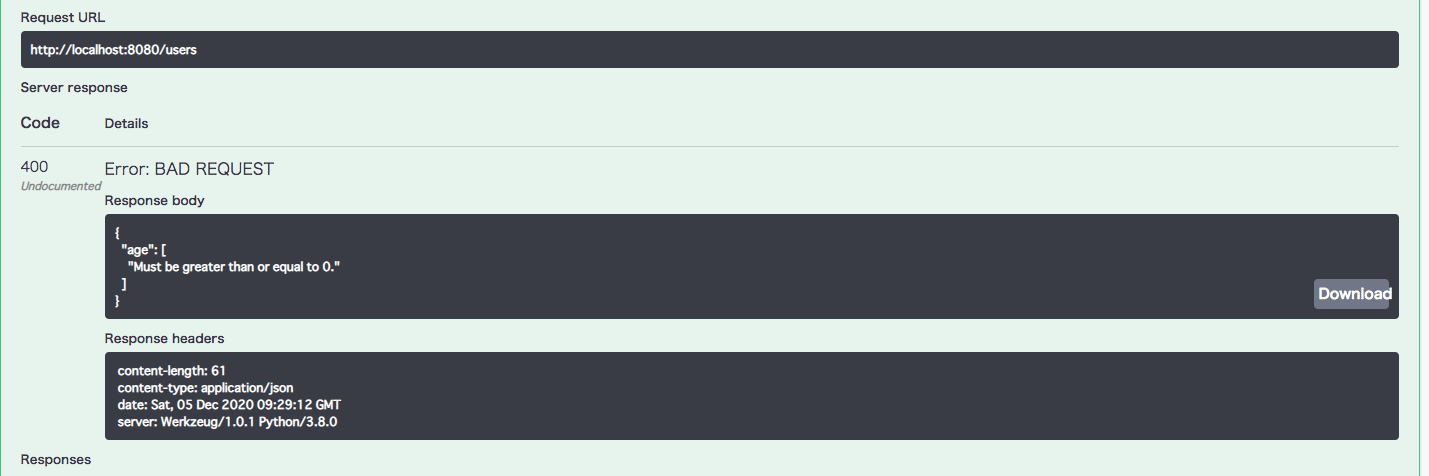
またUserSchemaで定義された制約に違反するリクエストを送信すると、marshmallowがraiseしたエラーが表示されます。
以下は年齢を-1として送信した結果です。
まとめ
環境を一度ここまで整備すれば、
- 入力値の検証のためにスキーマを書く
- APIを実装しdocstringを書く
二つの自然な手順でドキュメントの自動生成までスムーズに行うことができます。スキーマの制約を更新したり、新しい属性を追加した際のドキュメントの更新漏れもなくなるでしょう。
快適なドキュメントの自動生成の仕組みが備わっていると、APIを提供する側、利用する側共に気持ちよく開発できますね。
DX(Digital Transformation)だけでなく、DX(Developer Experience)も大切にしていきたいと思います。(これが言いたかっただけ)