MacOS の VirtualBox Ubntu上にDocker環境を構築
下記の手順で作業を行います。
- MacOS上のVirtualBoxにゲストOSとしてUbntuをインストール
- ゲストOSのUbntu上にDocker環境を構築
MacOS の VirtualBox にUbntuをゲストOSとしてインストール
VirtualBoxを入手する
VirtualBox binaries
https://www.virtualbox.org/wiki/Downloads
Macの場合は、「OS X Hosts」をクリックします。
Ubuntuを入手してインストール
Ubuntu Desktop 18.04.4 LTS
https://jp.ubuntu.com/download
Virtualboxのホストオンリーネットワークを作成
ホストOSで通信するために、Virtualboxのホストオンリーネットワークを作成します。
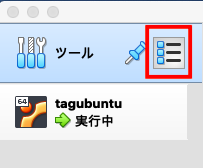
ホストOSの設定ではないのでクリックする場所に注意。

クリックするだけで設定等は自動で行われます。
自動入力される設定の例(環境によって設定内容は変わります、デフォルトのままでOK、修正不要):

DHCPの設定も勝手に入ると思います。
VirtualboxのゲストOS用ネットワークを作成
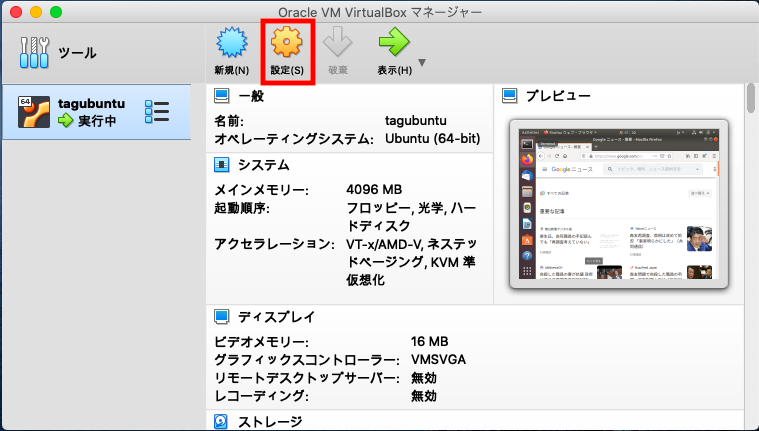
今度はゲストOS用のネットワーク設定です。クリックする場所に注意。

ネットワーク の アダプター2 に 割り当て ホストオンリーアダプター を選択します。
名前 で、先ほど作成したホストオンリーアダプターを選択できるはずです。

ゲストOS(Ubuntu)でインターネット通信が可能かを確認
Firefox(Webブラウザ)等で、インターネットに接続可能になったことを確認してください。
ゲストOS(Ubuntu)のアップデート
アップデートを行います。
sudo apt update
sudo apt upgrade
Net-tools , pingのインストール
IPの確認にifconfig,PINGを利用したいので、インストールしておきます。
sudo apt-get install net-tools iputils-ping
sshのインストール
ホストOSからゲストOSへの作業時にsshを利用したいので、インストールしておきます。
セキュリティ対策等は各自でお願いします。
sudo apt-get install ssh
systemctl start sshd
私の環境でのssh例(当然、IPやI/F等は各自の環境で変わってきます)
ゲストOSにログインし、sshが起動していることを確認します。
tagucchan@tagvirtualbox01:~$ ps -ef | grep ssh
tagucch+  1752  1675  0 10:50 ?        00:00:00 /usr/bin/ssh-agent /usr/bin/im-launch env GNOME_SHELL_SESSION_MODE=ubuntu gnome-session --session=ubuntu
root      4945     1  0 10:55 ?        00:00:00 /usr/sbin/sshd -D
root      6000  4945  0 10:57 ?        00:00:00 sshd: tagucchan [priv]
tagucch+  6090  6000  0 10:58 ?        00:00:00 sshd: tagucchan@pts/1
tagucch+  6117  6091  0 11:00 pts/1    00:00:00 grep --color=auto ssh
sshが起動中ですので、ゲストOS(Ubuntu)のIPを調べます。
tagucchan@tagvirtualbox01:~$ ifconfig
enp0s3: flags=4163<UP,BROADCAST,RUNNING,MULTICAST>  mtu 1500
        inet 10.0.2.15  netmask 255.255.255.0  broadcast 10.0.2.255
        inet6 fe80::3306:660:8dc9:8a3e  prefixlen 64  scopeid 0x20<link>
        ether 08:00:27:e9:85:d9  txqueuelen 1000  (Ethernet)
        RX packets 19747  bytes 19014822 (19.0 MB)
        RX errors 0  dropped 0  overruns 0  frame 0
        TX packets 7266  bytes 488706 (488.7 KB)
        TX errors 0  dropped 0 overruns 0  carrier 0  collisions 0

enp0s8: flags=4163<UP,BROADCAST,RUNNING,MULTICAST>  mtu 1500
        inet 192.168.56.101  netmask 255.255.255.0  broadcast 192.168.56.255
        inet6 fe80::ff08:5ca7:204b:8b9c  prefixlen 64  scopeid 0x20<link>
        ether 08:00:27:88:8e:37  txqueuelen 1000  (Ethernet)
        RX packets 83  bytes 12617 (12.6 KB)
        RX errors 0  dropped 0  overruns 0  frame 0
        TX packets 119  bytes 16465 (16.4 KB)
        TX errors 0  dropped 0 overruns 0  carrier 0  collisions 0

lo: flags=73<UP,LOOPBACK,RUNNING>  mtu 65536
        inet 127.0.0.1  netmask 255.0.0.0
        inet6 ::1  prefixlen 128  scopeid 0x10<host>
        loop  txqueuelen 1000  (Local Loopback)
        RX packets 254  bytes 20458 (20.4 KB)
        RX errors 0  dropped 0  overruns 0  frame 0
        TX packets 254  bytes 20458 (20.4 KB)
        TX errors 0  dropped 0 overruns 0  carrier 0  collisions 0
ホストOSのIPも確認し、通信可能なI/Fは上から2つ目の「enp0s8」、IPが「192.168.56.101」になります。
割愛しますが、ホストOSとゲストOSで「共通のIPではない方のIP」でsshできます。
詳細の説明は、Virtualboxのドキュメントを探して参照してみて下さい。
ホストOS(MacOS)のIP確認
enp0s3: flags=4163<UP,BROADCAST,RUNNING,MULTICAST>  mtu 1500
        inet 10.0.2.15  netmask 255.255.255.0  broadcast 10.0.2.255
        inet6 fe80::3306:660:8dc9:8a3e  prefixlen 64  scopeid 0x20<link>
        ether 08:00:27:e9:85:d9  txqueuelen 1000  (Ethernet)
        RX packets 19768  bytes 19016712 (19.0 MB)
        RX errors 0  dropped 0  overruns 0  frame 0
        TX packets 7290  bytes 490675 (490.6 KB)
        TX errors 0  dropped 0 overruns 0  carrier 0  collisions 0

enp0s8: flags=4163<UP,BROADCAST,RUNNING,MULTICAST>  mtu 1500
        inet 192.168.56.101  netmask 255.255.255.0  broadcast 192.168.56.255
        inet6 fe80::ff08:5ca7:204b:8b9c  prefixlen 64  scopeid 0x20<link>
        ether 08:00:27:88:8e:37  txqueuelen 1000  (Ethernet)
        RX packets 208  bytes 25051 (25.0 KB)
        RX errors 0  dropped 0  overruns 0  frame 0
        TX packets 196  bytes 27251 (27.2 KB)
        TX errors 0  dropped 0 overruns 0  carrier 0  collisions 0

lo: flags=73<UP,LOOPBACK,RUNNING>  mtu 65536
        inet 127.0.0.1  netmask 255.0.0.0
        inet6 ::1  prefixlen 128  scopeid 0x10<host>
        loop  txqueuelen 1000  (Local Loopback)
        RX packets 267  bytes 21659 (21.6 KB)
        RX errors 0  dropped 0  overruns 0  frame 0
        TX packets 267  bytes 21659 (21.6 KB)
        TX errors 0  dropped 0 overruns 0  carrier 0  collisions 0
Macからsshしてみます。
tagucchan@tagvirtualbox01:~$ ssh tagucchan@192.168.56.101
The authenticity of host '192.168.56.101 (192.168.56.101)' can't be established.
ECDSA key fingerprint is SHA256:rgLFPu10ZCNlOSnLROddIRtxfxYtqkzn38auX/c1rmk.
Are you sure you want to continue connecting (yes/no)? yes
Warning: Permanently added '192.168.56.101' (ECDSA) to the list of known hosts.
tagucchan@192.168.56.101's password:
Welcome to Ubuntu 18.04.4 LTS (GNU/Linux 5.3.0-42-generic x86_64)

 * Documentation:  https://help.ubuntu.com
 * Management:     https://landscape.canonical.com
 * Support:        https://ubuntu.com/advantage


 * Canonical Livepatch is available for installation.
   - Reduce system reboots and improve kernel security. Activate at:
     https://ubuntu.com/livepatch

11 個のパッケージがアップデート可能です。
0 個のアップデートはセキュリティアップデートです。

Your Hardware Enablement Stack (HWE) is supported until April 2023.
Last login: Tue Mar 24 10:58:01 2020 from 192.168.56.1
tagucchan@tagvirtualbox01:~$
ゲストOSのUbntu上にDocker環境を構築
公式ドキュメントdocker docs 「Install using the repository」通りに作業します。
aptがhttps経由でリポジトリを使用できるようにする
必要なパッケージをインストール。
sudo apt-get install \
    apt-transport-https \
    ca-certificates \
    curl \
    gnupg-agent \
    software-properties-common
Docker’s official GPG key を追加
curl -fsSL https://download.docker.com/linux/ubuntu/gpg | sudo apt-key add -
鍵の指紋(finger print)で正しい鍵かをチェック
の指紋(finger print)を確認
sudo apt-key fingerprint 0EBFCD88
以下が表示されればOKです。
「9DC8 5822 9FC7 DD38 854A E2D8 8D81 803C 0EBF CD88」
出力例:
tagucchan@tagvirtualbox01:~$ sudo apt-key fingerprint 0EBFCD88
pub   rsa4096 2017-02-22 [SCEA]
      9DC8 5822 9FC7 DD38 854A  E2D8 8D81 803C 0EBF CD88
uid           [ unknown] Docker Release (CE deb) <docker@docker.com>
sub   rsa4096 2017-02-22 [S]
リポジトリを追加( ここでは x86_64 / amd64 用 stable )
sudo add-apt-repository \
   "deb [arch=amd64] https://download.docker.com/linux/ubuntu \
   $(lsb_release -cs) \
   stable"
DOCKER ENGINE - COMMUNITY のインストール
DOCKER ENGINEのCOMMUNITY(コミュニティエディション)をインストールします。
最新に更新しておきます。
sudo apt-get update
sudo apt-get upgrade
DOCKER ENGINE - COMMUNITY のインストール
sudo apt-get install docker-ce docker-ce-cli containerd.io
DOCKER ENGINEの動作確認
動作するか hello-world で確認します。
sudo docker run hello-world
実行例:
Hello from Docker!
This message shows that your installation appears to be working correctly.
の表示が出ればOKです。
tagucchan@tagvirtualbox01:~$ sudo docker run hello-world
[sudo] password for tagucchan:
Unable to find image 'hello-world:latest' locally
latest: Pulling from library/hello-world
1b930d010525: Pull complete
Digest: sha256:f9dfddf63636d84ef479d645ab5885156ae030f611a56f3a7ac7f2fdd86d7e4e
Status: Downloaded newer image for hello-world:latest

Hello from Docker!
This message shows that your installation appears to be working correctly.

To generate this message, Docker took the following steps:
 1. The Docker client contacted the Docker daemon.
 2. The Docker daemon pulled the "hello-world" image from the Docker Hub.
    (amd64)
 3. The Docker daemon created a new container from that image which runs the
    executable that produces the output you are currently reading.
 4. The Docker daemon streamed that output to the Docker client, which sent it
    to your terminal.

To try something more ambitious, you can run an Ubuntu container with:
 $ docker run -it ubuntu bash

Share images, automate workflows, and more with a free Docker ID:
 https://hub.docker.com/

For more examples and ideas, visit:
 https://docs.docker.com/get-started/

tagucchan@tagvirtualbox01:~$
Dockerコンテナを停止
tagucchan@tagvirtualbox01:~$ exit  # Ubuntuのshellから抜ける
tagucchan@tagvirtualbox01:~$ sudo docker ps # 実行中確認
tagucchan@tagvirtualbox01:~$ sudo docker stop hello-world # コンテナhello-worldを停止
tagucchan@tagvirtualbox01:~$ sudo docker ps -a # 停止確認
注意事項
rootでdockerを利用継続するのはお勧めしません。
ここでは割愛していますが、sudoが不要にできる方法があります。
調べて対応してみてください。

