未来電子テクノロジー株式会社でインターンをしている大学一回生です。
PHPをブラウザで表示するのが難しかったのでアウトプットします。
問題点
ドッドインストールの、ローカル開発環境の構築(mac編)を参考にし、Virtualbox(6.0.6)とvagrant(2.2.4)とCyberduckをインストールし、PHPをブラウザで表示しようとしたが、Cyberduckの新規接続ができない。また、できたとしてもブラウザに表示できない。
解決策
1.Vagrantfileを編集する。
# -*- mode: ruby -*-
# vi: set ft=ruby :

# All Vagrant configuration is done below. The "2" in Vagrant.configure
# configures the configuration version (we support older styles for
# backwards compatibility). Please don't change it unless you know what
# you're doing.
Vagrant.configure("2") do |config|
  # The most common configuration options are documented and commented below.
  # For a complete reference, please see the online documentation at
  # https://docs.vagrantup.com.

  # Every Vagrant development environment requires a box. You can search for
  # boxes at https://vagrantcloud.com/search.
  config.vm.box = "bento/centos-6.8"

  # Disable automatic box update checking. If you disable this, then
  # boxes will only be checked for updates when the user runs
  # `vagrant box outdated`. This is not recommended.
  # config.vm.box_check_update = false

  # Create a forwarded port mapping which allows access to a specific port
  # within the machine from a port on the host machine. In the example below,
  # accessing "localhost:8080" will access port 80 on the guest machine.
  # NOTE: This will enable public access to the opened port
  # config.vm.network "forwarded_port", guest: 80, host: 8080

  # Create a forwarded port mapping which allows access to a specific port
  # within the machine from a port on the host machine and only allow access
  # via 127.0.0.1 to disable public access
  # config.vm.network "forwarded_port", guest: 80, host: 8080, host_ip: "127.0.0.1"

  # Create a private network, which allows host-only access to the machine
  # using a specific IP.
   config.vm.network "private_network", ip: "192.168.33.11"

  # Create a public network, which generally matched to bridged network.
  # Bridged networks make the machine appear as another physical device on
  # your network.
  # config.vm.network "public_network"

  # Share an additional folder to the guest VM. The first argument is
  # the path on the host to the actual folder. The second argument is
  # the path on the guest to mount the folder. And the optional third
  # argument is a set of non-required options.
  # config.vm.synced_folder "../data", "/vagrant_data"

  # Provider-specific configuration so you can fine-tune various
  # backing providers for Vagrant. These expose provider-specific options.
  # Example for VirtualBox:
  #
  # config.vm.provider "virtualbox" do |vb|
  #   # Display the VirtualBox GUI when booting the machine
  #   vb.gui = true
  #
  #   # Customize the amount of memory on the VM:
  #   vb.memory = "1024"
  # end
  #
  # View the documentation for the provider you are using for more
  # information on available options.

  # Enable provisioning with a shell script. Additional provisioners such as
  # Puppet, Chef, Ansible, Salt, and Docker are also available. Please see the
  # documentation for more information about their specific syntax and use.
  # config.vm.provision "shell", inline: <<-SHELL
  #   apt-get update
  #   apt-get install -y apache2
  # SHELL
end
上のコードの、「#」がはずれている、
config.vm.network "private_network", ip: "192.168.33.11"
の部分を編集しました。
ちなみにドットインストールでは、
config.vm.network "private_network", ip: "192.168.33.10"
でした。
参照(https://sazaijiten.work/docker_virtualbox_vagrant/)
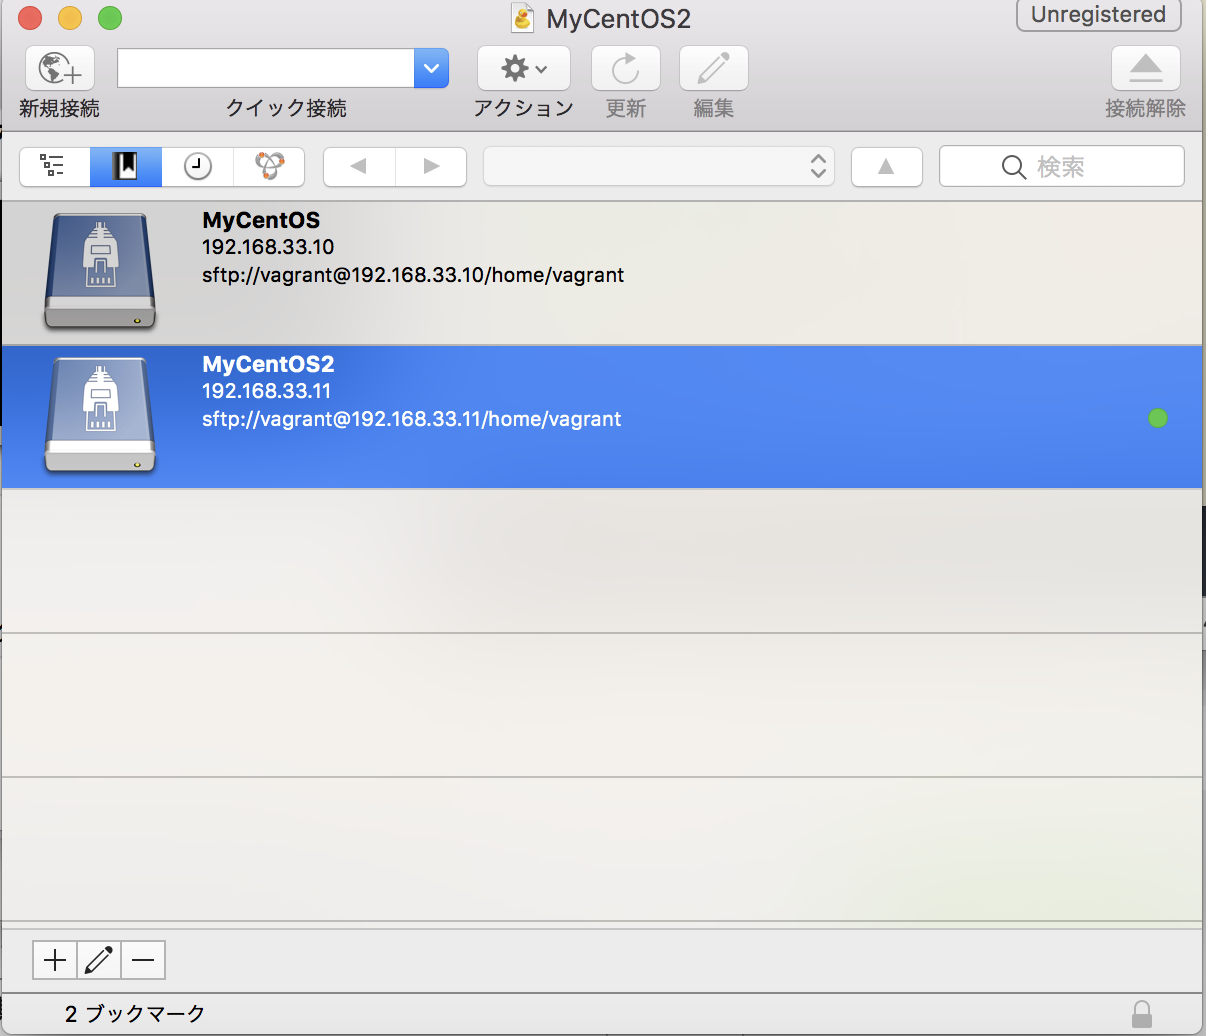
2.Cyberduckで新規接続

サーバは、先ほど変更した数字、ポートは22(ポートがなぜ22なのかは分からないです)、ユーザ名とパスワードはvagrantです。
3.ターミナルで操作
ターミナルでCyberduckで作ったファイルに入り、「ip a」を入力。
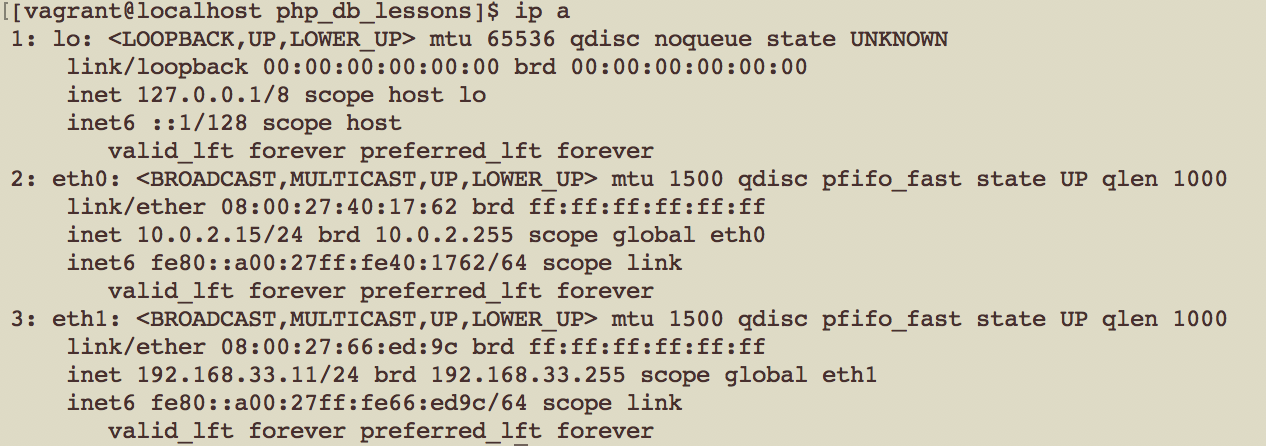
最後から3行目に「192.168.33.11」と表示されている。
次に、「php -S 192.168.33.11:8000」を入力し、(なぜ:8000なのかは分からないです)、ブラウザで「http://192.168.33.11:8000」と検索。

これでphpをブラウザで表示できます。
まとめ
最後にブックマークをすると、phpで作った複数のファイルがブラウザで表示できるようになりました。
プログラミングを始めて一ヶ月も経っておらず、不備があるかもしれないので、どうぞご指摘ください。