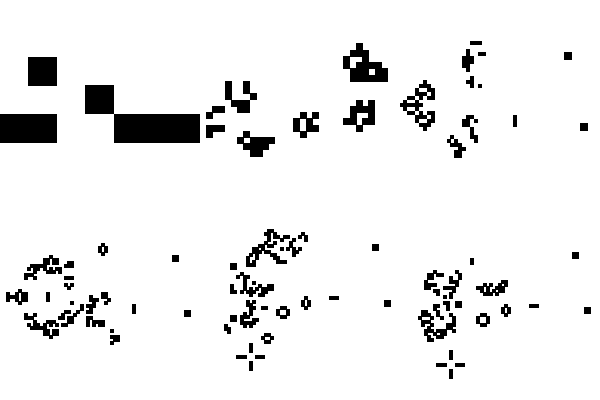
目的
Python で GUI アプリケーションを作るにはいくつか選択肢があります。
pygame というのがいろいろ高機能である、というのを見てなにやら難しいに違いない、と思い込んでいたのですが、ライフゲームの表示画面を作りたくなったので思い切ってトライしてみます。
作ったもの
いろいろな人が作った例を検索して真似てみたらそれらしいものができました。
使い方は以下です:
- LifeDisplay インスタンスを作る(ウィンドウが表示される)
- あとは無限ループ: a. draw メソッドを呼ぶと表示 b. clock_tick メソッドを呼ぶとフレームレートに従って待ちが入る c. 次の描画内容を決めて a に戻る
ボタンもなにもないシンプルな画面です。
import pygame

class LifeDisplay:
    u'''pygame を使ってライフゲームの盤面を表示する。
    呼び出し側は draw で描画、clock_tick で一定時間待って再度 draw で描画、
    という処理を繰り返す。
    '''
    def __init__(self, width=800, height=450,
                 bg_color=(200, 200, 200),
                 alive_color=(0, 0, 0)):
        u'''
        ライフゲーム表示ウィンドウを表示する。
        --------
        width : int
            表示する画面の幅
        height : int
            表示する画面の高さ
        bg_color: tuple(int)
            「死」セルの色
        alive_color:  tuple(int)
            「生」セルの色
        '''
        self.MARGIN = 10
        self.width, self.height = width, height
        self.bg_color, self.alive_color = bg_color, alive_color
        pygame.init()
        self.screen = pygame.display.set_mode((self.width, self.height))
        self.margin_frame = MarginFrame(10)
        pygame.display.set_caption('Life Game')
        self.clock = pygame.time.Clock()
    def clock_tick(self, fps):
        u'''与えられたフレームレートに従って待つ。
        --------
        fps : int
            フレームレート
        '''
        self.clock.tick(fps)
    def draw(self, dots):
        u'''「生」状態セルの set を画面上にボックスとして表示する。
        全体のバックグラウンド色は self.bg_color で、
        「生」状態セルの色は self.active_color。
        --------
        dots : set
            「生」セルの座標の set
        '''
        x_min, y_min, x_max, y_max = self.margin_frame.set(dots)
        x_cell_size = self.width / (x_max - x_min)
        y_cell_size = self.height / (y_max - y_min)
        cell_size = min(x_cell_size, y_cell_size)
        x_center = (x_min + x_max) / 2
        y_center = (y_min + y_max) / 2
        w_center = self.width / 2
        h_center = self.height / 2
        self.screen.fill(self.bg_color)
        for (x, y) in dots:
            px = int(w_center + (x - x_center) * cell_size)
            py = int(h_center + (y - y_center) * cell_size)
            pygame.draw.rect(self.screen, self.alive_color,
                             pygame.Rect(px, py,
                                         int(cell_size) if cell_size > 1.0 else 1,
                                         int(cell_size) if cell_size > 1.0 else 1))
        pygame.display.flip()
表示領域上に表示可能なセルの数は敢えて引数として与えないことにしました。ライブゲームの表示セルの座標を元に自動的にスケール変換して表示します。スケールフリーなライフゲームを実現しようとしているので、そのスケールフリーな感じをイメージとして見えるようにしたいと思いました。
しかし、単純にセルの座標の最小値・最大値を元に表示スケールを決めてしまうとブリンカーのように一ステップ毎に変化するものが端にあるときにチカチカしてしまいます。チカチカするだけならまあいいかと思っていたのですが、できた画像を眺めていると気分が悪くなってしまいます。
そこで、ある程度のマージンを許容して表示スケールが頻繁に大きくなったり小さくなったりを繰り返すことを避けることにしました。このために作ったクラスが以下です:
class MarginFrame:
    u'''与えられた範囲を包含する矩形領域を、なるべく変動を抑えた形で作成する。
    '''
    def __init__(self, margin=10):
        u'''
        与えられた変動許容幅で矩形領域を作成する
        --------
        margin : int
            変動許容幅
        '''
        self.x_min = Margin(margin)
        self.y_min = Margin(margin)
        self.x_max = Margin(margin)
        self.y_max = Margin(margin)
    def _set_x_min(self, x):
        return self.x_min.set_min(x)
    def _set_y_min(self, y):
        return self.y_min.set_min(y)
    def _set_x_max(self, x):
        return self.x_max.set_max(x)
    def _set_y_max(self, y):
        return self.y_max.set_max(y)
    def set(self, dots):
        u'''
        与えられた座標の集合について、その座標すべてを含む矩形領域を返す。
        なるべく前回返した矩形領域から大きく変化しないようにする。
        --------
        dots : Set[Tuple[int, int]]
            矩形領域に含むべき座標の集合
        '''
        return (
            self._set_x_min(min([x for (x, _) in dots])),
            self._set_y_min(min([y for (_, y) in dots])),
            self._set_x_max(max([x for (x, _) in dots]) + 1),
            self._set_y_max(max([y for (_, y) in dots]) + 1))
class Margin:
    u'''変動する値に対して、ある程度のマージンを許すことで変動を抑える。
    '''
    def __init__(self, margin):
        u'''変動する値に対して、ある程度のマージンを許すことで変動を抑える。
        --------
        margin : int
            許容幅
        '''
        self.margin = margin
        self.value = None
    def set_min(self, new_value):
        u'''与えられた値より少ない値を返す。なるべく前回の値に近い値を返す。
        --------
        new_value : int
            目標値
        '''
        self.value = (
            new_value if self.value is None or new_value < self.value else
            self.value + 1 if new_value > self.value + self.margin else
            self.value)
        return self.value
    def set_max(self, new_value):
        u'''与えられた値より大きい値を返す。なるべく前回の値に近い値を返す。
        --------
        new_value : int
            目標値
        '''
        self.value = (
            new_value if self.value is None or new_value > self.value else
            self.value - 1 if new_value < self.value - self.margin else
            self.value)
        return self.value
    def get_value(self):
        return self.value
アニメーション GIF を作りたい
記事として投稿するには、やはりアニメーション GIF を作って貼り付けておきたいものです。アニメーション GIF を作成する機能を付けたバージョンを作ってみました。
しかし、最初に試みたバージョンは遅くて実用的ではありません。
from PIL import Image

class LifeDisplayAndGenerateImages0(LifeDisplay):
    u'''画面上に描画し、描画した内容をアニメーション GIF に変換する。
    あまり実用的ではなかったバージョン。
    '''
    def __init__(self, *args, **kwargs):
        u'''LifeDisplay と同じ引数を与える。
        '''
        super(LifeDisplayAndGenerateImages0, self).__init__(*args, **kwargs)
        self.images = []
    def clock_tick(self, fps):
        u'''draw が十分遅いのでここではなにもしない
        '''
        pass
    def draw(self, dots):
        u'''画面に描画し、その内容を元に画像を作る。
        '''
        super(LifeDisplayAndGenerateImages0, self).draw(dots)
        self.images.append(self._get_image())
    def _get_image(self):
        u'''
        一ピクセルづつ画面からコピーして画像を作る。とても遅い。
        '''
        image = Image.new('RGB', (self.width, self.height), self.bg_color)
        for y in range(self.height):
            for x in range(self.width):
                px = self.screen.get_at((x, y))
                # 注意: px を tuple にして putpixel に与えなければならない
                image.putpixel((x, y), tuple(px))
        return image
    def generate_animation_gif(self, gen_file_path, **kwargs):
        u'''与えられたファイルパス名でアニメーション GIF を作る。
        '''
        self.images[0].save(gen_file_path,
                            save_all=True, append_images=self.images[1:],
                            **kwargs)
Pygame の画面をそのままピクセル単位でコピーするのはあまりに非効率的なので、画面に書くのと全く同じロジックで Image に描画することにしました。これで普通に使えるレベルになりました。
from PIL import ImageDraw

class LifeDisplayAndGenerateImages(LifeDisplay):
    u'''画面に描画し、その内容を GIF アニメーションファイルにする。
    '''
    def __init__(self, *args, **kwargs):
        u'''LifeDisplay と同じ引数を与える。
        '''
        super(LifeDisplayAndGenerateImages, self).__init__(*args, **kwargs)
        self.images = []
    def draw(self, dots):
        u'''LifeDisplay と同じ引数を与える。
        '''
        super(LifeDisplayAndGenerateImages, self).draw(dots)
        image = Image.new('RGB', (self.width, self.height), self.bg_color)
        draw = ImageDraw.Draw(image)
        x_min, y_min, x_max, y_max = self.margin_frame.set(dots)
        x_cell_size = self.width / (x_max - x_min)
        y_cell_size = self.height / (y_max - y_min)
        cell_size = min(x_cell_size, y_cell_size)
        x_center = (x_min + x_max) / 2
        y_center = (y_min + y_max) / 2
        w_center = self.width / 2
        h_center = self.height / 2
        for (x, y) in dots:
            px = int(w_center + (x - x_center) * cell_size)
            py = int(h_center + (y - y_center) * cell_size)
            draw.rectangle((px, py,
                            px + int(cell_size) if cell_size > 1.0 else 1,
                            py + int(cell_size) if cell_size > 1.0 else 1),
                           fill=self.alive_color)
        self.images.append(image)
    def generate_animation_gif(self, gen_file_path, **kwargs):
        u'''与えられたファイルパス名でアニメーション GIF を作る。
        --------
        gen_file_path : str
            アニメーション GIF ファイル作成先パス名
        '''
        self.images[0].save(gen_file_path,
                            save_all=True, append_images=self.images[1:],
                            **kwargs)
まとめ
案に相違して簡単にできてしまいました。やはり Python はライブラリも情報も充実していて使いやすいと思いました。
GUI で描画できるといろいろ捗るので、今後もいろいろ試してみようと思います。
