参考URL
https://support.microsoft.com/ja-jp/help/4036334/how-to-disable-autosave-in-office-365-proplus
上記URLのページがなくなってもいいように、以下に方法を記載。
手順
1.「Windowsキー」+「R」でファイル名を指定して実行ダイアログを表示する。
2.「regedit」と入力して「OK」をクリックする。
※ユーザアカウント制御が表示されたら「はい」をクリックする。
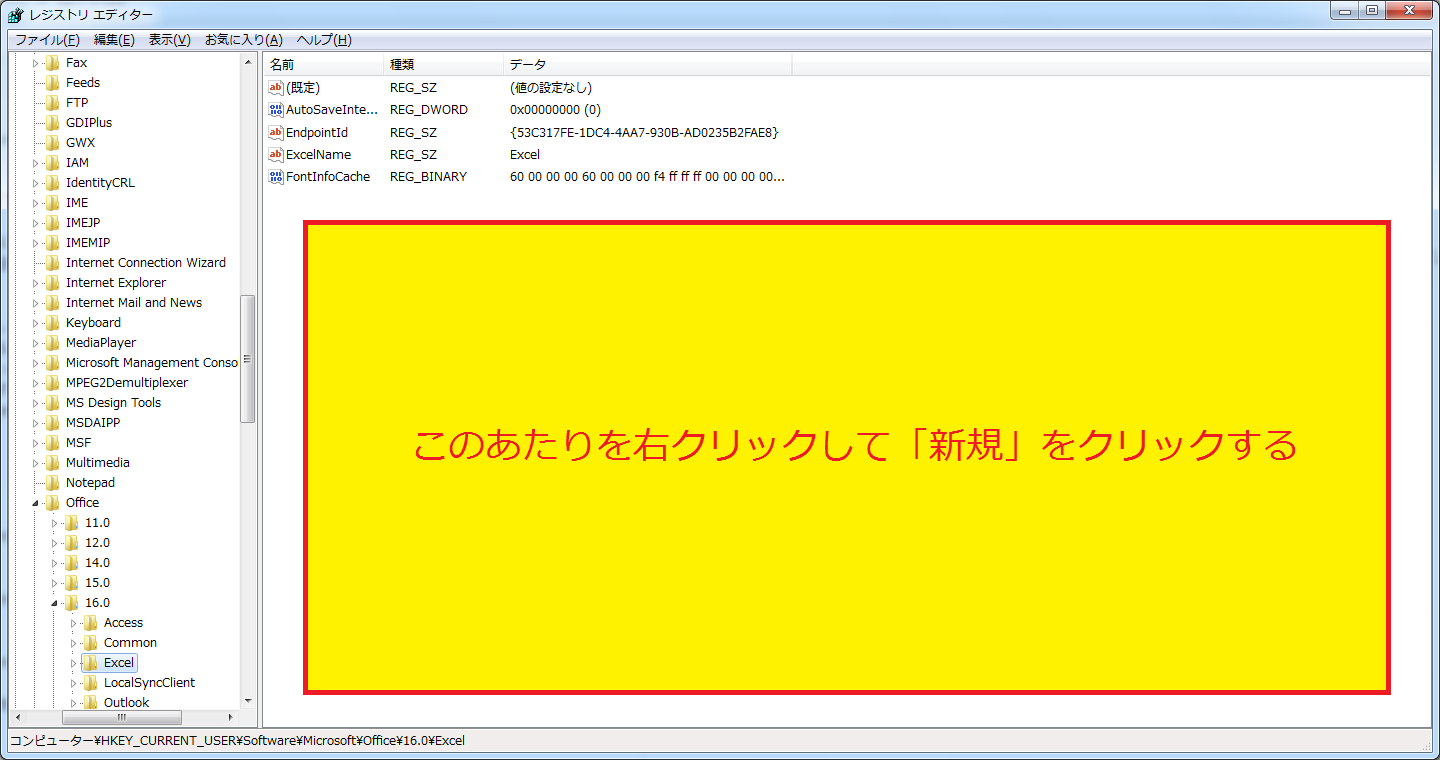
3.自動オフにしたいフォルダの最下層まで移動する。
※例えばExcelの場合は「HKEY_CURRENT_USER\SOFTWARE\Microsoft\Office\16.0\Excel\」まで移動する。
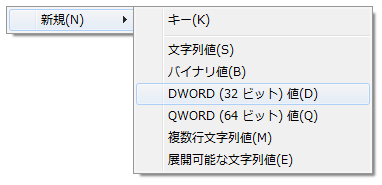
5.以下画像の通り「新規」→「DWORD(32ビット)値」をクリックする。

6.以下の画像のようになるので、「新しい値 #1」を「DontAutoSave」に名前を変更する。

↓
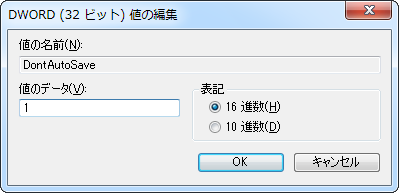
7.「DontAutoSave」をダブルクリックして、値のデータを「1」に変更して「OK」ボタンをクリックする。

Microsoft Word の場合: ※99.9はインストールされているバージョンによる
HKEY_CURRENT_USER\SOFTWARE\Microsoft\Office\99.9\Word\DontAutoSave
Microsoft Excel の場合: ※99.9はインストールされているバージョンによる
HKEY_CURRENT_USER\SOFTWARE\Microsoft\Office\99.9\Excel\DontAutoSave
Microsoft PowerPoint の場合: ※99.9はインストールされているバージョンによる
HKEY_CURRENT_USER\SOFTWARE\Microsoft\Office\99.9\PowerPoint\DontAutoSave
DWORD 値が “1” である場合に、自動保存が無効となります。


