免責
この記事に従って発生した如何なる損害も筆者は負うことができません。ご免なさい。
目標
PlatformIOが大好きなので、これでArduino NanoボードをISPとして使えるようになりたいです。
やり方
PlatformIOの環境が、インストールしてある場合は簡単でした。
old boootloaderとnew bootloaderで、initのオプションが違います。
old.bootloader
$ mkdir isp.nano328p
$ cd isp.nano328p
$ pio init -b nanoatmega328
$ pushd src
$ wget https://raw.githubusercontent.com/arduino/Arduino/master/build/shared/examples/11.ArduinoISP/ArduinoISP/ArduinoISP.ino
$ popd
$ pio run -t upload
new.bootloader
$ mkdir isp.nano328p
$ cd isp.nano328p
$ pio init -b nanoatmega328new
$ pushd src
$ wget https://raw.githubusercontent.com/arduino/Arduino/master/build/shared/examples/11.ArduinoISP/ArduinoISP/ArduinoISP.ino
$ popd
$ pio run -t upload
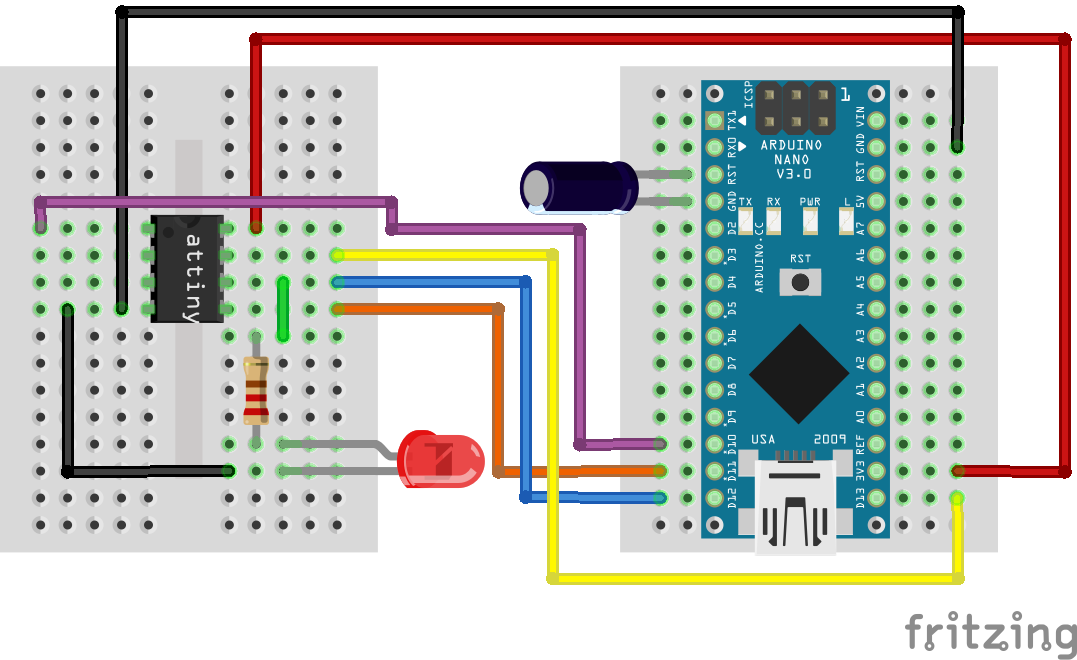
接続例
この図ではハートビートのLEDをD9に付けてません。
コンデンサを挿したままだとArduinoISPの書き込みに失敗します。
ただしAVRマイコンを書き換えるときにはコンデンサを挿してください。

まとめ
意外と簡単でした。