はじめに
Swift5でiOSアプリのアイコンを動的に切り替える方法を勉強してみました。
iPhoneアプリで、切り替えボタンを押すとホーム画面上のアプリアイコンが切り替わります。
アイコンを切り替える方法方法
どうやらiOS10.3から、「UIApplication.shared.setAlternateIconName」を使うと簡単に切り替えられるようです。WWDC2019アプリでもアイコンの着せ替えが使われていますね。
実装方法
あらかじめinfo.plistにアイコンの登録が必要です。
info.plistに「CFBundleIcons」キーを追加し、Typeを「Dictionary」にします。
その下に「CFBundleAlternateIcons」キーを追加し、Typeを「Dictionary」にします。さらに、切り替えるアイコンの名前をキーとして登録し、「CFBundleIconFiles」キーを「Array」で追加します。詳しくは下記のコードをご覧ください。ここでは、アイコンのファイル名を「r_icon」、「g_icon」、「b_icon」しています。
    <dict>
        <key>CFBundleAlternateIcons</key>
        <dict>
            <key>r_icon</key>
            <dict>
                <key>CFBundleIconFiles</key>
                <array>
                    <string>r_icon</string>
                </array>
                <key>UIPrerenderedIcon</key>
                <false/>
            </dict>
            <key>g_icon</key>
            <dict>
                <key>CFBundleIconFiles</key>
                <array>
                    <string>g_icon</string>
                </array>
                <key>UIPrerenderedIcon</key>
                <false/>
            </dict>
            <key>b_icon</key>
            <dict>
                <key>CFBundleIconFiles</key>
                <array>
                    <string>b_icon</string>
                </array>
                <key>UIPrerenderedIcon</key>
                <false/>
            </dict>
        </dict>
    </dict>
プロジェクトにアイコンファイルを追加します。
ここでは、60px*60pxでアイコンを3種類作成し、それぞれ「r_icon@x2.png」、「r_icon@x3.png」、「g_icon@x2.png」、「g_icon@x3.png」、「b_icon@x2.png」、「b_icon@x3.png」と命名し、プロジェクトにドラッグアンドドロップして追加します。
ソースコード
ViewControllerに3つのボタンを追加し、ボタンを押すとアイコンが切り替わるサンプルコードです。
import UIKit

class ViewController: UIViewController {

    override func viewDidLoad() {
        super.viewDidLoad()
        // Do any additional setup after loading the view.

        //赤色アイコンに切り替える
        let redBtn = UIButton(type: UIButton.ButtonType.system)
        redBtn.setTitle("Red Icon", for:.normal)
        redBtn.frame = CGRect(x:self.view.center.x - 50,y:100,width: 100,height: 70) //画面の中央に描画する
        redBtn.tag = 1
        redBtn.addTarget(self, action: #selector(self.changeIcon(_:)), for: .touchUpInside)
        view.addSubview(redBtn)
        //緑色アイコンに切り替える
        let greenBtn = UIButton(type: UIButton.ButtonType.system)
        greenBtn.setTitle("Green Icon", for:.normal)
        greenBtn.frame = CGRect(x:self.view.center.x - 50 ,y:200,width: 100,height: 70) //画面の中央に描画する
        greenBtn.tag = 2
        greenBtn.addTarget(self, action: #selector(self.changeIcon(_:)), for: .touchUpInside)
        view.addSubview(greenBtn)
        //青色アイコンに切り替える
        let blueBtn = UIButton(type: UIButton.ButtonType.system)
        blueBtn.setTitle("Blue Icon", for:.normal)
        blueBtn.frame = CGRect(x:self.view.center.x - 50,y:300,width: 100,height: 70) //画面の中央に描画する
        blueBtn.tag = 3
        blueBtn.addTarget(self, action: #selector(self.changeIcon(_:)), for: .touchUpInside)
        view.addSubview(blueBtn)
    }

    @IBAction func changeIcon(_ sender: UIButton){
        var iconName: String?
        //押されたボタンによってアイコンを切り替える.
        print(sender.tag)
        switch sender.tag {
        case 0:
            iconName = nil //デフォルトにする場合は nil を指定
        case 1:
            iconName = "r_icon" //赤色アイコン
        case 2:
            iconName = "g_icon" //緑色アイコン
        case 3:
            iconName = "b_icon" //青色アイコン
        default:
            fatalError()
        }

        UIApplication.shared.setAlternateIconName(iconName) { error in
            if let error = error {
                print("error = \(error)")
            }
        }
    }

}
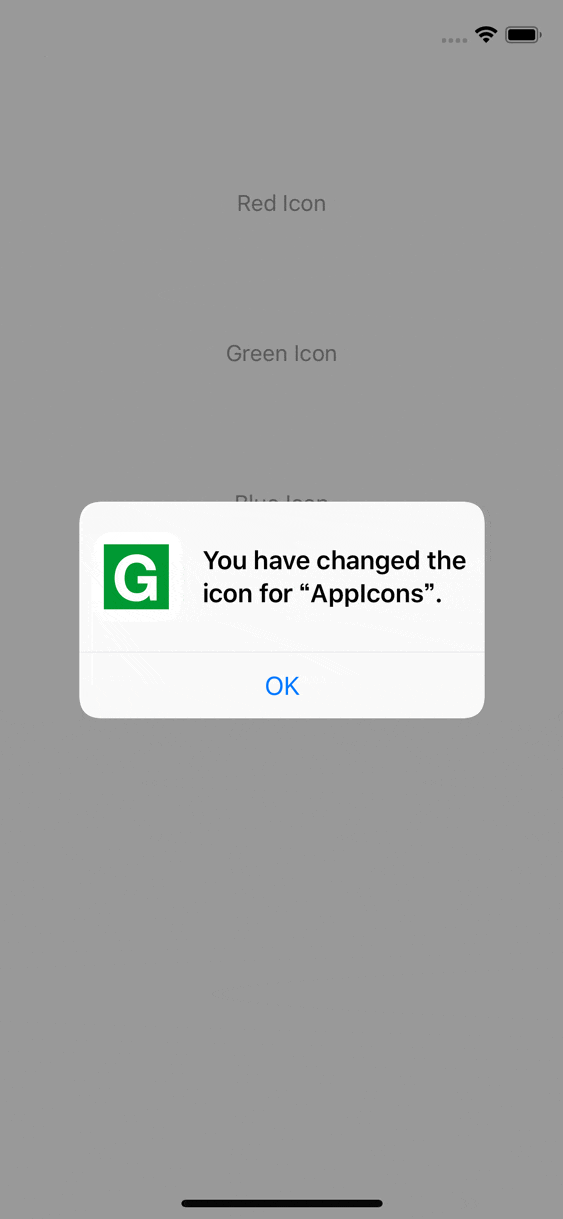
画面例
 アイコンを切り替えるとダイアログが自動的に表示されるようです。
# 環境
・Xcode 10.2.1
・Swift 5
・iOS 12.3.1
参考文献
Dynamically Change the App Icon
おわりに
Mahalo