はじめに
shopifyの案件をやったので、備忘録を書くよ。
shopify-cliでもいいけどローカルの監視が超楽だからTheme Kitを使用。
前提条件
- shopifyアカウントを取得済み
- Homebrew使用
手順
- 1.Shopify Theme Kitのインストール
- 2-1.テーマキットのパスワードを取得(プライベートアプリ使用の場合)
- 2-2.テーマキットのパスワードを取得(Theme Kit Access使用の場合。こちらが推奨されてる)
- 3.テーマをダウンロード
- 4.環境別にconfigを設定
- 5.Theme Kitのよく使うコマンド
- 6.vscodeにプラグインを入れる
1.Shopify Theme Kitのインストール
$ brew tap shopify/shopify
$ brew install themekit
全て完了したら動作確認
$ theme version
An update for Themekit is available. To update please run `theme update`
ThemeKit 1.1.6 darwin/amd64
アップデートしてねって言われたので、アップデート
$ theme version
ThemeKit 1.3.0 darwin/amd64
2-1.テーマキットのパスワードを取得(プライベートアプリ使用の場合)
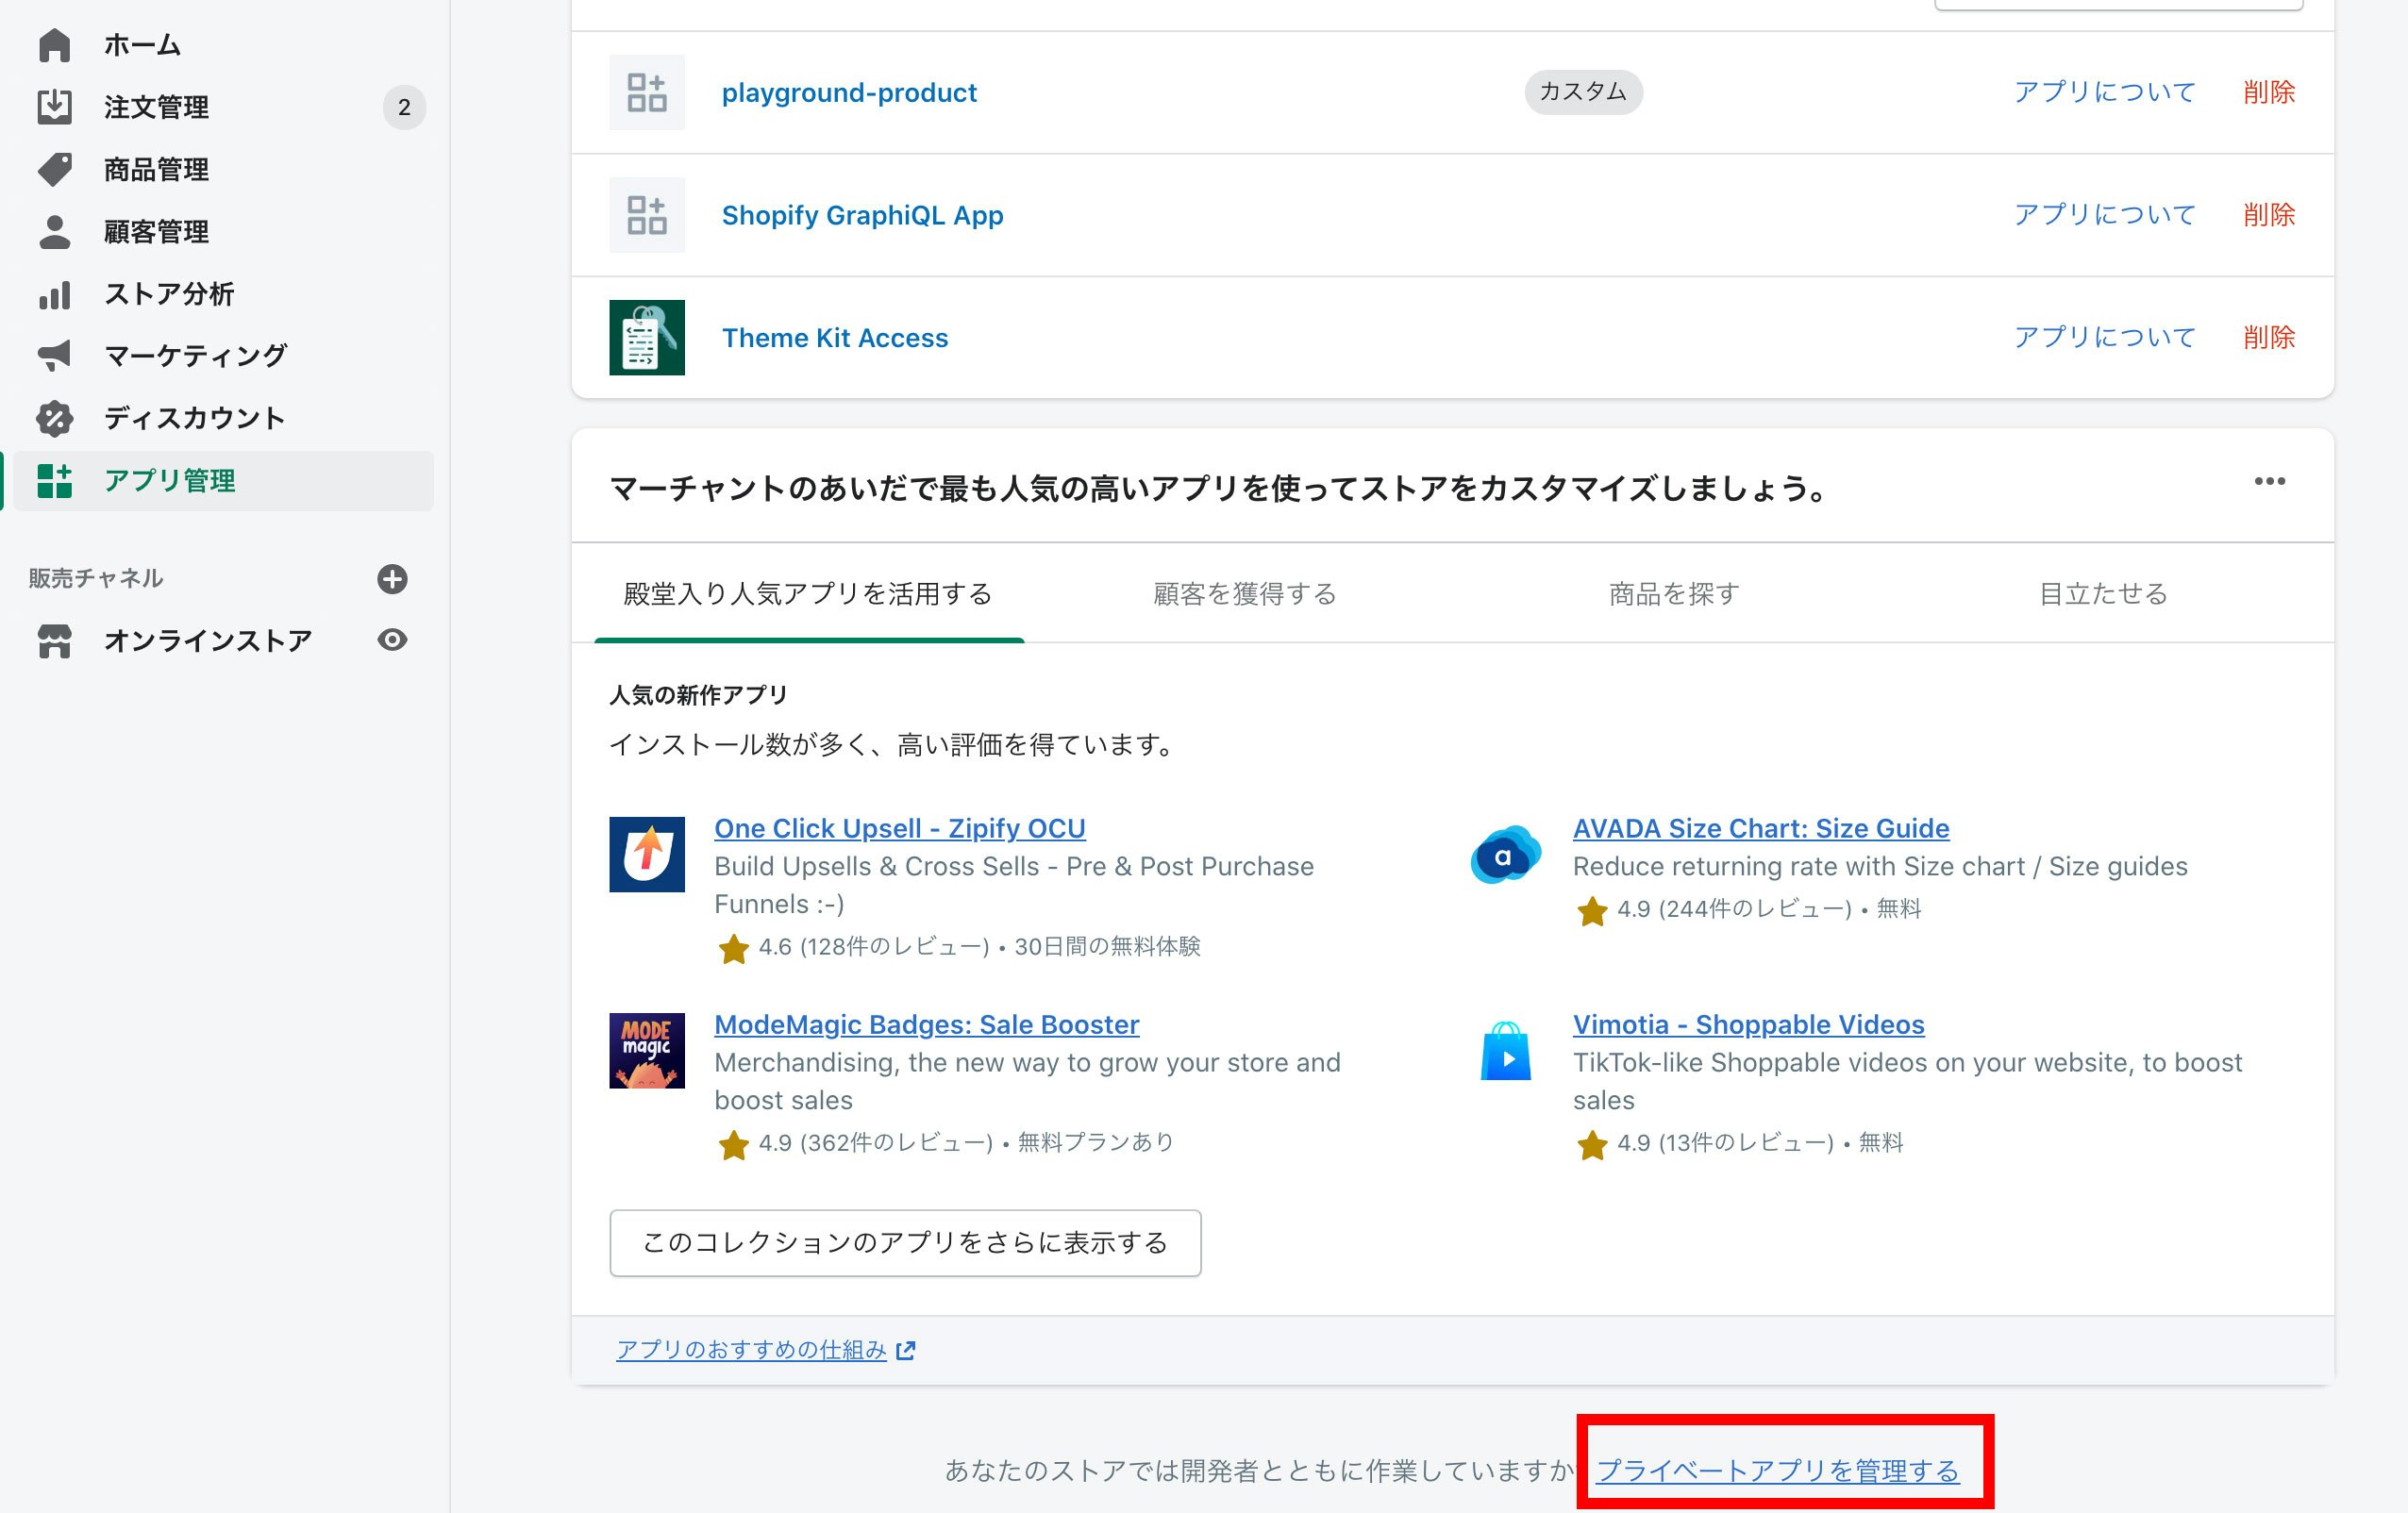
1.shopifyにログインして左のメニューの「アプリ管理」を開いて下の方の「プライベートアプリを管理する」をクリック
2.プライベートアプリを作成する

3.アプリの詳細と権限の設定

必要な権限にチェック入れる

4.保存→作成
5.作成したプライベートアプリの詳細のAdmin APIにAPI情報が書いてあるのでパスワードをコピーしておく
2-2.テーマキットのパスワードを取得(Theme Kit Access使用の場合。こちらが推奨されてる)
- Theme Kit Accessをショップに追加する
- 必要情報を入力しパスワード作成する
- 2に記入したメールアドレスにきたリンクにアクセスするとパスワードが表示される
※セキュリティのため、1度しか表示されないので、必ずメモして保管する
3.テーマをダウンロード
以下でテーマの情報を呼び出したりダウンロードできるので、お好みで新規作成するか、既存テーマをカスタマイズする
- [API-password]は2で取得したパス
- [store.myshopify.com]は該当ショップのurl
- [theme name]はテーマの名称(新規の場合は任意の名前)
- [theme id]はテーマのid(今shopify上で選択しているテーマのIDを取得参照)
今shopify上で選択しているテーマのIDを取得
theme get --list -p=[API-password] -s=[store.myshopify.com]
以下のように返ってくる
[theme id(テーマのid)][live(テーマを使用している場合)] Debut(テーマ名称)
Available theme versions:
  [111111111][live] Debut
  [222222222] OtherTheme
テーマを新規作成
$ theme new --password=[API-password] --store=[store.myshopify.com] --name=[theme name]
テーマを指定してダウンロード
theme get -p=[API-password] -s=[store.myshopify.com] -t=[theme id]
4.環境別にconfigを設定
config.ymlを作成してテーマと同じ階層に置く
   # 開発環境
  development:
    password: APIのパスワード
    theme_id: テーマID
    store: ストア名
本番環境を作ったら
本番環境と開発環境が別れている場合は環境別に操作するために、それぞれにプライベートアプリ(またはTheme Kit Access)を設定してパスとテーマIDを取得し以下のように書く。
  # 本番環境
  production:
    password: APIのパスワード
    theme_id: テーマID
    store: ストア名

  # 開発環境
  development:
    password: APIのパスワード
    theme_id: テーマID
    store: ストア名
これで
"--env=[環境名]" でデプロイや監視をしわける。
5.Theme Kitのよく使うコマンド
テーマの監視(変更を検知して自動的にアップロード)
※エラーが出る時は**「 --allow-live」**をつける
theme watch --env=development --allow-live
最新テーマをダウンロード(gitでいうとpull)
theme download --env=production --allow-live
テーマのデプロイ
本番環境にデプロイ
theme deploy --env=production --allow-live
個別でファイルをデプロイ
theme deploy assets/ファイル --env=development --allow-live
すべての環境にまとめてdeploy
theme deploy -a --allow-live
※まとめてデプロイする場合、setting.jsonもデプロイされるので、
本番と開発の設定などに差分がでてきたら、
ローカルが本番の最新の設定であることを確認してからじゃないと
設定もなにもかも上書きされちゃう。
アプリを使用してたらアプリが吐き出すIDなんかが違って動かないとか起こる
6.vscodeにプラグインを入れる
おすすめプラグイン
Shopify Liquid 構文の強調表示、フォーマット、コード補完など。
Shopify Liquid Template Snippets スニペット - 例えばassignって入力したら{% assign variable = value %}ってすぐ使えるようにスニペットを呼び出す
おまけ
変数の中身はjsonで見る
  <script>
    console.log("{{template}}");
    console.log("{{template.name}}");
  </script>
ログインしているかどうか
  {% unless customer %}
    isLogin = false;
  {% else %}
    isLogin = true;
  {% endunless %}
  if(!isLogin) {
    ログインしてないときの処理
  }
商品情報をajaxで取得
https://{shopifyのurl}/products/{productのurl}.json
商品のurlがhttps://hogehoge.com/products/111111の場合、
https://hogehoge.com/products/111111.jsonで取得できる
  var storeUrl = "https://hogehoge.com/";
  var productId = "111111";
  var url = storeUrl + '/products/' + productId + '.json';

  $.ajax({
    url: url,
    success: function(data) {
      console.log(data);
    }
  });
リンク
必要な時に何回も探しちゃったリンク集
Liquid reference - liquidの記述
Section schema - スキーマの設定
Input settings - スキーマの入力設定
Cart notes and attributes - Cart attributes カートへの入力項目追加。配送日時とか。
Collect additional customer information - 登録画面で入力項目を追加してnoteにセット
shopifyのテーマをいじってみた感想
- ドキュメントが豊富なのでやりやすい。
- スキーマとスニペットのあわせ技で更新が楽。スニペットでテンプレ化してスキーマでの繰り返し入力を呼び出したり。
- jsonベースだから扱いやすい