はじめに
こちらは エーピーコミュニケーションズ Advent Calendar 2020 3日目の記事となります。
今回は MirantisKubernetes の構築を行っていきます。
Mirantis 社が提供している Kubernetes 基盤になります。
旧 Docker Enterprise との比較をしてみると以下の様になります。
| DockerEnterprise | MirantisKubernetes | 説明 |
|---|---|---|
| Docker Enterprise Engine | Mirantis Container Runtime (MCR) | Docker 基盤 |
| Universal Control Plane | Mirantis Kubernetes Engine (MKE) | Kubernetes / Docker Swarm 基盤 |
| Docker Trusted Registry | Mirantis Secure Registry (MSR) | Docker Registry 基盤 |
環境構成
今回は Manager (Master) / Worker を1台ずつの簡易構成で構築します。
構築用の端末を1台追加していますが、Manager や Worker と兼務でも検証上は問題ありません。
また、各サーバの要求スペックは以下を参考にしてください。
System Requirements for Mirantis Launchpad
https://github.com/Mirantis/launchpad/blob/master/docs/system-requirements.md
ホストマシン
- Windows 10 Pro (20H2)
- VirtualBox:6.1.16
- Vagrant:2.2.14
ゲストマシン
- ubuntu:18.04.5
- docker-ee:19.03.12
- k8s:1.18.8
- launchpad:1.1.0
| 役割 | ホスト名 | 台数 | vCPU | Memory | IP Address |
|---|---|---|---|---|---|
| Client | lpd01 | 1 | 2 | 8 Gi | 192.168.10.70 |
| Manager | k8s01 | 1 | 4 | 16 Gi | 192.168.10.71 |
| Worker | k8s02 | 1 | 4 | 16 Gi | 192.168.10.72 |
VM構築
vagrant を使って VirtulaBox 上に VM を構築します。
今回は ubuntu が提供している vagrant の box を利用します。
Vagrantfile を作成し、vagrant upコマンドで起動します。
※shell モジュールでデフォルトゲートウェイを自宅のルーターに変更してます
※shell モジュールで hosts を書き換えています
# -*- mode: ruby -*-
# vi: set ft=ruby :

Vagrant.configure("2") do |config|
  config.vm.define "lpd01" do |server|
    server.vm.box = "ubuntu/xenial64"
    server.vm.hostname = "lpd01"
    server.vm.network "public_network", ip: "192.168.10.70"

    server.vm.provider "virtualbox" do |vb|
      vb.customize [
        "modifyvm", :id,
        "--memory", "8192",
        "--cpus", "2"
      ]
    end
    server.vm.provision "shell", run: "always", inline: <<-SHELL
sudo ip route del default via 10.0.2.2
sudo ip route add default via 192.168.10.1
sudo cat >/etc/hosts <<EOF
192.168.10.70 lpd01
192.168.10.71 k8s01
192.168.10.72 k8s02
EOF
    SHELL
  end

  (1..2).each do |i|
    config.vm.define "k8s0#{i}" do |server|
      server.vm.box = "ubuntu/xenial64"
      server.vm.hostname = "k8s0#{i}"
      server.vm.network "public_network", ip: "192.168.10.7#{i}"

      server.vm.provider "virtualbox" do |vb|
        vb.customize [
          "modifyvm", :id,
          "--memory", "16384",
          "--cpus", "4"
        ]
      end
      server.vm.provision "shell", run: "always", inline: <<-SHELL
sudo ip route del default via 10.0.2.2
sudo ip route add default via 192.168.10.1
sudo cat >/etc/hosts <<EOF
192.168.10.70 lpd01
192.168.10.71 k8s01
192.168.10.72 k8s02
EOF
      SHELL
    end
  end
end
MKE 構築準備
Client 端末に 必要なパッケージや構築ツールである launchpad を配置します。
構築ツールの launchpad は Client から各サーバに ssh 接続できる環境が必要なため、まずは ssh 鍵を作成して配置します。
# 鍵生成
vagrant@lpd01:~$ ssh-keygen
Enter file in which to save the key (/home/vagrant/.ssh/id_rsa): ★Enter
Enter passphrase (empty for no passphrase): ★Enter
Enter same passphrase again: ★Enter

# id_rsa / id_rsa.pub で新しく鍵が作成されていることを確認
vagrant@lpd01:~$ ls -l .ssh/
-rw------- 1 vagrant vagrant  389 Nov 29 14:42 authorized_keys
-rw------- 1 vagrant vagrant 1679 Nov 29 14:57 id_rsa
-rw-r--r-- 1 vagrant vagrant  395 Nov 29 14:57 id_rsa.pub

# 作成した公開鍵の内容を、各サーバの公開鍵のファイルに追記する
# 既存の公開鍵を消さずに追記することで vagrant に支障を与えないようにする
vagrant@lpd01:~$ cat .ssh/id_rsa.pub

vagrant@k8s01:~$ vi .ssh/authorized_keys
vagrant@k8s02:~$ vi .ssh/authorized_keys

# Client 端末から ssh 接続できるか確認
vagrant@lpd01:~$ ssh k8s01
Are you sure you want to continue connecting (yes/no)? yes

vagrant@lpd01:~$ ssh k8s02
Are you sure you want to continue connecting (yes/no)? yes
必要なパッケージ、及び launchpad を配置していきます。
# 必要なパッケージのインストール
vagrant@lpd01:~$ sudo apt-get update && sudo apt-get install -y apt-transport-https gnupg2

# kubectl のインストール前準備
# gpg キー追加
vagrant@lpd01:~$ curl -s https://packages.cloud.google.com/apt/doc/apt-key.gpg | sudo apt-key add -
OK

# レポジトリ追加
vagrant@lpd01:~$ echo "deb https://apt.kubernetes.io/ kubernetes-xenial main" | sudo tee -a /etc/apt/sources.list.d/kubernetes.list
deb https://apt.kubernetes.io/ kubernetes-xenial main

# リポジトリ情報更新
vagrant@lpd01:~$ sudo apt-get update
~
Get:1 https://packages.cloud.google.com/apt kubernetes-xenial InRelease [8993 B]
Get:4 https://packages.cloud.google.com/apt kubernetes-xenial/main amd64 Packages [41.7 kB]
~
Reading package lists... Done

# kubectl インストール
vagrant@lpd01:~$ sudo apt-get install -y kubectl
~
The following NEW packages will be installed:
  kubectl
0 upgraded, 1 newly installed, 0 to remove and 0 not upgraded.
~
Setting up kubectl (1.19.4-00) ...

# kubectl を使いやすいようにエイリアス追加
vagrant@lpd01:~$ vi ~/.bashrc

# 末尾に以下を追記
source <(kubectl completion bash)
alias kc=kubectl
complete -F __start_kubectl kc

# .bashrc を読み込みし直して確認
vagrant@lpd01:~$ source .bashrc

# Client バージョンを確認
# Server バージョンは接続先がまだなのでエラー表示で問題なし
vagrant@lpd01:~$ kc version
Client Version: version.Info{Major:"1", Minor:"19", GitVersion:"v1.19.4", GitCommit:"d360454c9bcd1634cf4cc52d1867af5491dc9c5f", GitTreeState:"clean", BuildDate:"2020-11-11T13:17:17Z", GoVersion:"go1.15.2", Compiler:"gc", Platform:"linux/amd64"}
The connection to the server localhost:8080 was refused - did you specify the right host or port?

# launchpad ダウンロード
wget https://github.com/Mirantis/launchpad/releases/download/1.1.0/launchpad-linux-x64

vagrant@lpd01:~$ ls -l
-rw-rw-r-- 1 vagrant vagrant 11206656 Nov 30 13:27 launchpad-linux-x64

# 配置と実行権限付与
vagrant@lpd01:~$ sudo mv launchpad-linux-x64 /usr/local/sbin/launchpad
vagrant@lpd01:~$ sudo chmod +x /usr/local/sbin/launchpad
vagrant@lpd01:~$ ls -l /usr/local/sbin/
-rwxrwxr-x 1 vagrant vagrant 11206656 Nov 30 13:27 launchpad

# 実行確認
vagrant@lpd01:~$ launchpad version
version: 1.1.0
commit: 16db114
MKE 構築
準備ができたので launchpad を使ってMKE を構築します。
launchpad を実行する前にユーザ情報を入力します。
※入力は英語表記です
※ライセンスの割当、サポート提供の際に利用されるため適当な値を入力します
vagrant@lpd01:~$ launchpad register
> Name ★指名
> Email ★メールアドレス
> Company ★会社名
> I agree to Mirantis Launchpad Software Evaluation License Agreement https://github.com/Mirantis/launchpad/blob/master/LICENSE ★Y
INFO[0021] Registration completed!
launchpad での構築では クラスタ構成ファイル (yaml) を使います。
launchpad init > launchpad.yaml でテンプレートが作成できます。
今回は以下の yaml ファイルを利用します。
※ユーザ名 (user)、ssh 鍵 (keypath) を指定しています
※address で 接続先のホストを指定しています (今回は hosts に登録した名前を利用しています)
※mke で構築後に接続するユーザ名とパスワードを設定しています
※今回は VirtualBox のローカル環境を利用しているため、--pod-cidr で Pod のネットワークを設定しています
apiVersion: launchpad.mirantis.com/mke/v1.1
kind: mke
metadata:
  name: my-mke-cluster
spec:
  hosts:
  - address: k8s01
    role: manager
    ssh:
      user: vagrant
      port: 22
      keyPath: ~/.ssh/id_rsa
    privateInterface: enp0s8
  - address: k8s02
    role: worker
    ssh:
      user: vagrant
      port: 22
      keyPath: ~/.ssh/id_rsa
    privateInterface: enp0s8
  mke:
    version: 3.3.3
    adminUsername: admin
    adminPassword: passw0rd!
    installFlags:
    - --default-node-orchestrator=kubernetes
    - --pod-cidr 10.0.0.0/16
  engine:
    version: 19.03.12
作成した launchpad.yaml を使って MKE を構築します。
※--config でファイルしていできますが、デフォルトで launchpad.yaml を読み込みます。
vagrant@lpd01:~$ launchpad apply


                       ..,,,,,..
              .:i1fCG0088@@@@@880GCLt;,               .,,::::::,,...
         ,;tC0@@@@@@@@@@@@@@@@@@@@@@@@@0:,     .,:ii111i;:,,..
      ,;1ttt1;;::::;;itfCG8@@@@@@@@@i @@@@0fi1t111i;,.
     .,.                  .:1L0@@   @8GCft111ii1;
                               :f0CLft1i;i1tL . @8Cti:.               .,:,.
                           .:;i1111i;itC;  @@@@@@@@@@@80GCLftt11ttfLLLf1:.
                    .,:;ii1111i:,.    , G8@@@@@@@@@@@@@@@@@@@@@@@0Lt;,
            ...,,::;;;;::,.               ,;itfLCGGG0GGGCLft1;:.


   ;1:      i1, .1, .11111i:      .1i     :1;     ,1, i11111111: ;i   ;1111;
   G@GC:  1G0@i ;@1 ;@t:::;G0.   .0G8f    L@GC:   i@i :;;;@G;;;, C@ .80i:,:;
   C8 10CGC::@i :@i :@f:;;;CG.  .0G ,@L   f@.iGL, ;@;     @L     L@. tLft1;.
   G8   1;  ;@i ;@i :@L11C@t   ,08fffL@L  L@.  10fi@;    .@L     L@.    .:t@1
   C0       ;@i :@i :@i   ;Gf..0C     ,8L f@.   .f0@;    .8L     L8  fft11fG;
   ..        .   .   ..     ,..,        , ..      ..      ..     ..  .,:::,

   Mirantis Launchpad (c) 2020 Mirantis, Inc.                          v1.1.0

INFO ==> Running phase: Open Remote Connection
・・・
INFO ==> Running phase: Validate Hosts
・・・
INFO ==> Running phase: Install Docker EE Engine on the hosts
・・・
INFO ==> Running phase: Pull MKE images
・・・
INFO ==> Running phase: Install MKE components
・・・
INFO M k8s01:22: time="2020-12-01T15:09:13Z" level=info msg="Running install agent container ..."
INFO M k8s01:22: time="2020-12-01T15:09:14Z" level=info msg="Loading install configuration"
INFO M k8s01:22: time="2020-12-01T15:09:14Z" level=info msg="Running Installation Steps"
INFO M k8s01:22: time="2020-12-01T15:09:14Z" level=info msg="Step 1 of 39: [Setup Internal Cluster CA]"
INFO M k8s01:22: time="2020-12-01T15:09:17Z" level=info msg="Step 2 of 39: [Setup Internal Client CA]"
INFO M k8s01:22: time="2020-12-01T15:09:17Z" level=info msg="Step 3 of 39: [Initialize etcd Cluster]"
・・・
INFO M k8s01:22: time="2020-12-01T15:09:41Z" level=info msg="Step 16 of 39: [Deploy UCP Controller Server]"
INFO M k8s01:22: time="2020-12-01T15:09:43Z" level=info msg="Step 17 of 39: [Deploy Kubernetes API Server]"
INFO M k8s01:22: time="2020-12-01T15:09:50Z" level=info msg="Step 18 of 39: [Deploy Kubernetes Controller Manager]"
INFO M k8s01:22: time="2020-12-01T15:09:54Z" level=info msg="Step 19 of 39: [Deploy Kubernetes Scheduler]"
INFO M k8s01:22: time="2020-12-01T15:09:59Z" level=info msg="Step 20 of 39: [Deploy Kubelet]"
INFO M k8s01:22: time="2020-12-01T15:10:17Z" level=info msg="Step 21 of 39: [Deploy Kubernetes Proxy]"
INFO M k8s01:22: time="2020-12-01T15:10:17Z" level=info msg="Step 22 of 39: [Wait for Healthy UCP Controller and Kubernetes API]"
・・・
INFO M k8s01:22: time="2020-12-01T15:10:23Z" level=info msg="Step 25 of 39: [Install Kubernetes CNI Plugin]"
INFO M k8s01:22: time="2020-12-01T15:10:45Z" level=info msg="Step 26 of 39: [Install CoreDNS]"
・・・
INFO M k8s01:22: time="2020-12-01T15:10:47Z" level=info msg="Step 29 of 39: [Install Istio Ingress]"
INFO M k8s01:22: time="2020-12-01T15:10:59Z" level=info msg="Step 30 of 39: [Create UCP Controller Kubernetes Service Endpoints]"
INFO M k8s01:22: time="2020-12-01T15:11:01Z" level=info msg="Step 31 of 39: [Install Metrics Plugin]"
INFO M k8s01:22: time="2020-12-01T15:11:03Z" level=info msg="Step 32 of 39: [Install Kubernetes Compose Plugin]"
INFO M k8s01:22: time="2020-12-01T15:11:07Z" level=info msg="Step 33 of 39: [Deploy Manager Node Agent Service]"
INFO M k8s01:22: time="2020-12-01T15:11:07Z" level=info msg="Step 34 of 39: [Deploy Worker Node Agent Service]"
INFO M k8s01:22: time="2020-12-01T15:11:07Z" level=info msg="Step 35 of 39: [Deploy Windows Worker Node Agent Service]"
INFO M k8s01:22: time="2020-12-01T15:11:07Z" level=info msg="Step 36 of 39: [Deploy Cluster Agent Service]"
INFO M k8s01:22: time="2020-12-01T15:11:07Z" level=info msg="Step 37 of 39: [Set License]"
INFO M k8s01:22: time="2020-12-01T15:11:07Z" level=info msg="Step 38 of 39: [Set Registry CA Certificates]"
INFO M k8s01:22: time="2020-12-01T15:11:07Z" level=info msg="Step 39 of 39: [Wait for All Nodes to be Ready]"
INFO M k8s01:22: time="2020-12-01T15:11:12Z" level=info msg="All Installation Steps Completed"
INFO ==> Running phase: Upgrade MKE components
INFO M k8s01:22: cluster already at version 3.3.3, not running upgrade
INFO ==> Running phase: Join managers to swarm
INFO M k8s01:22: already a swarm node
INFO ==> Running phase: Join workers
INFO W k8s02:22: joined succesfully
・・・
INFO ==> Running phase: MKE cluster info
INFO Cluster is now configured.
INFO MKE cluster admin UI: https://k8s01/
INFO You can download the admin client bundle with the command 'launchpad client-config'
無事に構築が完了しました。
クラスタアクセス
早速アクセスしてみましょう。
# 接続用クライアント情報ダウンロード
vagrant@lpd01:~$ launchpad client-config
INFO ==> Running phase: Open Remote Connection
・・・
INFO ==> Running phase: Download Client Bundle
INFO Successfully wrote client bundle to /home/vagrant/.mirantis-launchpad/cluster/my-mke-cluster/bundle/admin
INFO ==> Running phase: Close Connection
INFO M k8s01:22: connection closed

# 接続用クライアント設定
vagrant@lpd01:~$ cd /home/vagrant/.mirantis-launchpad/cluster/my-mke-cluster/bundle/admin/ && eval "$(<env.sh)" && cd ~
Cluster "ucp_k8s01:6443_admin" set.
User "ucp_k8s01:6443_admin" set.
Context "ucp_k8s01:6443_admin" created.

# 接続確認 (バージョン情報確認)
vagrant@lpd01:~$ kc version
Client Version: version.Info{Major:"1", Minor:"19", GitVersion:"v1.19.4", GitCommit:"d360454c9bcd1634cf4cc52d1867af5491dc9c5f", GitTreeState:"clean", BuildDate:"2020-11-11T13:17:17Z", GoVersion:"go1.15.2", Compiler:"gc", Platform:"linux/amd64"}
Server Version: version.Info{Major:"1", Minor:"18+", GitVersion:"v1.18.8-mirantis-1", GitCommit:"43e7409273737fcaa74b2c010bdb5ddc24c1701c", GitTreeState:"clean", BuildDate:"2020-08-19T03:01:58Z", GoVersion:"go1.13.15", Compiler:"gc", Platform:"linux/amd64"}

# 接続確認 (ノード情報取得)
vagrant@lpd01:~$ kc get node
NAME    STATUS   ROLES    AGE     VERSION
k8s01   Ready    master   6m58s   v1.18.8-mirantis-1
k8s02   Ready    <none>   5m18s   v1.18.8-mirantis-1
CLI でアクセスできたので、今度は WebUI でアクセスします。
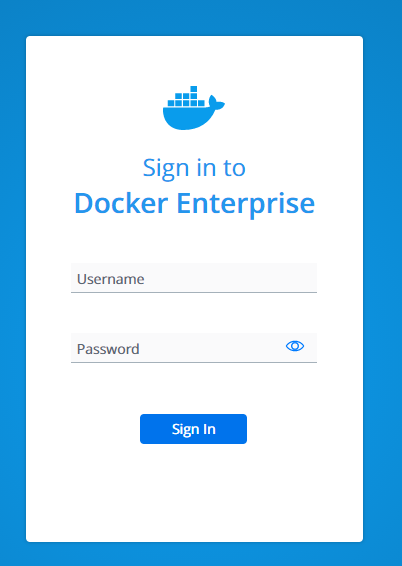
https://k8s01/login/ にアクセスします。
※Windows 側の hosts ファイル (C:\Windows\System32\drivers\etc\hosts) に k8s01 の IP アドレス (192.168.10.71) を登録しています
yaml ファイルで設定したユーザ名・パスワードでログインします。
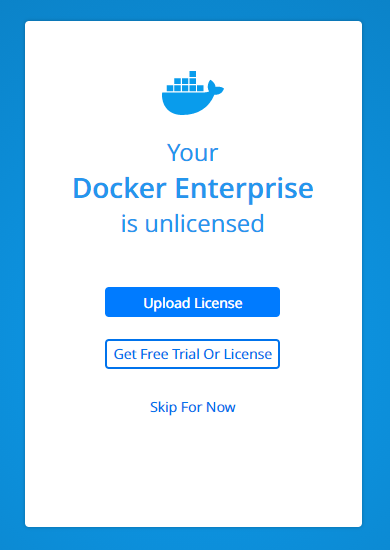
ライセンスキーの登録画面が表示されるので、今回は「Skip For Now」でスキップします。
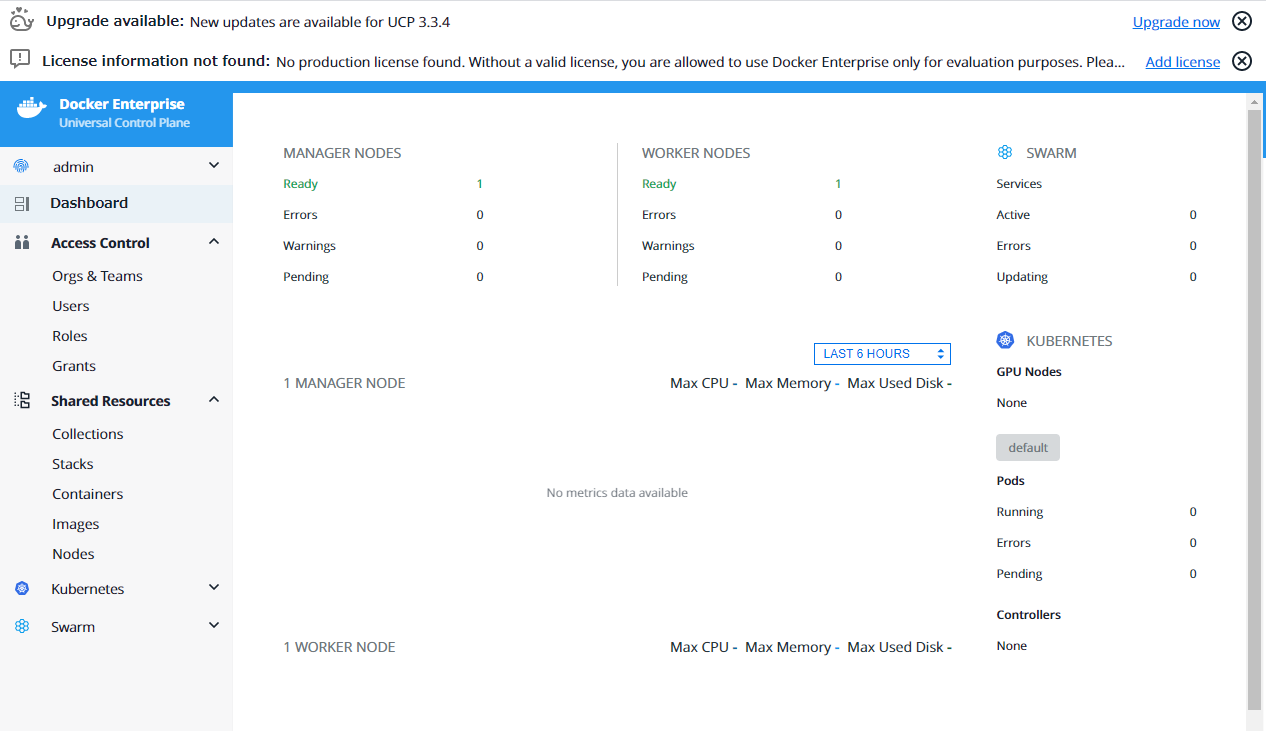
Dashboard 画面が表示されました。
まとめ
MirantisKubernetes を構築してみました。
yaml ひとつで k8s クラスタが構築できるのは、非常に簡単でした。
k8s の各コンポーネントはコンテナで実行されているため、別記事でその辺は整理してみようと思います。
また、今回は1台ずつの構成だったため、複数台のクラスタの構築や MSR の構築も実施してみようと思います。