はじめに
Geo-Python and Automating GIS Processes (‘AutoGIS’) have been developed by the Department of Geosciences and Geography at the University of Helsinki, Finland. The course has been planned and organized by the Digital Geography Lab. The teaching materials are openly accessible for anyone interested in learning.
Course material and videos are open for everyone. The aim of this course is to share the knowledge and help people to get started with their journey towards doing GIS analyses more efficiently and in a better reproducible manner: using Python and its manifold modules. Feel free to share this website with anyone interested, and use the provided material in your own teaching.
要約(ざっくり)
このコースはHelsinki大学のGeosciences and Geography部門によって開発されたものです。
GISを学習する人向けに公開されていてだれでも見ることができます。共有や教育に使ってもOKです。
Lesson 1
ゴール(ざっくり)
- pointとかpolygonが何なのかわかって、Python使って自分で作れる
Why Python for GIS?
When it comes to data science, and especially spatial data science and spatial data analysis, Python currently is the most useful programming or scripting language to learn. On the one hand, the Python ecosystem, which allows people to share their libraries easily with others, is very rich, and has packages for almost any task imaginable. Researchers who find that a particular tool does not exist, often go ahead and create it themselves. Python’s packages cover such a broad range of applications, that its import statement has become the trope of many jokes:
要約(ざっくり)
なぜPythonか?→ライブラリとか充実しているから
このページは、代表的なパッケージとその簡単な説明がありますが、現時点は「ふーん」ぐらいでよいでしょう。
All geospatial vector data can be described by a combining a set of fundamental geometric objects: points, lines, and polygons are the basic ingredients of working with spatial data.
Even more fundamental than that, coordinate tuples are what is used to define the geometric fundamentals point, line, and polygon. Coordinate tuples typically are either two-dimensional (x, y), or three-dimensional (x, y, z).
要約(ざっくり)
- point(点)、line(線)、polygon(ポリゴン)が基本。
- 座標は、二次元の場合は(x, y)、三次元の場合は (x, y, z)の座標をtupleで格納する
MultiPointとかもありますが、現時点では気にしなくてよいでしょう。
Creating Point geometries and accessing their properties
で、やっとコードが登場。Pointを作成してみましょう。
# Import `shapely.geometry.Point` class
from shapely.geometry import Point
# Create `Point` objects:
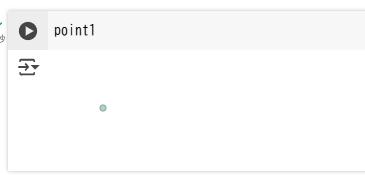
point1 = Point(2.2, 4.2)
point2 = Point(7.2, -25.1)
point3 = Point(9.26, -2.456)
point4_3D = Point(9.26, -2.456, 0.57)
Google Colab、初回の実行はちょっと待ちます。裏で色々立ち上げているからだっと思います。
が、上記だけだと結果何も出ません。変数に値をセットしただけなので。
変数だけだと形そのものが表示されます。が、これだけだと意味不明です。
printやtypeで変数を見てみる。

shapelライブラリは今後も頻繁に出てきます。

座標がtupleとして(丸括弧で)格納されていることが確認できます。

二次元、三次元の座標が確認できます。
点同士の距離を求めることもできます。
# Calculate the distance between point1 and point2
dist = point1.distance(point2)

# Print out a nicely formatted info message
print(f"Distance between the points is {dist:.2f} units")
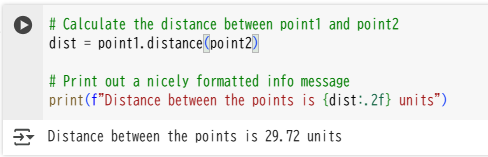
はてさて、「距離」とは言いましたが、29.72とは何の距離なのでしょうか?
Shapely geometries are, by design, agnostic (unaware) of the reference system used to represent them. Distances and surface area calculated using the built-in shapely methods will always: a) assume a flat, Cartesian, Euclidean space, and b) return the calculated value in the unit of the coordinates (e.g., meters, or degrees).
This is perfectly fine for small-scale geo-spatial operations, if you keep yourself aware of the expected output unit. Most packages built on top of shapely, for instance GeoPandas, which we will get to know in lesson 2, bring their own functions and take the coordinate reference system into consideration.
ざっくりいうと、Shapelyは、座標が緯度経度かメートルかなどには無頓着で、単に平面上で計算するだけです。
なので、ここでは、sqrt(xの差分^2+yの差分^2)≒29.72となります。
Lines
点の次は線です。複数の点から線を形成します。
Point型の変数からでも、座標のハードコーディングでも可です。
# import the LineString class
from shapely.geometry import LineString
# Create a LineString from our Point objects
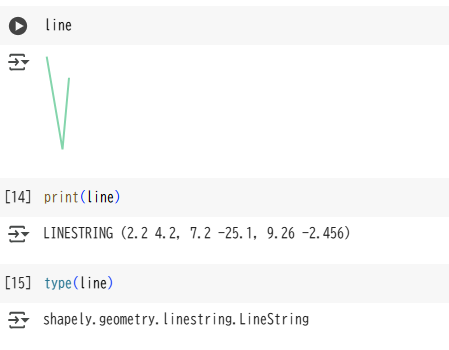
line = LineString([point1, point2, point3])
# Create a LineString from a list of coordinates:
# (with the same coordinate values as the points, so results should be identical)
line2 = LineString([(2.2, 4.2), (7.2, -25.1), (9.26, -2.456)])
変数だけだと形そのものが表示されます。Pointのときよりは理解しやすいでしょうか。ついでに、printやtypeで変数を見てみます。
中途半端ですが、いったんここまでとします。