AWS Apmlifyは、モバイルアプリケーションとウェブアプリケーションを構築するためのAWSがOSSで公開する開発プラットフォームです。
簡単に言えば、AWSでもFirebaseみたいにバックエンドはお任せでフロントだけ開発できるようにしてくれるフレームワークみたいなやつです。
あくまでもプラットフォームなので、AWS Amplify == Firebaseではないです。
↓AWSのページ
https://aws.amazon.com/jp/amplify/
↓公式ドキュメント
https://aws-amplify.github.io/docs/
今回は、Apmlifyの概要とプロジェクトの作成からデプロイまで軽く触ってみます。
AWS Apmlifyとは
AWSのサービスを用いた、Web・モバイルアプリを最速でリリースするための開発プラットフォームです。
React, Vue, AngularなどでのSPAや、Gatsby, Hugoなどの静的サイトジェネレーターを用いたWebアプリケーションを最速で開発するためのプラットフォームと紹介されています。
アプリケーション開発者はフロントエンドの開発に集中でき、バックエンドとインフラはAWSにサーバーレスでお任せできます。
さらに、CI/CD環境の構築も自動で構築してくれます。このあたりはFirebaseとよく似ています。
AWSのサービスを駆使して同等な環境を構築できますが、175個もあるサービスから選定してアーキテクトするのはかなり時間がかかります。
そのコストをAmplifyが解決してくるということです。
AWS Amplifyの以下のような特徴があります。
- 最速でアプリを開発できる
- スケールするアプリを開発できる
- 簡単にアプリを開発できる
サービスの立ち上げからグロースまでを行うことができることが特徴です。
構成
AWS AmplifyはAWSの様々なサービスやツールで構成されています。
そのため、AWS Amplifyで提供されているサービスやツールをまとめてAmplifyファミリーと呼ばれています。
Amplifyファミリーは以下の構成になっています。
- Framework
- CLI
- Developer Tools
Amplify Framework
ライブラリ、UIコンポーネント、CLIを含むOSSのクライアントフレームワーク。SDKとコンポーネントが一緒になったみたいなものです。
Amplify Framreworkは、クライアントがAWSのバックエンドと連携するための処理を数行で実装できるようにするフレームワークです。
以下のようなサービスが提供されています。
- クライアントライブラリ(JavaScript・iOS・Android)
- UIコンポーネント
- Amplify DataStore
- Amplify CLI
クライアントライブラリ
Amplify for JavaScript / iOS / Andoridとして各クラインとごとにライブラリを提供しています。(iOS/Androidはプレビュー版)
特徴としては、
- AWSバックエンドと簡単に統合できるクライアントライブラリ
- React / Vue / AngularといったWebフレームワークやiOS / Androidに対応
- カテゴリベースで直感的な実装ができるインターフェイス
があげられます。SDKのラッパーのような役割だと思ってもらえれば。
UIコンポーネント
各フレームワーク向けにUIコンポーネントライブラリを提供しています。React, React Native, Angular, Ionic, Vue向けに提供されています。
例えば、ユーザー認証用のUIを追加する場合、UIコンポーネントがあると予め用意された認証UIをさくっと実装できますが、ない場合は全て自らUIとその機能を実装する必要があります。
この後で少し触りますが、一瞬で認証機能を構築することができます。
AWS DataSotre
マルチプラットフォームなクライアント向けのストレージエンジを提供します。
AWS上にバックエンドを用意しなくても、GraphQL経由で自動的にアプリケーション・バックエンドのデータを同期することができます。
Amplifyでのバックエンドの実装は、AWS AppSyncを使用したGraphQL APIがデフォルトの選択肢になっています。
API GateawayとAWS Lambdaを使用したREST APIに変更することもできます。
DataStoreはオフラインに対応しています。
Amplify CLI
AWSでサーバーレスなバックエンドを構築・管理するためのCLIツール。コマンドを実行して対話的に質問に回答するだけで、サーバーレスなバックエンドを構築することができます。
バックエンドとの接続に必要な設定ファイルやソースコードの一部を自動で生成することができます。
Amplify CLIがない場合、
- AWSのバックエンドをGUIから手動で構築しないといけない
- AWS CloudFormationやAWS SAMなどで、バックエンドをモデル化し自動で構築する
といった「やりたいこと」の実現手法を知っていれば構築できるやり方です。
しかし、GUIで構築する場合は手順書を用意する必要があり、AWSのGUIが変更されると手順書も更新しなければなりません。また、手順書がなければAWSが初めての方は調べながら構築する必要があり時間がかなりかかります。
また、CloudFormation、AWS SAM、以前紹介したServerless Frameworkなどを使用する場合は、手動で構築する問題を解決できますが、CloudFormationの記法を知らなければ、どのようなバックエンド構成かを理解するのに時間がかかります。
一方のAmplify CLIは「やりたいこと」から実現する手法を構築してくれます。
例えば認証機能を追加した場合は、amplify add authとするだけでAWSの各サービスを組み合わせて認証機能のバックエンドを構築することができます。
Developer Tools
フロントエンドとバックエンドに対してビルド、テスト、デプロイ、ホスティングを容易に実現できるAWSサービス群のことです。
以下のサービスで構成されています。
- AWS Amplify Console
- AWS Device Farm
AWS Amplify Consoleは、SPAとSSGによるフルスタックなWebアプリ向けCI/CD環境構築とホスティングを行うことができます。
Gitリポジトリを接続するだけで、WebアプリケーションのためのCI/CDパイプラインを簡単に構築でき、さらにホスティングまでできちゃう、といったところでしょうか。ここはまだあまり理解できていません。
Amplifyの紹介は以上です。
ではAmplifyファミリーのFrameworkを使用して、認証機能とGraphQLでのバックグラウンドを構築していこうと思います。
AWS Amplify実践
AWS Amplifyのインストール
では早速Amplify CLIをインストールしていきます。
$ npm install -g @aws-amplify/cli
$ amplify -v
4.16.1
$ amplify configure
amplify configureを起動すると、AWSのログイン画面がブラウザで表示されます。この辺はFirebaseとほぼ一緒ですね。
ルートユーザーでも、IAMユーザーでもログインできます。
ログインしたらコンソールに戻って、エンターキーを押してください。
ログインすると、Amplifyで使用するリージョンを聞かれます。使用するリージョンを決定してください。
Specify the AWS Region
? region:  ap-northeast-1
次に、ユーザー名を聞かれます。これは、IAMユーザーを聞かれていますので、作成していなければそのまま実行します。
Specify the username of the new IAM user:
? user name:
すると、AWS IAMのユーザー作成の画面が表示されます。ここからは、普通にIAMユーザーを作成していきます。
-
プログラムによるアクセスのみ許可 - アクセス権限はとりあえず
AdministratorAccessで - タグはお好みで追加
ユーザーを作成すると、アクセスキーとシークレットアクセスキーを取得することができます。念のためCSVファイルをダウンロードして大切に保管してださい。
ユーザーを作成できたら、先ほど取得したアクセスキーとシークレットアクセスキーを設定します。
Enter the access key of the newly created user:
? accessKeyId:  (<YOUR_ACCESS_KEY_ID>)
? secretAccessKey:  (<YOUR_SECRET_ACCESS_KEY>)
次にプロファイル情報の名前を聞かれますが、任意の名前で大丈夫です。すでにAWS CLIなどがインストールされていて、プロファイル情報がある場合は上書きされます。
This would update/create the AWS Profile in your local machine
? Profile Name:  (default)
以上で初期設定は環境です、
Successfully set up the new user.
Reactアプリケーションの作成
検証用アプリケーションはReactで実装していきます。まずはReactアプリケーションを作成します。
$ npx create-react-app amplify-todo
$ cd amplify-todo
このタイミングで、いらないファイルは消しておきましょう。
Amplifyプロジェクトの構築
Amplifyのプロジェクトを立ち上げて初期化します。プロジェクトを初期化するにはamplify initコマンドを実行します。
$ amplify init
? Enter a name for the project amplify-todo
? Enter a name for the environment dev
? Choose your default editor: Visual Studio Code
? Choose the type of app that you're building javascript
Please tell us about your project
? What javascript framework are you using react
? Source Directory Path:  src
? Distribution Directory Path: build
? Build Command:  npm run build
? Start Command: npm start
Using default provider  awscloudformation

For more information on AWS Profiles, see:
https://docs.aws.amazon.com/cli/latest/userguide/cli-multiple-profiles.html

? Do you want to use an AWS profile? Yes
? Please choose the profile you want to use default
上記のように必要な情報を聞かれるので、プロジェクトに沿った回答をします。
コマンドの実行が完了すると、amplifyディレクトリとsrc/aws-exports.jsファイルが作成されます。
// WARNING: DO NOT EDIT. This file is automatically generated by AWS Amplify. It will be overwritten.

const awsmobile = {
    "aws_project_region": "ap-northeast-1"
};


export default awsmobile;
Amplify CLIの初期設定で設定したリージョンが指定されています。プロジェクトの初期化は以上で完了です。
認証機能の追加
Amplifyプロジェクトの初期化ができたので、次は認証機能を追加します。
まずは、Amplifyの認証機能を追加するコマンドを実行します。Apmlifyに機能を追加する場合は、amplify add <機能>コマンドで追加します。
今回はメールアドレスで認証を行うため、ログイン方法にEmailを選択します。
$ amplify add auth
Using service: Cognito, provided by: awscloudformation

 The current configured provider is Amazon Cognito.

 Do you want to use the default authentication and security configuration? Default configuration
 Warning: you will not be able to edit these selections.
 How do you want users to be able to sign in? Email
 Do you want to configure advanced settings? No, I am done.
設定が成功したら、amplify pushコマンドで認証機能をクラウドに反映します。
$ amplify push
Current Environment: dev

| Category | Resource name       | Operation | Provider plugin   |
| -------- | ------------------- | --------- | ----------------- |
| Auth     | amplifyuser751c3c76 | Create    | awscloudformation |
? Are you sure you want to continue? Yes
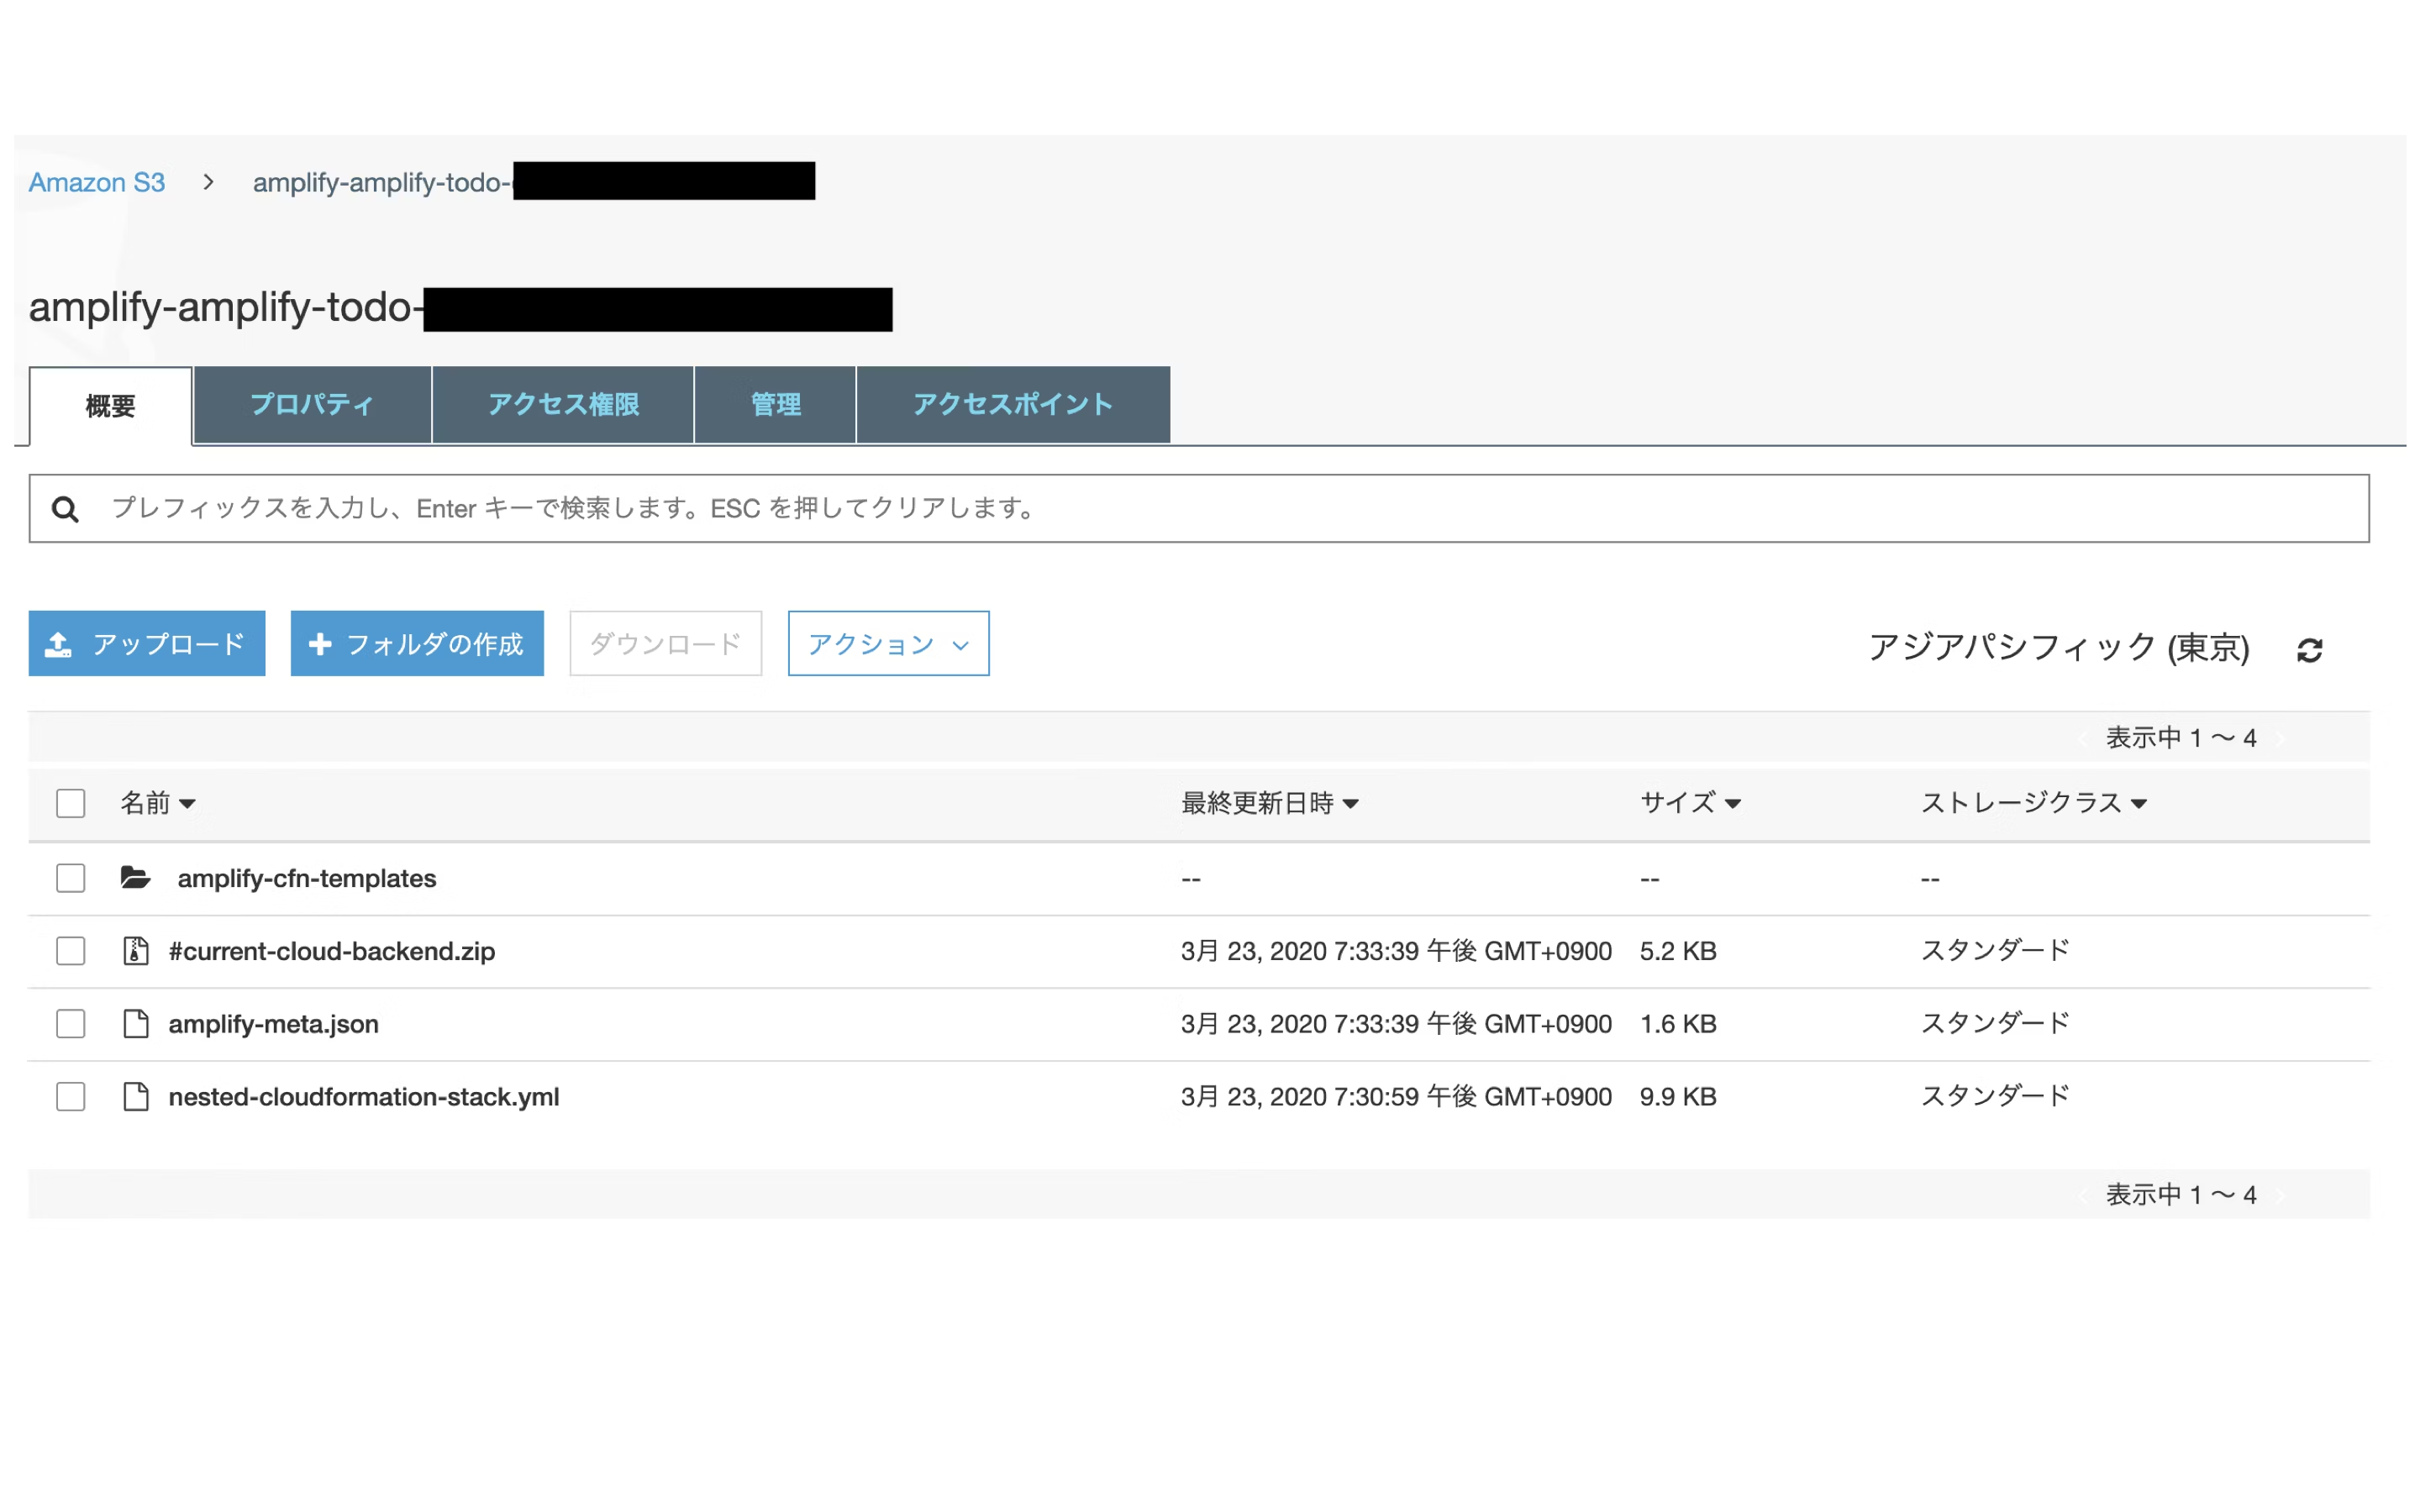
コマンドの実行が完了するとS3のバケットに最新のCloudfrontのテンプレートファイルなどがアップデートされます。
次に、ReactのアプリケーションにAmplifyライブラリをインストールします。
$ yarn add aws-amplify aws-amplify-react
src/App.jsにAmplifyライブラリの設定を追加します。
signUpConfigには、ユーザーを登録する際に必要な情報を指定することができます。
詳しい設定方法は公式ドキュメントを参照してください。
https://aws-amplify.github.io/docs/js/react#signup-configuration
import React from 'react';
import Amplify, { Auth } from "aws-amplify";
import awsmobile from "./aws-exports";
import { withAuthenticator } from "aws-amplify-react";

// Amplifyの設定を行う
Amplify.configure(awsmobile)

// SingUp時に、メールアドレスとパスワードを要求する
const signUpConfig = {
    header: 'Sign Up',
    hideAllDefaults: true,
    defaultCountyCode: '1',
    signUpFields: [
        {
            label: 'User Name',
            key: 'username',
            required: true,
            displayOrder: 1,
            type: 'string'
        },
        {
            label: 'Email',
            key: 'email',
            required: true,
            displayOrder: 2,
            type: 'string'
        },
        {
            label: 'Password',
            key: 'password',
            required: true,
            displayOrder: 3,
            type: 'password'
        }
    ]
}

// SingOut
function signOut(){
  Auth.signOut()
  .then()
  .catch();
}

function App() {
  return (
    <React.Fragment>
      <button onClick={signOut}>Sign out</button>
      <div>
        Hello World
      </div>
    </React.Fragment>
  );
}

// Appコンポーネントをラップする
export default withAuthenticator(App,{signUpConfig});
これで、コンポーネントを開く前にユーザーのメールアドレスでログイン画面が表示されます。ローカルで確認してみます。
$ npm start
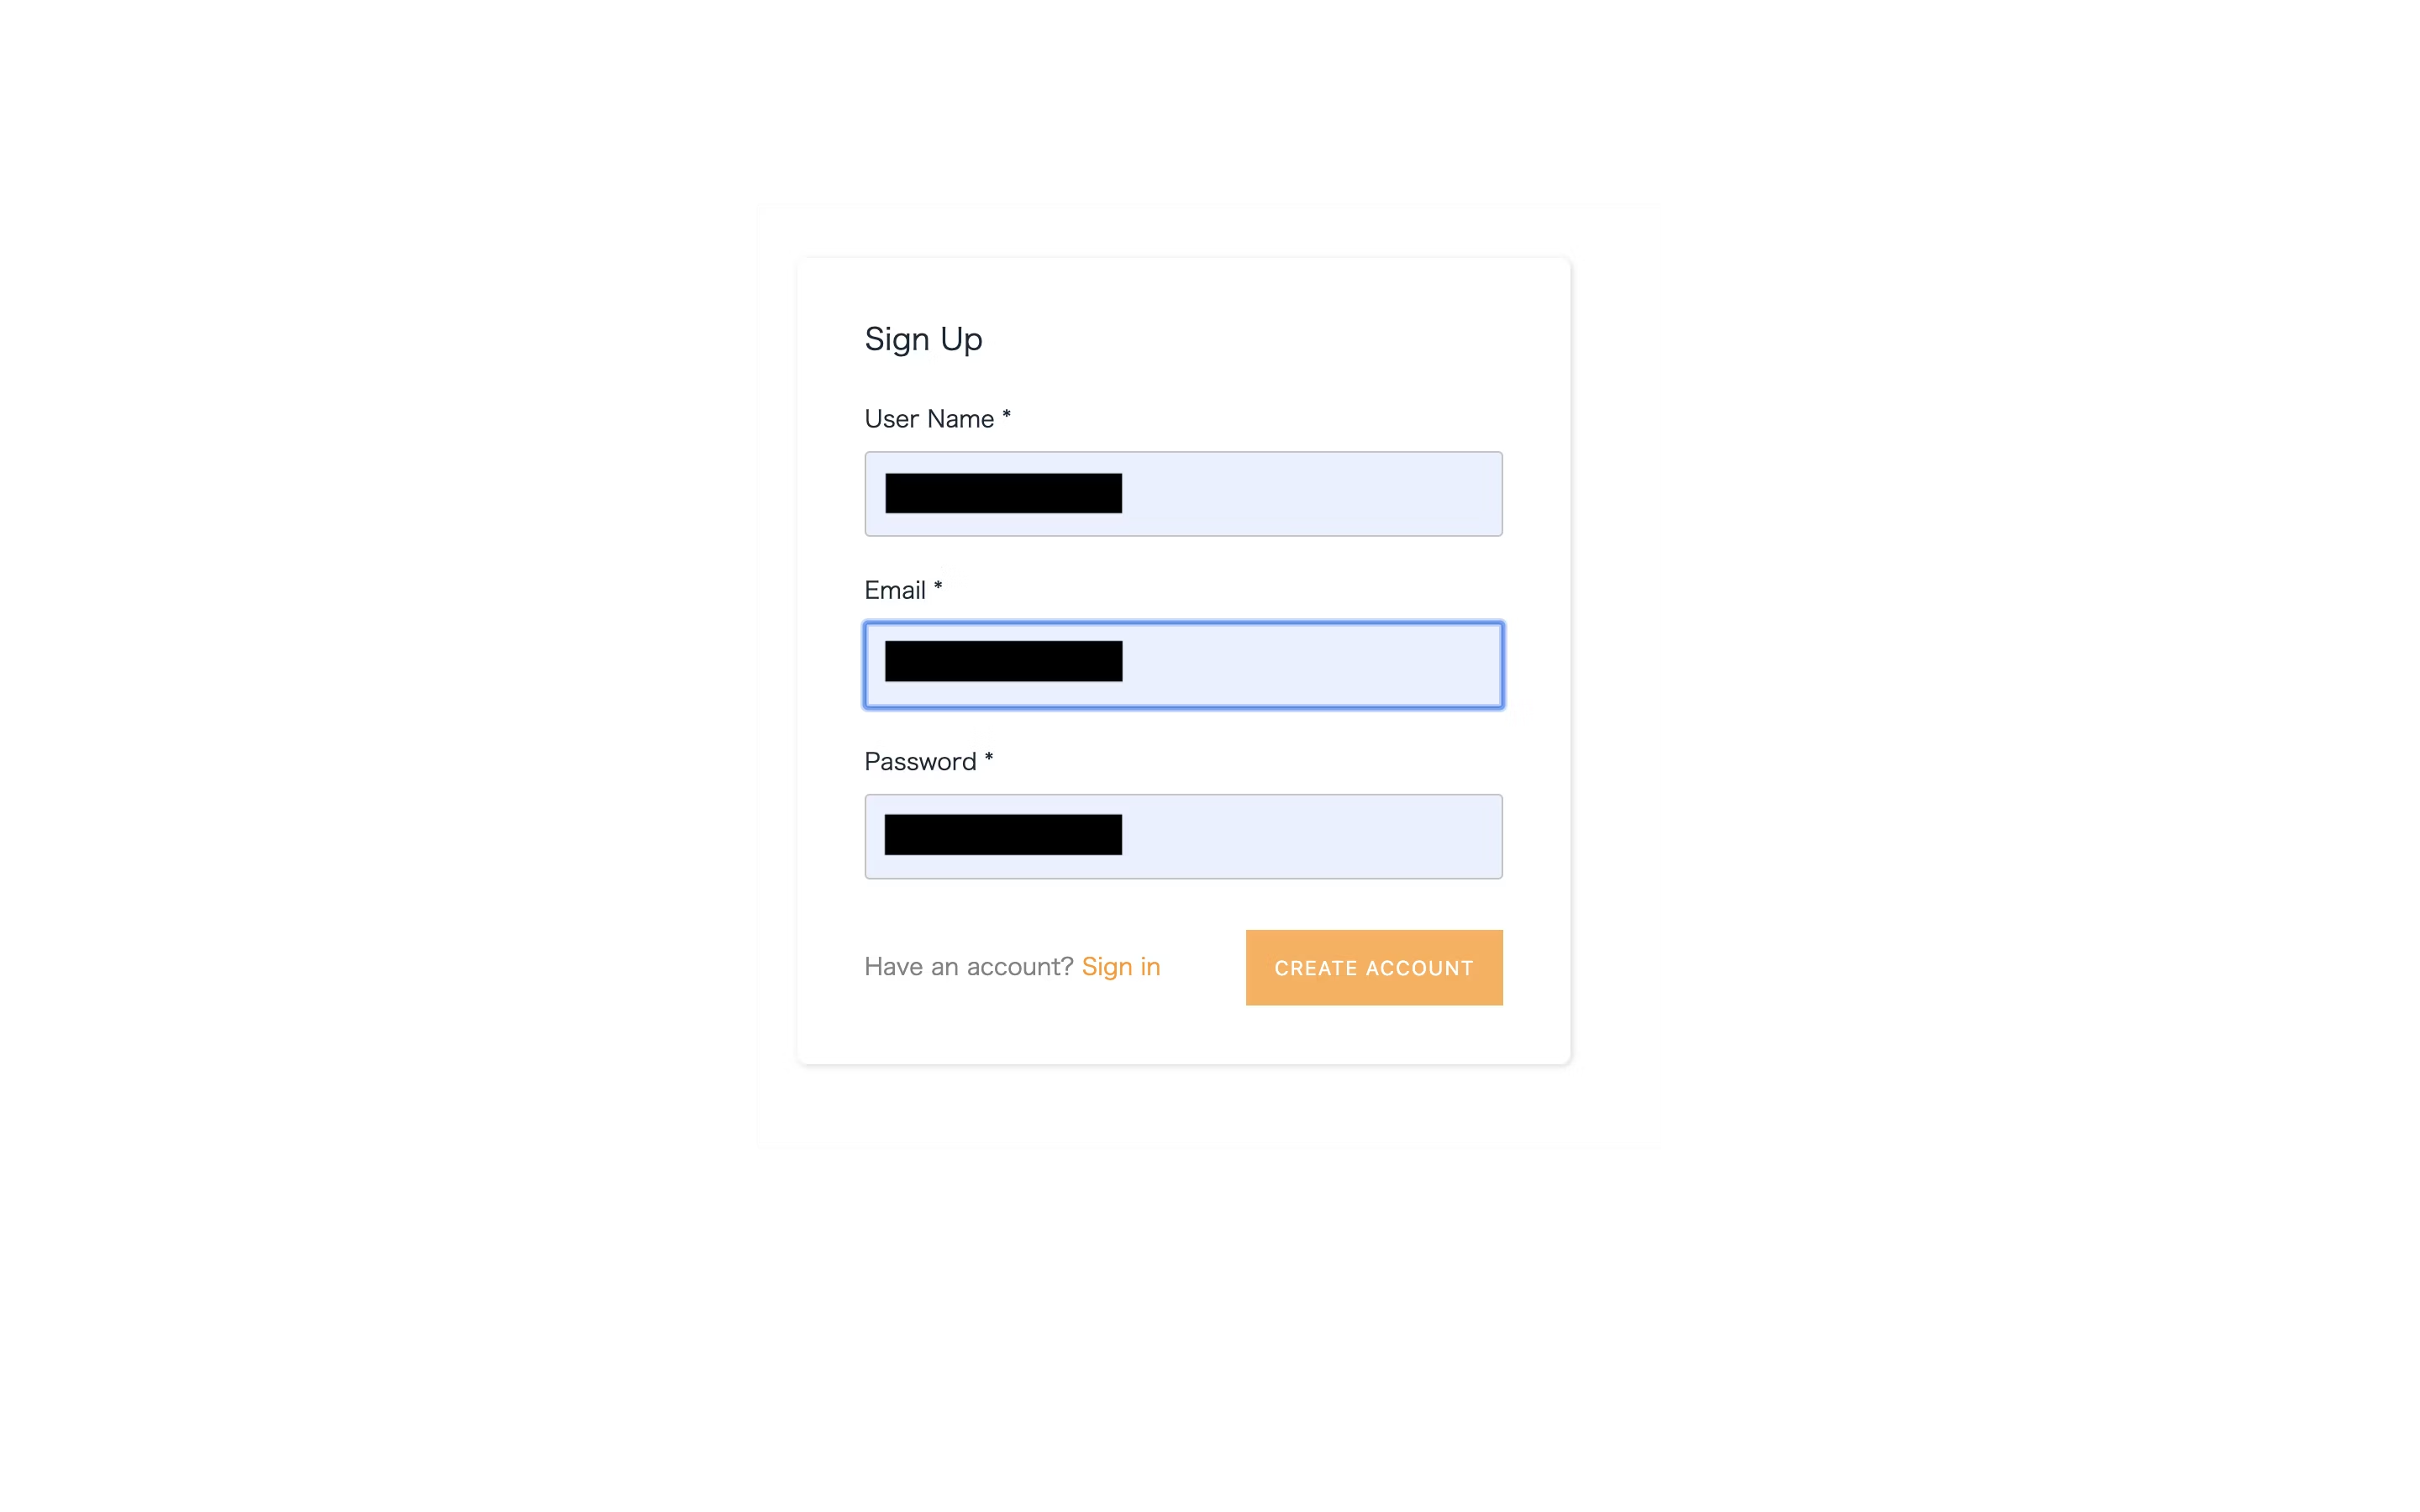
http://localhost:3000/にアクセスすると、次の画面が表示されます。

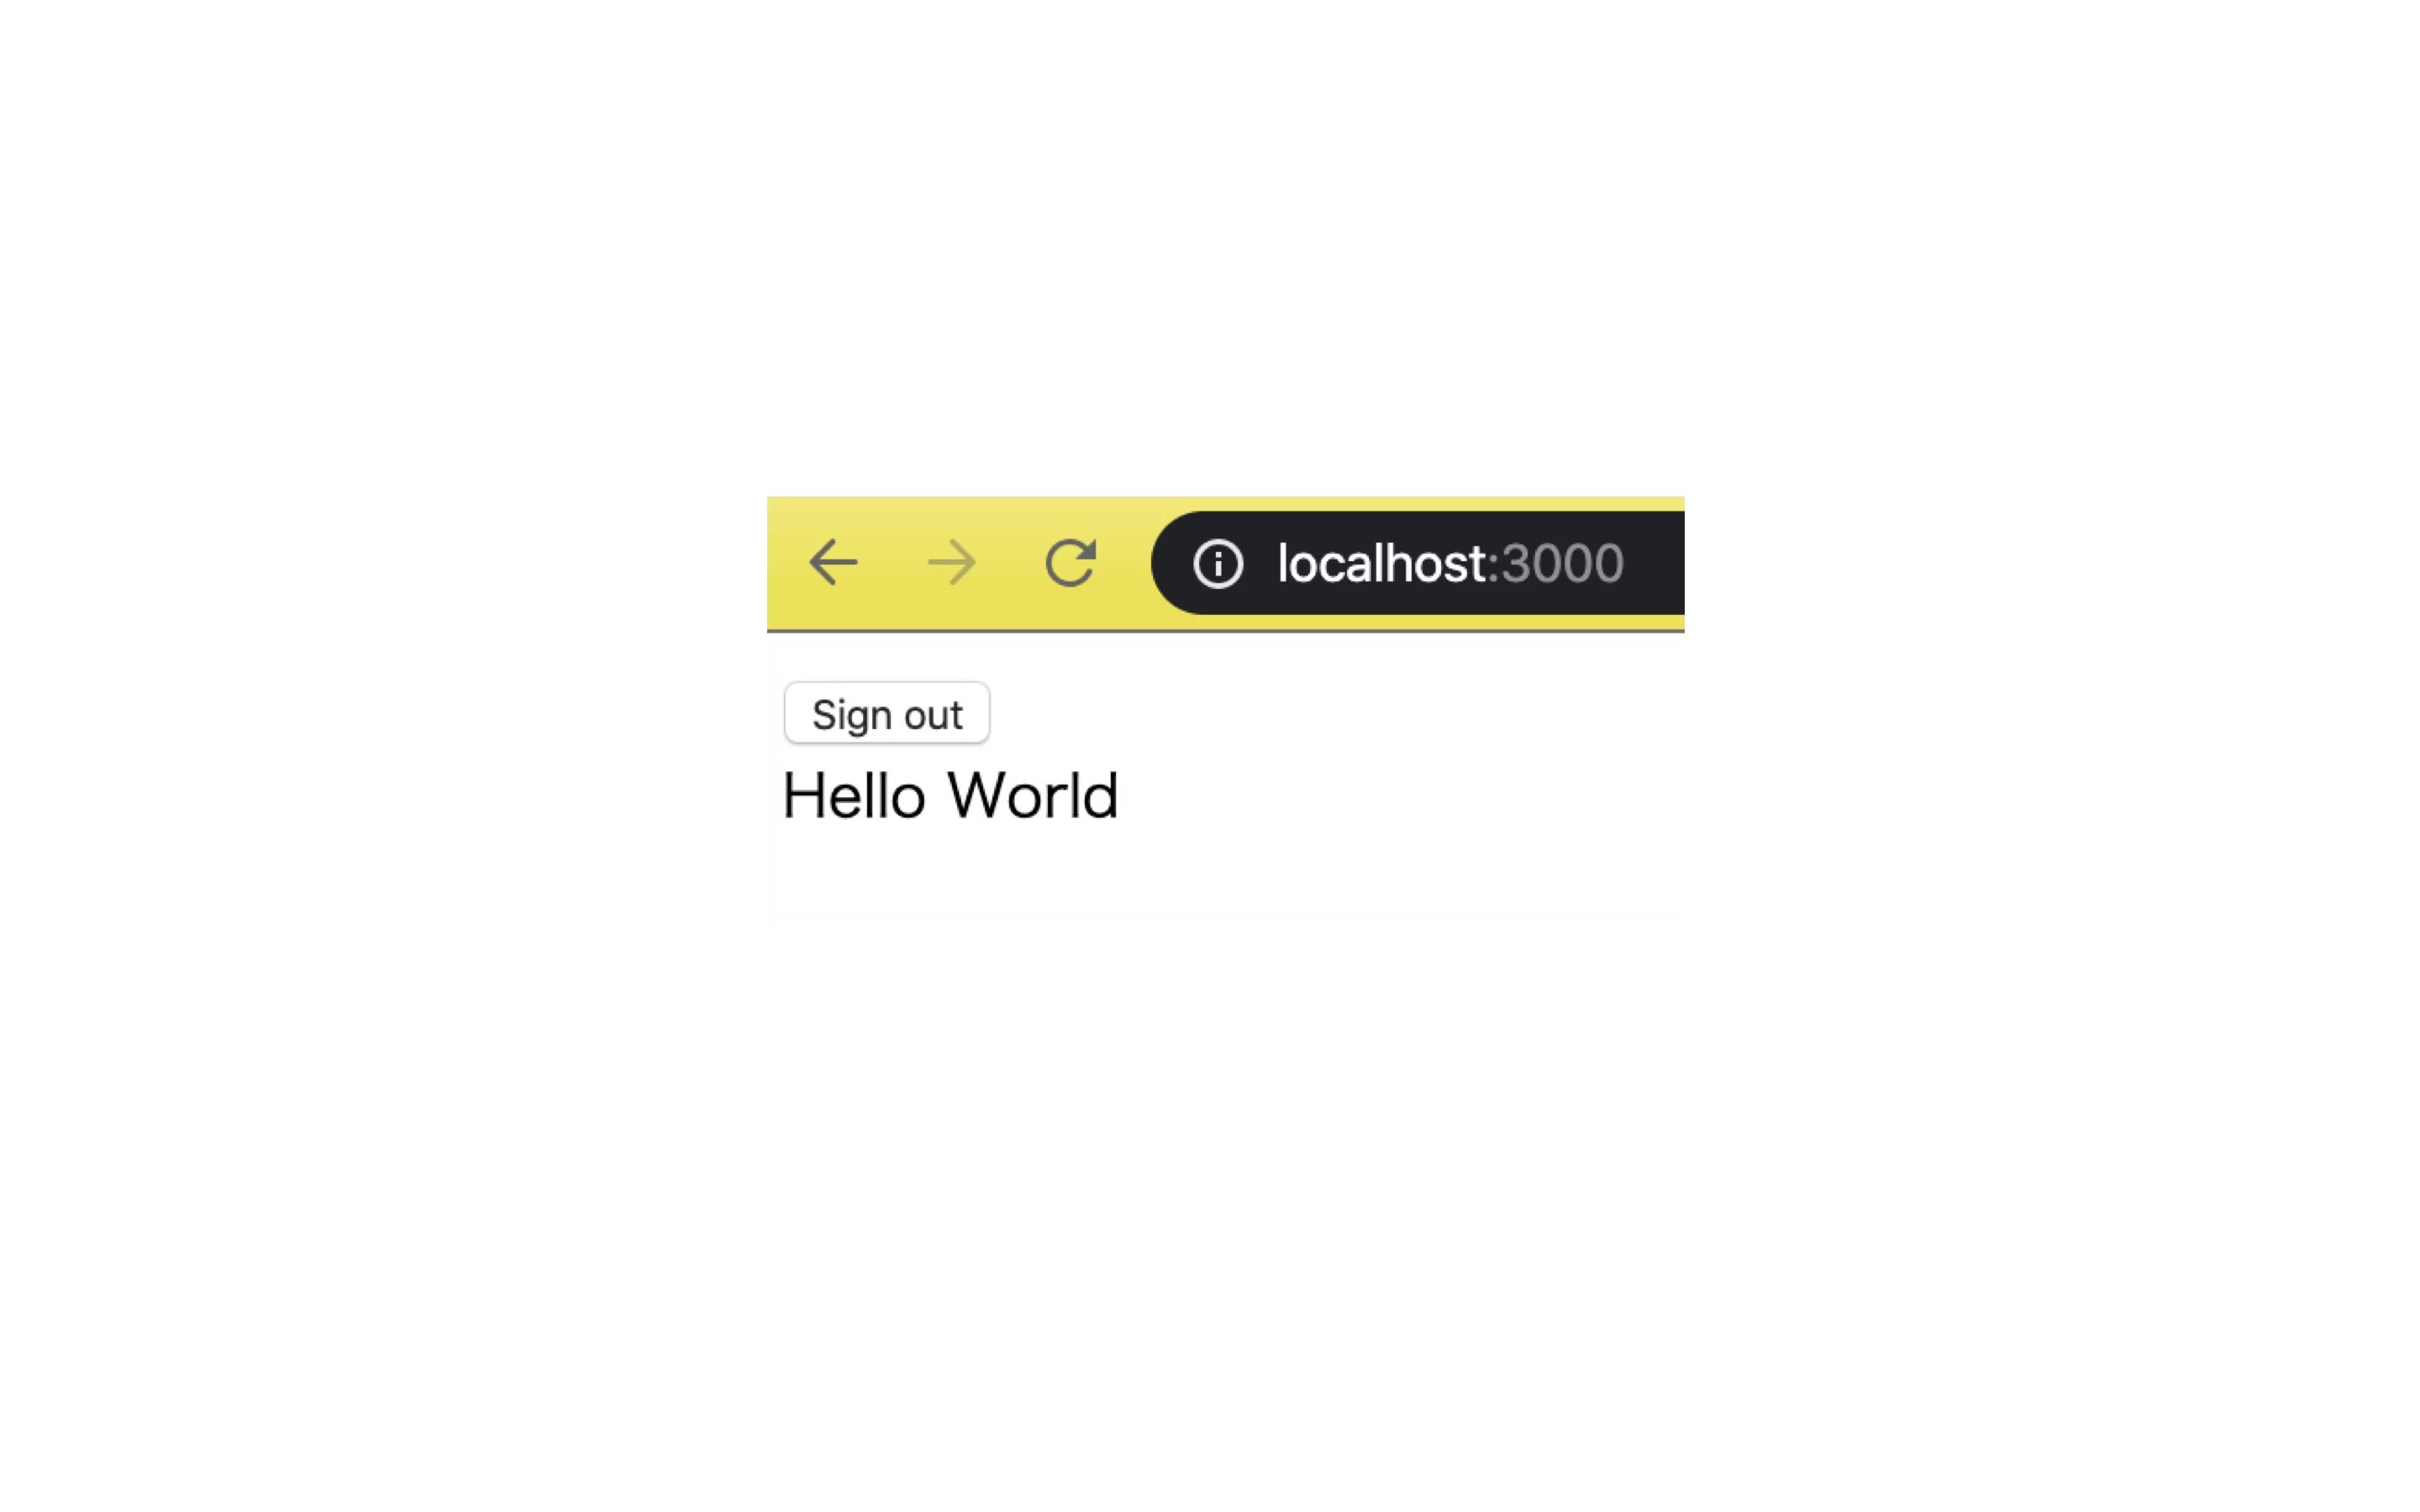
Create accountをクリックしアカウント作成画面でアカウントを作成し、ログインしてみます。作成したユーザーは、Cognitoに作成されています。
- 画面
- Cognito

Hello Worldの画面が表示されます。
サイトを公開する
apmlify add hostingでS3での静的ウェブホスティングを有効にします。バケット名には、何も指定しない場合デフォルトでユニークなバケットを作成してくれます。
$ amplify add hosting
? Select the plugin module to execute Amazon CloudFront and S3
? Select the environment setup: PROD (S3 with CloudFront using HTTPS)
? hosting bucket name
Static webhosting is disabled for the hosting bucket when CloudFront Distribution is enabled.

You can now publish your app using the following command:
Command: amplify publish
ホスティングを有効した後に、amplify publishを実行し、アプリケーションをビルドしデプロイします。
$ amplify publish
✔ Successfully pulled backend environment dev from the cloud.

Current Environment: dev

| Category | Resource name       | Operation | Provider plugin   |
| -------- | ------------------- | --------- | ----------------- |
| Auth     | amplifyuser751c3c76 | No Change | awscloudformation |
| Hosting  | S3AndCloudFront     | No Change | awscloudformation |
? Are you sure you want to continue? Yes
~ 省略 ~
✔ Uploaded files successfully.
Your app is published successfully.
https://×××××××××××××.cloudfront.net
最後に表示されるURLにアクセスしてみてください。先ほど作成した画面が、CloudFrontで公開されています。
これで、プロジェクトの作成からデプロイまでが完了です。
バックエンドのGraphQLを追加する
認証機能を設定できたので、データベースにデータを永続化し、バックエンドAPIを追加します。
まずは、amplify addでGraphQLを選択肢API機能を追加します。
認証形式にAmazon Cognito User Poolを選択すると、先ほど作成したユーザー情報を用いた認証を使用することができます。
$ amplify add api
? Please select from one of the below mentioned services: GraphQL
? Provide API name: amplifytodo
? Choose the default authorization type for the API Amazon Cognito User Pool
Use a Cognito user pool configured as a part of this project.
? Do you want to configure advanced settings for the GraphQL API No, I am done.
? Do you have an annotated GraphQL schema? No
? Do you want a guided schema creation? No
? Provide a custom type name Todo
amplify statusで確認します。
$ amplify status
amplify status                                                                                                                                                                             11:12:55

Current Environment: dev

| Category | Resource name       | Operation | Provider plugin   |
| -------- | ------------------- | --------- | ----------------- |
| Api      | AmplifyUserAPI      | Create    | awscloudformation |
| Auth     | amplifyuser751c3c76 | No Change | awscloudformation |
| Hosting  | S3AndCloudFront     | No Change | awscloudformation |
APIが追加されていることがわかります。
@modelの作成
@modelが付与されたオブジェクトは、エンティティとしてAmazon DynamoDBに保存されます。@modeの単位でテーブルが作成されるイメージです。
TODOアプリ用に、モデルを作成していきます。
amplify/backend/api/amplifytodoディレクトリにschema.graphqlファイルが作成されています。
それを以下のように書き換えます。
type Todo @model {
	id: ID!
	title: String!
	detail: String!
	createdAt: AWSDateTime
	updatedAt: AWSDateTime
}
この状態で、amplify pushをしてみます。一旦全てデフォルトの値で設定します。
$ amplify push
? Do you want to generate code for your newly created GraphQL API Yes
? Choose the code generation language target javascript
? Enter the file name pattern of graphql queries, mutations and subscriptions src/graphql/**/*.js
? Do you want to generate/update all possible GraphQL operations - queries, mutations and subscriptions Yes
? Enter maximum statement depth [increase from default if your schema is deeply nested] 2
~省略~
✔ Generated GraphQL operations successfully and saved at src/graphql
✔ All resources are updated in the cloud

GraphQL endpoint: https://×××××××××××××.appsync-api.ap-northeast-1.amazonaws.com/graphql
GraphQL Endpointが表示されれば成功です。
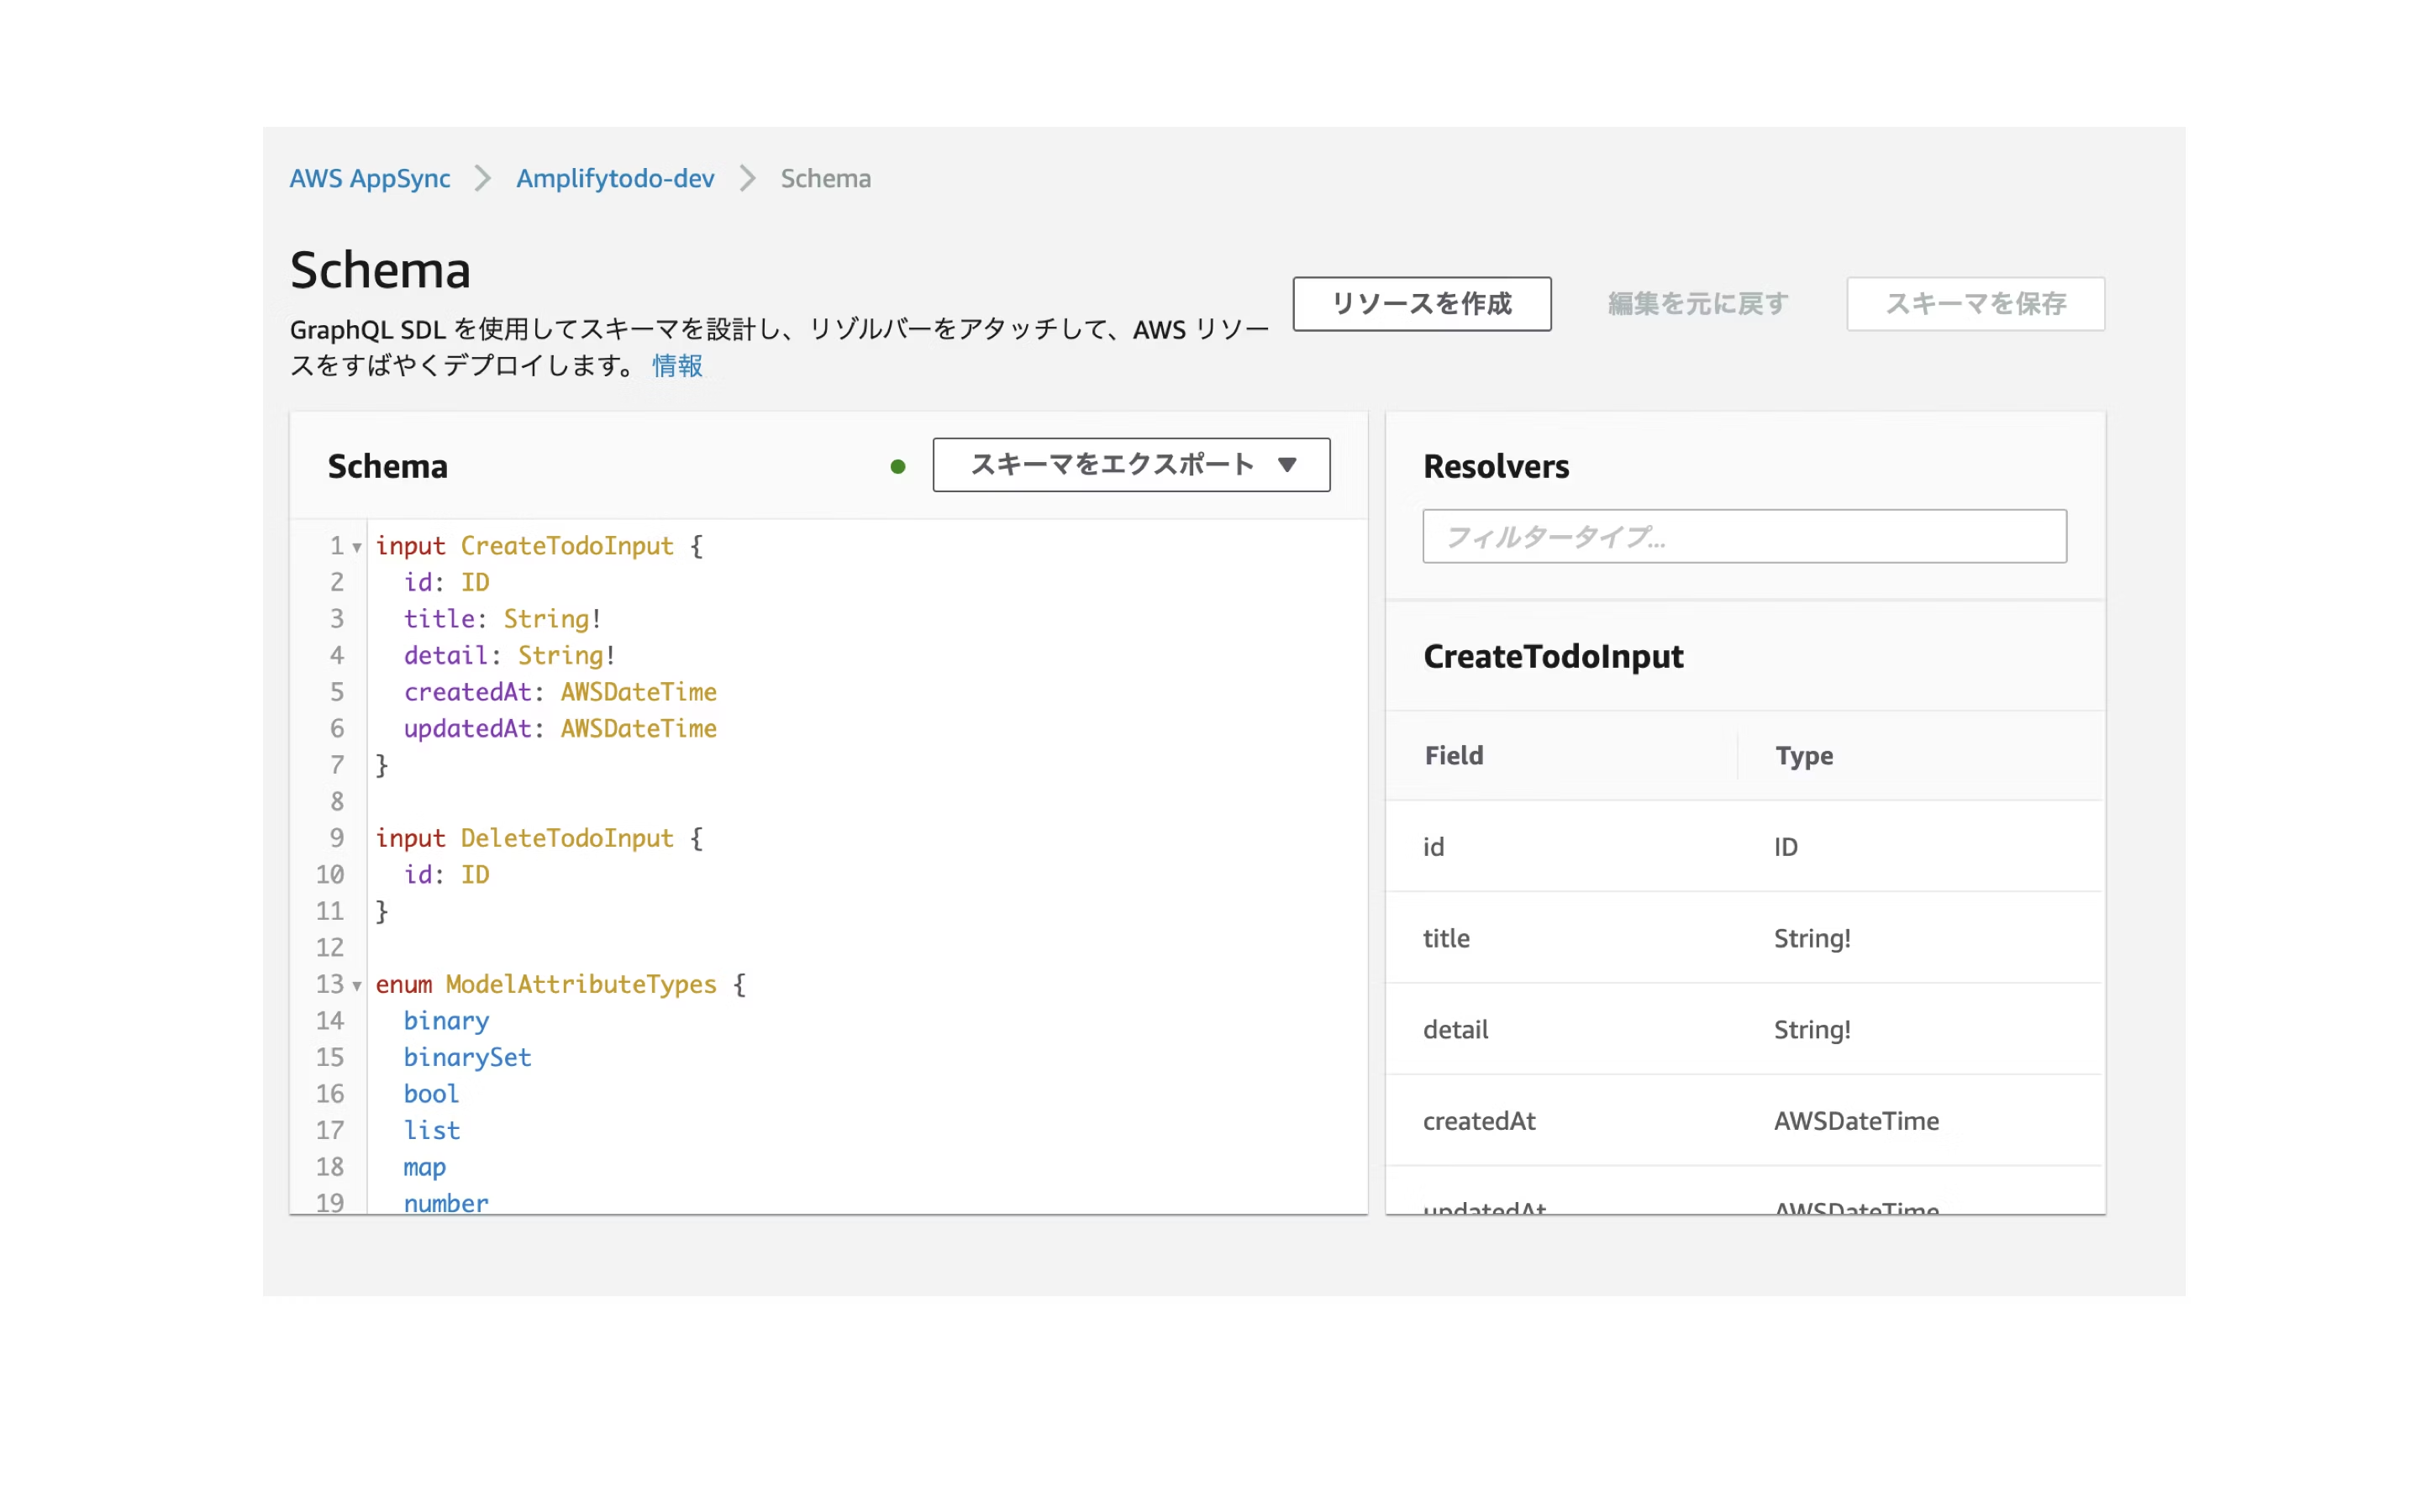
AppSyncとDynamoDBのページでリソースが作成されているか確認してみてください。
- AppSync
- DynamoDB
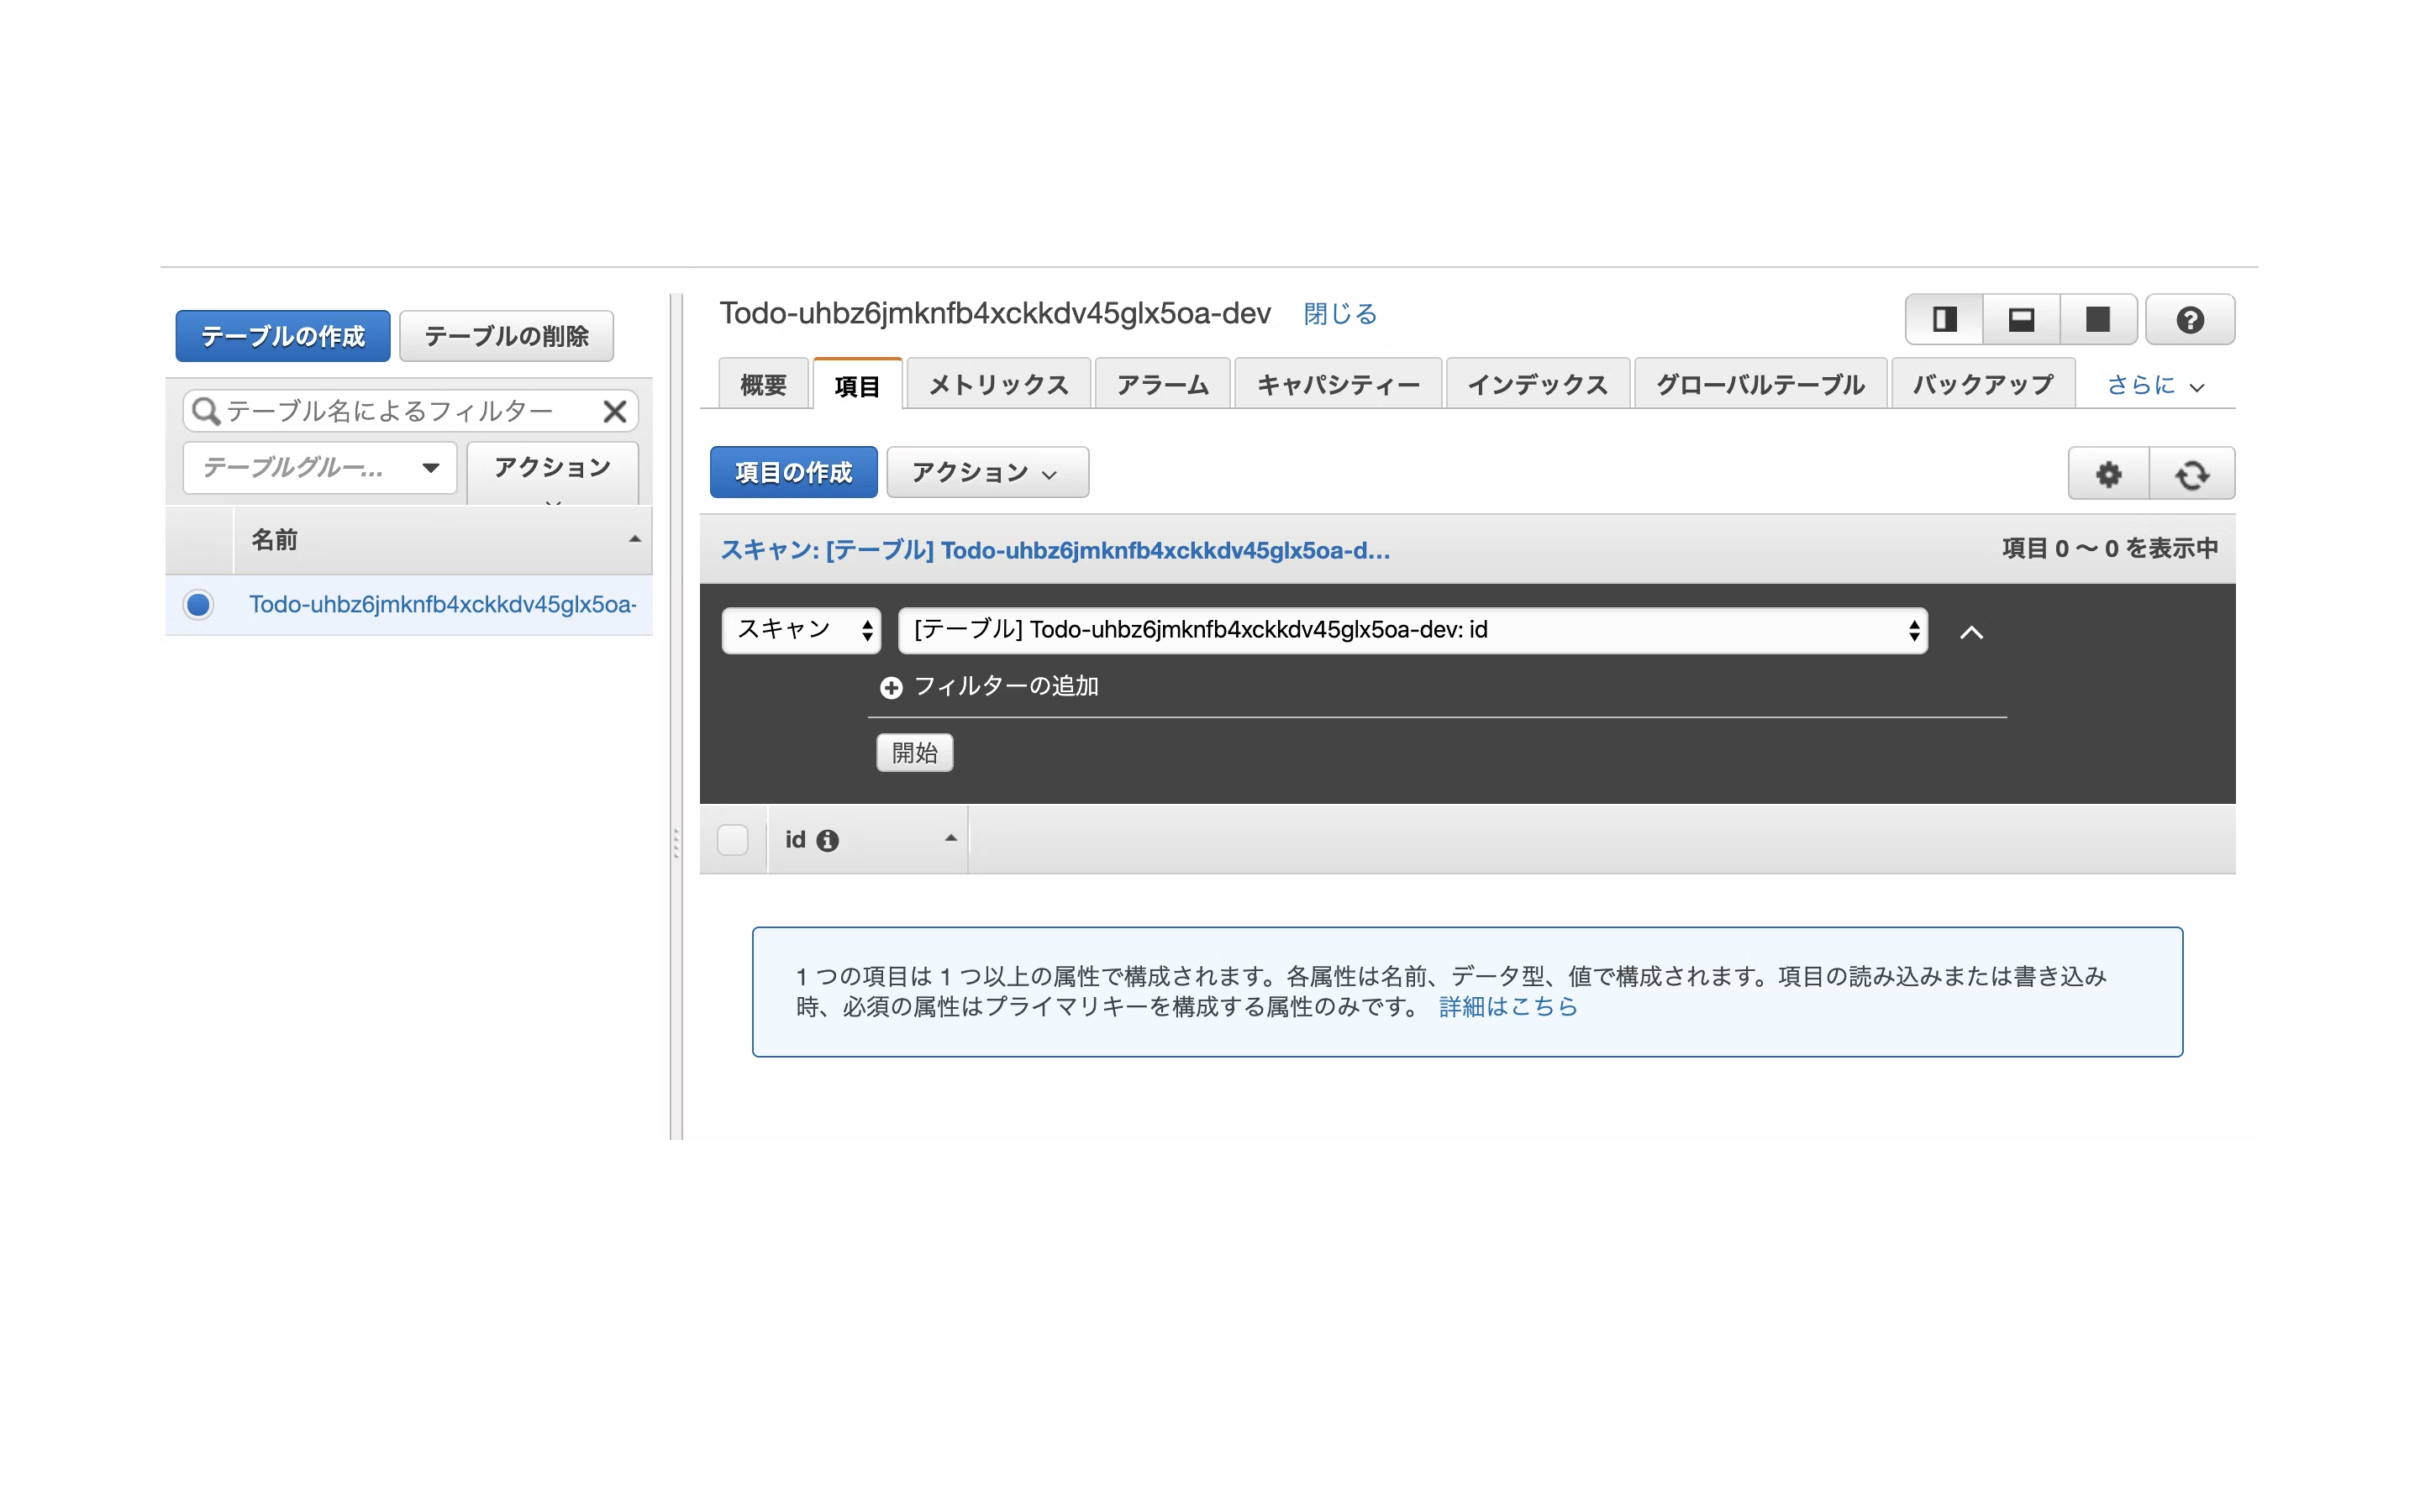
ではTODOを追加、確認できるようにしていきます。
まずはライブラリを追加します。
$ npm install @aws-amplify/api @aws-amplify/pubsub
src/App.jsを以下のように書き換えます。
import React, {useState, useEffect, useReducer } from 'react';
import Amplify, { Auth } from 'aws-amplify';
import API, { graphqlOperation } from '@aws-amplify/api';
import { withAuthenticator } from 'aws-amplify-react'
import { createTodo } from './graphql/mutations';
import { listTodos } from './graphql/queries';
import { onCreateTodo } from './graphql/subscriptions';

import awsconfig from './aws-exports';

Amplify.configure(awsconfig);

const GET = 'GET';
const CREATE = 'CREATE';

const initialState = {
  todos: [],
};

const reducer = (state, action) => {
  switch (action.type) {
    case GET:
      return {...state, todos: action.todos};
    case CREATE:
      return {...state, todos:[...state.todos, action.todo]}
    default:
      return state;
  }
};

function signOut(){
  Auth.signOut()
  .then()
  .catch();
}

function App() {
  const [state, dispatch] = useReducer(reducer, initialState);
  const [user, setUser] = useState(null);
  const [title, setTitle] = useState(null);
  const [detail, setDetail] = useState(null);

  function onChange(e){
    if(e.target.id === 'title'){
      setTitle(e.target.value);
    }
    if(e.target.id === 'detail'){
      setDetail(e.target.value);
    }
  }

  async function create(e) {
    e.preventDefault();
    setTitle('')
    setDetail('')
    const todo = { title:title, detail:detail };
    await API.graphql(graphqlOperation(createTodo, { input: todo }));
  }

  useEffect(() => {

    async function getUser(){
      const user = await Auth.currentUserInfo();
      setUser(user);
      return user
    }

    getUser();

    async function getData() {
      const todoData = await API.graphql(graphqlOperation(listTodos));
      dispatch({ type: GET, todos: todoData.data.listTodos.items });
    }

    getData();

    const subscription = API.graphql(graphqlOperation(onCreateTodo)).subscribe({
      next: (eventData) => {
        const todo = eventData.value.data.onCreateTodo;
        dispatch({ type: CREATE, todo });
      }
    });

    return () => subscription.unsubscribe();
  }, []);

  return (
    <div className="App">
      <p>user: {user!= null && user.username}</p>
      <button onClick={signOut}>Sign out</button>
      <div>
        <table border="1" style={{'border-collapse': 'collapse'}}>
          <tr>
            <th>No</th>
            <th>Title</th>
            <th>Detail</th>
            <th></th>
          </tr>
          <tr>
            <td></td>
            <td><input id='title' type='text' onChange={onChange} value={title}/></td>
            <td><input id='detail' type='text' onChange={onChange} value={detail}/></td>
            <th><button onClick={create}>New</button></th>
          </tr>
          {state.todos && state.todos.map((todo,index) => {
            return(
              <tr key={todo.id}>
                <td>{index + 1}</td>
                <td>{todo.title}</td>
                <td>{todo.detail}</td>
                <td>{todo.createdAt}</td>
              </tr>
            )
          })}
        </table>
      </div>
    </div>
  );
}

const signUpConfig = {
    header: 'Sign Up',
    hideAllDefaults: true,
    defaultCountyCode: '1',
    signUpFields: [
        {
            label: 'User Name',
            key: 'username',
            required: true,
            displayOrder: 1,
            type: 'string'
        },
        {
            label: 'Email',
            key: 'email',
            required: true,
            displayOrder: 2,
            type: 'string'
        },
        {
            label: 'Password',
            key: 'password',
            required: true,
            displayOrder: 3,
            type: 'password'
        }
    ]
}

export default withAuthenticator(App, {
  signUpConfig: signUpConfig
});
ローカルで実行してみます。
$ npm start
ブラウザでサイトを立ち上げて確認してみます。
TODOが追加できていることがわかります。DynamoDBのコンソールでも確認してみてください。
作成したTODOが追加されています。
簡単ですが、GraphQLのバックグラウンドを追加してデータの追加をしてみました。
削除
amplify deleteでinitで作成した環境を全て削除できます。何かとお金がかかるので不安な方は実行してください。
まとめ
AWS Amplifyの紹介と実際に少し触ってみました。
まだまだAmplifyの一部分しか触れていませんが、一から構築するのと比べものにならないぐらい爆速でアプリを立ち上げることができます。
Amplify Frameworkの基本的なフローは、amplify addで機能を追加しamplify pushでCloudFrontのテンプレートファイルを更新し、amplify publishで静的サイトをデプロイする、の流れになります。
Amplifyを使ってAWSを簡単に導入して、少しずつ各サービスを理解していき、最終的には同等の環境をAmplifyなしで構築できればベストかなと感じました。