Firebaseの Cloud Messaging を試してみます。
Cloud Messaging
Firebase Cloud Messaging(FCM)は メッセージを配信するソリューションです。
iOSアプリやAndroidアプリの場合はプッシュ通知を実装する場合に利用できます。Web Push対応したChrome等のブラウザがインストールさてれいればサイトからのプッシュ通知としても実装する事ができます。
今回は Web Push を試してみることにしました。
-
ブラウザで firebase console を開く
https://console.firebase.google.com/?hl=ja -
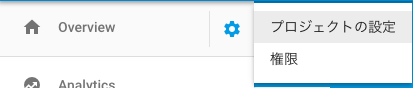
左上にあるプロジェクト名の隣の歯車アイコンを押して プロジェクトの設定を開きます。
-
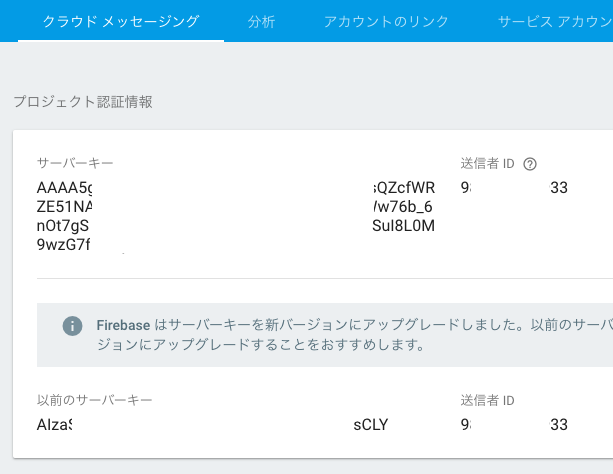
クラウドメッセージングタブを選択して、送信者IDを確認してください。あとで FCM送信者ID として使用するので覚えておきます。
-
適当なプロジェクトディレクトリを作って初期化する
mkdir web-push-sample firebase init -
今回はサンプルなので Hosting を選び、2で作成したプロジェクトを選択する
残りの選択は全て Yes で。firebase.jsonやpublicディレクトリが作成される。 -
publicディレクトリに images ディレクトリを作り icon.png を追加する。

icon.png -
Service Workerを追加する。
publicディレクトリにfirebase-messaging-sw.jsというファイル名で下記のコードのファイルを作る。※FCMを利用する場合ファイル名firebase-messaging-sw.js固定のようです。firebase-messaging-sw.jsimportScripts('https://www.gstatic.com/firebasejs/3.7.0/firebase-app.js'); importScripts('https://www.gstatic.com/firebasejs/3.7.0/firebase-messaging.js'); firebase.initializeApp({ 'messagingSenderId': 'YOUR-SENDER-ID' }); const messaging = firebase.messaging(); messaging.setBackgroundMessageHandler(function(payload) { console.log('[firebase-messaging-sw.js] Received background message ', payload); // Customize notification here const notificationTitle = payload.notification.title; const notificationOptions = { body: payload.notification.body, icon: payload.notification.icon }; return self.registration.showNotification(notificationTitle,notificationOptions); }); -
3で確認した送信者IDを ``` 'messagingSenderId': 'YOUR-SENDER-ID' `` にコピーして書き換える。
-
publicディレクトリに
manifest.jsonを作成する。※FCMを利用する場合この値103953800507固定のようです。{ "gcm_sender_id": "103953800507" } -
index.htmlに manifest.json を指定するメタタグを追加する
<link rel="manifest" href="/manifest.json"> -
WebPush取得処理を開始するための ボタンとユーザー毎のトークンを表示する欄をindex.htmlに追加する。
<input type="button" id="btnWebPush" value="WebPush権限を取得"> <br> <input type="text" value="YOUR-IID-TOKEN" id="txtIIToken" style="width:80%;"> -
index.html に FCMを利用するための javascript を追加する。
const messaging = firebase.messaging(); messaging.onMessage(function(payload) { console.log("Message received. ", payload); alert(payload.notification.title+"\r\n" +payload.notification.body+"\r\n" +payload.notification.icon); }); //プッシュ通知パーミッション取得 var requestPermission = function () { messaging.requestPermission() .then(function() { //ユーザー毎のトークンを取得して画面に表示する messaging.getToken() .then(function(token) { console.log('Token refreshed.'); console.log("token "+token); document.getElementById("txtIIToken").value = token; }) .catch(function(err) { console.log('Unable to retrieve refreshed token ', err); }); }) .catch(function(err) { console.log('Unable to get permission to notify.', err); }); } window.onload = function() { //パーミッションを取得するボタンクリック時 document.getElementById("btnWebPush").onclick = requestPermission; }; -
ローカル環境で実行して内容を確認してみる
firebase serve
表示される URLをブラウザで開く
http://localhost:5000 -
WebPush権限を取得ボタンをクリックしてユーザートークンを取得する。
トークン取得に成功すればYOUR-IID-TOKEN欄に表示されます。
ここまでの実装でFCMの利用準備ができました。続いてコマンドラインからメッセージを送ってみます。
コマンドラインからメッセージ送信
-
メッセージは下記のコマンドで送信することができます。
curl -X POST -H "Authorization: key=YOUR-SERVER-KEY" -H "Content-Type: application/json" -d '{ "notification": { "title": "タイトル", "body": "本文", "icon": "/images/icon.png", "click_action": "http://localhost:5000" }, "to": "YOUR-IID-TOKEN" }' "https://fcm.googleapis.com/fcm/send" -
YOUR-SERVER-KEYは 上の欄3のfirebase consoleで確認した サーバーキーをコピーします。 -
WebPush権限を取得ボタンをクリックして取得した
YOUR-IID-TOKENを YOUR-IID-TOKEN 欄にコピーする -
ターミナルを開いて実行してみる。成功すれば下のようなレスポンスが表示される。
* "success":1 があれば成功している。{ "multicast_id":12345678..., "success":1, "failure":0, "canonical_ids":0, "results":[{"message_id":"0:1234567890%abcdfeg123456"}] } -
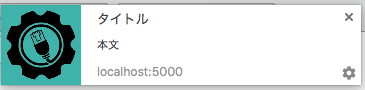
ローカル実行で開いていたタブを閉じた状態で上のコマンドを実行すると ブラウザプッシュ通知が表示される。
とても簡単にWebPushを実装する事ができました。
本来はService Workerの知識やGCM(Google Cloud Messaging)の知識が必要で難しいのですが、Firebaseのjavascriptライブラリのおかげで簡単に実装できるようです。
おまけ
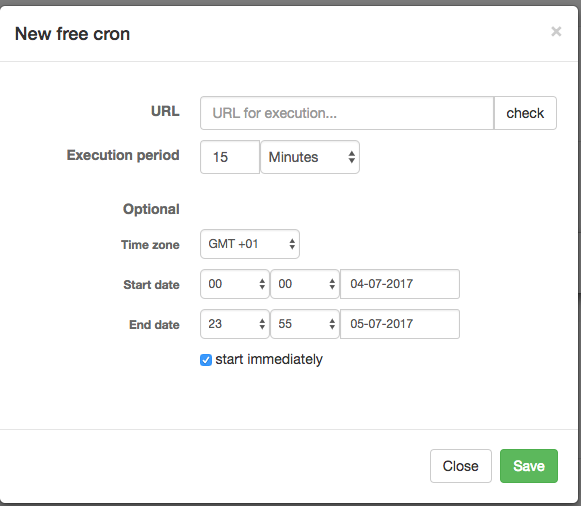
特定のURLに定期的にアクセスしてくれる CronサービスMy Web Cron Service を使ってFCMを実行する方法
-
fcm_send.html 等の名前で javascript から FCMにメッセージをPOSTするhtmを作る。
$(function(){
console.log("onload");
//FCMへPOSTする
const options = {
url:'https://fcm.googleapis.com/fcm/send',
type:"POST",
headers:{
"Authorization":"key="+SERVER_KEY,
"Content-Type":"application/json"
},
contentType: 'application/json',
dataType: "json",
data:JSON.stringify({
notification: {
title: "タイトル",
body: "本文",
icon: "/images/icon.png",
click_action: "http://localhost:5000"
},
to: YOUR_IID_TOKEN
}),
success:function(json) {
console.log("success");
console.log(json);
},
error: function() {},
complete: function() {}
};
$.ajax(options);
});
```
-
firebaseホスティングにdeployして サーバ上の fcm_send.html のURLを覚える
https://xxxxxxx.firebaseapp.com/fcm_send.html -
fcm_send.htmlのURLを My Web Cron Service に登録する
-
指定時間毎にWebPushが実行される。