qnote Advent Calendar の7日目です。
はじめに
先日会社の LT で JavaScript の OptionalChaining と Null合体演算子 について発表したのですが、それがきっかけで TypeScript 使いたいなと思うようになりました。
どうせなら何か作りたいなとも思ったので、今回は Vue CLI を使って Vue + TypeScript で、おみくじを引ける静的な web アプリを作ってみます。
初期設定
環境
Vue CLI v4.1.1
TypeScript のサポートは v3.0 系からあるようなので、 v3.0 系でも大丈夫です。
Vue CLI のインストールはここでは省略いたします。
プロジェクト作成
$ vue create neko-omikuji
対話形式で初期設定が行えます。下記の選択では今回は TypeScript を使用したいので、マニュアルで設定します。
? Please pick a preset:
  default (babel, eslint)
❯ Manually select features
次にインストールしたい機能を選択します。今回はシンプルに使いたかったので下記のように選択しました。
? Check the features needed for your project:
 ◯ Babel
 ◉ TypeScript
 ◯ Progressive Web App (PWA) Support
 ◉ Router
 ◯ Vuex
 ◯ CSS Pre-processors
❯◉ Linter / Formatter
 ◯ Unit Testing
 ◯ E2E Testing
あといろんな設定が続きますがお好みで選択していきます。
? Use class-style component syntax? Yes
? Use Babel alongside TypeScript (required for modern mode, auto-detected polyfills, transpiling JSX
)? No
? Use history mode for router? (Requires proper server setup for index fallback in production) Yes
? Pick a linter / formatter config: Airbnb
? Pick additional lint features: (Press <space> to select, <a> to toggle all, <i> to invert selectio
n)Lint on save
? Where do you prefer placing config for Babel, ESLint, etc.? In dedicated config files
? Save this as a preset for future projects? No
🎉  Successfully created project neko-omikuji.
👉  Get started with the following commands:
このメッセージが出たら作成完了です!
早速動かしてみましょう。
$ cd neko-omikuji
$ npm run serve

例の画面が出ました!
実装
おみくじを引いたら弊社の猫社員の画像がランダムで表示されることを目標にしました。
メインとなるページから実装していきます。
デコレータを使った Vue の書き方を試してみます。
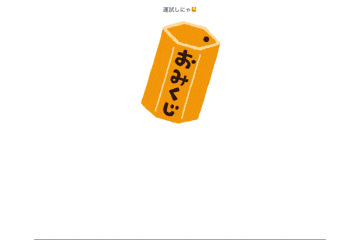
<template>
  <div>
    <p>運試しにゃ🐱</p>
    <a
      href="#"
      @click="onLightboxOpen">
      <img
        alt="omikuji"
        class="omikuji"
        src="../assets/omikuji.png">
    </a>

    <lightbox
      v-if="isLightboxActive"
      :is-active="isLightboxActive"
      :src="src"
      :result="resultList[result]"
      @lightbox-close="onLightboxClose" />
  </div>
</template>

<script lang="ts">
import { Component, Vue } from 'vue-property-decorator'
import Lightbox from './Lightbox.vue'

@Component({
  components: {
    Lightbox,
  },
})
export default class Omikuji extends Vue {
  // data
  isLightboxActive: boolean = false

  resultList: {} = {
    daikichi: '大吉',
    kichi: '吉',
    chukichi: '中吉',
    syokichi: '小吉',
    suekichi: '末吉',
    kyo: '凶',
    daikyo: '大凶',
  }

  result: string = ''

  number: number = 1

  // computed
  get src(): string {
    return `./img/${this.result}_${this.number}.png`
  }

  // methods
  getResult(): void {
    const keys = Object.keys(this.resultList)
    this.result = keys[Math.floor(Math.random() * keys.length)]
    this.number = Math.floor(Math.random() * 3) + 1
  }

  onLightboxOpen(): void {
    this.getResult()
    this.isLightboxActive = true
  }

  onLightboxClose(): void {
    this.isLightboxActive = false
  }
}
</script>

...
テンプレートこそ変わりませんが、
スクリプトは普段の Vue の書き方とはだいぶ違いますね。
data はクラスのプロパティとして、
computed は get および set アクセサを使って、
method はクラスのメソッドとして、
それぞれ定義されています。
また components オプションはデコレータを使用しています。
次に画像が表示される Lightbox コンポーネントを作成します。
...

<script lang="ts">
import {
  Component, Prop, Vue, Emit,
} from 'vue-property-decorator'
import FadeTransition from './FadeTransition.vue'

@Component({
  components: {
    FadeTransition,
  },
})
export default class Lightbox extends Vue {
  @Prop({ default: false })
    isActive!: Boolean

  @Prop({ default: '' })
    src!: String

  @Prop({ default: '' })
    result!: String

  @Emit('lightbox-close')
  // eslint-disable-next-line class-methods-use-this
  onLightboxClick() {}
}
</script>

...
親コンポーネントから渡される props もデコレータを使って書きました。
うーん、正直なところプロパティで書くほうがわかりやすい気がしますね、あちらも型の指定はできますし ![]()
$emit もデコレータを使います。
完成
はい、完成したものがこちらになります。
![]() [qnote猫おみくじ] (https://taisukearase.github.io/neko-omikuji/)
[qnote猫おみくじ] (https://taisukearase.github.io/neko-omikuji/) ![]()
おわりに
というわけで、 Vue と TypeScript で簡単に遊んでみました。
最初は普段と違う記述方法に戸惑いましたが、型を明確にしながら実装していくことで機能のイメージが掴みやすかったり、エディタのサポートが手厚くなったりと、確実にメリットはあると感じました。
今回使いたかった OptionalChaining は使う機会がなかったのと Vue CLI の TypeScript が 3.5.3 でそもそもまだ導入されていないバージョンだったのが残念でしたが、いつかプロジェクトで使える日が来るときのために、 TypeScript を勉強しておこうと思います!
今回作成したコードは こちら にありますので、必要であればご覧ください。
最後に、素材をお借りした いらすとや様、いつも可愛い写真を撮ってくださる qnote の皆様、癒しをくれる弊社猫社員の方々、 ありがとうございました!