はじめに
この記事はフリューAdvent Calendar 2022の8日目の記事となります。
今回はUnityからAzure Cognitive Servicesの一つであるComputer Visionを利用する機会がありましたので記録として残しておきます。
利用する際にアセンブリが重複する部分もあったので、そのあたりの解決方法も含めて紹介します。
Azure Cognitive Servicesとは
この記事に辿り着いてる方には説明不要とは思いますが、簡単に紹介しておきます。
Azure Cognitive Servicesはトレーニング済みのAIを簡単にアプリに組み込めるAPI形式のサービスとなっており音声、画像、言語など様々な解析が可能です。
サービスの詳細は公式サイトをご覧ください。
今回紹介するAzure Computer Visionについて
Computer Visionは画像解析を行い視覚的情報をテキストとして返してくれるサービスとなっています。
簡単に言うと、画像には何が写っているのかを返してくれるAPIになります。
動作確認した環境
今回は以下の環境での説明となります。
Windows10 Pro
Unity 2021.3.21f
Unityでの実行
この記事の内容は2022.11.30時点のものとなります。
それでは実際にUnityから呼び出しを作っていきます。
基本的には次のクイックスタートC#版に沿って手順を進めていきます。
Computer Visionのリソース作成に関してはクイックスタートにもありますし、Unityに限った話でもありませんので割愛します。
クライアントライブラリのインストール
クイックスタートにはVisual Studioでの手順は記載されていますが、Unityでの記載はありません。
順を追って説明していきます。
1.NuGetForUnityパッケージをインストールする
NuGetを利用してインストールできるようなのでNuGetForUnityを使用してライブラリをインストールします。
NuGetForUnityについては以下のサイトを参考にパッケージをインストールしました。
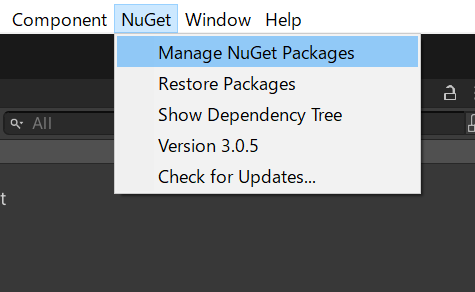
NuGetForUnityのパッケージ追加が終わればUnityのメニューにNuGetが追加されます。
2.Azure Computer Visionクライアントをインストールする
「NuGet」-> 「Manage NuGet Packages」を選択してNuGetを開きます。
NuGetのウィンドウから「Computer Vision」を検索し、表示されたMicrosoft.Azure.CognitiveServices.Vision.ComputerVisionを選択し「Install」ボタンを押してクライアントライブラリをインストールします。

自動的にダウンロードとビルドが始まります。
終わってインストールが完了したと思いきや、ビルドエラーが発生します。
Multiple precompiled assemblies with the same name Newtonsoft.Json.dll included on the current platform. Only one assembly with the same name is allowed per platform. (Assets/Packages/Newtonsoft.Json.10.0.3/lib/netstandard1.3/Newtonsoft.Json.dll)
冒頭で紹介したアセンブリの重複です。

この原因ですが、Newtonsoft.Json.dllはUnityのデフォルトライブラリとしてインストールされており、今回インストールしたComputer VisionのライブラリはNewtonsoft.Json.dllが依存関係であるため、一緒にインストールされ重複しエラーとなっています。
3.アセンブリ重複の解決
解決方法は次のようになります。
まずは、Computer Visionのクライアントライブラリが依存するライブラリの厳密なバージョンチェックを解除してバージョンが新しいUnityデフォルトのNewtonsoft.Json.dllを使用できるようにします。
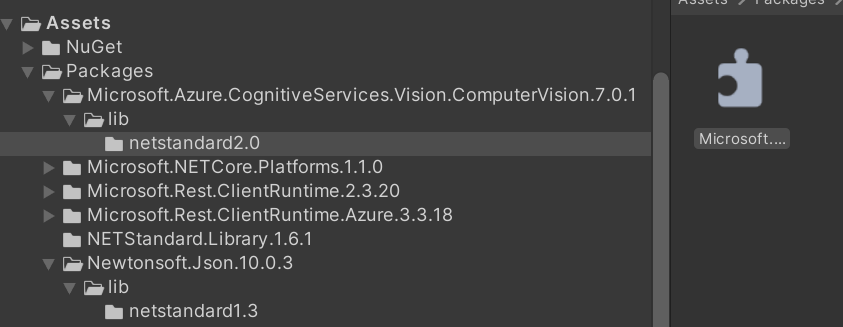
AssetsのPackagesにあるMicrosoft.Azure.CognitiveServices.Vision.ComputerVison.7.0.1の中にあるDLLを選択します。
Inspectorから「Validate Reference」のチェックを外し「Apply」を押します。

同様にAssets/Packagesにある以下の2つのDLLに関しても「Validate Reference」のチェックを外します。
Microsoft.Rest.ClientRuntime.dll

Microsoft.Rest.ClientRuntime.Azure.dll

Validate Referenceは以下のUnity公式ドキュメントを参照してください。
最後にPackagesに入っている古いバージョンのNewtonsoft.Jsonを削除することでUnityデフォルトで入っているライブラリを使用することができます。
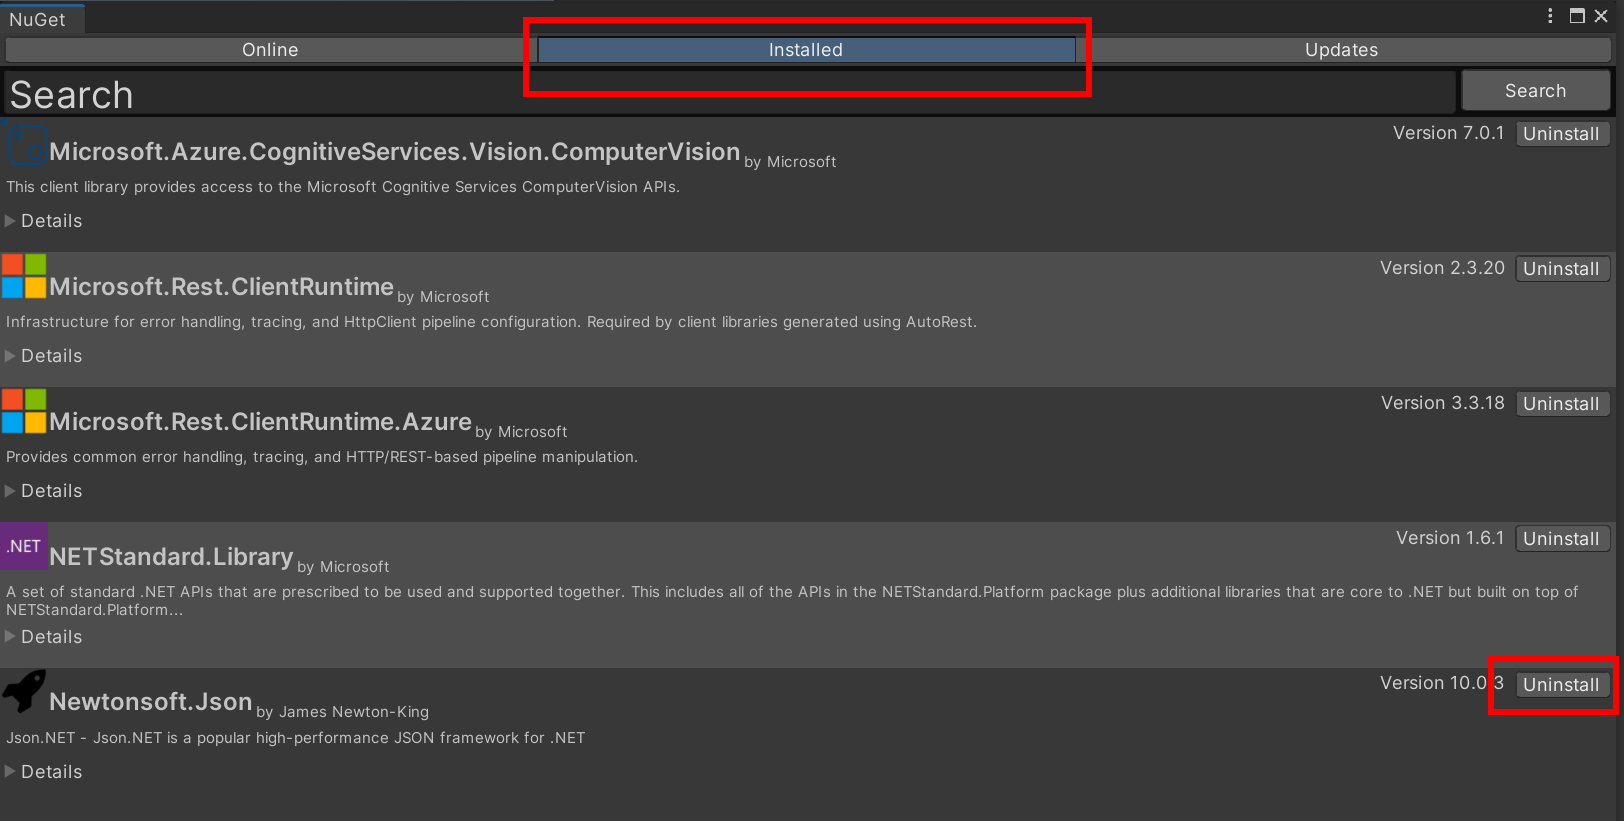
メニューの「NuGet」から「Manage NuGet Packages」してウィンドウが開いたら「Installed」を選択し、Newtonsoft.Jsonの「Uninstall」を押せば削除されます。
これでクライアントライブラリのインストールが完了しました。
後はクイックスタートにあるソースコードを使えば実行が確認できます。
ソースコードの準備
以下はクイックスタートにあるコードをUnityスクリプトへ置き換えたものです。
したがって動作が確認できる最低限のコードになります。
コード中にあるsubscriptionKeyおよび、endpointはAzureで作成したリソースから取得したものに書き換えてください。
using System.Collections.Generic;
using UnityEngine;
using Microsoft.Azure.CognitiveServices.Vision.ComputerVision;
using Microsoft.Azure.CognitiveServices.Vision.ComputerVision.Models;
using System.Threading.Tasks;
using System.IO;

public class ComputerVision : MonoBehaviour
{
	// Add your Computer Vision subscription key and endpoint
	private static string subscriptionKey = "PASTE_YOUR_COMPUTER_VISION_SUBSCRIPTION_KEY_HERE";
	private static string endpoint = "PASTE_YOUR_COMPUTER_VISION_ENDPOINT_HERE";

	// URL image used for analyzing an image (image of puppy)
	private const string ANALYZE_URL_IMAGE = "https://moderatorsampleimages.blob.core.windows.net/samples/sample16.png";

	// Start is called before the first frame update
	async void Start()
    {
		Debug.Log("Azure Cognitive Services Computer Vision - .NET quickstart example");

		// Create a client
		ComputerVisionClient client = Authenticate(endpoint, subscriptionKey);

		// Analyze an image to get features and other properties.
		await AnalyzeImageUrl(client, ANALYZE_URL_IMAGE);

	}

	/*
	 * AUTHENTICATE
	 * Creates a Computer Vision client used by each example.
	 */
	private ComputerVisionClient Authenticate(string endpoint, string key)
	{
		ComputerVisionClient client =
		  new ComputerVisionClient(new ApiKeyServiceClientCredentials(key))
		  { Endpoint = endpoint };
		return client;
	}

	private async Task AnalyzeImageUrl(ComputerVisionClient client, string imageUrl)
	{
		Debug.Log("----------------------------------------------------------");
		Debug.Log("ANALYZE IMAGE - URL");

		// Creating a list that defines the features to be extracted from the image.

		List<VisualFeatureTypes?> features = new List<VisualFeatureTypes?>()
			{
				VisualFeatureTypes.Tags
			};

		Debug.Log($"Analyzing the image {Path.GetFileName(imageUrl)}...");

		// Analyze the URL image
		ImageAnalysis results = await client.AnalyzeImageAsync(imageUrl, visualFeatures: features);

		// Image tags and their confidence score
		Debug.Log("Tags:");
		foreach (var tag in results.Tags)
		{
			Debug.Log($"{tag.Name} {tag.Confidence}");
		}
	}
}
このスクリプトを適当なオブジェクトにアタッチして実行すると即座にComputer Vision APIを呼び出します。
以下のようなログが出てくれば呼び出しに成功しています。
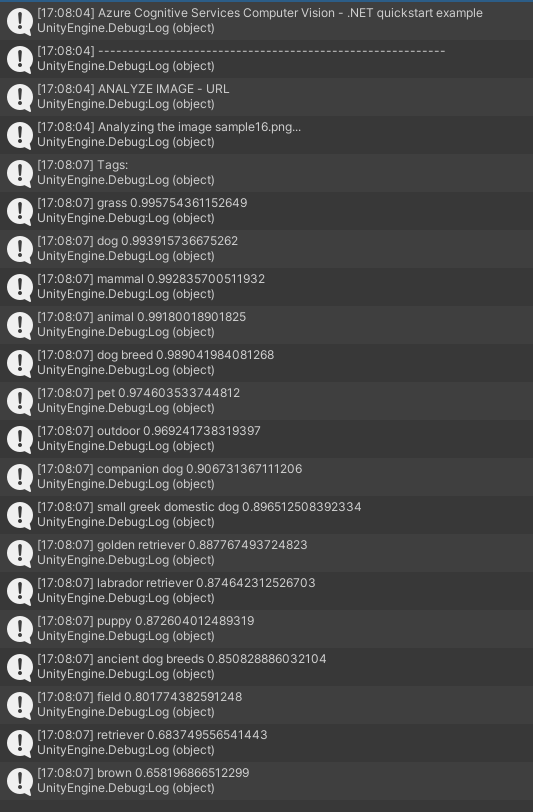
クイックスタートの出力結果とも一致しています。
(https://learn.microsoft.com/ja-jp/azure/cognitive-services/computer-vision/quickstarts-sdk/image-analysis-client-library?tabs=visual-studio%2C3-2&pivots=programming-language-csharp#output)
これでUnityからAzure Computer Visionを利用することができました。
任意のテクスチャをComputer Visionで解析する
サンプルだけではつまらないので多少アレンジしたコードも用意しておきました。
Computer Vision APIはURLの画像解析だけではなく、画像ファイルを直接アップロードして解析することもできます。
テクスチャをEncodeToでPNGなりJPGなりのファイルフォーマットに変換してAnalyzeImageInStreamAsyncの引数に指定するだけです。
Webカメラからの入力画像を渡せば色々解析できて楽しいのではないかと思います。
	private async Task AnalyzeImageTexture(ComputerVisionClient client, Texture2D texture )
	{
		Debug.Log("----------------------------------------------------------");
		Debug.Log("ANALYZE IMAGE");

		// Creating a list that defines the features to be extracted from the image.

		List<VisualFeatureTypes?> features = new List<VisualFeatureTypes?>()
			{
				VisualFeatureTypes.Tags
			};

		Debug.Log($"Analyzing the image ...");

		ImageAnalysis results = null;
		using (MemoryStream memStream = new MemoryStream(texture.EncodeToPNG()))
		{
			// Analyze the Image
			results = await client.AnalyzeImageInStreamAsync(memStream, visualFeatures: features);

		}

		// Image tags and their confidence score
		Debug.Log("Tags:");
		foreach (var tag in results.Tags)
		{
			Debug.Log($"{tag.Name} {tag.Confidence}");
		}
	}
実際に手元の画像を渡したところ
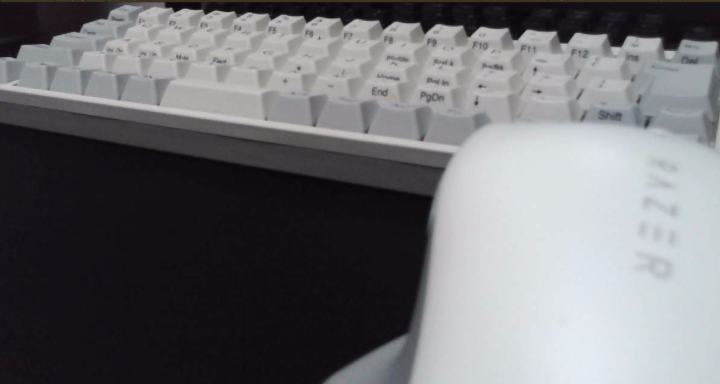
電化製品やキーボードという結果が得られています。
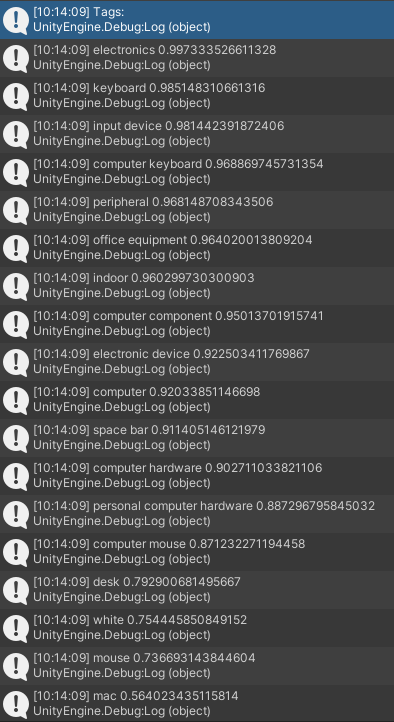
これで画像に特定の物が写っていれば何か処理を行うなどの判定が可能となりますね!
リファレンス
リファレンスは以下になります。
VisualFeatureTypesを追加していくことで取得できる情報が増えますので目を通してみてください。
最後に
いかがでしたでしょうか?
今回は
・UnityからComputer Visionを利用する方法
・アセンブリの重複はValidate Referenceのチェックを外して古いアセンブリを削除する
この2点の紹介でした。
C#のライブラリが用意されており、Unityでも利用できました。
私自身やりたいことが簡単に実現できたので非常にありがたいサービスでした。