やりたいこと
- 買い物リストなどチェックリストを入力する
- 項目をクリックするとチェック済みとなる
- チェック済みの項目は一括で削除できる
- データの取得/更新はAPIで行う
今回はVuetifyを使っていたので、v-data-tableを使って実現しました。
Vuetifyの環境構築についてはこちらのページに記載しています。
ソースコードの構成
src/componentにチェックリスト表示/入力用のコンポーネントを作ります。
実際にはsrc/views配下にチェックリスト用の親ページを作り複数のチェックリストを管理します。
親ページから各チェックリスト画面に遷移しますが、今回はコンポーネントの中身のみを説明します。
チェックリストコンポーネント
<template>
  <div>
    <v-card>
      <v-card-title class="body-2"> リスト詳細 </v-card-title>
      <v-card-actions>
        <v-spacer />
        <v-btn text @click="newRegister"> 項目追加 </v-btn>
      </v-card-actions>
      <v-container class="py-0">
        <v-data-table
          class="pb-1"
          :headers="headers"
          :items="list"
          hide-default-header
          hide-default-footer
        >
          <template v-slot:item="{ item }">
            <tr>
              <template v-for="each in headers">
                <td
                  v-if="item.is_checked === 0"
                  width="286px"
                  :key="each.value"
                  class="text-left cursor-pointer body-1"
                  @click="changeCheck(item.detail_id, item.is_checked)"
                >
                  {{ item[each.value] }}
                </td>
                <td
                  v-else
                  width="286px"
                  :key="each.value"
                  class="text-left cursor-pointer body-1"
                  @click="changeCheck(item.detail_id, item.is_checked)"
                >
                  <s>{{ item[each.value] }}</s>
                </td>
              </template>
            </tr>
          </template>
        </v-data-table>
      </v-container>
      <v-card-actions>
        <v-btn text @click="deleteChecked"> チェック済み削除 </v-btn>
        <v-spacer />
        <v-btn text @click="close"> 閉じる </v-btn>
      </v-card-actions>
    </v-card>
    <v-dialog
      v-if="isShowRegister"
      v-model="isShowRegister"
      width="310"
      persistent
    >
      <RegisterCheckListDialogComponent
        v-on:close="onRegisterClose"
        :listId="listId"
      ></RegisterCheckListDialogComponent>
    </v-dialog>
  </div>
</template>

<script>
import { mapActions } from "vuex";
import RegisterCheckListDialogComponent from "@/components/RegisterCheckListDialogComponent";

export default {
  name: "CheckListDialogComponent",
  components: {
    RegisterCheckListDialogComponent,
  },
  data() {
    return {
      headers: [{ text: "リスト", value: "detail_name", width: "100px" }],
      list: [],
      selectedItem: null,
      isShowRegister: false,
    };
  },
  props: {
    listId: null,
  },
  async created() {
    await this.getCheckListData();
  },
  methods: {
    ...mapActions("life-companion", [
      "getCheckList",
      "setCheckLists",
      "patchCheckOn",
      "patchCheckOff",
      "deleteCheckList",
    ]),
    newRegister() {
      this.isShowRegister = true;
    },
    async onRegisterClose() {
      this.isShowRegister = false;
      await this.getCheckListData();
    },
    async getCheckListData() {
      await this.getCheckList(this.listId)
        .then((response) => {
          this.list = response.data;
          this.setCheckLists(response.data);
        });
    },
    close() {
      this.$emit("close");
    },
   async deleteChecked() {
      await this.deleteCheckList(this.listId)
        .then(() => {
          this.getCheckListData();
        });
    },
    async changeCheck(id, flag) {
      if (flag === 0) {
        await this.patchCheckOn(id);
      } else {
        await this.patchCheckOff(id);
      }
      await this.getCheckListData();
    },
  },
};
</script>

<style scoped></style>
以下で細かく説明します。
データテーブル
<v-data-table
  class="pb-1"
  :headers="headers"
  :items="list"
  hide-default-header
  hide-default-footer
>
:headersは列の要素です。
チェックリスト中身として表示する内容は:itemsとして渡します。
チェックリストはヘッダが必要ないため、hide-default-headerでヘッダを非表示としています。
hide-default-footerでフッタも非表示としています。
headers: [{ text: "リスト", value: "detail_name", width: "100px" }],
list: [],
ヘッダはあらかじめdata()に定義しておきます。listは宣言だけしておきます。
<template v-slot:item="{ item }">
  <tr>
    <template v-for="each in headers">
      <td
        v-if="item.is_checked === 0"
        width="286px"
        :key="each.value"
        class="text-left cursor-pointer body-1"
        @click="changeCheck(item.detail_id, item.is_checked)"
      >
        {{ item[each.value] }}
      </td>
      <td
        v-else
        width="286px"
        :key="each.value"
        class="text-left cursor-pointer body-1"
        @click="changeCheck(item.detail_id, item.is_checked)"
      >
        <s>{{ item[each.value] }}</s>
      </td>
    </template>
  </tr>
</template>
上記はv-slotを使ってitemのレコード単位に見てます。
headersに定義した項目数分処理してますが、ここでは1項目のみです。
itemのis_checkedが0の場合はそのままdetail_nameが表示され、is_checkedが0以外の場合は取り消し線が引かれたdetail_nameが表示されます。
@click="changeCheck(item.detail_id, item.is_checked)"はクリックされた際に呼ばれるメソッドを定義しています。
チェックリストのデータ構造
[
  {
    "detail_id": 2,          // 項目ID
    "list_id": 2,            // 親のID
    "detail_name": "猫砂",    // 項目名
    "is_check": 0            // チェックフラグ
  },
  ...
]
リストのデータ構造としては上記のようになっています。
初期表示
async created() {
  await this.getCheckListData();
},
async getCheckListData() {
  await this.getCheckList(this.listId)
    .then((response) => {
      this.list = response.data;
      this.setCheckLists(response.data);
    });
},
画面表示時にMapActionでストア経由のAPIでデータを取得し、ストアに保持しています。
登録用ダイアログ
<v-dialog
  v-if="isShowRegister"
  v-model="isShowRegister"
  width="310"
  persistent
>
  <RegisterCheckListDialogComponent
    v-on:close="onRegisterClose"
    :listId="listId"
  ></RegisterCheckListDialogComponent>
</v-dialog>
上記は登録用のダイアログです。
<v-btn text @click="newRegister"> 項目追加 </v-btn>
newRegister() {
  this.isShowRegister = true;
},
async onRegisterClose() {
  this.isShowRegister = false;
  await this.getCheckListData();
},
項目追加ボタンが押されたら表示されるようにしています。(ダイアログの説明は省略)
イベント処理
async changeCheck(id, flag) {
  if (flag === 0) {
    await this.patchCheckOn(id);
  } else {
    await this.patchCheckOff(id);
  }
  await this.getCheckListData();
},
リストがクリックされたら呼ばれるメソッドです。
is_checkedの状態に応じて、チェックフラグを更新するAPIをストア経由で呼び出します。(APIは省略)
<v-btn text @click="deleteChecked"> チェック済み削除 </v-btn>
async deleteChecked() {
   await this.deleteCheckList(this.listId)
     .then(() => {
       this.getCheckListData();
     });
 },
チェックした(取り消し線をつけた)項目をリストから一括削除するAPIを実行します。(APIは省略)
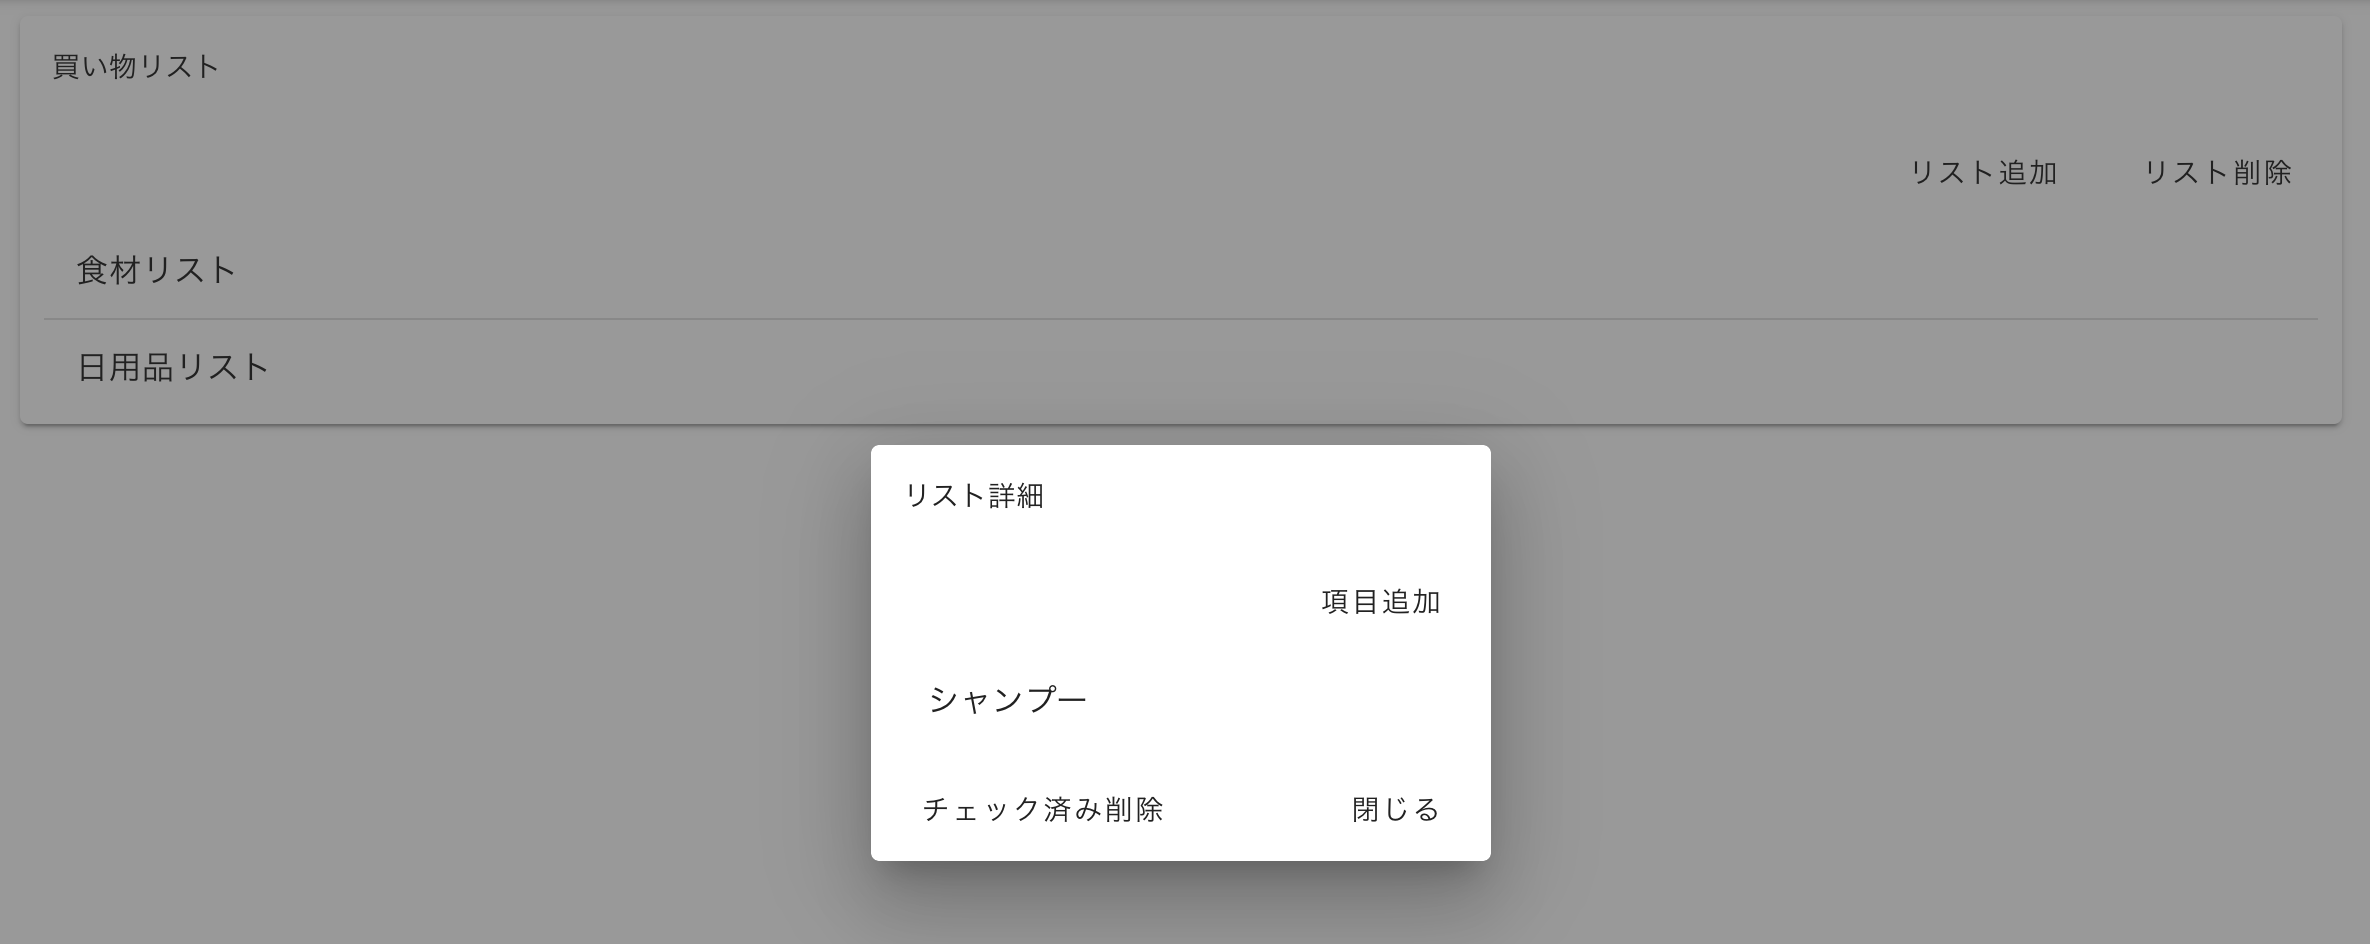
完成
下記のようなチェックリストが表示されます。(背景は親ページのリスト)

項目をクリックすると取り消し線が引かれます。

「チェック済み削除」ボタンを押下することでチェック済みの項目が削除されます。