目的
Apacheが動くところまで作成してみて、
Dockerコンテナがどういうものかを把握する。
▼作成する環境
・CentOS7.5.1804
・Apacheは最新
作業手順
①Dockerをインストール
https://docs.docker.com/docker-for-windows/install/
※推奨環境に注意(Hyper-vなど)
②Dockerで必要なファイルを用意
Dockerfile・・・コンテナの作成指示書
supervisord.conf・・・複数のプロセスを動かす場合にsupervisordが必要らしい(centos+apache)
index.html・・・HelloWorldを出力するファイル
③コンテナのイメージファイルを作成(PowerShellなどで)
docker image build -t cu_centos .
※"②"のファイルが置いてある、ディレクトリに移動してから
例)cd desktop/docker/centos などなど。
④コンテナを実行
docker run --privileged -p 2222:22 -p 8080:80 -i -t cu_centos /sbin/init
※-p [ホスト側のポート番号]:[コンテナのポート番号]
→ポートフォワード(ホスト側XX番ポートをコンテナ側のXX番ポートに転送する)
※--privileged
特権モード(セキュリティーの分離をオフ)
⑥、⑦でsystemctlを使用するために
⑤sshで、centosに接続
ssh -o UserKnownHostsFile=/dev/null -o StrictHostKeyChecking=no -l root -p 2222 localhost
※パスワードはDockerfileに記載(添付ファイルはrootにしてある)
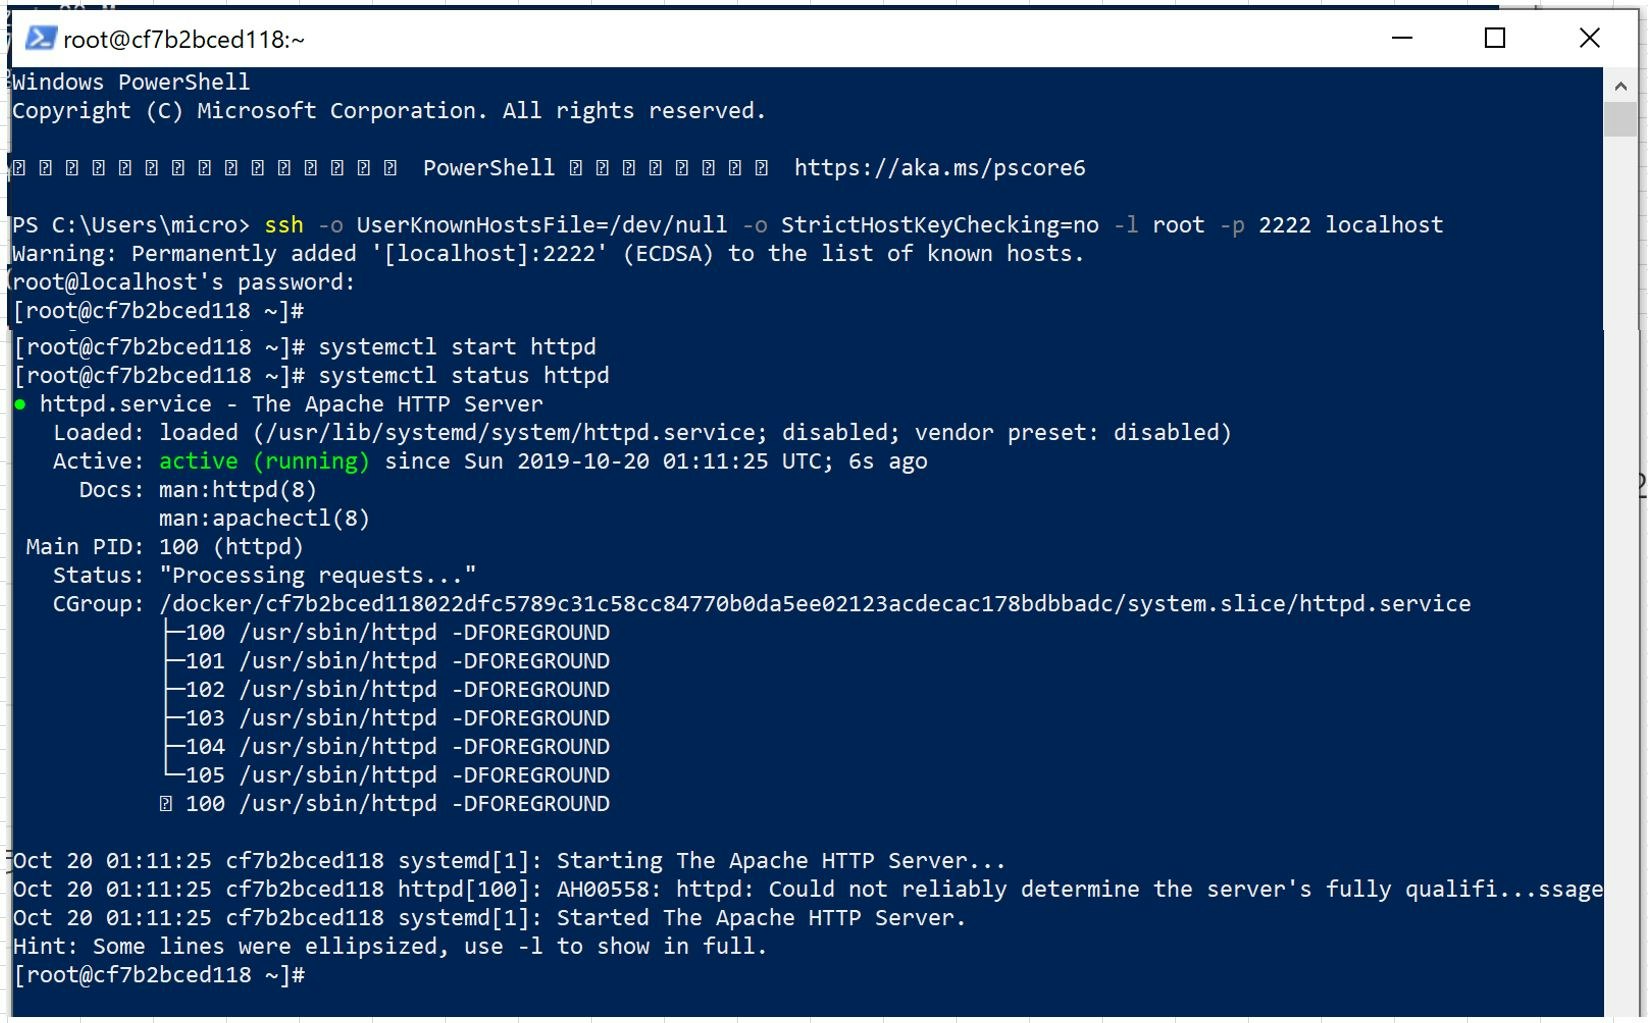
⑥apacheの起動
systemctl start httpd
⑦apacheの状態確認
systemctl status httpd
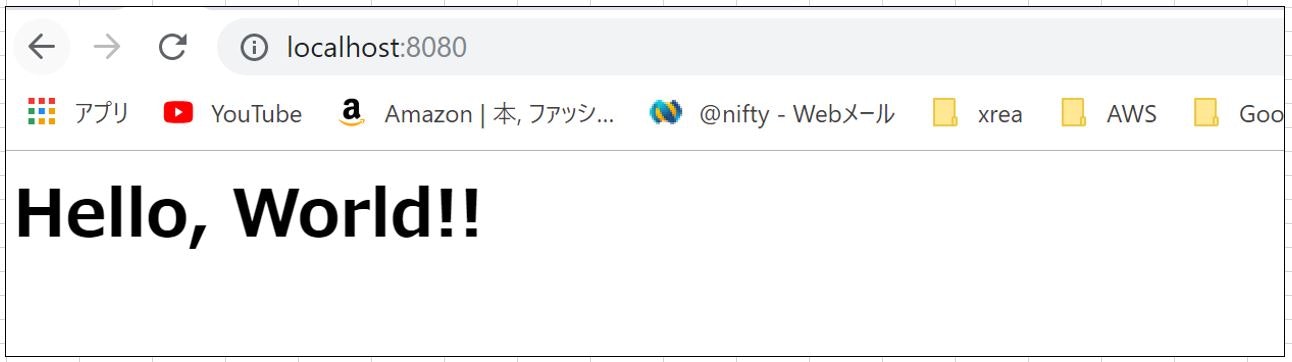
⑧webページ確認
http://localhost:8080/
→helloworldを確認
作業ピックアップ
②Dockerで必要なファイルを用意
# Docker hub(公開レジストリ)のcentos7をベースとする ※https://hub.docker.com/
FROM centos:7.5.1804

# Supervisor の設定を Docker イメージ内に転送する
ADD supervisord.conf /etc/supervisord.conf

# httpd で公開するファイルを Docker イメージ内に転送する
ADD index.html /var/www/html/

# yum で python-pip を入れるために EPEL をインストールしておく
RUN yum -y install epel-release

# 必要なパッケージをインストールする(openssh-server,httpd,python-pip,sudo)
RUN yum -y install openssh-server httpd python-pip sudo

# root ユーザでログインできるようにする
RUN sed -ri 's/^#PermitRootLogin yes/PermitRootLogin yes/' /etc/ssh/sshd_config

# root ユーザのパスワードを 'root' にする
RUN echo 'root:root' | chpasswd

# 使わないにしてもここに公開鍵を登録しておかないとログインできない
RUN ssh-keygen -t rsa -N "" -f /etc/ssh/ssh_host_rsa_key

# Supervisor をインストールする
RUN pip install supervisor

# sshd: 22, httpd: 80 を公開する
EXPOSE 22 80

# Supervisor を起動する
CMD ["/usr/bin/supervisord"]
[supervisord]
nodaemon=true

[program:httpd]
command=/usr/sbin/httpd -D FOREGROUND

[program:sshd]
command=/usr/sbin/sshd -D
<h1>Hello, World!!</h1>
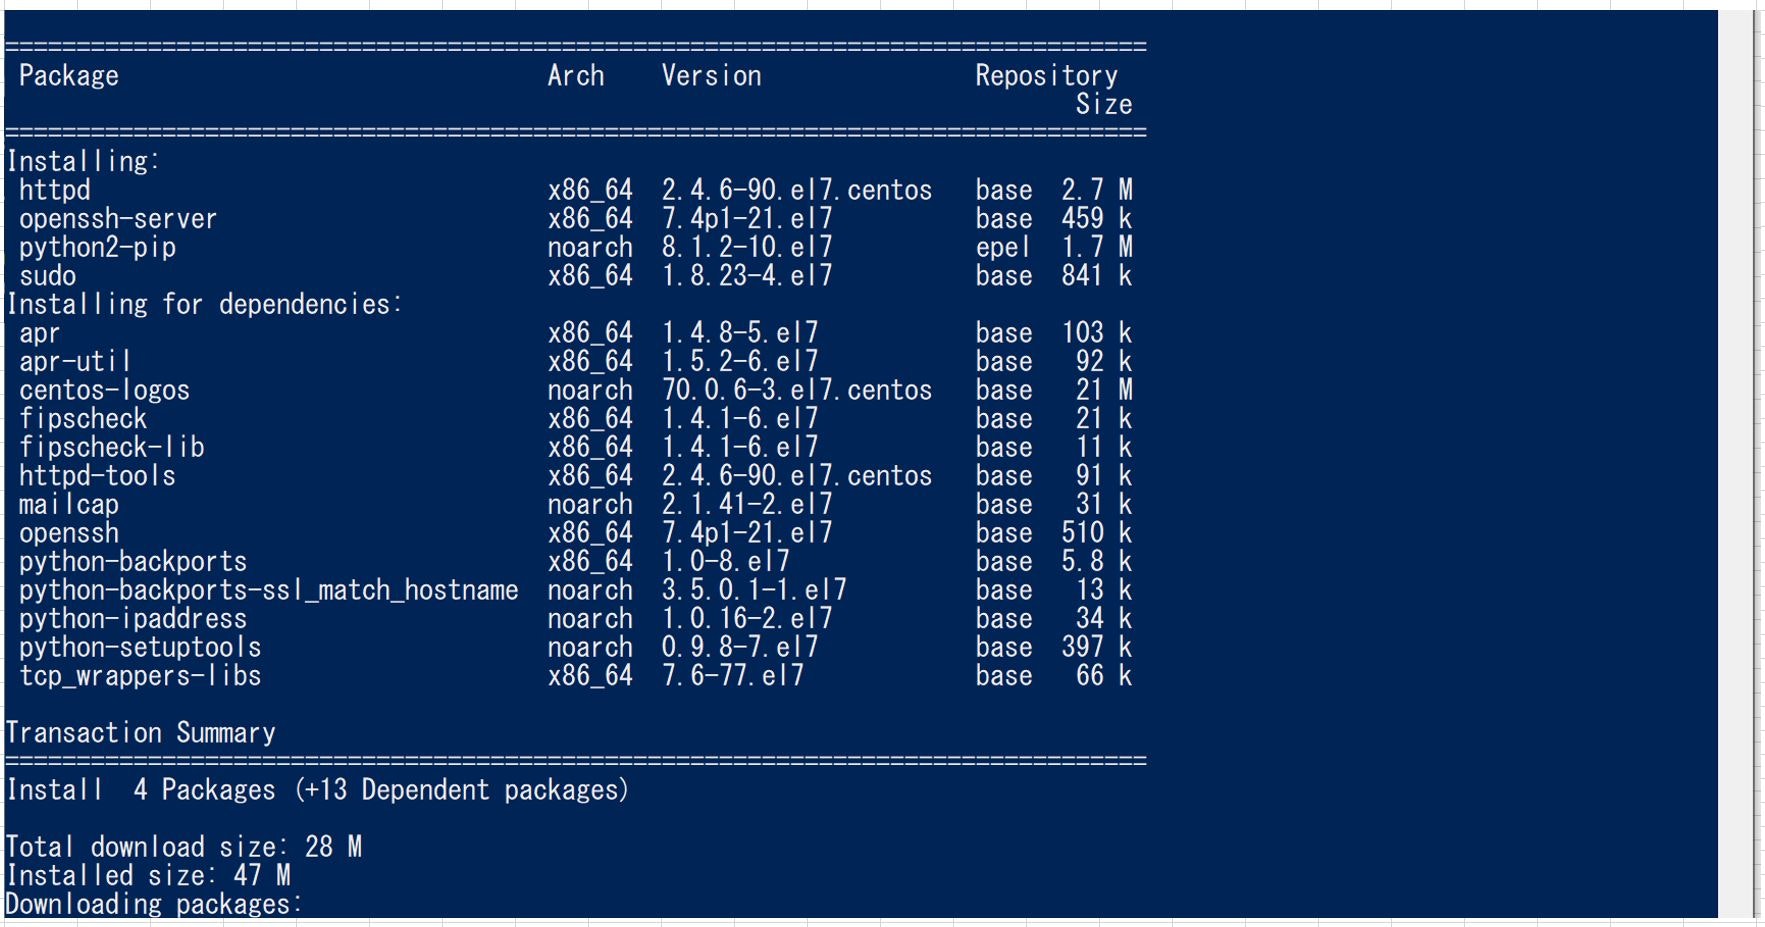
③コンテナのイメージファイルを作成
コマンド実行

▼実行ログ抜粋(指定したファイルがインストールされている)
④コンテナを実行
コマンド実行

▼実行ログ抜粋
⑤sshで、centosに接続/⑥apacheの起動/⑦apacheの状態確認
④の後に、別ウィンドウでPowerShellを立ち上げて、作業
※sshのrootパスワードはDockerfileに記載のroot
⑧webページ確認
できた!!
参考 Dockerコマンド
・起動中のコンテナをすべて停止して削除
docker stop $(docker ps -q);docker rm $(docker ps -q -a);
・コンテナイメージを確認
docker images
・起動中のコンテナを確認
docker ps
・タグがついていないイメージをすべて削除する
docker rmi $(docker images -f 'dangling=true' -q)
※ビルドの際に同名(タグ名含め)でイメージを作成すると、
前回作成分のイメージ名タグ名がnoneになって残った状態になる。
上記コマンドで不要なイメージを削除できる。
参考
https://hub.docker.com/_/centos?tab=description
https://momijiame.tumblr.com/post/125344790446/ssh-%E3%81%A7%E3%83%AD%E3%82%B0%E3%82%A4%E3%83%B3%E3%81%A7%E3%81%8D%E3%82%8B-centos-%E3%81%AE-docker-%E3%82%A4%E3%83%A1%E3%83%BC%E3%82%B8%E3%82%92%E4%BD%9C%E3%81%A3%E3%81%A6%E3%81%BF%E3%82%8B
https://www.opensourcetech.tokyo/entry/20190222/1550822082
http://fnya.cocolog-nifty.com/blog/2016/03/centos7-docker-.html
http://yyasui.hatenablog.com/entry/2017/03/07/222117
http://m-shige1979.hatenablog.com/entry/2015/11/20/080000
https://qiita.com/taka4sato/items/1f59371ead748d88635a
https://webdesign-manga.com/docker_run_option/
https://teratail.com/questions/83479
おわりに
これをベースに、いろいろできることを考えて試していけたらと思います^^
いまいち、どういう時に使ったら便利かを実感していないので。。