Yet another AWS EC2 Jupyter notebook立ち上げ
ラボ内の勉強会とかのためにJupyter-notebookを使いたくて、ただ自由にできるwebサーバーをもっていなかったので、AWS EC2の無料枠で立ててみた。
AWS EC2でインスタンスの立ち上げ
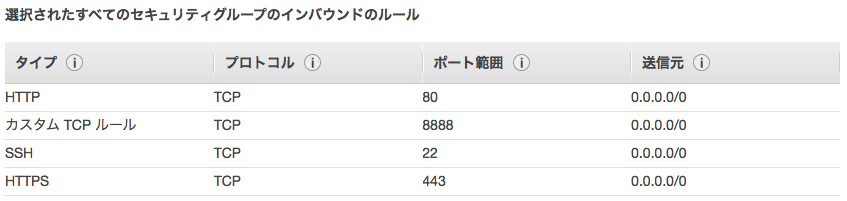
ubuntuで、t2.microのインスタンスを作成します。Jupyter notebookを立ち上げる時に、ポートを8888を解放してつなげるので、以下のようにセキュリティーグループのルールを新しく作ったあげます。
[参考]
http://chrisalbon.com/jupyter/run_project_jupyter_on_amazon_ec2.html
ubuntu環境の整備
sudo apt update
sudo atp upgrade
sudo apt install emacs wget pkg-config make gcc binutils
Python 環境の構築
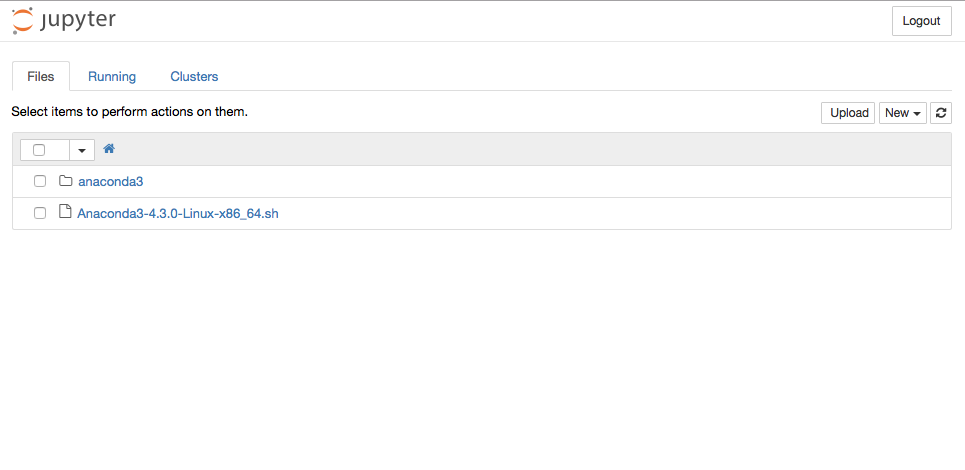
wget https://repo.continuum.io/archive/Anaconda3-4.3.0-Linux-x86_64.sh
bash ./Anaconda3-4.3.0-Linux-x86_64.sh
## Enter/yes
source .bashrc
とりあえず立ち上げてみる
jupyter notebook --no-browser

[I 05:54:53.253 NotebookApp] Serving notebooks from local directory: /home/ubuntu
[I 05:54:53.253 NotebookApp] 0 active kernels
[I 05:54:53.253 NotebookApp] The Jupyter Notebook is running at: http://localhost:8888/?token=****
[I 05:54:53.253 NotebookApp] Use Control-C to stop this server and shut down all kernels (twice to skip confirmation).
[C 05:54:53.254 NotebookApp]

    Copy/paste this URL into your browser when you connect for the first time,
    to login with a token:
        http://localhost:8888/?token=****
となって、Jupyter notebookを立てることはできます。
余談ですが、ここ によると、localhost (Mac)で表示できるらしい、そしてやって見たらできた。
ただ、毎回sshするのはめんどくさいし、public domainからアクセスした方が優しいので、いろいろ設定して行きます。
Notebook passwordの作成
公開されたdomainでnotebookを作るのはいいけどアクセスを制限するのにpasswordを設定していきます。
ubuntu@ip-172-31-27-190:~$ ipython
Python 3.6.0 |Anaconda 4.3.0 (64-bit)| (default, Dec 23 2016, 12:22:00)
Type "copyright", "credits" or "license" for more information.

IPython 5.1.0 -- An enhanced Interactive Python.
?         -> Introduction and overview of IPython's features.
%quickref -> Quick reference.
help      -> Python's own help system.
object?   -> Details about 'object', use 'object??' for extra details.

In [1]: from IPython.lib import passwd

In [2]: passwd()
Enter password:
Verify password:
Out[2]: 'sha1:**********************************'

In [3]: exit
- サーティフィケイトを作成
cd ~
mkdir .cert
cd .cert
sudo openssl req -x509 -nodes -days 365 -newkey rsa:1024 -keyout mycert.pem -out mycert.pem
## ENTERを数回
- Jupiter_notebook_config.pyをいじる
emacs ~/.jupyter/jupyter_notebook_config.py

## The full path to an SSL/TLS certificate file.
c.NotebookApp.certfile = '/home/ubuntu/.certs/mycert.pem'
c.NotebookApp.keyfile = '/home/ubuntu/.certs/mycert.pem'
## The IP address the notebook server will listen on.
c.NotebookApp.ip = '*'
## Whether to open in a browser after starting. The specific browser used is
#  platform dependent and determined by the python standard library `webbrowser`
#  module, unless it is overridden using the --browser (NotebookApp.browser)
#  configuration option.
c.NotebookApp.open_browser = False
## Hashed password to use for web authentication.
#
#  To generate, type in a python/IPython shell:
#
#    from notebook.auth import passwd; passwd()
#
#  The string should be of the form type:salt:hashed-password.
c.NotebookApp.password = 'sha1:********'
## The port the notebook server will listen on.
c.NotebookApp.port = 8888
ここでなぜか、sslを許可するとkernelにつながらないとかソケットが〜〜てきなエラーが大量に出てきた。どうやらこれはsafariだと出る問題らしいから、chromeでアクセス。
Jupyter notebookをたちあげていじる
ubuntu@ip-172-31-27-190:~/Notebook$ cd ~
ubuntu@ip-172-31-27-190:~/Notebook$ mkdir Notebook
ubuntu@ip-172-31-27-190:~/Notebook$ jupyter notebook
[I 06:25:19.871 NotebookApp] Serving notebooks from local directory: /home/ubuntu/Notebook
[I 06:25:19.871 NotebookApp] 0 active kernels
[I 06:25:19.871 NotebookApp] The Jupyter Notebook is running at: https://[all ip addresses on your system]:8888/
[I 06:25:19.871 NotebookApp] Use Control-C to stop this server and shut down all kernels (twice to skip confirmation).
PUBLICDOMAIN*:8888にアクセスする。

先ほどipython内で登録したパスワードをいれると、やっとjupyter notebookがひらけます。
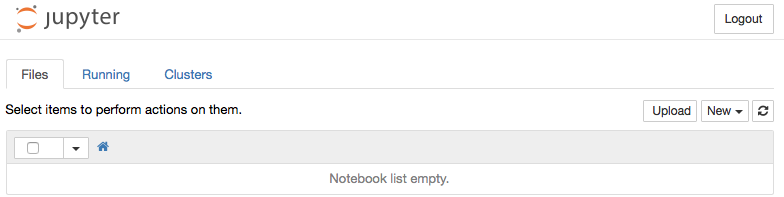
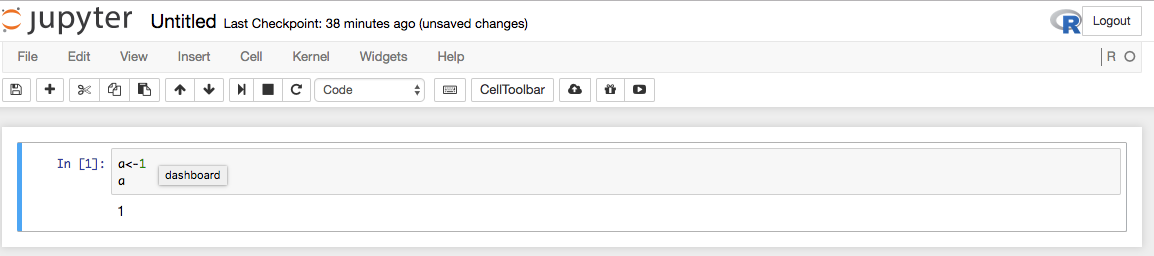
とりあえずなにか投げたいので、[New▼]からPython 3のNotebookを作成する。
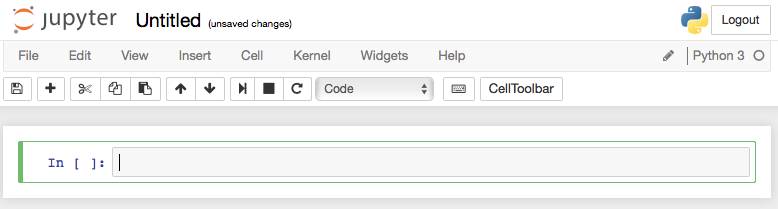
すると新しいnotebookを作成できる。これはpython用のkernelなので、pythonを全く知らない私ですが、とりあえず全世界共通言語hello worldを投げる。

最高。
他の言語を使えるようにする
普段perlとRを書いているので、それぞれのkernelを入れて行きます。
まずはいろんなものを入れる
sudo apt install libzmq3-dev libmagic-dev libcairo2-dev
sudo apt install r-base libcurl4-openssl-dev libssl-dev libssh2-1-dev
- PerlはIPerlで。
sudo apt install cpanminus
cpanm --local-lib=~/perl5 local::lib && eval $(perl -I ~/perl5/lib/perl5/ -Mlocal::lib)
cpanm Devel::IPerl
echo "export PERL5LIB=$HOME/perl5/lib/perl5" >> ~/.bashrc
source ~/.bashrc

# 以下の二つ (もしかしたらどちらか)をやらないとjupyterにkernelとして認識されない
sudo find / name -name iperl
/home/ubuntu/perl5/bin/iperl console
/home/ubuntu/perl5/bin/iperl notebook

- RはIRkernel
conda install zeromq
R

## R内
install.packages(c('repr', 'IRdisplay', 'evaluate', 'crayon', 'pbdZMQ', 'devtools', 'uuid', 'digest'))
devtools::install_github('IRkernel/IRkernel')
# 相変わらずのkernel認識おまじない。
IRkernel::installspec()
##

# または
# conda install -c r r-essentials
## うまくいかないことがあるらしいからmanualの方がよいかもしれない。
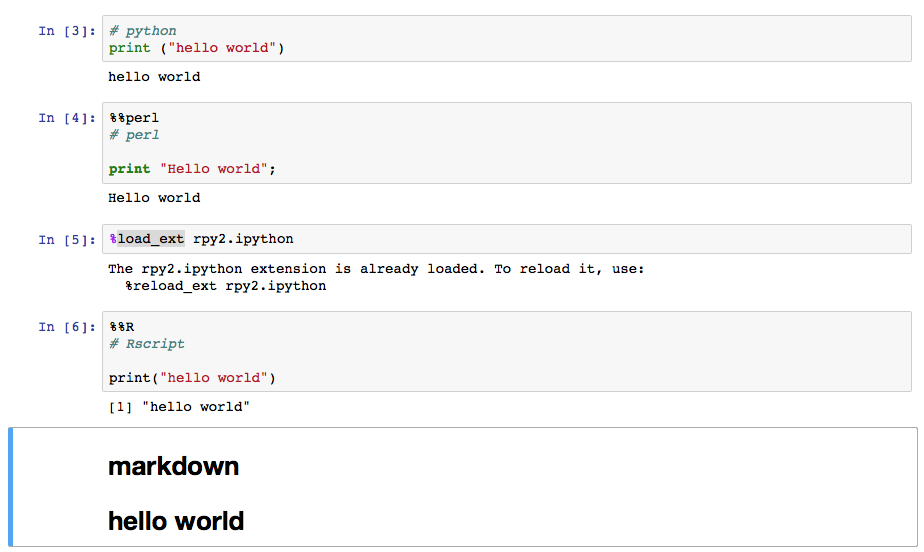
そしてkernelからRを選ぶと、以下のようにRがかけます。
切り替えはkernel->change kernelから

もちろん他の言語も (kernelが実装されて入れば)使えます。
余談ですが、一つのpython kernelのnotebook内で複数の言語を打つ買うことができます。
pip install rpy2
# => これだけだとlibgompがないと怒られるから、LD_LIBRARY_PATHを指定しておく。
sudo find / name -name libgomp.so.1
emacs ~/.bashrc
###
LD_LIBRARY_PATH=/usr/lib/x86_64-linux-gnu:/home/ubuntu/anaconda3/lib:/home/ubuntu/anaconda3/pkgs/libgcc-4.8.5-2/lib;
export LD_LIBRARY_PATH
###

# => こうするとreadlineがおかしいといわれるから、readlineをちょっと変える
# [参考] https://github.com/ContinuumIO/anaconda-issues/issues/152#issuecomment-225214743

conda remove --force readline
pip install readline.
とするとおなじnotebook内でいろんな言語をかけるようになりました。めでたし。
いろんなlibrary/module入れる
- g-language
coryさんのブログを参考にして。
http://blog.livedoor.jp/corylvdr/archives/7055108.htmlを参考にしながら
wget -O g-language-1.9.1.tar.gz "https://ja.osdn.net/frs/redir.php?m=jaist&f=%2Fglang%2F64267%2Fg-language-1.9.1.tar.gz"
sudo apt install gnuplot imagemagick libgd-dev
cpanm --force --verbose Chart::Graph
>> gnuplot
cpanm ./g-language-1.9.1.tar.gz
- Rのいろいろ
## conda install -c r r-essentialsするといろんな事件が起きるのでオススメしない。
conda install -c r r-ggplot2
conda install -c r r-reshape
余談
jupyter notebookでperl kernel使ってる時に、pngとかをinlineで表示したい時があると思います。
そういうときは。
IPerl->png( "http://www.libpng.org/pub/png/PngSuite/ccwn3p08.png" );
# もしくは
IPerl->png( "graph/ecoli.png" );
といったふうに、相対パスでperl内で出力したpngなどを表示できます。