この記事は クラウドワークス Advent Calendar 2020 の9日目の記事です。
はじめに
この記事は、普段 Rails を使用して開発を行なっているエンジニアが、 Vue.js (Vue3) を触り始めようとする時に見て役に立ったら嬉しいものです。
今回は Vue3 での開発を想定したものになります。 Vue2 での開発に関して知りたい方は下記の記事をご覧ください。
Vue.js チュートリアル for Rails エンジニア(Vue2 version)
また、 Vue.js 自体を触るのは今回が初めてという方は、先に下記のようなチュートリアル記事を参照されることをお勧めします。
Vue.js を vue-cli を使ってシンプルにはじめてみる
対象読者
- Rails に関しての知識がある程度ある方(Rails チュートリアルをやっていれば OK)
- Vue.js に関しての知識がある程度ある方(なんらかのチュートリアルなどをやっていれば OK。Vue3 の知識は必須でないです)
- Rails + Vue3 のアプリケーションをどうやって開発すればいいかを知りたい方
作るもの
今回は Webpacker を使用して Rails + Vue3 の簡単なアプリケーションを作っていきます。
そもそも Webpacker を使用しない手法だったり、Docker を使ったり、 TypeScript を使ったりといったことは本稿では扱わないのでご了承ください。
(Vue.js を使った開発のとっかかりとしてのチュートリアルという位置付けにしたいため)
作成予定の画面は ↓ にあるような、簡単なテーブル構造を持つ画面になります。


サンプルコードこちらに置いています: https://github.com/t0yohei/rails-vue3-app
では、早速環境構築からチュートリアルに入っていきましょう。
環境構築
環境構築には、 homebrew , rbenv を使用します。インストールがまだな方は、各自インストールをお願いします。
- rbenv: https://github.com/rbenv/rbenv#installation
- homebrew: https://brew.sh/index_ja
使用する環境
- macOS: 10.15.7 (Catalina)
- Ruby: 2.7.2
- Rails: 6.0.3
- Webpacker: 4.3.0
- yarn: 1.22.10
- Vue: 3.0.3
※ macOS を除いて、記事作成時点で最新のバージョンになります。
アプリケーションを作成するディレクトリを作成
はじめに、これからアプリケーションを実装していくディレクトリを rails-vue3-app という名前で作成します。今回はこの rails-vue3-app がアプリケーションの名前になります。
$ mkdir rails-vue3-app
$ cd rails-vue3-app
rbenv を使用して Ruby 2.7.2 をインストール
Ruby 2.7.2 をインストールします。
$ brew update && brew install ruby-build // または brew update && brew upgrade ruby-build
$ rbenv install 2.7.2
$ rbenv local 2.7.2
$ rbenv rehash
$ ruby -v
ruby 2.7.2p137 (2020-10-01 revision 5445e04352) [x86_64-darwin19]
yarn 1.22.10 のインストール
yarn をインストールします。
今回は 1.22.10 を前提に進めていきますが、 1.22.10 以上であれば基本問題ないはずです。
$ brew install yarn // または brew upgrade yarn
$ yarn -v
1.22.10
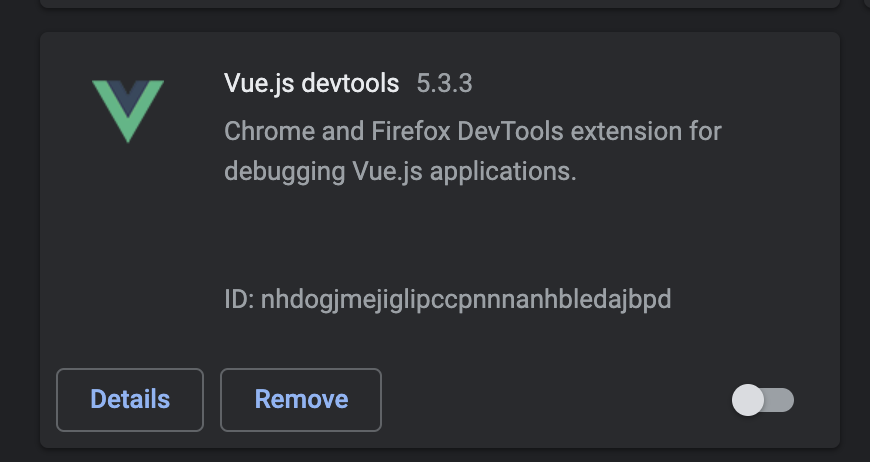
Vue.js devtools (Vue3 用)のインストール
Installation | Vue Devtools から devtools をインストールします。
以前に Vue.js devtools をインストールしている場合(Vue2 の Vue.js devtools を使っていた場合)、Vue3 の Vue.js devtools とは併用できなくなっています(2020 年 12 月時点)。
そのため、拡張機能の設定から既存の Vue.js devtools (Vue2 用) を OFF にする必要があります。
Chrome の場合は chrome://extensions/ を開き、 Vue2 の Vue.js devtools を OFF にしてください。
以上で環境構築は終わりです。次からはプロジェクトの作成を進めていきます。
プロジェクトの作成
カレントディレクトリ(rails-vue3-app)を起点に Rails プロジェクトを作成します。
$ bundle init
$ echo 'gem "rails", "~> 6.0.3"' >> Gemfile
$ bundle install --path vendor/bundle
$ bundle exec rails new . --skip-turbolinks --skip-coffee
Overwrite (略)/rails-vue3-app/Gemfile? (enter "h" for help) [Ynaqdhm] y
※ --skip-turbolinks --skip-coffee のオプションをつけて、今回は不要となるものを削ぎ落としています。 1
Vue2 では、 rails new . --webpack=vue として実行していたのですが、Vue3 ではオプションが提供されていないため --webpack=vue のオプションを付けずに実行します。 2
Vue3 のセットアップ
--webpack=vue3 といった形での Vue3 のセットアップができないため、独自で Vue3 のセットアップを行っていきます。
Vue3 用の各種パッケージをインストール
$ yarn add vue@next
$ yarn add --dev vue-loader@next @vue/compiler-sfc
インストール完了後、 package.json は以下のようになっているはずです(細かいバージョンはインストールのタイミングで違ってきます)
{
  "name": "rails_vue3_app",
  "private": true,
  "dependencies": {
    "@rails/actioncable": "^6.0.0",
    "@rails/activestorage": "^6.0.0",
    "@rails/ujs": "^6.0.0",
    "@rails/webpacker": "4.3.0",
    "vue": "^3.0.3"
  },
  "version": "0.1.0",
  "devDependencies": {
    "@vue/compiler-sfc": "^3.0.3",
    "vue-loader": "^16.0.0"
    "webpack-dev-server": "^3.11.0"
  }
}
Webpack の設定
次に .vue の拡張子がついた Vue ファイルを、 Webpack でコンパイルするための設定を追加します。
config/webpack/environment.js を開いてみると、現状は次のような状態になっているはずです。
const { environment } = require('@rails/webpacker')

module.exports = environment
以下のように書き変えて、 Vue ファイルに対して vue-loader を使用するように指定します。
  const { environment } = require('@rails/webpacker')
+ const { VueLoaderPlugin } = require('vue-loader')
+
+ environment.plugins.prepend(
+     'VueLoaderPlugin',
+     new VueLoaderPlugin()
+ )
+
+ environment.loaders.prepend('vue', {
+     test: /\.vue$/,
+     use: [{
+         loader: 'vue-loader'
+     }]
+ })

  module.exports = environment
補足: ファイルを分けて定義することも可能
config/webpack/loaders/vue.js を作成して、 loader の定義ファイルを切り出すことも可能です。
module.exports = {
  test: /\.vue(\.erb)?$/,
  use: [{
    loader: 'vue-loader'
  }]
}
  const { environment } = require('@rails/webpacker')
+ const { VueLoaderPlugin } = require('vue-loader')
+ const vue = require('./loaders/vue')

+ environment.plugins.prepend('VueLoaderPlugin', new VueLoaderPlugin())
+ environment.loaders.prepend('vue', vue)
  module.exports = environment
config/webpacker.yml の extensions に .vue を追加します。
default: &default
  # ...


  extensions:
    # ...
+    - .vue
以上で Webpack の設定は終わりです。
一番シンプルな Rails + Vue を使った画面の実装
環境構築や設定周りの変更が完了したので、ここからは実際にアプリケーションの実装に入っていきます。
最初に、 Rails + Vue を使った一番シンプルな画面を実装をしていきます。
コントローラーの作成
まずは rails g controller コマンドでコントローラーやルーティングを作成します。
$ bundle exec rails g controller HelloVue index --no-helper --no-assets
※ 今回は、ヘルパーやアセットファイルなど不要なものを生成しないオプションを指定しています。 3
一旦サーバーを起動して、画面が表示するか見てみましょう。
$ bundle exec rails s
http://localhost:3000/hello_vue/index にアクセスして、下記のページが表示されると ok です。

javascript_pack_tag を使用して、 js ファイルを読み込めるようにする
javascript_pack_tag を使用することで app/javascript/packs 配下にあるファイルの読み込みが可能になります(この辺は Webpacker の設定によるもの)。
今回は、読み込む対象としてこの後作成する hello_vue.js を指定します。
  <h1>HelloVue#index</h1>
  <p>Find me in app/views/hello_vue/index.html.erb</p>
+ <%= javascript_pack_tag 'hello_vue.js' %>
index.html.erb から読み込む js ファイルを作成
先ほど作成した index.html.erb から読み込む js ファイルを作成します。
document.addEventListener("DOMContentLoaded", () => {
  console.log('this is hello_vue.js')
});
再度 http://localhost:3000/hello_vue/index にアクセスして開発者ツールを開くと、 Console に this is hello_vue.js と出力されます。

Vue ファイルを作成
次に画面表示に使用するシンプルな Vue ファイル(Vue コンポーネント)を作成します。
<template>
  <p>
    {{ message }}
  </p>
</template>

<script>
export default {
  data() {
    return {
      message: "Hello Vue!"
    }
  }
}
</script>

<style scoped>
p {
  font-size: 2em;
  text-align: left;
}
</style>
補足: Composition API を使って書く場合
今回はそもそもコンポーネントが大きくないので、Composition API を使うメリットはそんなにありませんが、 Composition API を使用した実装をする場合は下記のようになります。
<template>
  <p>
    {{ message }}
  </p>
</template>

<script>
import { ref } from 'vue'

export default {
  setup() {
    const message = ref('Hello World')
    return { message }
  }
}
</script>

<style scoped>
p {
  font-size: 2em;
  text-align: left;
}
</style>
余談ですが、 data 関数など使用した従来の Vue コンポーネントの実装方法は Options API を使用した実装と呼ばれています。
app コンポーネントを index.html.erb にマウントする
最後に、先ほど作成した app.vue のコンポーネントを index.html.erb にマウントします。
まずはマウント対象の要素を index.html.erb に作成します。
  <h1>HelloVue#index</h1>
  <p>Find me in app/views/hello_vue/index.html.erb</p>
  <%= javascript_pack_tag 'hello_vue.js' %>
+ <div id='vue-app'></div>
この要素に対して、 App コンポーネントをマウントする実装を hello_vue.js に追加します。
+ import { createApp } from "vue";
+ import App from "../app.vue";

  document.addEventListener("DOMContentLoaded", () => {
-    console.log('this is hello_vue.js')
+    const app = createApp(App);
+    app.mount("#vue-app");
  });
http://localhost:3000/hello_vue/index にアクセスしてみると、下記のような画面が表示されるはずです。

この時点で、一番の基本となる Rails + Vue のアプリケーション実装が完了しました ![]() 。
。
bin/webpack を使用した js, vue ファイルの事前ビルド
今までのやり方では、 http://localhost:3000/hello_vue/index にアクセスがあった時点で、毎回 js, vue ファイルのビルドを行うため、画面が表示されるのに少し時間がかかってしまいます。
下記のコマンドを実行することで、 app/JavaScript 配下の js, vue ファイルを事前にビルドしておくことができます。
$ bin/webpack
rails server を立ち上げ直した後に http://localhost:3000/hello_vue/index に再度アクセスすると、先ほどよりも早く画面が表示されるようになるはずです。
※ 必ず rails server を立ち上げ直してください
bin/webpack コマンドの詳細について知りたい方はこちら: https://qiita.com/chimame/items/8d3d6f4afea675cffa7d
webpack の自動ビルド
先ほどは、 bin/webpack のビルドを行いましたが、これでは js, vue ファイルを変更するたびに再度コマンドを叩いてビルドをする必要があります。
それでは面倒なので、開発中は bin/webpack の代わりに下記コマンドを実行して、ファイルを保存するたびに自動ビルドが走るようにしておくといいでしょう(rails server を実行しているタブとは別のタブで実行してください)。
$ bin/webpack-dev-server
Vue.js devtools
せっかくなので Vue.js devtools の使い方をここで確認しておきます。
使い方は簡単で、 chrome の developer ツールを開いて、 Vue のタブを選択するだけです。

Vue のタブを選択し、コンポーネントを選択してみると、内部の data などを確認できます。

※ Vue.js devtools がうまく表示されない場合は、 chrome://extensions/ で複数の Vue.js devtools が ON になっていないかを確認してください。あるいは、 chrome の developer ツールを開き直してみてください。
実践的な実装
先ほど実装では、本番アプリケーションを実装する上で必須になってくるバックエンド(controller など)からのデータの受け渡しを行なっていなかったので、ここからはその点を深掘っていきます。
Webpacker を使用した、 Rails + Vue のアプリケーションを作成する際、データの渡し方には色々あるのですが、今回は個人的にデータフローがわかりやすかった以下の 2 通りの方法でサンプルアプリケーションを作っていきます。
-
- HTML のデータ属性に値を設定して渡す方法
-
- API を使用して渡す方法
1. HTML のデータ属性に値を設定して渡す方法
まずはページを表示するためのコントローラーを、 HomeController という名前で作成します。
$ bundle exec rails g controller Home index --no-helper --no-assets
次にコントローラー内部の実装を進めていきます。 index メソッドのインスタンス変数として、 title description そして Hash 形式の contents を用意します。
  class HomeController < ApplicationController
    def index
+     @title = 'Home#index'
+     @description = 'トップページ'
+     @contents = get_contents
    end
+
+   private
+
+   def get_contents
+     {
+       outer_links: [
+         {
+           name: 'Qiitaページ',
+           text: 'Qiita',
+           url: 'https://qiita.com/t0yohei/items/cd11b15642fbb26f71e2'
+         },
+         {
+           name: 'ソースコード',
+           text: 'GitHub',
+           url: 'https://github.com/t0yohei/rails-vue3-app'
+         }
+       ],
+     }
+   end
  end
続いて view の実装です。ここでポイントとなるのが、 Rails の content_tag ヘルパーを利用して、 div タグの data 属性に vue 側へ受け渡したいデータを設定している点です。 vue へ受け渡すデータは json 形式に変換しておきます。
- <h1>Home#index</h1>
- <p>Find me in app/views/home/index.html.erb</p>
+ <%= javascript_pack_tag 'home/index.js' %>
+ <%= content_tag :div,
+   id: "homeIndex",
+   data: {
+     title: @title,
+     description: @description,
+     contents: @contents
+   }.to_json do %>
+ <% end %>
生成される html は下記画像のようになります。

※ data 属性に設定した情報は、 developer tool などを使うことで閲覧可能です。そのため API 同様にユーザーのプライペート情報など、秘匿情報は公開しないよう注意してください。
data 属性に設定した値を読み込む js ファイルを作成
先ほど view で設定したデータを、 js 側から読み取ってみましょう。 app/javascript/packs/home/index.js を下記の通り実装します。
document.addEventListener("DOMContentLoaded", () => {
  const node = document.getElementById("homeIndex");
  const initialData = JSON.parse(node.getAttribute("data"));
  console.log(initialData);
});
http://localhost:3000/home/index にアクセスして、 developer tool の console を開けてみます。

このように、 Rails の view ファイルで設定したデータが、 object として取得できていることがわかります。
この object のデータを使用して、実装を進めていきましょう。
読み取った値を表示する Vue コンポーネントの実装
props として initialData を受け取る Index コンポーネントを作成します。
<template>
  <div>
    <h1>{{ initialData.title }}</h1>
    <p>{{ initialData.description }}</p>
    <table class="contents-table">
      <tr>
        <th>名前</th>
        <th>リンク</th>
      </tr>
      <tr v-for="outer_link in initialData.contents.outer_links" v-bind:key="outer_link.name">
        <td>{{ outer_link.name }}</td>
        <td>
          <a v-bind:href="outer_link.url">{{ outer_link.text }}</a>
        </td>
      </tr>
    </table>
  </div>
</template>

<script>
export default {
  props: {
    initialData: {
      type: Object,
      default: () => {}
    }
  },
};
</script>

<style scoped>
.contents-table {
  border: 1px solid gray;
  margin: 10px;
}
.contents-table th,
.contents-table td {
  border: 1px solid gray;
}
</style>
補足: data プロパティを設定する場合
今回の実装では、 props で受け取った値をそのまま画面に表示するだけなので今の実装で十分ですが、props の値は immutable (書き換え不可)なので任意のタイミングで値を変更したりできません。
(どこかのボタンを押すと description の値を変更させる、といった処理はできません。)
そう言った場合は、 props で受け取った値を初期値として data 属性を設定することで、 mutable な state (書き換え可能な値)を設定することができます。
  <template>
    <div>
-     <h1>{{ initialData.title }}</h1>
-     <p>{{ initialData.description }}</p>
+     <h1>{{ title }}</h1>
+     <p>{{ description }}</p>
      <table class="contents-table">
        <tr>
          <th>名前</th>
          <th>リンク</th>
        </tr>
-       <tr v-for="outer_link in initialData.contents.outer_links" v-bind:key="outer_link.name">
+       <tr v-for="outer_link in contents.outer_links" v-bind:key="outer_link.name">
          <td>{{ outer_link.name }}</td>
          <td>
            <a v-bind:href="outer_link.url">{{ outer_link.text }}</a>
          </td>
        </tr>
      </table>
    </div>
  </template>

  <script>
  export default {
    props: {
      initialData: {
        type: Object,
        default: () => {}
      }
    },
+   data() {
+     return {
+       title: this.initialData.title,
+       description: this.initialData.description,
+       contents: this.initialData.contents
+     }
+   },
  };
  </script>
補足: data プロパティの設定を Composition API を使って書く場合
toRefs をでの分割代入を使用して実装します。
...
<script>
import { toRefs } from 'vue'

export default {
  props: {
    initialData: {
      type: Object,
      default: () => {}
    }
  },
  setup(props) {
    const { title, description, contents } = toRefs(props.initialData)
    return { title, description, contents }
  }
};
</script>
...
Index コンポーネントをマウントする
index.js で Index コンポーネントに props として initialData を渡し初期化し4、 index.html.erb の div 要素にマウントします。
+ import { createApp } from "vue";
+ import Index from "../../components/home/Index.vue";

  document.addEventListener("DOMContentLoaded", () => {
    const node = document.getElementById("homeIndex");
    const initialData = JSON.parse(node.getAttribute("data"));
+   const app = createApp(Index, { initialData: initialData })
+   app.mount("#homeIndex");
-   console.log(initialData);
  });
ページの表示
app/javascript/packs 配下に追加した js ファイルを読み込ませるためには、 webpack-dev-server の再起動が必要です。 webpack-dev-server を実行中の場合は一度停止し、再度下記コマンドを実行しましょう。
$ bin/webpack-dev-server
http://localhost:3000/home/index にアクセスした時、下記のようなページが表示されていると ok です。

実装のリファクタリング
とりあえず表示させることを優先で、 Index.vue に全てを書いていたので、簡単にコンポーネントの分割します。分割のイメージは下記になります。

ちょっとずつ実践的な実装になってきましたね。
HeaderView.vue の作成
Index コンポーネントの title , description 部分を切り出した HeaderView コンポーネントを作成します。このコンポーネントは、他のコンポーネントでも使いやすいように、1 階層上 (app/javascript/components 直下) に配置します。
<template>
  <div>
    <h1>{{ title }}</h1>
    <p>{{ description }}</p>
  </div>
</template>

<script>
export default {
  props: {
    title: {
      type: String,
      default: () => ""
    },
    description: {
      type: String,
      default: () => ""
    }
  }
};
</script>

<style></style>
Contents.vue の作成
次に、 Index コンポーネントの table 部分を切り出した Contents コンポーネントを作成します。
<template>
  <div>
    <table class="contents-table">
      <tr>
        <th>名前</th>
        <th>リンク</th>
      </tr>
      <tr v-for="outer_link in contents.outer_links" v-bind:key="outer_link.name">
        <td>{{ outer_link.name }}</td>
        <td>
          <a v-bind:href="outer_link.url">{{ outer_link.text }}</a>
        </td>
      </tr>
    </table>
  </div>
</template>

<script>
export default {
  props: {
    contents: {
      type: Object,
      default: () => {}
    }
  }
};
</script>

<style scoped>
.contents-table {
  border: 1px solid gray;
  margin: 10px;
}
.contents-table th,
.contents-table td {
  border: 1px solid gray;
}
</style>
Index.vue の修正
最後に、 Index コンポーネントで HeaderView コンポーネント、 Contents コンポーネントを使用する形に修正します。
  <template>
    <div>
-     <h1>{{ initialData.title }}</h1>
-     <p>{{ initialData.description }}</p>
-     <table class="contents-table">
-       <tr>
-         <th>名前</th>
-         <th>リンク</th>
-       </tr>
-       <tr v-for="outer_link in initialData.contents.outer_links" v-bind:key="outer_link.name">
-         <td>{{ outer_link.name }}</td>
-         <td>
-           <a v-bind:href="outer_link.url">{{ outer_link.text }}</a>
-         </td>
-       </tr>
-     </table>
+     <HeaderView v-bind:initialData.title="title" v-bind:description="initialData.description" />
+     <Contents v-bind:contents="initialData.contents" />
    </div>
  </template>

  <script>
+ import HeaderView from "../HeaderView.vue";
+ import Contents from "./Contents.vue";

  export default {
+   components: {
+     HeaderView,
+     Contents
+   },
    props: {
      initialData: {
        type: Object,
        default: () => {}
      }
    },
  };
  </script>
- <style scoped>
- .contents-table {
-   border: 1px solid gray;
-   margin: 10px;
- }
- .contents-table th,
- .contents-table td {
-   border: 1px solid gray;
- }
- </style>
+ <style scoped></style>
Index コンポーネントがだいぶスッキリしましたね。
念の為、再度 http://localhost:3000/home/index にアクセスして、画面がちゃんと表示されることを確認しておきましょう。
2. API を使用して渡す方法での実装
次に、API を使用して渡す方法での実装を進めていきましょう。
下記の手順で整数リテラルの分類表を作成してみます。
- 2-1. API を叩くコンポーネントの実装
- 2-2. API エンドポイントの実装
- 2-3. コンポーネントから API を叩いてデータを取得
- 2-4. 取得したデータをコンポーネント内で描画
2-1. API を叩くコンポーネントの実装
まずはページを表示するためのコントローラーを作成します。
$ bundle exec rails g controller IntegerLiteralDescriptions index --no-helper --no-assets
コントローラーの実装
今回は何もしないです。
View の実装
javascript_pack_tag と、コンポーネントをマウントするための div 要素を追加します。
- <h1>IntegerLiteralDescriptions#index</h1>
- <p>Find me in app/views/integer_literal_descriptions/index.html.erb</p>
+ <%= javascript_pack_tag 'integerLiteralDescriptions/index.js' %>
+ <div id="integerLiteralDescriptionsIndex"></div>
コンポーネントの実装
index.html.erb にマウントする Index コンポーネントと Contents コンポーネントを追加します。
<template>
  <div>
    <HeaderView v-bind:title="title" v-bind:description="description" />
    <Contents v-bind:contents="contents" />
  </div>
</template>

<script>
import HeaderView from "../HeaderView.vue";
import Contents from "./Contents.vue";

export default {
  components: {
    HeaderView,
    Contents
  },
  data() {
    return {
      title: "title",
      description: "description",
      contents: []
    };
  }
};
</script>

<style scoped>
</style>
<template>
  <div>
    <table class="contents">
      <tr>
        <th>名前</th>
        <th>英語訳</th>
        <th>表記例</th>
        <th>用途</th>
      </tr>
      <tr v-for="content in contents" v-bind:key="content.name">
        <td>{{ content.name }}</td>
        <td>{{ content.english }}</td>
        <td>{{ content.sample }}</td>
        <td>{{ content.usage }}</td>
      </tr>
    </table>
  </div>
</template>

<script>
export default {
  props: {
    contents: {
      type: Array,
      default: () => []
    }
  }
};
</script>

<style scoped>
.contents {
  border: 1px solid gray;
}
.contents th,
.contents td {
  border: 1px solid gray;
}
</style>
Vue コンポーネントをマウントする実装
Index コンポーネントと Contents コンポーネントを index.html.erb にマウントします。
import { createApp } from "vue";
import Index from "../../components/integerLiteralDescriptions/Index.vue";

document.addEventListener("DOMContentLoaded", () => {
  const app = createApp(Index)
  app.mount("#integerLiteralDescriptionsIndex");
});
再び bin/webpack-dev-server を実行し直し、 http://localhost:3000/integer_literal_descriptions/index にアクセスすると、下記画像のようなページが表示されます。

これで API を叩いて取得したデータを受け取り、表示するためのコンポーネントが完成しました。
次は、先ほど作成したコンポーネントからリクエストを受け、レスポンスを返す処理を実装していきます。
2-2. API エンドポイントの実装
コントローラーを、 Api::V1::IntegerLiteralDescriptionsController という名前で作成します。
$ bundle exec rails g controller api/v1/integer_literal_descriptions index --no-helper --no-assets --no-view-specs
コントローラーの実装
整数リテラルの分類表の json を返却する index メソッドを実装します。
 class Api::V1::IntegerLiteralDescriptionsController < ApplicationController
   def index
+    title = 'IntegerLiteralDescriptions#index'
+    description = '整数リテラルの分類表'
+    contents = get_integer_literals
+    result_values = {
+      title: title,
+      description: description,
+      contents: contents
+    }
+    render json: result_values
   end
-end
+
+  private
+
+  def get_integer_literals
+    [
+      {
+        name: '10進数',
+        english: 'decimal',
+        sample: '42',
+        usage: '数値'
+      },
+      {
+        name: '2進数',
+        english: 'binary digits',
+        sample: '0b0001',
+        usage: 'ビット演算など'
+      },
+      {
+        name: '8進数',
+        english: 'octal',
+        sample: '0o777',
+        usage: 'ファイルのパーミッションなど'
+      },
+      {
+        name: '16進数',
+        english: 'hexadecimal, hex',
+        sample: '0xEEFF',
+        usage: '文字のコードポイント、RGB値など'
+      }
+    ]
+  end
+end
アクセスの確認
この状態で、 http://localhost:3000/api/v1/integer_literal_descriptions/index にアクセスしてみると、下記のような画面が表示されるはずです。

一旦これで、 API のエンドポイントが完成しました。
2-3. コンポーネントから API を叩いてデータを取得
コンポーネントと API の Ajax 通信は axios というライブラリを使用します。5
まずは axios をインストールします。
$ yarn add --dev axios
install に成功していると、 package.json axios の項目が追記されているはずです。
   "devDependencies": {
+    "axios": "^0.21.0",
     "webpack-dev-server": "^3.11.0"
   }
次に integerLiteralDescriptions/Index.vue を書き換えて、 axios でのデータ取得を実装します。
 import Contents from "./Contents.vue";
+import Axios from "axios";

 export default {
   components: {
     HeaderView,
      Contents
   },
   data: function() {
     return {
       title: "title",
       description: "description",
       contents: []
     };
+  },
+
+  created: function() {
+    this.updateContents();
+  },
+
+  methods: {
+    updateContents() {
+      Axios.get("/api/v1/integer_literal_descriptions/index.json").then(
+        response => {
+          const responseData = response.data;
+          console.log(responseData);
+        }
+      );
+    }
   }
補足: Composition API を使って書く場合
<script>
import HeaderView from "../HeaderView.vue";
import Contents from "./Contents.vue";
import Axios from "axios";
import { ref, onMounted } from "vue";

export default {
  components: {
    HeaderView,
    Contents
  },

  setup() {
    const title = ref('')
    const description = ref('')
    const contents = ref([])

    const updateContents = () => {
      Axios.get("/api/v1/integer_literal_descriptions/index.json").then(
        response => {
          const responseData = response.data;
          console.log(responseData);
        }
      );
    }

    onMounted(updateContents)

    return { title, description, contents }
  }
};
</script>
created で vue コンポーネントが作成されたタイミングで axios によるデータ取得を走らせるようにしています。
console.log によって、取得したデータが出力されているはずなので、 http://localhost:3000/integer_literal_descriptions/index を見てみましょう。
↓ のようなログが出て、データ取得に成功しているはずです。

Tips: JavaScript のデバッグ
具体的には下記のように仕込むことができます。
   Axios.get("/api/v1/integer_literal_descriptions/index.json").then(
     response => {
       const responseData = response.data;
-      console.log(responseData);
+      debugger;
     }
   );
開発者ツールを開きながら、再度先ほどの http://localhost:3000/integer_literal_descriptions/index にアクセスしてみると、

debugger を仕込んだ部分で処理が止まり、 Console からその時点の各種データを覗くことができます。(↑ 画像の場合、画像下部で responseData の値を確認しています。)
2-4. 取得したデータをコンポーネント内で描画
先ほど axios で取得したデータを、画面に反映させます。
今回の場合、下記の部分を書き換えるだけです。
   Axios.get("/api/v1/integer_literal_descriptions/index.json").then(
     response => {
       const responseData = response.data;
-      console.log(responseData);
+      this.title = responseData.title;
+      this.description = responseData.description;
+      this.contents = responseData.contents;
     }
   );
http://localhost:3000/integer_literal_descriptions/index にアクセスしてみると、整数リテラル分類表が出てくるはずです。

Tips: 整数リテラルとは
JavaScript で表現できる 整数リテラル には 10 進数、2 進数、8 進数、16 進数があります。
JavaScript では 0 で始まる数値の直後に b, o, x をつけることで、それぞれ 2 進数、8 進数、16 進数が表現できます。
b, o, x は英語訳を見てみると、それぞれ binary digits, octal, hex となっており、それぞれの頭文字から来ていることがわかります。今回の実装で整数リテラル分類表をサンプルに組み込んだ理由はただの思いつきです。
リンクボタンを追加
せっかくなので、 home/index から http://localhost:3000/integer_literal_descriptions/index に飛べるよう、リンクボタンを追加しておきましょう。
           url: 'https://github.com/t0yohei/rails-vue-app'
         }
       ],
+      inner_links: [{
+        label: '整数リテラル分類表',
+        url: url_for(action: 'index', controller: 'integer_literal_descriptions')
+      }]
     }
...
         </td>
       </tr>
     </table>
+    <div v-for="inner_link in contents.inner_links" v-bind:key="inner_link.label">
+      <button v-on:click="changeLocation(inner_link.url)" class="btn-push">{{ inner_link.label }}</button>
+    </div>
   </div>
 </template>

 <script>
 export default {
   props: {
     contents: {
       type: Object,
       default: () => {}
     }
+  },
+  methods: {
+    changeLocation(url) {
+      window.location.href = url;
+    }
   }
 };
 </script>

 <style scoped>
...
+.btn-push {
+  margin: 10px;
+  max-width: 180px;
+  text-align: left;
+  background-color: rgb(24, 174, 238);
+  font-size: 14px;
+  color: #fff;
+  text-decoration: none;
+  font-weight: bold;
+  padding: 10px 24px;
+  border-radius: 4px;
+  border-bottom: 4px solid rgb(24, 174, 238);
+}
+.btn-push:active {
+  transform: translateY(4px);
+  border-bottom: none;
+}
 </style>
補足: Composition API を使って書く場合
<script>
import { ref } from "vue";

export default {
  props: {
    contents: {
      type: Object,
      default: () => {}
    }
  },

  setup(props) {
    const changeLocation = url => {
      window.location.href = url;
    }
    return { changeLocation }
  }
};
</script>
http://localhost:3000/home/index を開いて、こんな感じのボタンができていたら ok です。

最後に
今回のチュートリアルは以上で終了です。
このチュートリアルで学習したのは Webpacker を使用した Vue + Rails アプリケーションの基本となる部分で、大きなアプリケーションに取り組むときにも、これからアプリケーションを作り始める時にも大きな武器になるはずです。
このチュートリアルが、 Rails や Vue を学習される方の助けに少しでもなっていれば幸いです。
では。
参考
- rails/webpacker: Use Webpack to manage app-like JavaScript modules in Rails
- Vue.js 3 · Issue #2751 · rails/webpacker
- Vue3 on Rails - DEV
- はじめに | Vue.js
- メンテ不能になったフロントエンド環境を立て直す話
注釈
-
今回の実装では CoffeeScript と turbolinks のセットアップを省いています。既存の rails プロジェクトで Vue.js を使用する場合は、 turbolinks と戦う必要がありそうです。 ↩
-
Webpacker 6.0 でそもそも
--webpack=vueといったオプション自体が廃止されるとのこと。ちなみの --webpack のオプションを指定しない場合でも、 rails new 時に default で webpacker:install が実行されます。 ↩ -
createApp の第二引数に root props を渡せる機能を活用しています。 ↩
-
axios を利用した API の使用。 Ajax 通信をする手段としては、他のも fetch API などを使用する方法が有名です。 ↩