前回までにQiitaのAPIを呼び出し、レイアウトの大枠を作りました
今回はAPIのレスポンスをレイアウトに反映させてみたいと思います
repository:
実装
まずAPIのレスポンスのおさらい
documentのレスポンス例によると以下
HTTP/1.1 200
Content-Type: application/json

[
  {
    "rendered_body": "<h1>Example</h1>",
    "body": "# Example",
    "coediting": false,
    "comments_count": 100,
    "created_at": "2000-01-01T00:00:00+00:00",
    "group": {
      "created_at": "2000-01-01T00:00:00+00:00",
      "description": "This group is for developers.",
      "name": "Dev",
      "private": false,
      "updated_at": "2000-01-01T00:00:00+00:00",
      "url_name": "dev"
    },
    "id": "c686397e4a0f4f11683d",
    "likes_count": 100,
    "private": false,
    "reactions_count": 100,
    "stocks_count": 100,
    "tags": [
      {
        "name": "Ruby",
        "versions": [
          "0.0.1"
        ]
      }
    ],
    "title": "Example title",
    "updated_at": "2000-01-01T00:00:00+00:00",
    "url": "https://qiita.com/Qiita/items/c686397e4a0f4f11683d",
    "user": {
      "description": "Hello, world.",
      "facebook_id": "qiita",
      "followees_count": 100,
      "followers_count": 200,
      "github_login_name": "qiitan",
      "id": "qiita",
      "items_count": 300,
      "linkedin_id": "qiita",
      "location": "Tokyo, Japan",
      "name": "Qiita キータ",
      "organization": "Qiita Inc.",
      "permanent_id": 1,
      "profile_image_url": "https://s3-ap-northeast-1.amazonaws.com/qiita-image-store/0/88/ccf90b557a406157dbb9d2d7e543dae384dbb561/large.png?1575443439",
      "team_only": false,
      "twitter_screen_name": "qiita",
      "website_url": "https://qiita.com"
    },
    "page_views_count": 100,
    "team_membership": {
      "name": "Qiita キータ"
    }
  }
]
今回欲しいのはbody, tags, title, userの4つになります
レスポンス自体は配列で返ってくるので受け皿としてitemsを、Qiita APIを呼び出すgetArticlesを_MyHomePageStateに定義します
class _MyHomePageState extends State<MyHomePage> {
  List items = [];

  Future<void> getArticles() async {
    var url =
        Uri.https('qiita.com', 'api/v2/items', {'page': '1', 'per_page': '20'});
    var response = await http.get(url);

    setState(() {
      items = jsonDecode(response.body);
    });
  }

  @override
  void initState() {
    super.initState();
    getArticles();
  }
}
型定義とエラーハンドリングもしたいところですが、一旦このまま。後でやりたいと思います
initState で定義したgetArticlesを呼び出します
そしたらこのitemsを使ってListViewを生成する
  @override
  Widget build(BuildContext context) {
    return Scaffold(
      appBar: AppBar(
        title: Text(widget.title),
      ),
      body: ListView.separated(
        padding: const EdgeInsets.all(8),
        itemCount: items.length,
        itemBuilder: (BuildContext context, int index) {
          return Container(
            height: 150,
            padding: const EdgeInsets.all(16),
            child: Row(
              children: [
                CircleAvatar(
                    radius: 25,
                    backgroundImage: NetworkImage(
                        items[index]['user']['profile_image_url'])),
                const SizedBox(width: 24),
                Expanded(
                  child: Column(
                    children: [
                      Container(
                          alignment: Alignment.centerLeft,
                          child: Text(
                            items[index]['title'],
                            overflow: TextOverflow.ellipsis,
                            style: const TextStyle(
                                fontWeight: FontWeight.bold, fontSize: 24),
                          )),
                      Container(
                          alignment: Alignment.centerLeft,
                          child: Text(
                            items[index]['tags']
                                .map((tag) => tag['name'])
                                .join(','),
                            style: const TextStyle(color: Colors.grey),
                          )),
                      const SizedBox(height: 8),
                      Container(
                          alignment: Alignment.centerLeft,
                          child: Text(
                            items[index]['body'],
                            overflow: TextOverflow.ellipsis,
                          )),
                    ],
                  ),
                )
              ],
            ),
          );
        },
        separatorBuilder: (BuildContext context, int index) => const Divider(),
      ),
      floatingActionButton: const FloatingActionButton(
        onPressed: null,
        tooltip: 'Search',
        child: Icon(Icons.search),
      ),
    );
  }
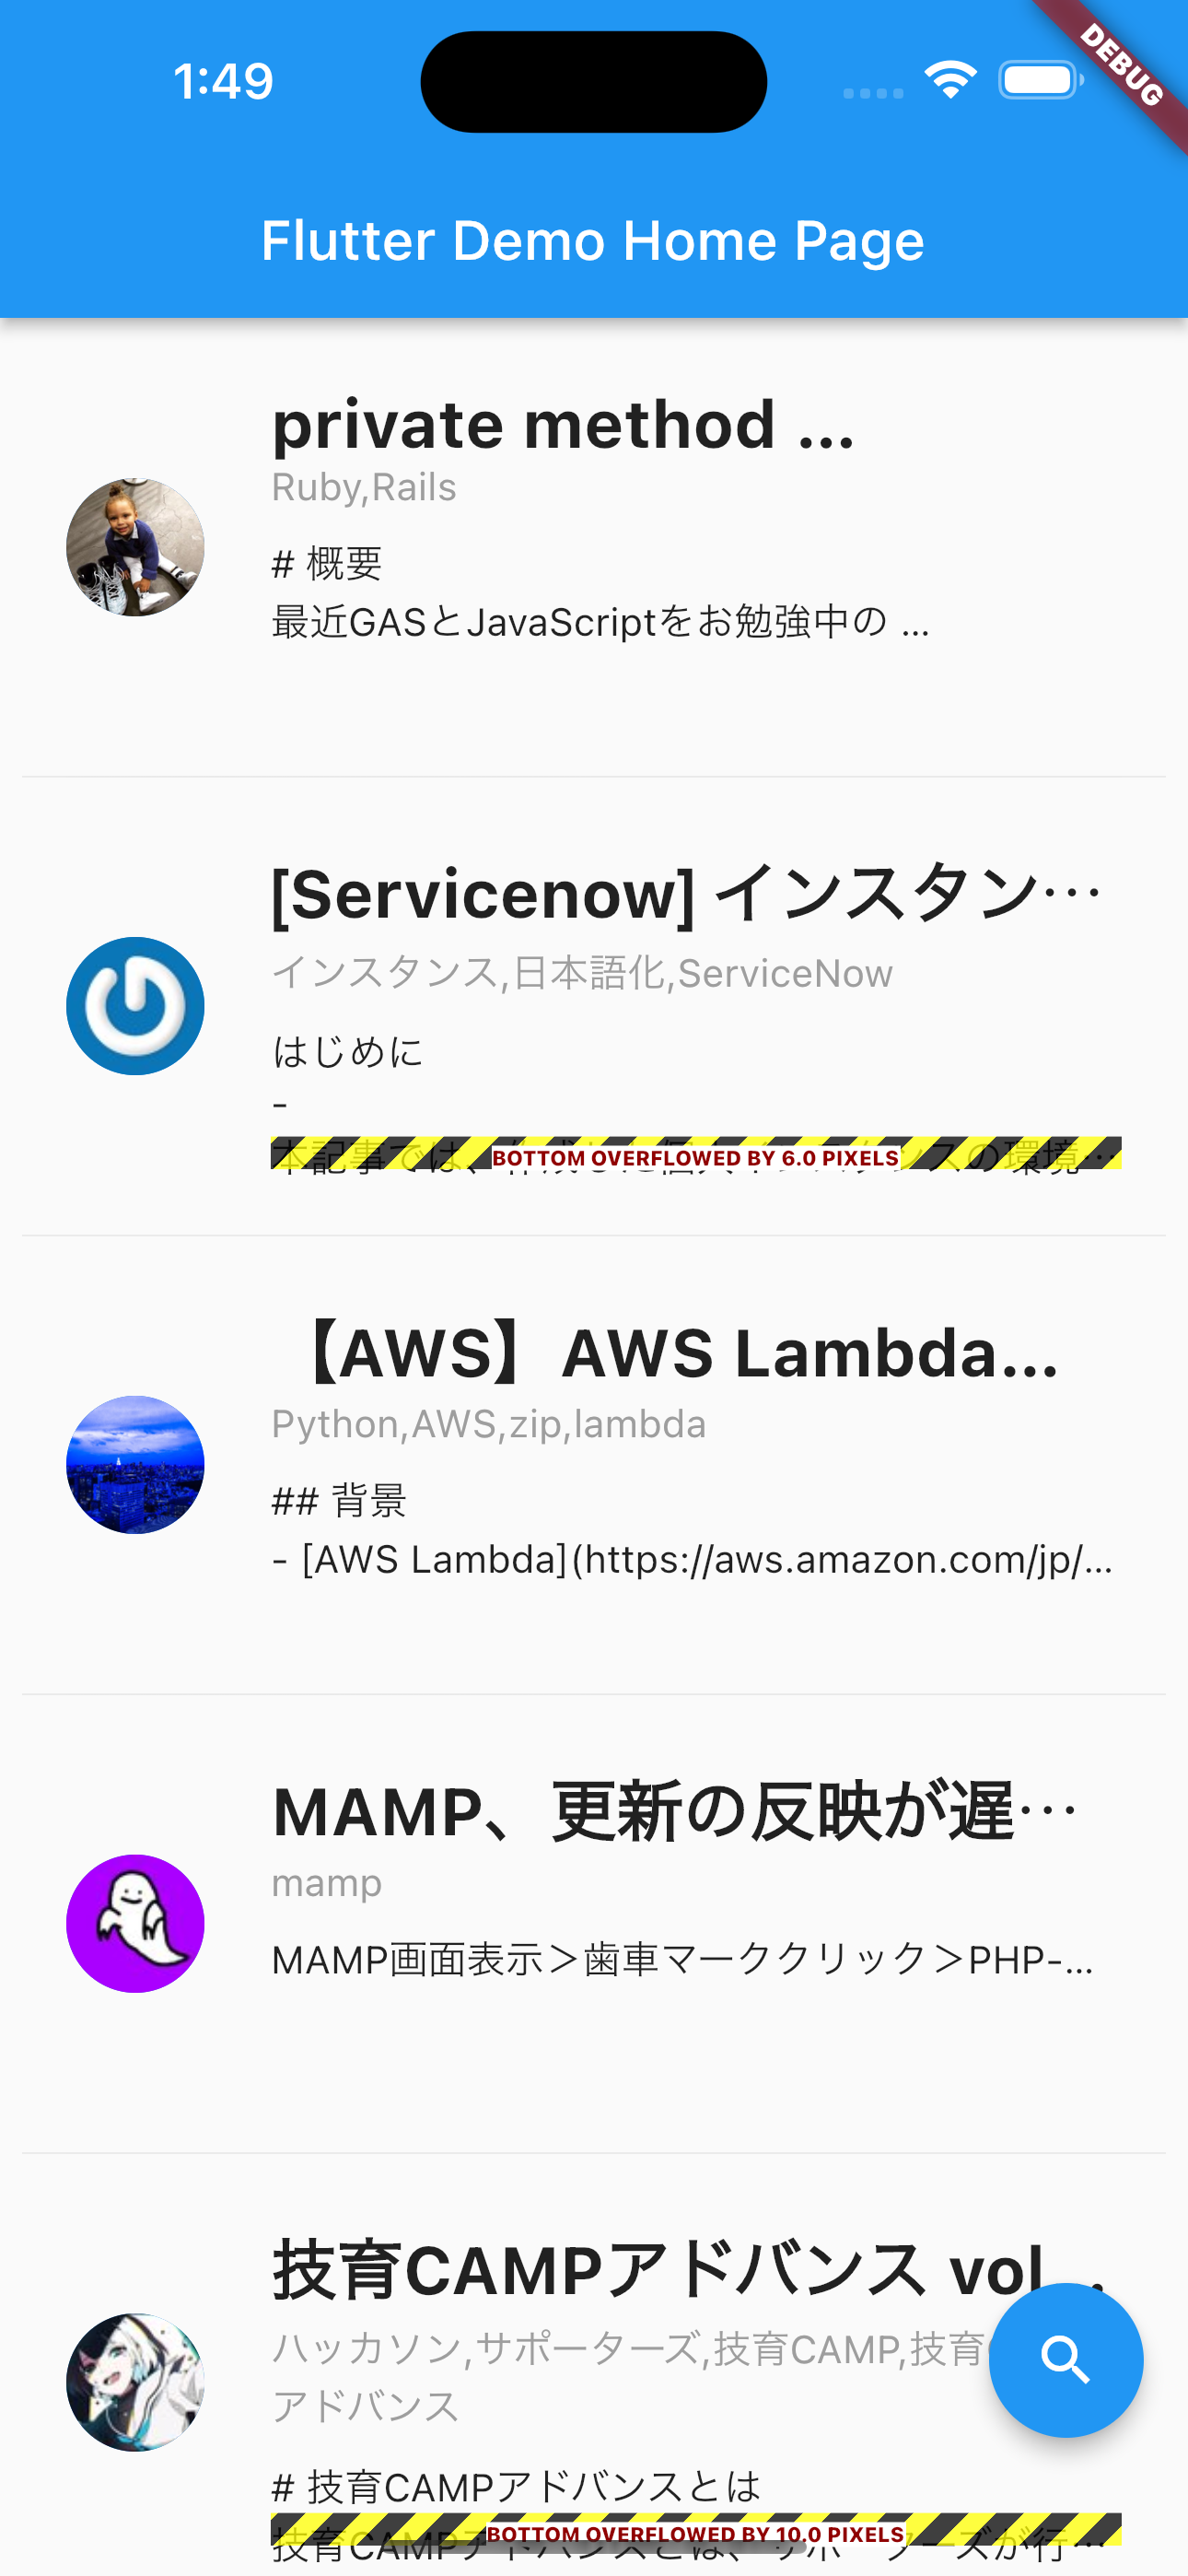
おや?何かエラーが出ている
The following assertion was thrown during layout:
A RenderFlex overflowed by 6.0 pixels on the bottom.
bottomが6pixelはみ出てるよってこと?なんでだ?
よくログをみるともう一つ
Another exception was thrown: A RenderFlex overflowed by 10.0 pixels on the bottom.
title, tags, bodyの内容によって150pixelを越えてしまう時に起こるっぽい
なのでここは一旦maxLines: 1をそれぞれのTextに適用する
実行してエラーが出なくなった![]()
続いて記事をタップで該当の記事をWebViewで開きたいと思います
ひとまず記事をタップしたら画面が遷移するところまで作っていきます
こちらのdocumentに沿って引数で記事のURLを受け取る新しいWidgetを作成します
それがこちら
import 'package:flutter/material.dart';

class ArticleArguments {
  final String url;

  ArticleArguments(this.url);
}

class ArticleWebView extends StatelessWidget {
  const ArticleWebView({super.key});

  static const routeName = '/article';

  @override
  Widget build(BuildContext context) {
    final args = ModalRoute.of(context)!.settings.arguments as ArticleArguments;

    return Scaffold(
      appBar: AppBar(
        title: Text('article'),
      ),
      body: Center(
        child: Text(args.url),
      ),
    );
  }
}
document通り作成し、受け取ったURLを表示させてみます
Widgetが出来たのでrouteを作成します
  @override
  Widget build(BuildContext context) {
    return MaterialApp(
      title: 'Qiita App',
      debugShowCheckedModeBanner: false,
      theme: ThemeData(
        primarySwatch: Colors.lightGreen,
      ),
      routes: {ArticleWebView.routeName: (context) => const ArticleWebView()},//ここ
      home: const MyHomePage(title: '記事一覧'),
    );
  }
そしてListViewにitemのTap処理を追加する
ListView自体にonClickみたいなのがあるのかなと思ったのですが、childで書かないといけないらしい
GestureDetectorとかInkWellでchildをwrapしてあげてonTapを書く
今回はripple effectがあるInkWellを採用
@override
  Widget build(BuildContext context) {
    return Scaffold(
      appBar: AppBar(
        title: Text(widget.title),
      ),
      body: ListView.separated(
        padding: const EdgeInsets.all(8),
        itemCount: items.length,
        itemBuilder: (BuildContext context, int index) {
          return InkWell(
              onTap: () => Navigator.pushNamed(
                    context,
                    ArticleWebView.routeName,
                    arguments: ArticleArguments(items[index]['url']),
                  ),
              child: Container(
                height: 150,
                ...
無事遷移でき、URLも表示出来ました![]()
Qiitaに画像上げるのって月でサイズ制限があるんですね。知らなかった...
というわけでSSは無しです![]()
ぜひ手元で実行してみてください
少し長くなってきたのでWebViewに関しては次回やります
