Brightの対象
Webアプリ開発 Elixir > クラス1 > Web・DB・API > RDB > MySQL構築
検証環境
Ubuntu 22.04 LTS (KVM上に構築)
Phoenix installer v1.7.12
Erlang/OTP 25 [erts-13.0.4]
Elixir (1.14.5)
MySQLインストール
$ sudo apt update
$ sudo apt install mysql-server
MySQLのユーザー作成
$ sudo mysql
※検証の為権限を強くしてます
mysql> CREATE USER 'sammy'@'localhost' IDENTIFIED BY 'password';
mysql> GRANT ALL PRIVILEGES ON *.* TO 'sammy'@'localhost' WITH GRANT OPTION;
mysql> exit
Phoenix PJ作成
$ mix phx.new ymn --database mysql
$ cd ymn
下記のファイルを一部を書き換える
DBの設定です
config/dev.exs
config :ymn, Ymn.Repo,
-  username: "root",
+  username: "sammy",
-  password: "",
+  password: "password",
  hostname: "localhost",
  database: "ymn_dev",
  stacktrace: true,
  show_sensitive_data_on_connection_error: true,
  pool_size: 10
DB作成と動作チェック
$ mix ecto.create
$ mix phx.server
ここまで動けばDBの設定はあってます
いったんphx.serverを停止します(Ctrl + C)
phx.gen.liveでデータ登録画面を作る(DBのテスト)
$ mix phx.gen.live Accounts User users name:string
下記のファイルを部分追加します
lib/ymn_web/router.ex
  scope "/", YmnWeb do
    pipe_through :browser

+    live "/users", UserLive.Index, :index
+    live "/users/new", UserLive.Index, :new
+    live "/users/:id/edit", UserLive.Index, :edit

+    live "/users/:id", UserLive.Show, :show
+    live "/users/:id/show/edit", UserLive.Show, :edit
    get "/", PageController, :home
  end
migrate
$ mix ecto.migrate
テスト
$ mix phx.server
phx.server起動後
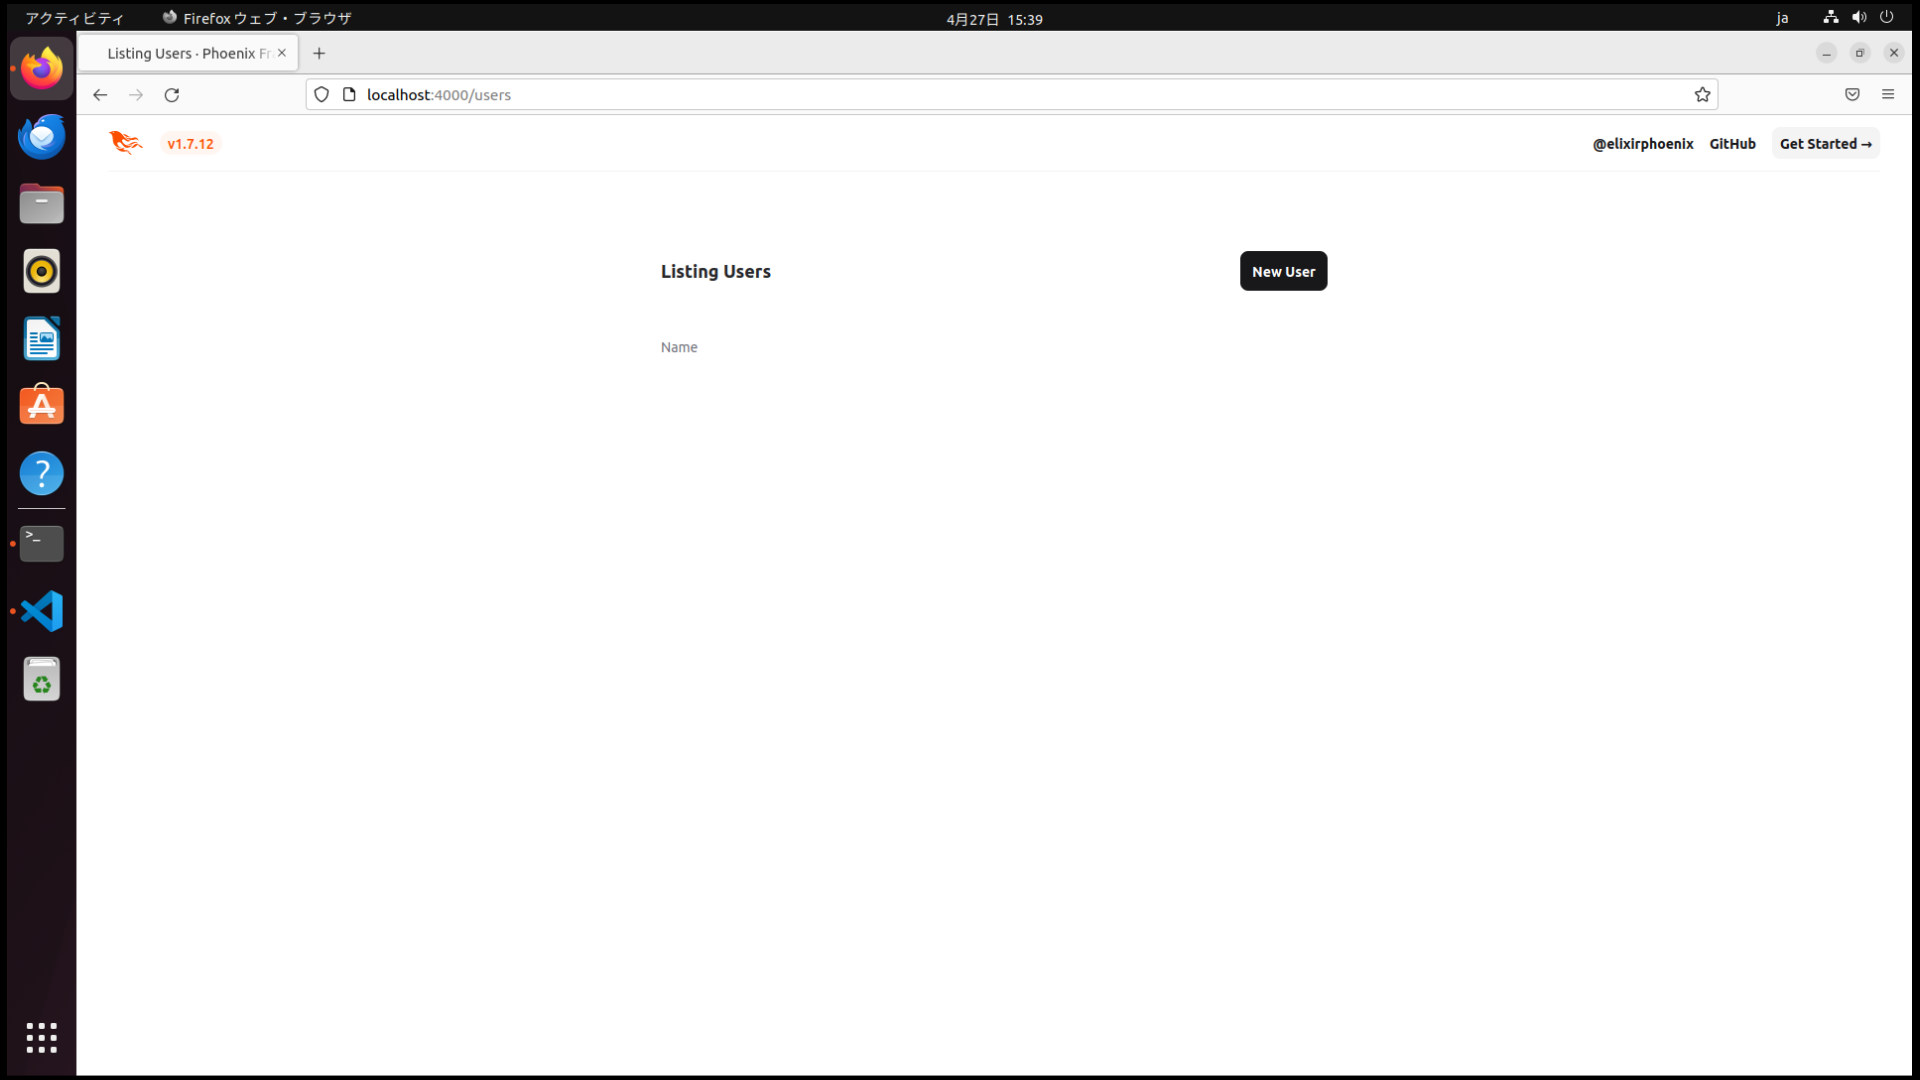
http://localhost:4000/users
にアクセス
New Userをクリック
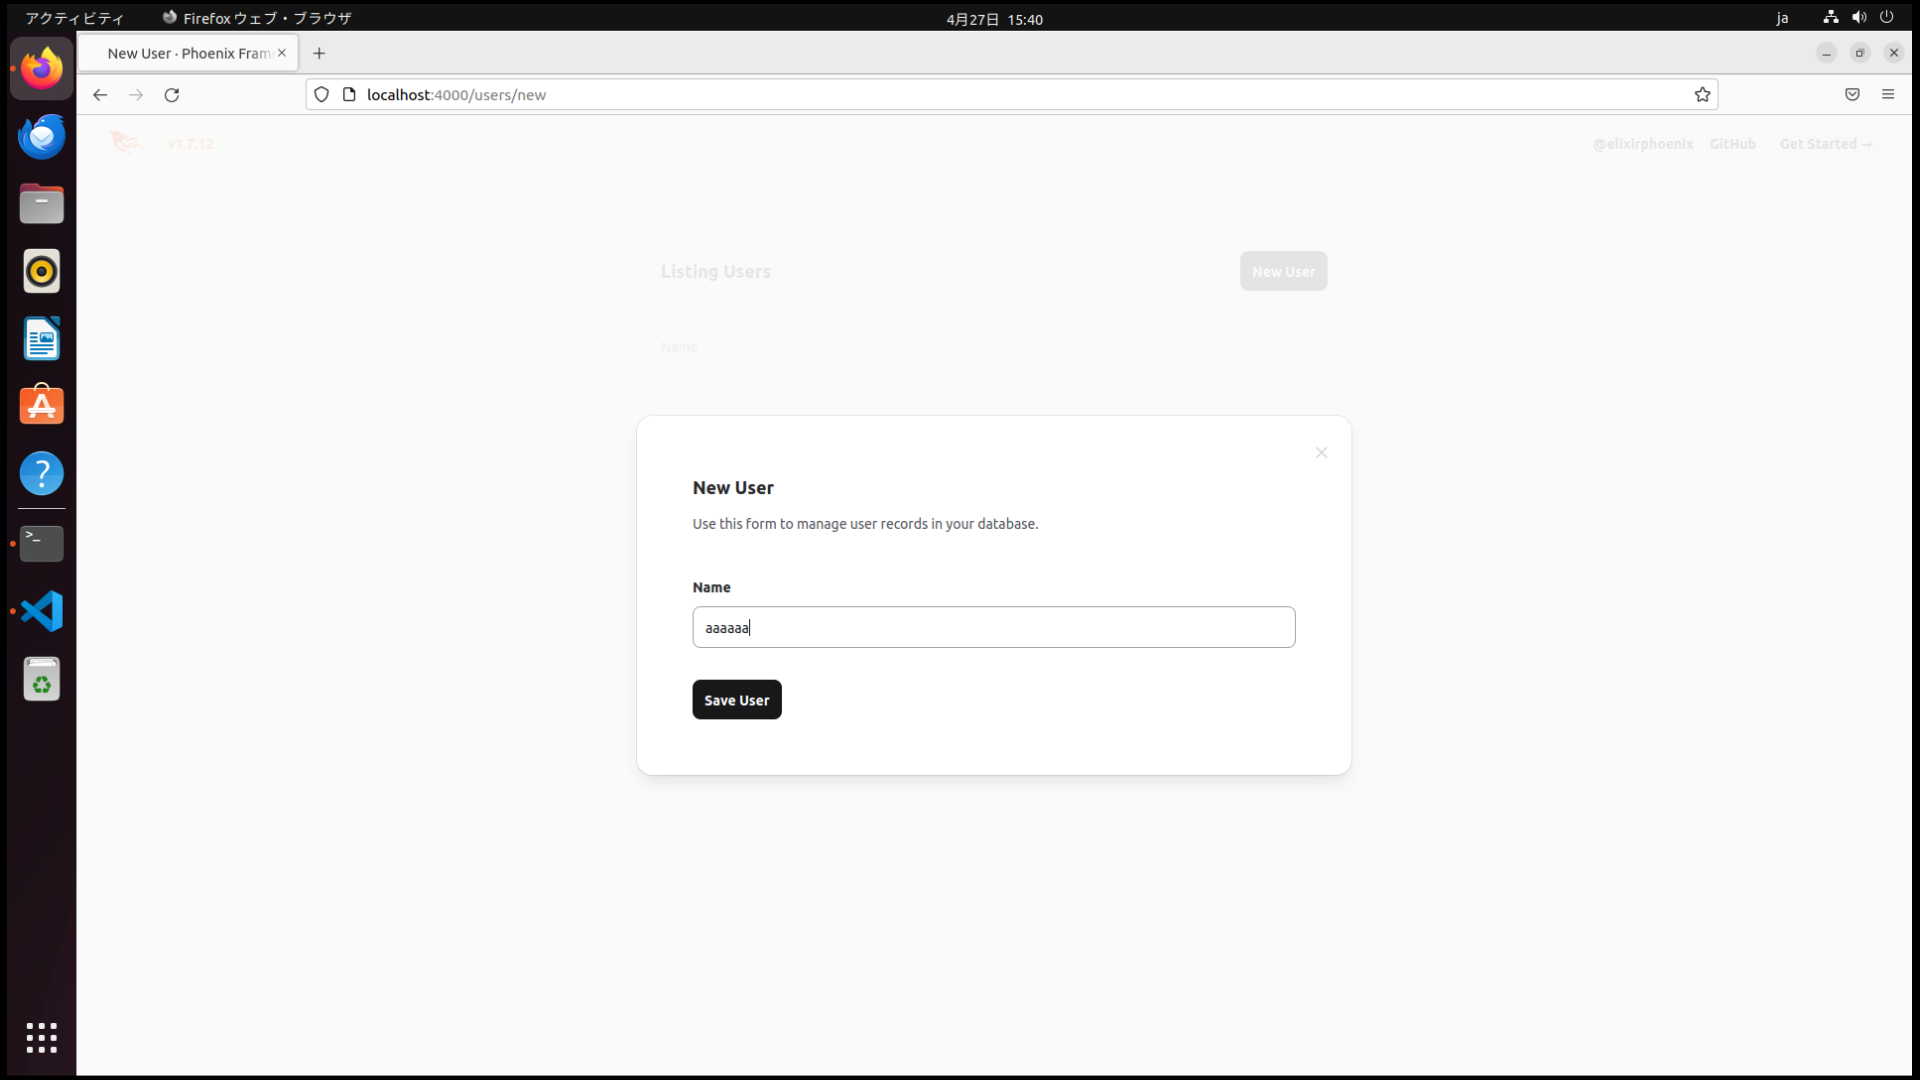
Namaを入力し、Seve Userをクリック
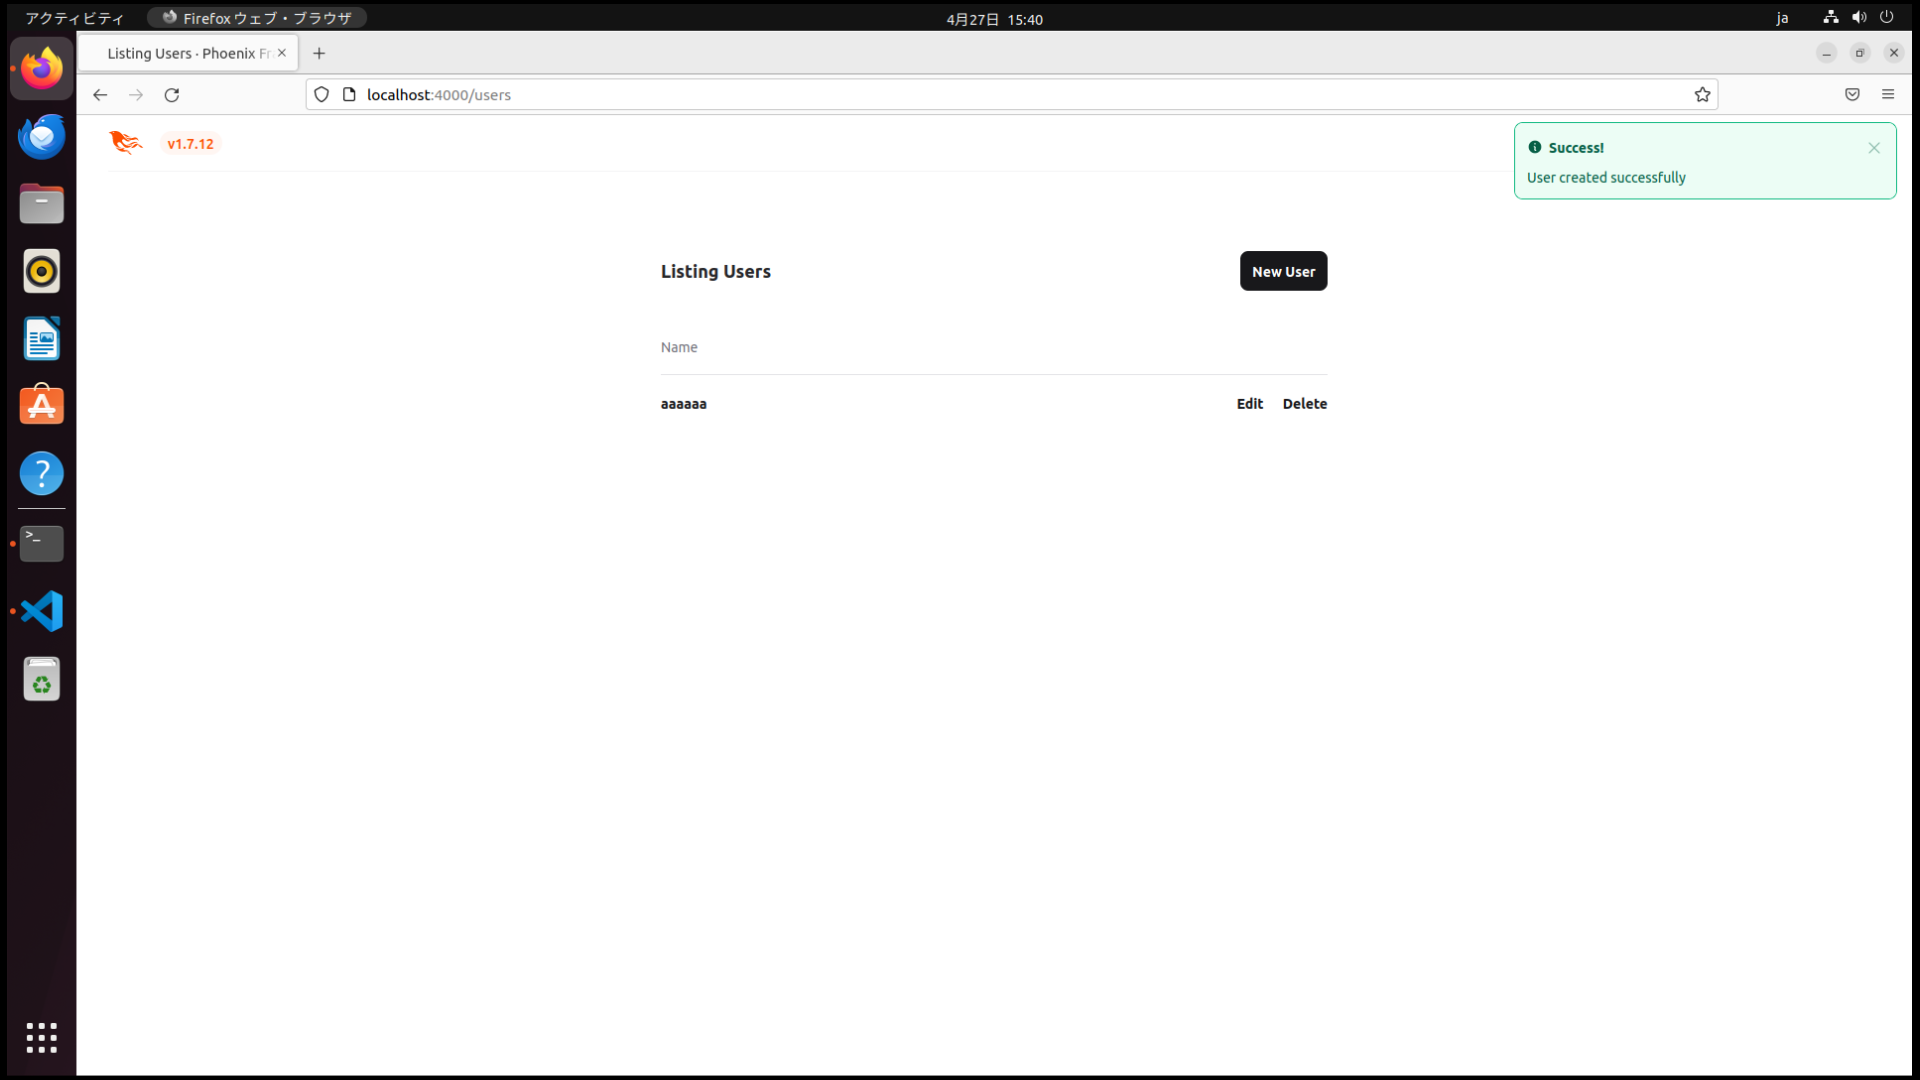
Userが登録を確認できました
以上
参考にしたサイト