はじめに
この記事は自動生成した要素をアニメーションさせてから自動消滅させるまでの流れを把握することを目的にしています。
初心者向けの内容ですが、2 ファイル合計 120 行程度のコードなので気軽にご覧ください。
※ガチのパーティクルを簡単に扱いたい場合には Vue Particles が便利です。
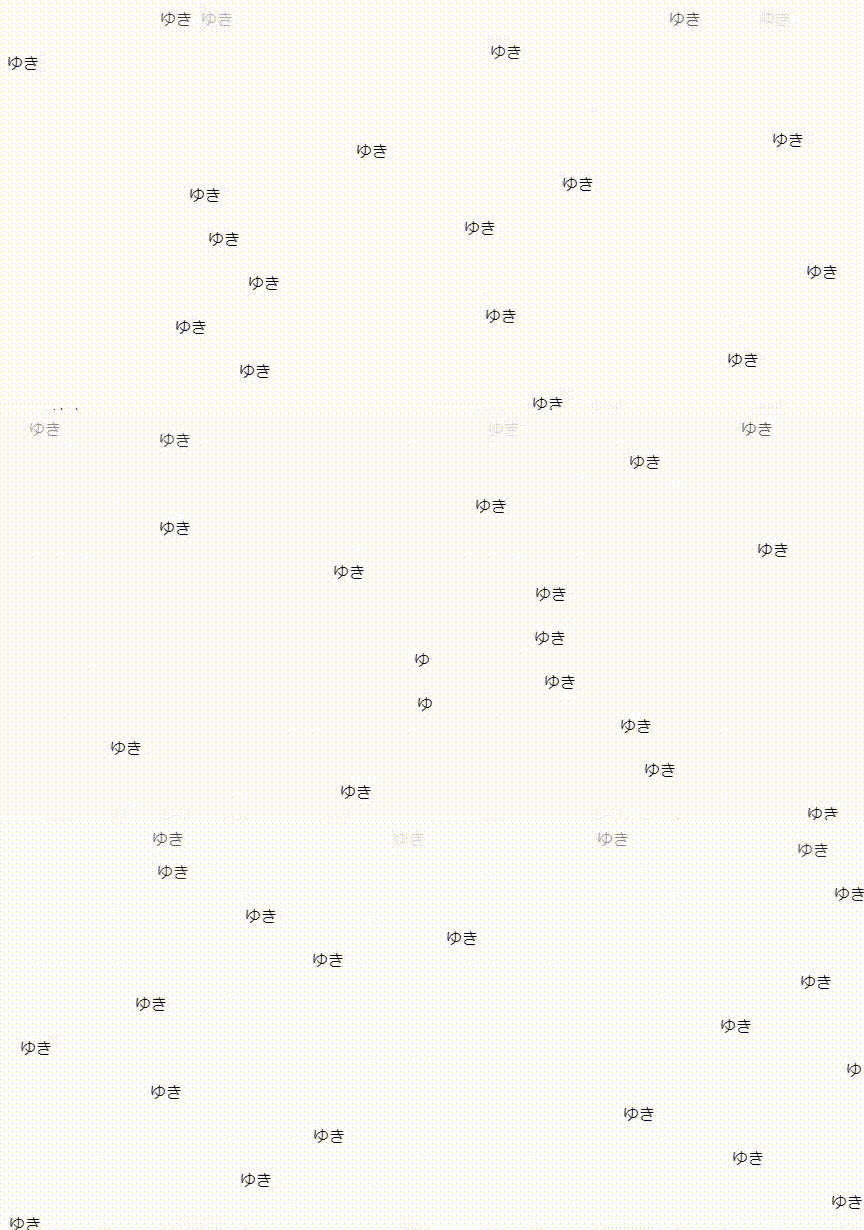
出来上がるもの
チートシート的なもの(初心者向け)
- 定期的な雪情報の生成 → requestAnimationFrame
- 雪情報配列への格納 → push
- 雪情報の定義 → コンポーネント化
- 見た目の構成 → template
- すべての雪の描画 → v-for
- 雪の落下アニメーション → transform
- 雪のタイミング制御 → setTimeout
- 雪を消す通知 → emit
- 雪情報配列からの削除 → splice
コード全文
<template>
  <div id="app">
    <snow v-for="(particle,index) in perticles" v-bind:key="particle.id"
      :x="particle.x"
      :y="particle.y"
      :limit_y="windowHeight-30"
      :dr="particle.dr"
      @thaw="thaw_snow(index)"
    >
    </snow>
  </div>
</template>

<script>
import Snow from './components/snow.vue'

export default {
  name: 'app',
  components: {
    Snow
  },
  data () {
    return {
      perticles: [],
      windowWidth: window.innerWidth,
      windowHeight: window.innerHeight,
      lastSpawnTime: 0,
    }
  },
  mounted() {
    window.addEventListener('resize', this.get_window_size)
    this.spawn_loop(0)
  },
  methods: {
    random_x(){
      return Math.floor(Math.random() * this.windowWidth)
    },
    next_id(){
      const usedids = this.perticles.reduce((accumulator, element) => {
          accumulator[element.id] = true
          return accumulator
      }, []);
      const nextid = usedids.findIndex((exists) => !exists)
      return nextid < 0 ? usedids.length : nextid
    },
    spawn_snow(){
      const id = this.next_id()
      const particle = { id, x: this.random_x(), y:0, dr: 1300}
      this.$data.perticles.push(particle)
    },
    thaw_snow(index){
      this.perticles.splice(index, 1)
    },
    get_window_size: function() {
      this.windowWidth = window.innerWidth
      this.windowHeight = window.innerHeight
    },
    spawn_loop: function(timestamp) {
      if(timestamp - this.lastSpawnTime > 60){
        this.spawn_snow()
        this.lastSpawnTime = timestamp
      }
      window.requestAnimationFrame(this.spawn_loop)
    }
  }
}
</script>
<template>
  <div class="snow-container"
  :style="{
     transform: `translate(${x}px, ${y+dy}px)`,
     transition: `transform ${dr}ms linear`
   }"
   >
    <span>ゆき</span>
  </div>
</template>

<script>
export default {
  name: 'snow',
  props: {
    x: { type: [Number], default: 0 },
    y: { type: [Number], default: 0 },
    limit_y: { type: [Number], default: 0 },
    dr: { type: [Number], default: 0 },
  },
  data () {
    return {
      dy: 0
    }
  },
  mounted(){
    window.setTimeout(() => {
      this.fall()
    } , 100)
  },
  methods: {
    fall(){
      this.dy = this.limit_y - this.y
      window.setTimeout(() => {
        this.$emit('thaw')
      } , this.dr)
    }
  }
}
</script>

<!-- Add "scoped" attribute to limit CSS to this component only -->
<style scoped>
div.snow-container {
  position: absolute;
  animation: fadein 1s ease 0s 1 normal;
}

@keyframes fadein {
  0% {opacity: 0}
  20% {opacity: 1}
}

</style>
定期的な雪情報の生成
雪の生成と管理に使う情報は App.vue で保持しています。
data () {
  return {
    perticles: [],
    windowWidth: window.innerWidth,
    windowHeight: window.innerHeight,
    lastSpawnTime: 0,
  }
}
雪の位置情報は perticles 配列に格納します。
画面の横幅/縦幅は windowWidth / windowHeight に格納します。
最後に雪を生成した時刻は lastSpawnTime に格納します。
では雪を生成(spawn)する関数を見ます。
random_x(){
  return Math.floor(Math.random() * this.windowWidth)
},
next_id(){
  const usedids = this.perticles.reduce((accumulator, element) => {
      accumulator[element.id] = true
      return accumulator
  }, []);
  const nextid = usedids.findIndex((exists) => !exists)
  return nextid < 0 ? usedids.length : nextid
},
spawn_snow(){
  const id = this.next_id()
  const particle = { id, x: this.random_x(), y:0, dr: 1300}
  this.$data.perticles.push(particle)
},
関数random_x()は画面の横幅に収まるようにランダムな x 座標を取得します。
関数next_id() は perticles 内で未使用の id を探し出します。
@FumioNonaka 様の記事を参考にさせていただきました。
追加と削除が繰り返される配列要素のオブジェクトに一意のid番号を振る
関数spawn_snow() は新しい雪情報を perticles に追加します。
雪の y 座標は画面の最上部である 0 にしています。
dr は 雪の落下にかかる時間(ミリ秒)で、1.3 秒に固定値しています。
spawn_snow()を定期的に実行するために、マウント後に発生するイベントで関数spawn_loop()呼び出します。
mounted() {
  window.addEventListener('resize', this.get_window_size)
  this.spawn_loop(0)
},
spawn_loop: function(timestamp) {
  if(timestamp - this.lastSpawnTime > 60){
    this.spawn_snow()
    this.lastSpawnTime = timestamp
  }
  window.requestAnimationFrame(this.spawn_loop)
}
関数spawn_loop()は、内部で関数requestAnimationFrame()を使用して繰り返しspawn_loop()を呼び出します。
前回の生成時刻から 60 ミリ秒経過している場合に関数spawn_snow()を実行します。
雪情報の定義
雪情報は snow.vue の snow コンポーネントの props で定義しています。
export default {
  name: 'snow',
  props: {
    x: { type: [Number], default: 0 },
    y: { type: [Number], default: 0 },
    limit_y: { type: [Number], default: 0 },
    dr: { type: [Number], default: 0 },
  },
x,y は最初に雪を表示する画面上の x 座標と y 座標です。
limit_y は雪が降った後で消える地点の y 座標です。
dr は雪が現れてから降り終わるまでの時間(ミリ秒)です。
蛇足ですが、これらの情報は実際には App.vue が管理します。snow.vue の役割はこれらの値を App.vue から受け取って表示に反映するだけです。
すべての雪の描画
v-for ディレクティブを使用して perticles の要素数だけ snow コンポーネントを生成しています。
<snow v-for="(particle,index) in perticles" v-bind:key="particle.id"
  :x="particle.x"
  :y="particle.y"
  :limit_y="windowHeight-30"
  :dr="particle.dr"
  @thaw="thaw_snow(index)"
>
ここでは、App.vue が持つ情報と snow コンポーネントの props を関連付けています。
後述しますが、snow コンポーネントが通知する @thawイベントのハンドラも定義しています。
雪の落下アニメーション
snow コンポーネントのスタイルを指定します。
div.snow-container {
  position: absolute;
  animation: fadein 1s ease 0s 1 normal;
}

@keyframes fadein {
  0% {opacity: 0}
  20% {opacity: 1}
}
要素の座標は absolute (絶対位置)にしています。
また、雪が現れた瞬間はうっすらと半透明にしたいので、キーフレームアニメーションでフェードインの効果を付けています。
雪が降る動きは CSS アニメーションを用います。
まず、雪コンポーネント唯一の data として dy を定義しています。
data () {
  return {
    dy: 0
  }
},
dy は y 座標の変位です。props の y との合計値が落下後の y 座標になります。
<div class="snow-container"
  :style="{
   transform: `translate(${x}px, ${y+dy}px)`,
   transition: `transform ${dr}ms linear`
 }"
 >
  <span>ゆき</span>
</div>
Vue.jsでの CSS ア二メーションは @yuneco 様の記事を参考にさせていただきました。
Vue.js+SVGで自由にCSSアニメーションしたい人のための完全解説(ソース付き)
雪のタイミング制御
雪の落下タイミングを調整するために、マウント後のイベント内で関数setTimeout()を用います。
mounted(){
  window.setTimeout(() => {
    this.fall()
  } , 100)
},
マウント後、つまり雪が画面上部(y 座標:0)の位置に現れてから 100 ミリ秒後に落下用の関数fall()を実行します。
fall(){
  this.dy = this.limit_y
    window.setTimeout(() => {
      this.$emit('thaw')
  } , this.dr)
}
fall()が dy を変更することで、落下アニメーションが発生します。
その後、アニメーション時間分待機してから、雪を消す通知を発行します。(後述)
雪を消す通知
雪を消すための通知には$emitを用います。
fall(){
  this.dy = this.limit_y
    window.setTimeout(() => {
      this.$emit('thaw')
  } , this.dr)
}
上記のコードでは dr ミリ秒後(アニメーション時間後)にthawという名前のイベントを発行します。
<snow v-for="(particle,index) in perticles" v-bind:key="particle.id"
  :x="particle.x"
  :y="particle.y"
  :limit_y="windowHeight-30"
  :dr="particle.dr"
  @thaw="thaw_snow(index)"
>
App.vue は snow コンポーネントが発行する@thawイベントを検知するために、バインディングしています。
App.vue は@thawイベントを受け取ると、関数thaw_snow()を実行します。
雪情報配列からの削除
thaw_snow()はアニメーションの終了した雪を配列から削除します。
thaw_snow(index){
  this.perticles.splice(index, 1)
},
引数で配列番号を受け取り、splice()で配列要素を削除します。
まとめ
Vue.js でコンポーネント化した要素の扱い方を学ぶために、自動生成やメッセージを試してみました。
しかしながら要素の削除においては、ICS Media の 池田 泰延 様が以下のような調査報告をなさっています。
Vue.jsの性能が優れないのはDevToolsを使うと理解できます。
— 池田 泰延 (@clockmaker) August 1, 2019
リストレンダリングにおいて、追加・更新時は問題ないものの、削除時には仮想DOMから実DOMへの反映がうまくいっていません。
(要素が全部作り直されている)
比較検証を実施することで、Vue.jsに苦手処理があることが判明するわけです。 pic.twitter.com/2eVu6ErQvq
要素を動的に追加、削除する際は注意が必要ですね。

