前回Azure FunctionsでAzure OpenAI ServiceのChatモデルを呼び出す関数を作ったので、今度はこの関数を呼び出すチャット画面を構築する
はじめに
もともとはオンプレのWindows Server上のIISで稼働しているサイトの中に適当に混ぜて試すために単一のHTMLファイルに全部突っ込んだ状態にしました(あんま良くないけど、お試しだしボリュームも大したことないので)
ですが、ローカルでデバッグのためにHTMLファイル直接ブラウザで開いて動かした際、CORS(Cross-Origin Resource Sharing)ポリシーに引っ掛かってFunctionの関数呼び出しでこけたので、急遽Flask使うことにしました。(ポリシーのやつは完全に意識の外でした)
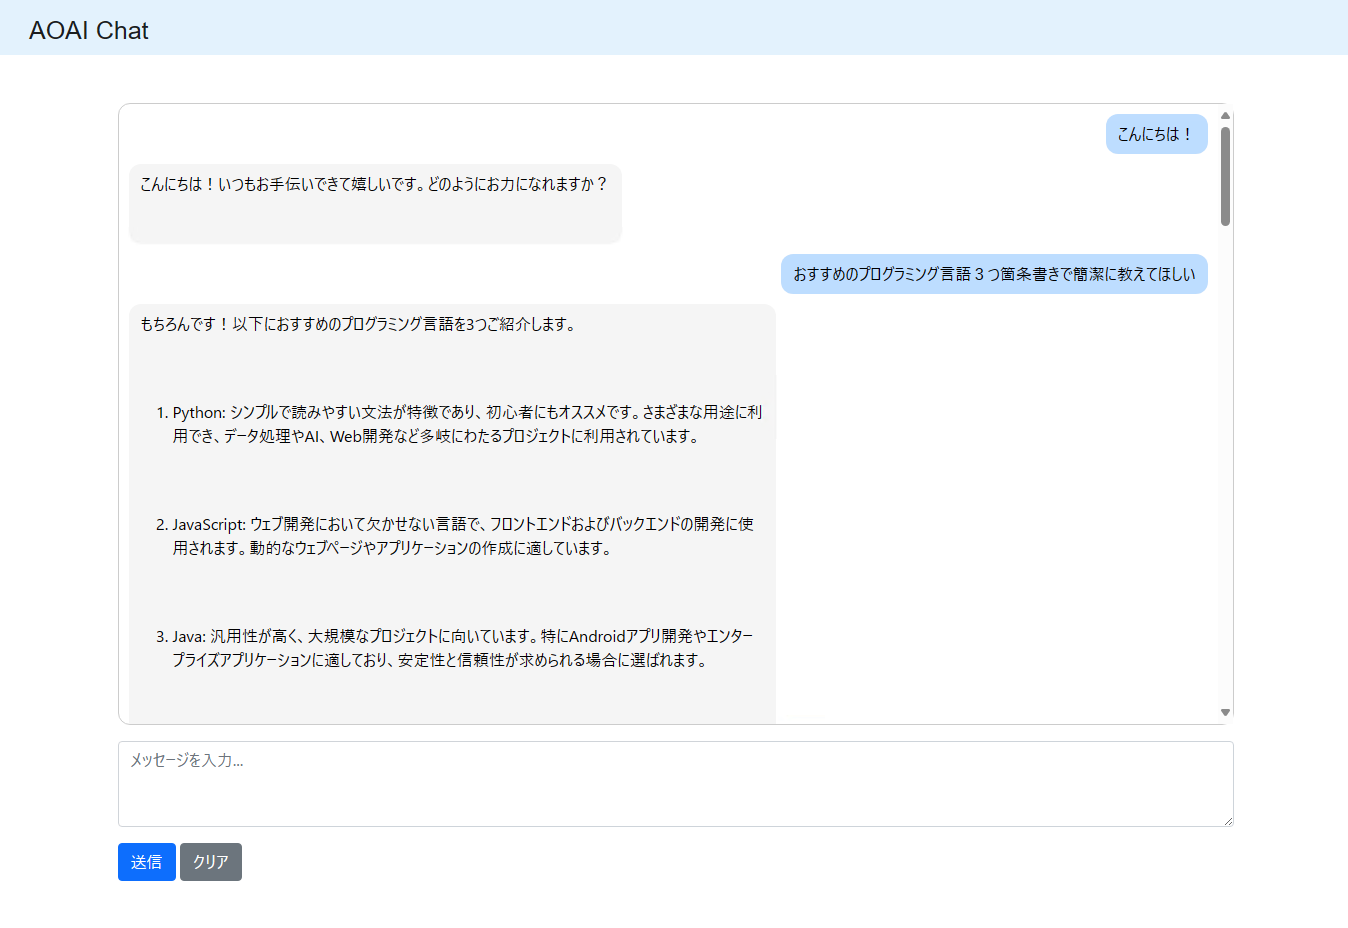
作った画面はこんな感じ
最低限あればいいので画面としてはシンプルにこれだけ
ざっくりChatGPTで雛形吐き出させてから修正して作る
<!DOCTYPE html>
<html lang="ja">

<head>
    <meta charset="UTF-8">
    <meta name="viewport" content="width=device-width, initial-scale=1.0">
    <title>AOAI Chat</title>
    <!-- Bootstrap CSS -->
    <link href="https://cdn.jsdelivr.net/npm/bootstrap@5.1.3/dist/css/bootstrap.min.css" rel="stylesheet">
     <!-- jQuery (necessary for Bootstrap"s JavaScript plugins) -->
     <script src="https://ajax.googleapis.com/ajax/libs/jquery/3.6.0/jquery.min.js"></script>
     <!-- Bootstrap Bundle with Popper -->
     <script src="https://cdn.jsdelivr.net/npm/bootstrap@5.1.3/dist/js/bootstrap.bundle.min.js"></script>
     <script src="https://cdn.jsdelivr.net/npm/marked/marked.min.js"></script>
    <style>
        #chat {
            display: flex;
            flex-direction: column;
            align-items: flex-start;
            height: 65vh;
            overflow-y: auto;
            border: 1px solid #ccc;
            border-radius: 12px;
            padding: 10px;
            margin-bottom: 10px;
        }

        .message,
        .bot-message {
            display: block;
            max-width: 60%;
            padding: 8px 12px;
            background-color: #beddff;
            color: rgb(0, 0, 0);
            border-radius: 12px;
            margin-bottom: 10px;
            word-wrap: break-word;
        }

        .message {
            align-self: flex-end;
            background-color: #beddff;
        }

        .bot-message {
            align-self: flex-start;
            background-color: #f5f5f5;
        }

        .navbar {
            padding-top: 0px !important;
            padding-bottom: 0px !important;
            background-color: #e3f2fd !important;
        }

        .navbar-brand {
            display: flex;
            align-items: center;
        }

        .MainTitle {
            margin-left: 20px;
            margin-top: 10px;
            font-size: 25px;
            font-family: Arial, Helvetica, sans-serif;
        }

        .background-layer {
            background-color: #ffffff !important;
        }

        pre {
            background-color: #2d2d2d;
            color: #f8f8f2;
            padding: 10px;
            border-radius: 5px;
            overflow-x: auto;
            font-size: 14px;
            line-height: 1.5;
        }

        pre code {
            color: #f8f8f2 !important;
        }

        pre::-webkit-scrollbar {
            height: 8px;
        }

        pre::-webkit-scrollbar-thumb {
            background: #888;
            border-radius: 5px;
        }

        pre::-webkit-scrollbar-thumb:hover {
            background: #555;
        }

    </style>
</head>

<body>
    <nav class="navbar navbar-light bg-light">
        <div class="container-fluid">
            <a class="navbar-brand" href="#">
                <span class="MainTitle">AOAI Chat</span>
            </a>
        </div>
    </nav>
    <div class="background-layer">
        <div class="container py-5">
            <div class="row">
                <div class="col-12">
                    <div id="chat" class="mb-3"></div>
                    <textarea id="message" class="form-control mb-3" rows="3" placeholder="メッセージを入力..."></textarea>
                    <button id="send" class="btn btn-primary">送信</button>
                    <button id="clear" class="btn btn-secondary">クリア</button>
                </div>
            </div>
        </div>
    </div>

    <script>
        let request_body_json = {};

        let system_message = {};
        let human_message = {};
        let ai_message ={};

        //ページロード時
        $(document).ready(function(){
            MessageClear();
        });

        function MessageClear() {
            request_body_json = {
                "messagelist": []
            };

            system_message = {
                type: "system",
                message: "あなたは優秀なアシスタントです。日本語で回答してください。"
            };

            request_body_json.messagelist.push(system_message);
        }

        $("#send").on("click", async function() {
            console.log("送信ボタンクリック");
            var chat = $("#chat");
            var input_message = $("#message").val().trim();
            if (input_message) {
                var userPara = $("<div></div>").addClass("message").html(input_message.replace(/\n/g, "<br>"));
                chat.append(userPara);

                //メッセージのリストの要素が20以上になった場合は古いやり取りを消す
                //systemmessageは消さないので、全体数からマイナス1した要素数で判定
                if (request_body_json.messagelist.length -1  >= 20) {
                    request_body_json.messagelist.splice(1, 2); // 先頭から2番目の要素(HumanMessage)と3番目の要素(AiMessage)を削除
                }
                human_message = {
                    type:"human",
                    message:input_message
                }
                request_body_json.messagelist.push(human_message);
                console.log(request_body_json);
                let response = await fetch("your-functions-url", {
                    method: "POST",
                    headers: {
                        "Content-Type": "application/json"
                    },
                    body: JSON.stringify(request_body_json)
                });

                if(response.ok){
                    let responseText = await response.text(); // 応答の本文にセットされたテキストを取得
                    //レスポンスがMarkdownっぽいのでHTML形式に変換
                    let htmlContent = marked.parse(responseText);
                    //console.log("responseText");
                    //console.log(responseText);
                    var botPara = $("<div></div>").addClass("bot-message").html(htmlContent.replace(/\n/g, "<br>"));
                    chat.append(botPara);

                    ai_message ={
                        type:"ai",
                        message:responseText
                    }
                    request_body_json.messagelist.push(ai_message);

                }else{
                    var botPara = $("<div></div>").addClass("bot-message").html("API実行で予期せぬエラーが発生しました".replace(/\n/g, "<br>"));
                    chat.append(botPara);
                }

                $("#message").val(""); // Clear input field after sending
                chat.scrollTop(chat[0].scrollHeight); // Scroll to the bottom of the chat
            }
        });

        $("#clear").on("click", function() {
                MessageClear();
        });

    </script>
</body>

</html>
Functionsの関数URL
let response = await fetch("your-functions-url", {
この「your-functions-url」部分はご自身の関数URLに置き換えてください。
Azure Functionsの関数を呼び出すためのキー付きの関数URLの取得方法は前回記事に書いてるのでそっちを見てください
メッセージ
HTTPのリクエストの要求本文にセットしているのは、会話履歴を含む形のJSON形式のリストです。
- type = system:プロンプトに当たるやつ
- type = human:ユーザが入力したメッセージ
- type = ai :生成AIが返したメッセージ
になっていて、会話を重ねるごとにリストが増えていきます。
これはFunction側に会話履歴を保持させるような仕組みを入れてないためこうしてます。
10回やり取りしたら古いメッセージの1回分を消すようにして、直近10個のやり取りを覚えるようにしてます。

Flaskの環境を作る
フォルダの構成
適当な場所に「simplechatpage」というフォルダを作り、以下のような階層の構造を作ります。
作成したindex.htmlは「templates」というフォルダに格納し、app.pyのpythonのファイルも作成します。
.
└── simplechatpage/
    ├── templates/
    │   └── index.html
    └── app.py
pythonの仮想環境を作成
VScodeのターミナルからsimplechatpageフォルダの階層で下記を実行
python -m venv venv
これで、venvというフォルダが作成される。

仮想環境をアクティベートする(Windows用のコマンドです)
.\venv\Scripts\activate
Flaskをインストール
pip install Flask

pythonのファイルの中身を実装する
from flask import Flask, render_template

app = Flask(__name__)

@app.route('/')
def index():
    # test0002.htmlを提供する
    return render_template('index.html')

if __name__ == '__main__':
    app.run(debug=True)
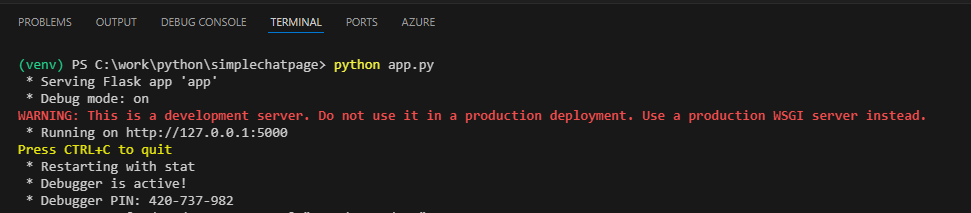
実行する
VScodeのターミナルで下記を実行
python app.py
そうすると、localhostのサーバーが立ち上がる
これで、下記のURLでアクセスすればOK
http://localhost:5000/
ただし、CORS(Cross-Origin Resource Sharing)ポリシーへの対策として、Azureポータル上からlocalhostで実行するための設定を入れる
ポータルで実行先の関数のリソースを表示し、左のメニューの「CORS」から設定を追加する

これで会話できるようになる

さいごに
今回は目的があってindex.htmlに全部乗せしてるが、jsやcssはちゃんと分けたほうが良いし、Flaskを使う方向にするなら、あえてFunctions経由しなくてもlangchainとか使って直接AOAIのリソースにアクセスしたほうが良いと思います。
とりあえず個人的に試せたいことは試せたので、次は同じような感じでRAGかなー
※追記:クリアボタンあるけど、JSONのメッセージリストだけ初期化して画面表示してるメッセージ消す処理入れてなかったな。。。(まあいいいか