(2014/04/14時点)
・【NCMBの配信端末情報の登録に使用するsenderIdの確認方法】
Androidアプリ開発でNIFTY Cloud mobile backend(ニフティモバイルバックエンド:以下NCMB)を使用しプッシュ通知を行う場合、端末情報の登録を行う処理が必要になるが、その際に指定するsenderIdはGoogleDeveloperConsoleより確認できる。
//以下、getRegistrationIdInBackground()の第一引数に指定するIDについて

final NCMBInstallation instllation = NCMBInstallation.getCurrentInstallation();
instllation.getRegistrationIdInBackground("senderId", new RegistrationCallback() {
    @Override
    public void done(NCMBException e) {
        if (e == null) {
            // 成功
            try {
                instllation.save();
            } catch (NCMBException le) {
                // サーバ側への保存エラー
            }
        } else {
            // エラー
        }
    }
});
NCMBPush.setDefaultPushCallback(this, MainActivity.class);
NCMBの開発者向けドキュメントでは項目「 配信端末情報の登録 」でsenderidにProjectNumberを指定するよう促しているため確認を行う。参考:http://mb.cloud.nifty.com/doc/sdkguide/android/push.html
■GoogleDeveloperConsoleでの確認方法は以下の通り
以下よりGoogleDeveloperConsoleへログインする。
参考:https://console.developers.google.com/
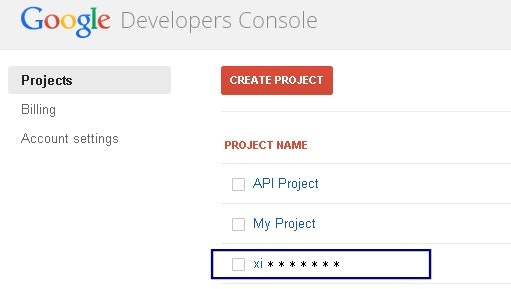
任意のプロジェクトを指定する。
(プロジェクトがない場合にはCLEATE PROJECTを押下し作成する)
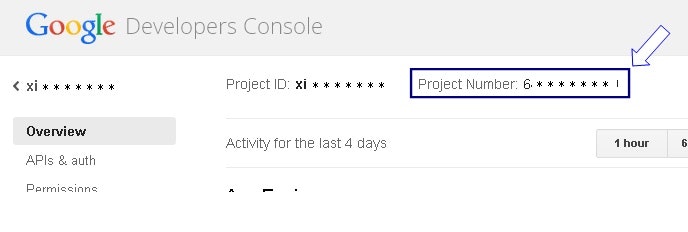
ここで指定したプロジェクトのProjectNumberが確認できる。
※指定するべきなのはProjectIdではなくProjectNumberなので注意。
参考まで。